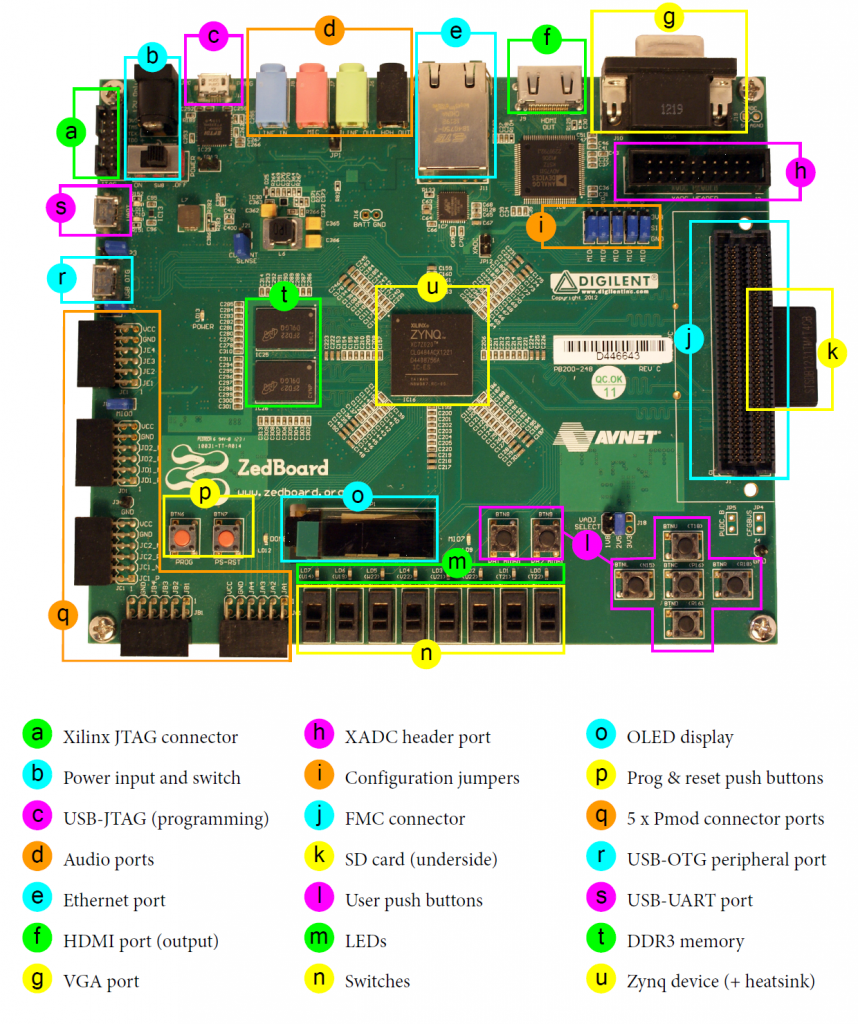
ZedBoard Quick start
This guide provides quick instructions on how to set up the EVAL-AD463x-FMCZ / EVAL-AD4030-24FMCZ on:
ZedBoard on FMC LPC
Using Linux as software
Necessary files
Note
The SD card includes several folders in the root directory of the BOOT partition. In order to configure the SD card to work with the ZedBoard and ADI evaluation board, several files must be copied onto the root directory. Using the host PC, drag and drop the required files onto the BOOT partition, and use the EJECT function when removing the SD card from the reader.
The following files are needed for the system to boot:
HDL boot image:
BOOT.BINLinux Kernel image:
uImageLinux device tree:
devicetree.dtb
They can either be taken from the SD card – already generated by us, or you can build them manually:
Instructions on how to choose the boot files from the SD card can be found in the Platform-Specific Manual Steps section from here: Hardware Configuration.
Instructions on how to manually build the boot files from source can be found here:
AD4630-FMC HDL project build documentation. More HDL build details at Build an HDL project.
Important
The BOOT.BIN must be synchronized to the ADC attributes in the device
tree. Multiple pre-configured BOOT.BIN files are available on the SD
card in sub-directories labeled according to the clocking mode (SPI vs.
Echo), number of active lanes per channel (1, 2, or 4), and data rate
(SDR vs. DDR). See the User Guide for a
full list of available configurations.
Required software
SD Card 16GB imaged with ADI Kuiper Linux (check out that guide on how to do it, then come back to this section)
Required hardware
Digilent ZedBoard and its 12 V power supply
EVAL-AD463x-FMCZ or EVAL-AD4030-24FMCZ evaluation board
SD card with at least 16GB of memory
Micro-USB cable (USB OTG)
SMA cables for input signal connections
Recommended: Band-pass filter centered on test signal frequency
More details as to why you need these can be found at Prerequisites.
Testing
Creating the setup
To avoid ESD damage, follow these steps in order:
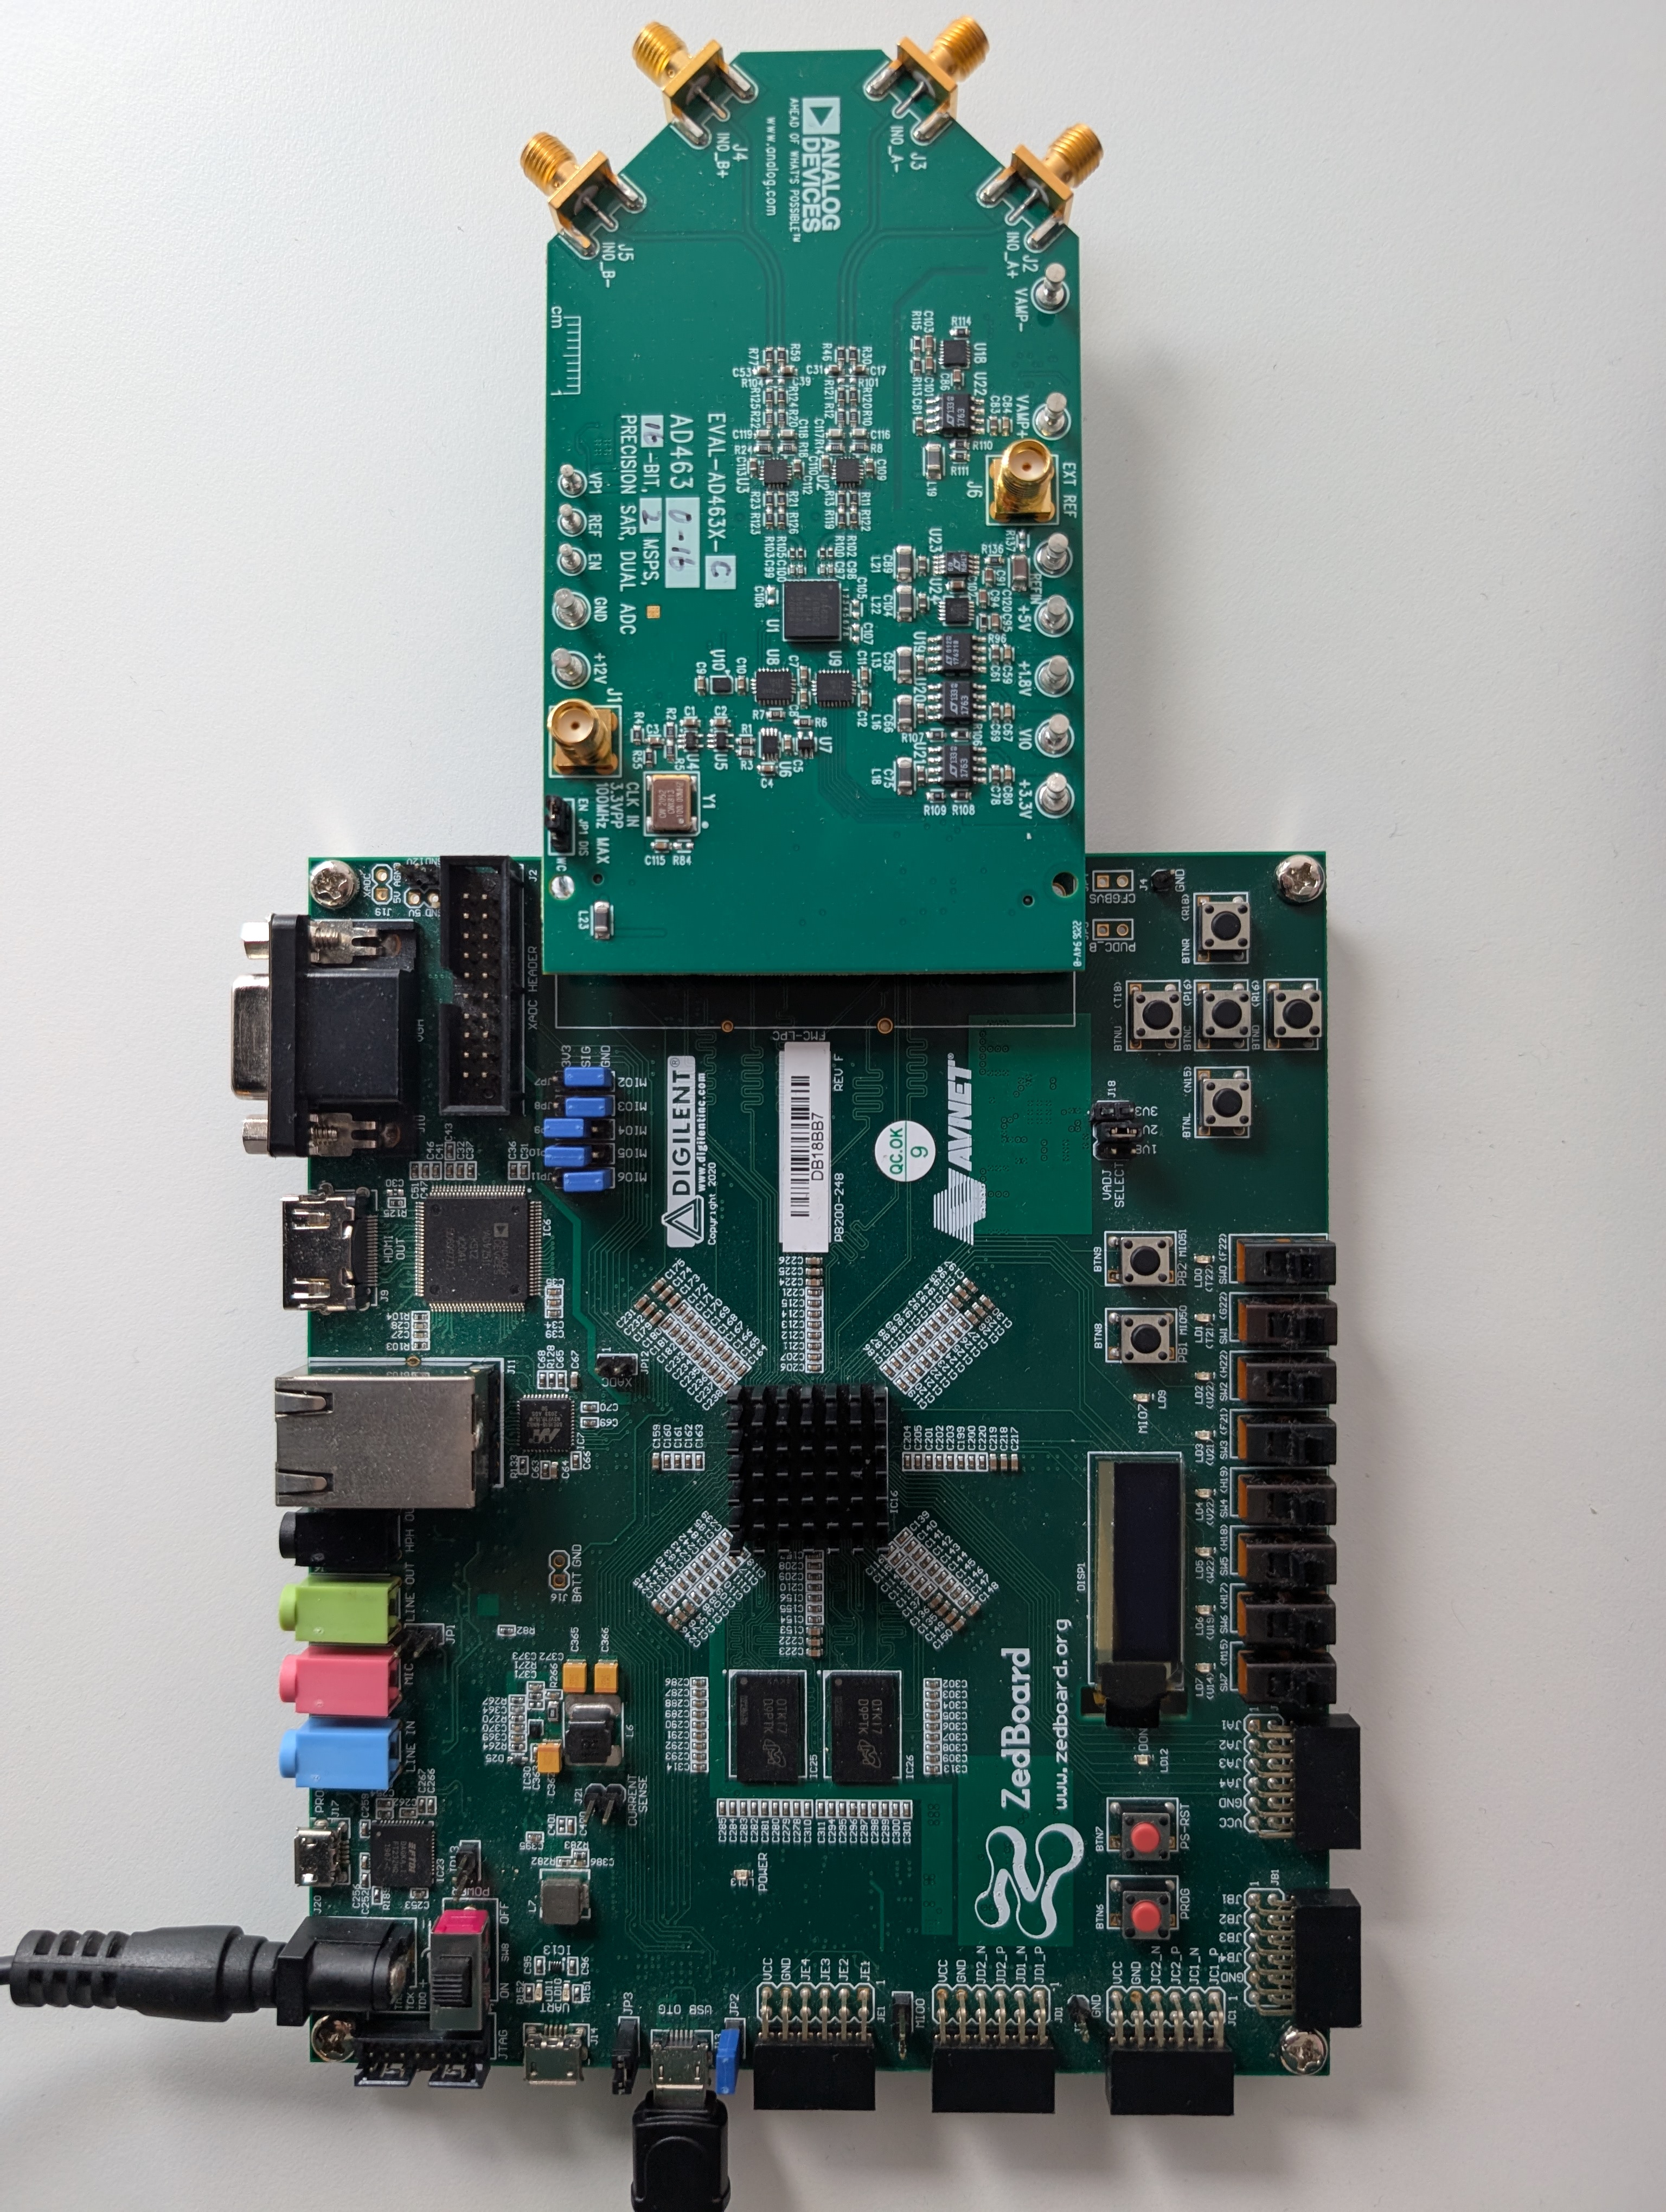
Connect the EVAL-AD463x-FMCZ / EVAL-AD4030-24FMCZ board to the ZedBoard FMC LPC connector.
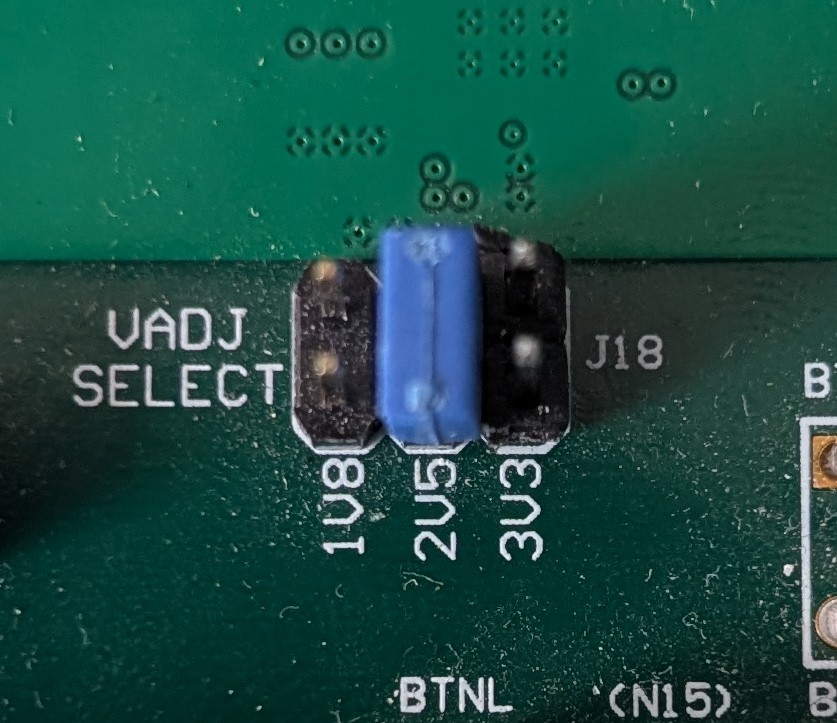
Important
To avoid potential issues, ensure the ZedBoard VADJ SELECT = 2.5 V.
Insert the SD card into the SD card slot (J12) on the underside of the ZedBoard.
Note
If there is a need to re-image or create a new SD card, instructions are available here: ADI Kuiper Linux with support for ACE Evaluation.
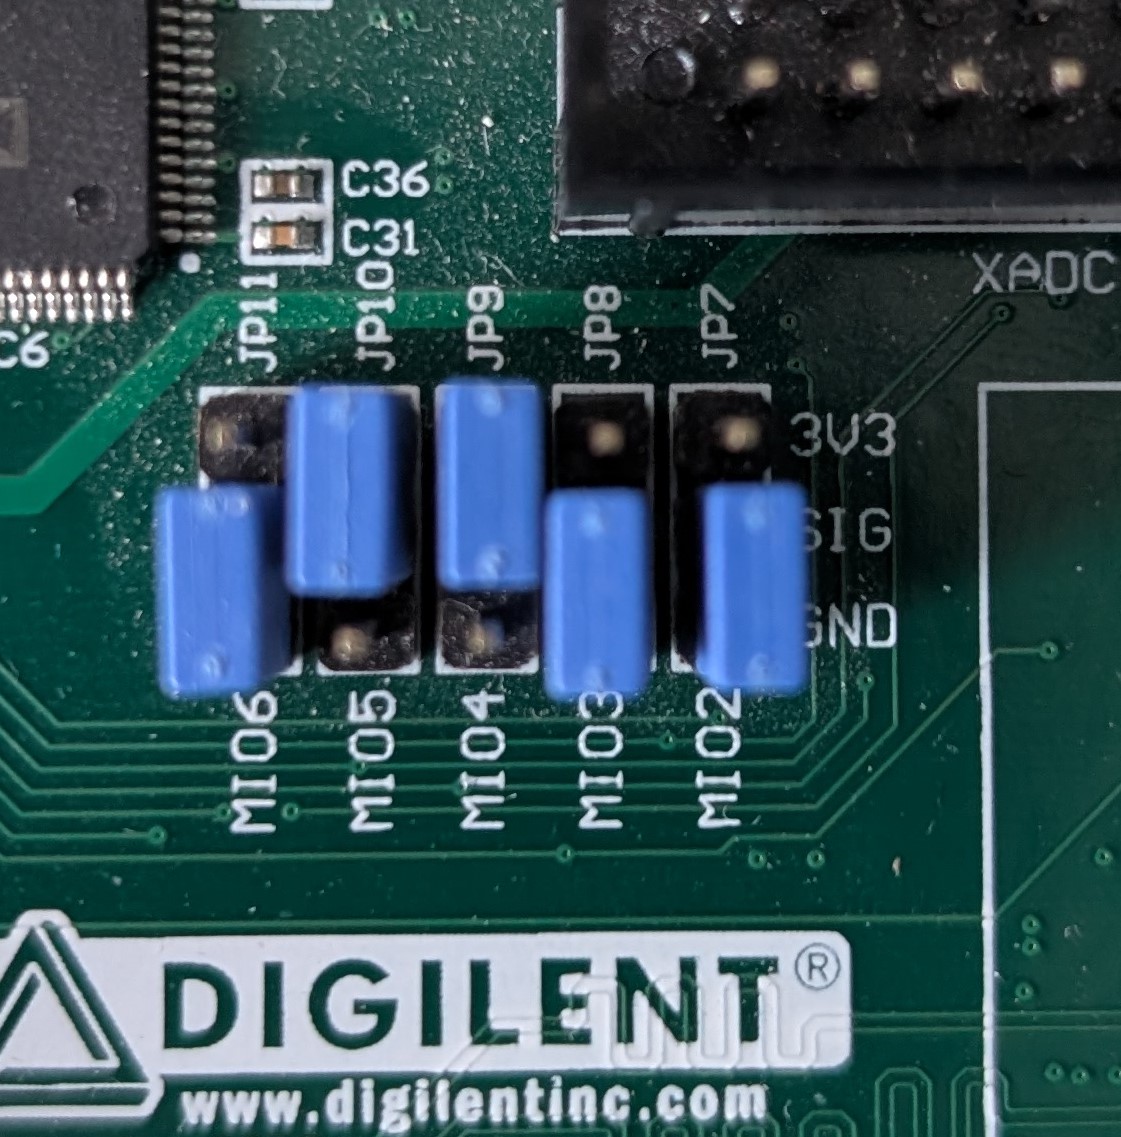
Configure the ZedBoard boot jumpers for SD card boot as shown.
Connect the USB cable from the PC to J13/USB OTG port and the PSU to J20/DC input.
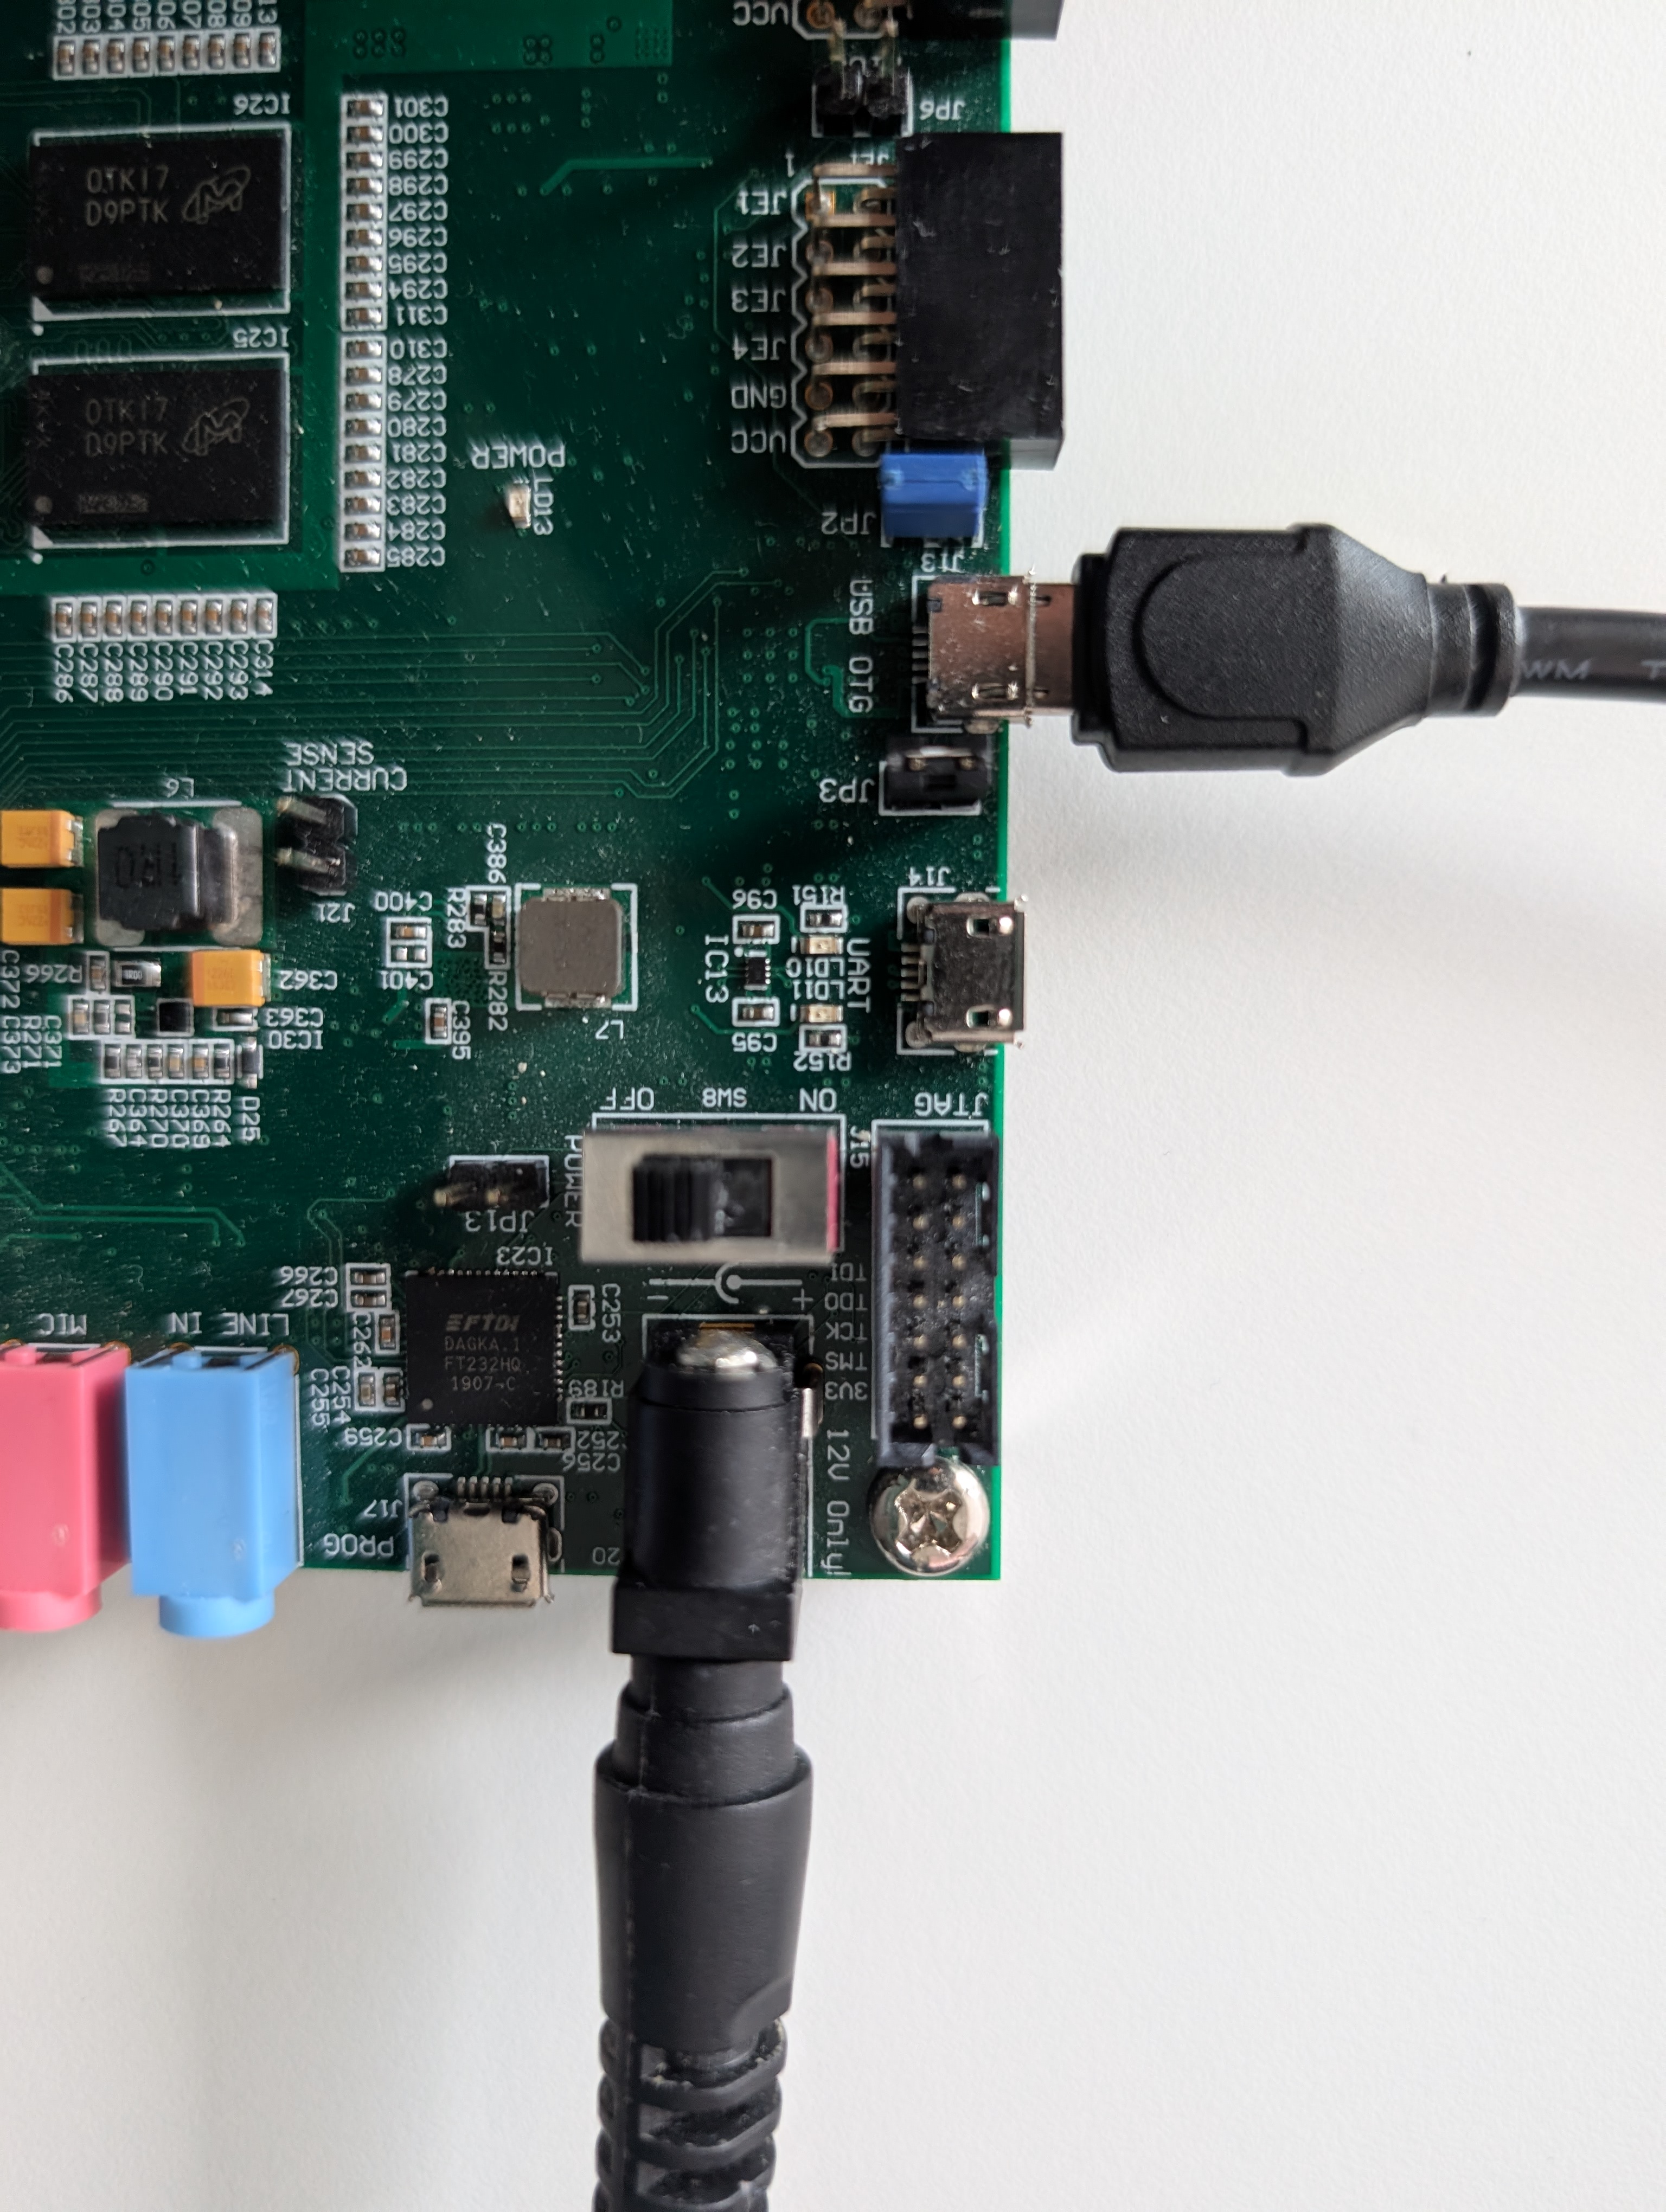
Connect the desired input signal to the appropriate input on the evaluation board (J2-J5).
Slide SW8/POWER switch to the ON position. The green LD13/POWER LED should turn on.
The blue LD12/DONE LED and red LD0 LED should start blinking ~20-30 seconds later which indicates the boot process is complete.
Tip
Linux versions prior to ADI Kuiper Linux for Evaluation version 2024-8-27 will instead boot with the BLUE LD12/DONE LED blinking immediately and LD7 blinking after ~20-30 Seconds. This may indicate that an improved version of the ACE plugin is available if the SD-Card is updated to the latest version.
Launch the ACE software from the Analog Devices folder in the Windows Start menu. The Evaluation Board should appear in the ACE Start Tab >> Attached Hardware view.
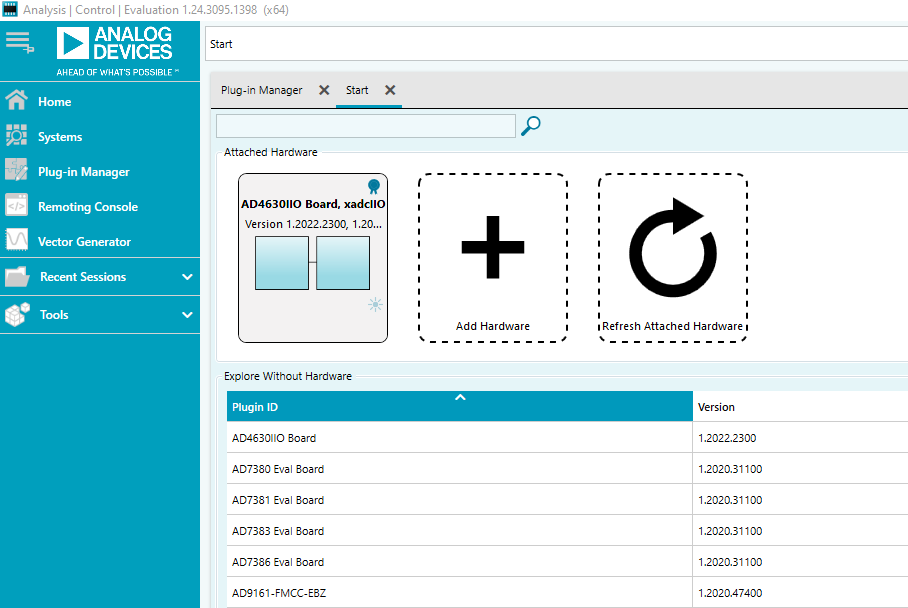
ACE evaluation software
The ADI ACE application provides a plug-and-play evaluation experience, enabling users to get up and running quickly with the product evaluation board. ACE can configure the embedded software on supported controller boards and provides a quick and easy way to get set up, configure the board and perform data capture and analysis and/or waveform generation. For ACE installation and documentation instructions see ACE. Make sure to follow the instructions to install the necessary evaluation board plug-in support.
If the machine that ACE is installed on has internet access, you can find/install/update plug-ins directly from the ACE application. For environments without internet access, you can download these plug-ins from the previous link to portable storage and install them into ACE.
Note
Product-specific documentation for the evaluation software can be found within the ACE plug-in.
The controller board supported by ACE with this product evaluation board is the ZedBoard.