AD-R1M ROS2 Examples
This page provides practical examples for using the AD-R1M robot with ROS2, including mapping, localization, and autonomous navigation.
Mapping with SLAM Toolbox
Create a map of your environment using SLAM Toolbox for real-time mapping.
Starting the Mapping Session
# On the robot (via SSH)
~/bringup_mapping.sh
Active Docker Compose Services:
motors,imu,tof,tof_republish(core sensors/actuators)mapping(SLAM Toolbox)teleop_radio(radio control for driving)rmw_zenoh_router(middleware)
Mapping Process
Start RViz on your host computer (see AD-R1M ROS 2 Getting Started):
cd platform/common/scripts
./start_rviz.sh 0 false
Change the Fixed Frame in RViz to
mapArm the robot using the killswitch on the RC handset (switch SA to “ARMED”)
Drive the robot around using the right stick on the remote control
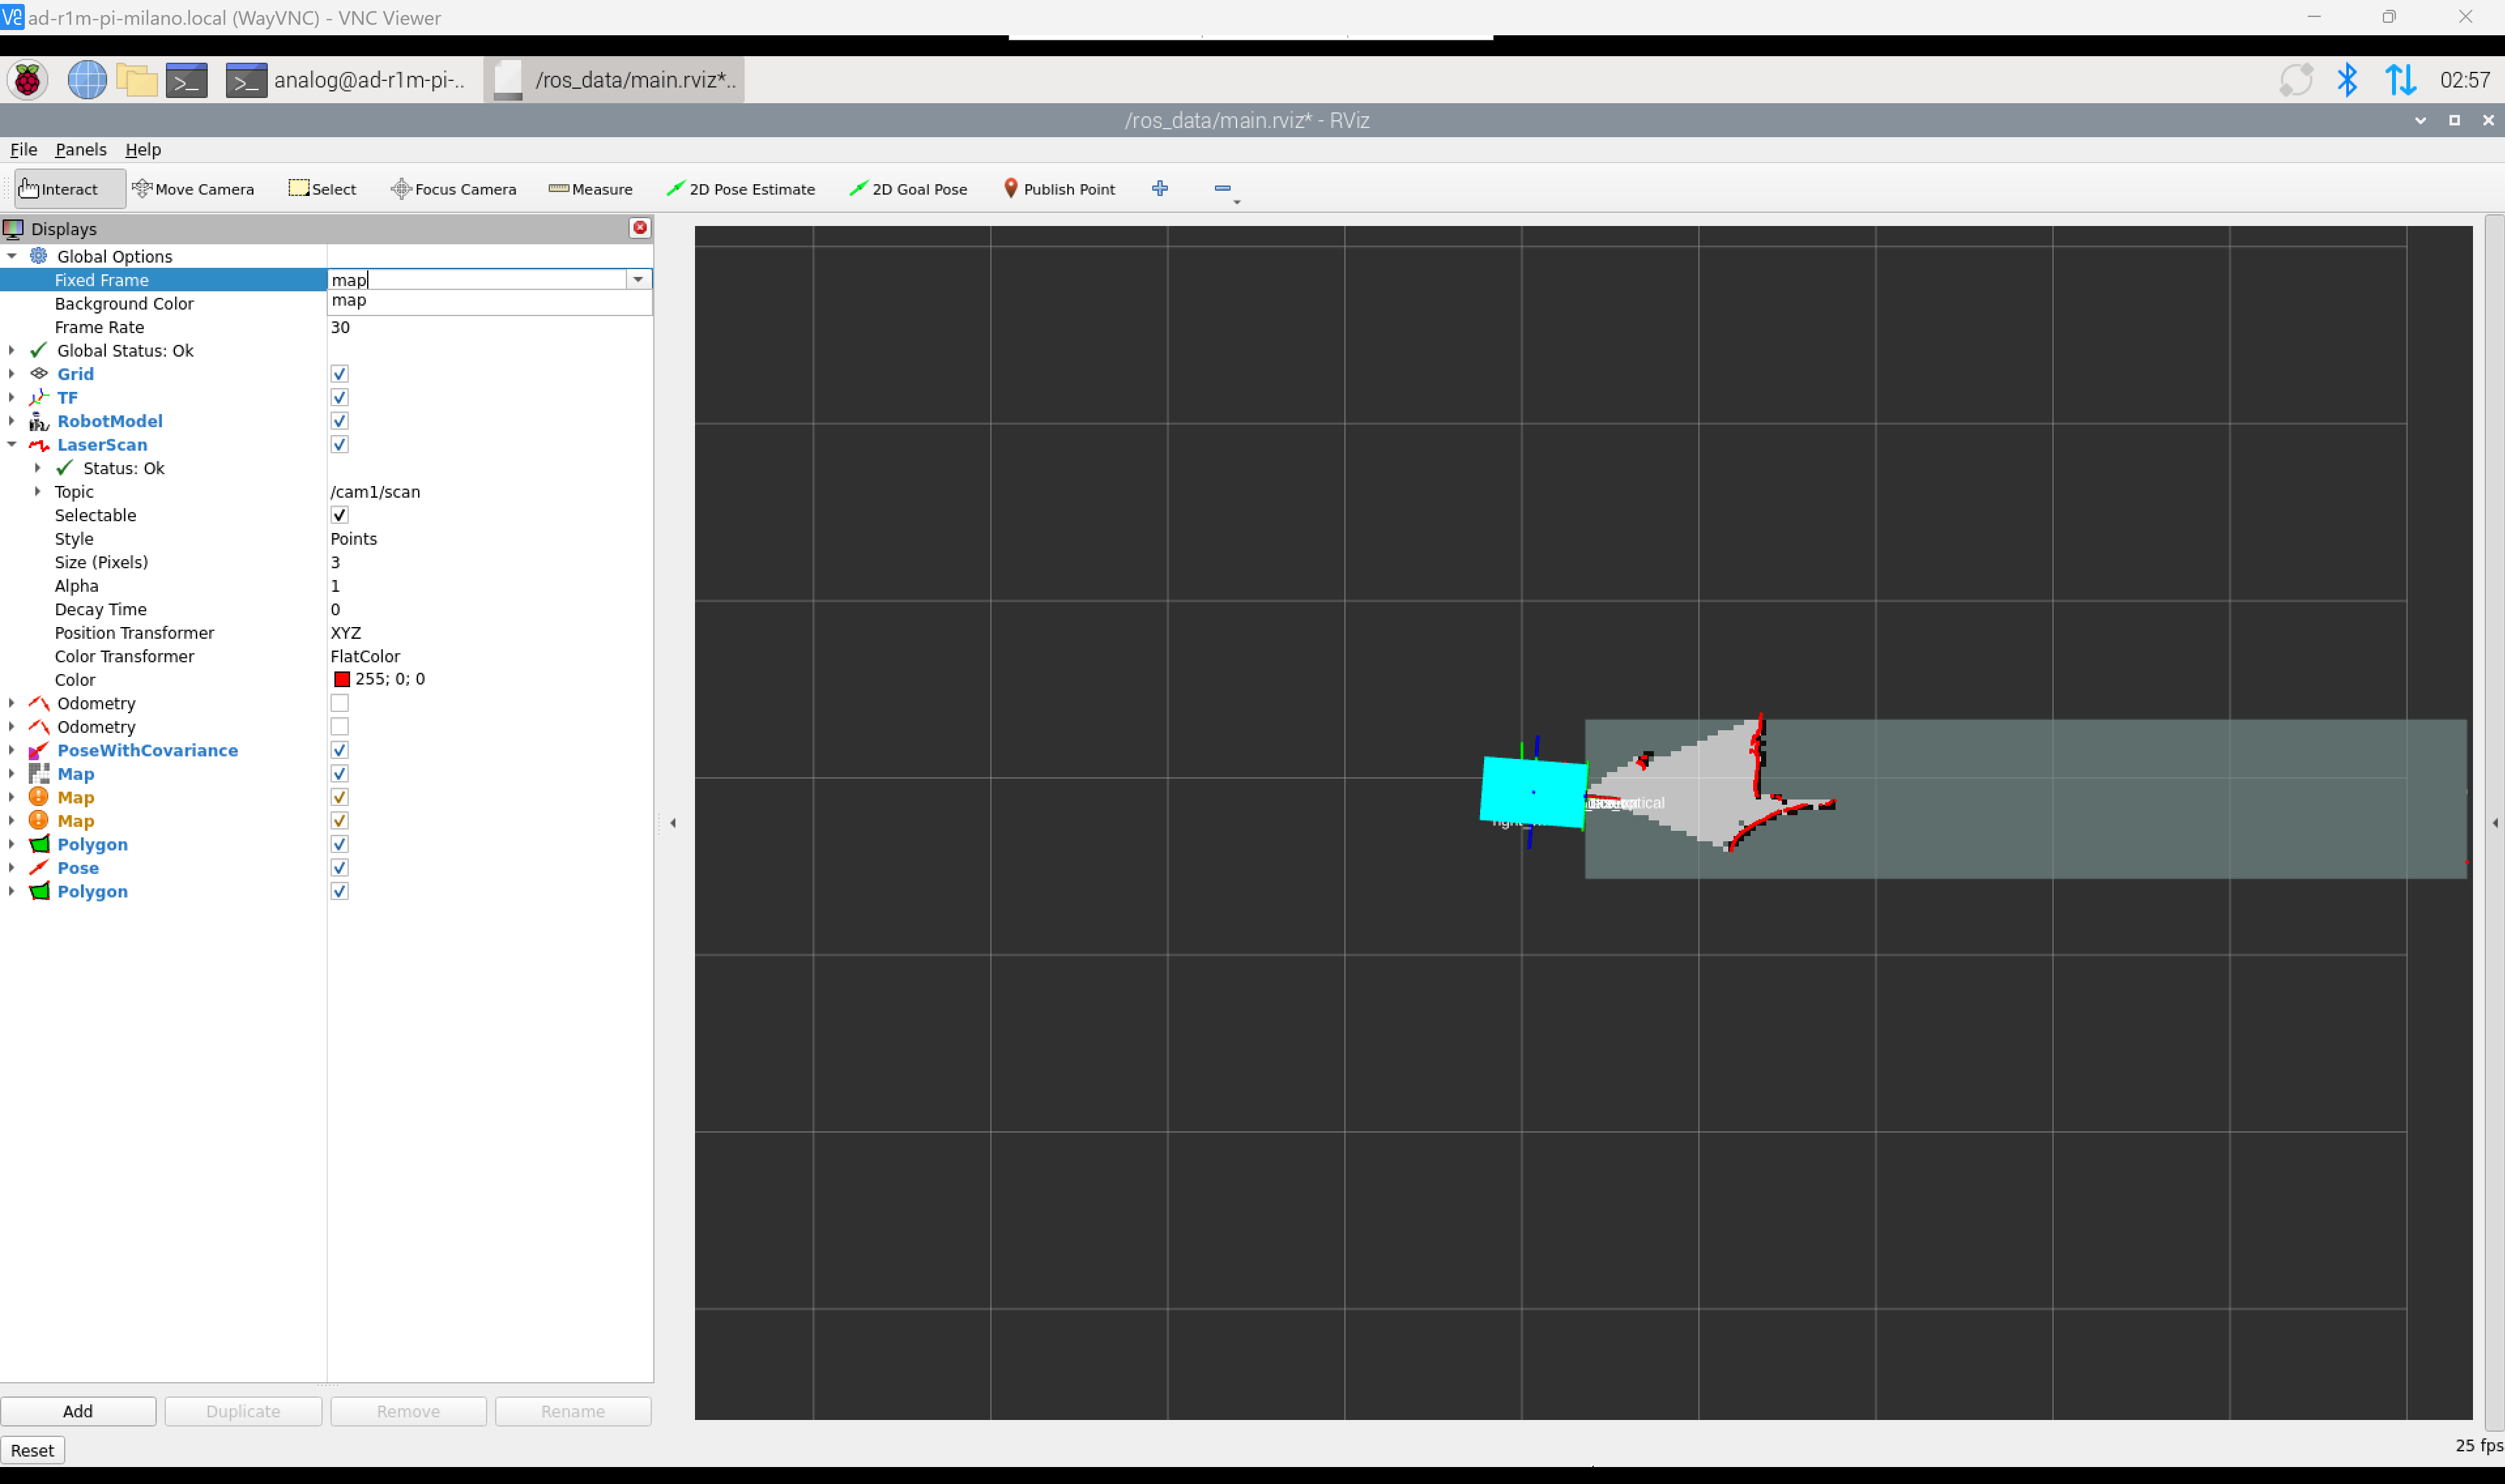

Map Legend:
White areas = Free space (safe to navigate)
Black areas = Obstacles (walls, objects)
Gray areas = Unexplored/unknown
Saving the Map
After mapping is complete, save the map:
# Use the convenience script
~/save_map.sh

# Or manually
ros2 run nav2_map_server map_saver_cli -f /ros_data/maps/map
This creates two files in /home/analog/ros_data/maps/:
map.pgm- Grayscale image (white=free, black=occupied, gray=unknown)map.yaml- Map metadata (resolution, origin, thresholds)
SLAM Configuration
SLAM Toolbox parameters: /ros_data/mapping_params.yaml
Key parameters:
slam_toolbox:
  ros__parameters:
    resolution: 0.05            # Map resolution (meters/pixel)
    max_laser_range: 5.0        # Maximum laser range to use
    minimum_travel_distance: 0.3  # Min distance before adding scan
Localization with AMCL
Once you have a map, use AMCL (Adaptive Monte Carlo Localization) to localize the robot.
Starting Localization
# Start with AMCL localization and Nav2
~/bringup_amcl.sh

# Or with explicit environment variables
LOCALIZATION=amcl NAVIGATION=nav2 TELEOP=radio ~/bringup.sh
Setting Initial Pose
In RViz:
Click 2D Pose Estimate in the toolbar
Click on the map where the robot is located
Drag to set the orientation (direction robot is facing)
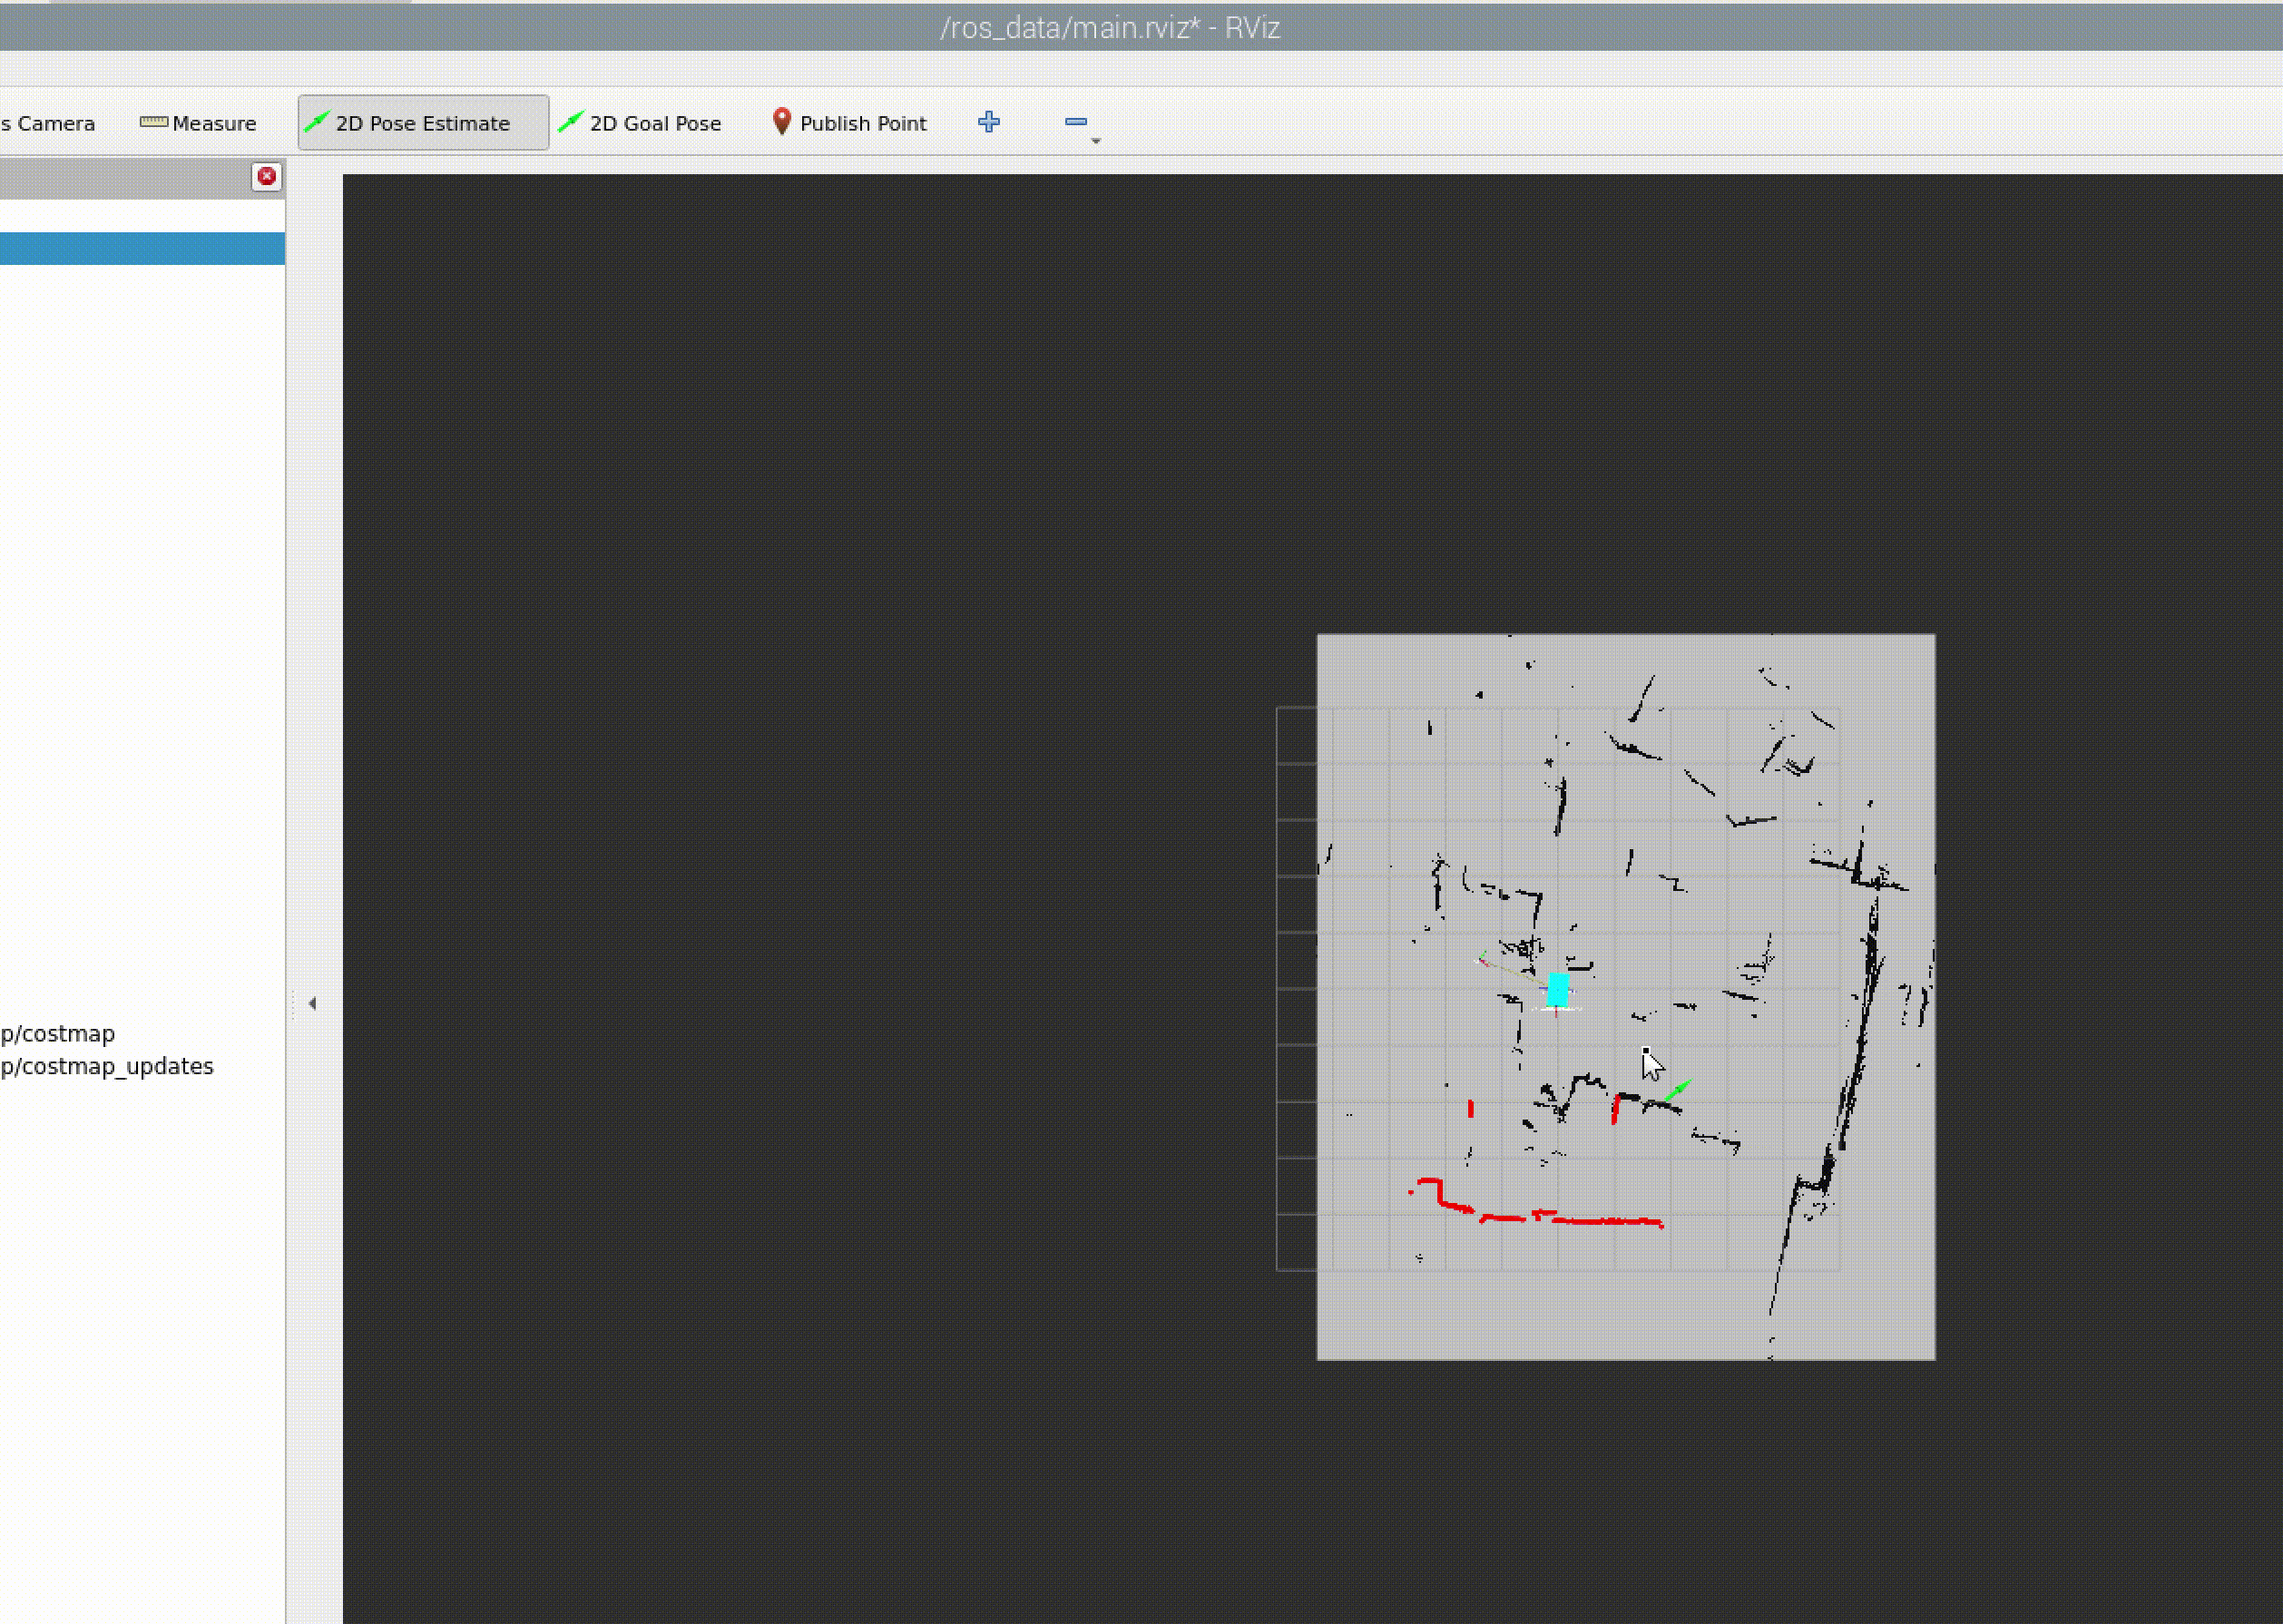
The robot’s estimated position (red arrow) and uncertainty (purple ellipse) will be displayed.
Tips for good localization:
Set the initial pose as accurately as possible
Drive the robot around to help particles converge
Ensure the saved map matches the current environment
AMCL Topics
Publishes:
/amcl_pose(geometry_msgs/PoseWithCovarianceStamped)Publishes: TF transform (
map→odom)Subscribes:
/cam1/scan(laser scan)Subscribes:
/odom(odometry)
Autonomous Navigation with Nav2
Use the Nav2 navigation stack for autonomous point-to-point navigation.
Sending Navigation Goals
In RViz:
Click 2D Nav Goal in the toolbar
Click on the desired destination on the map
Drag to set the goal orientation
The robot will plan a path and navigate autonomously
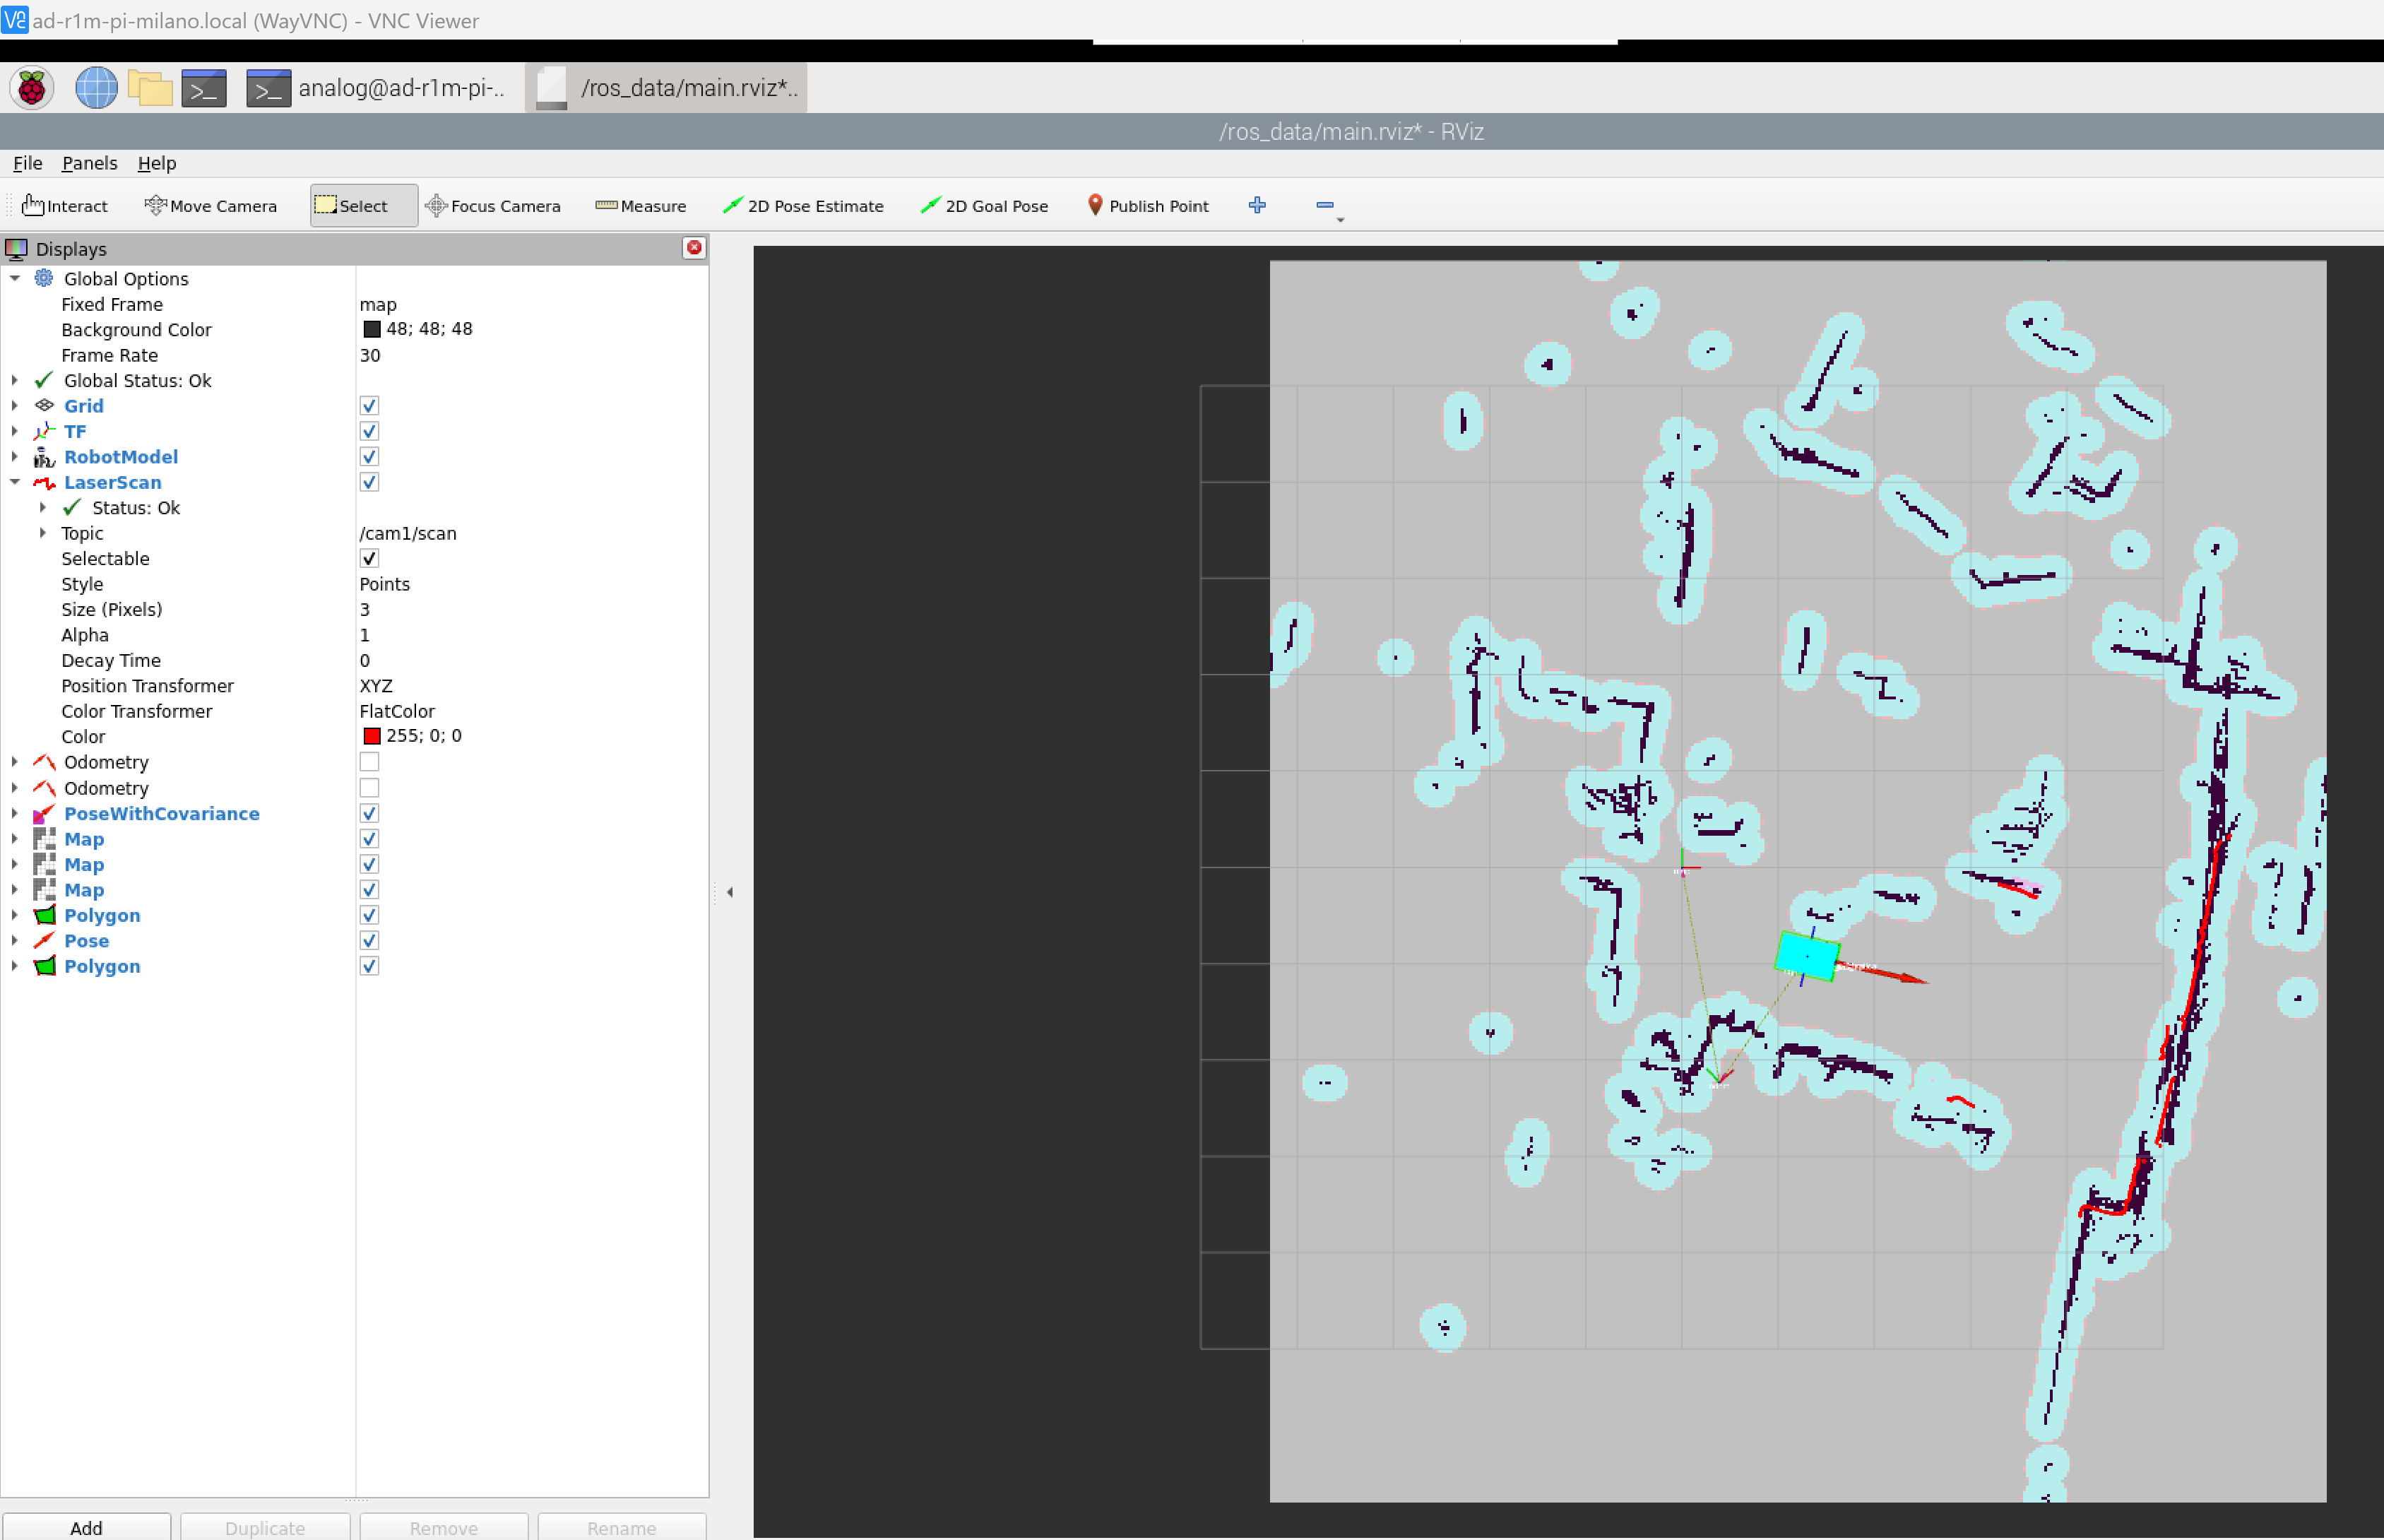
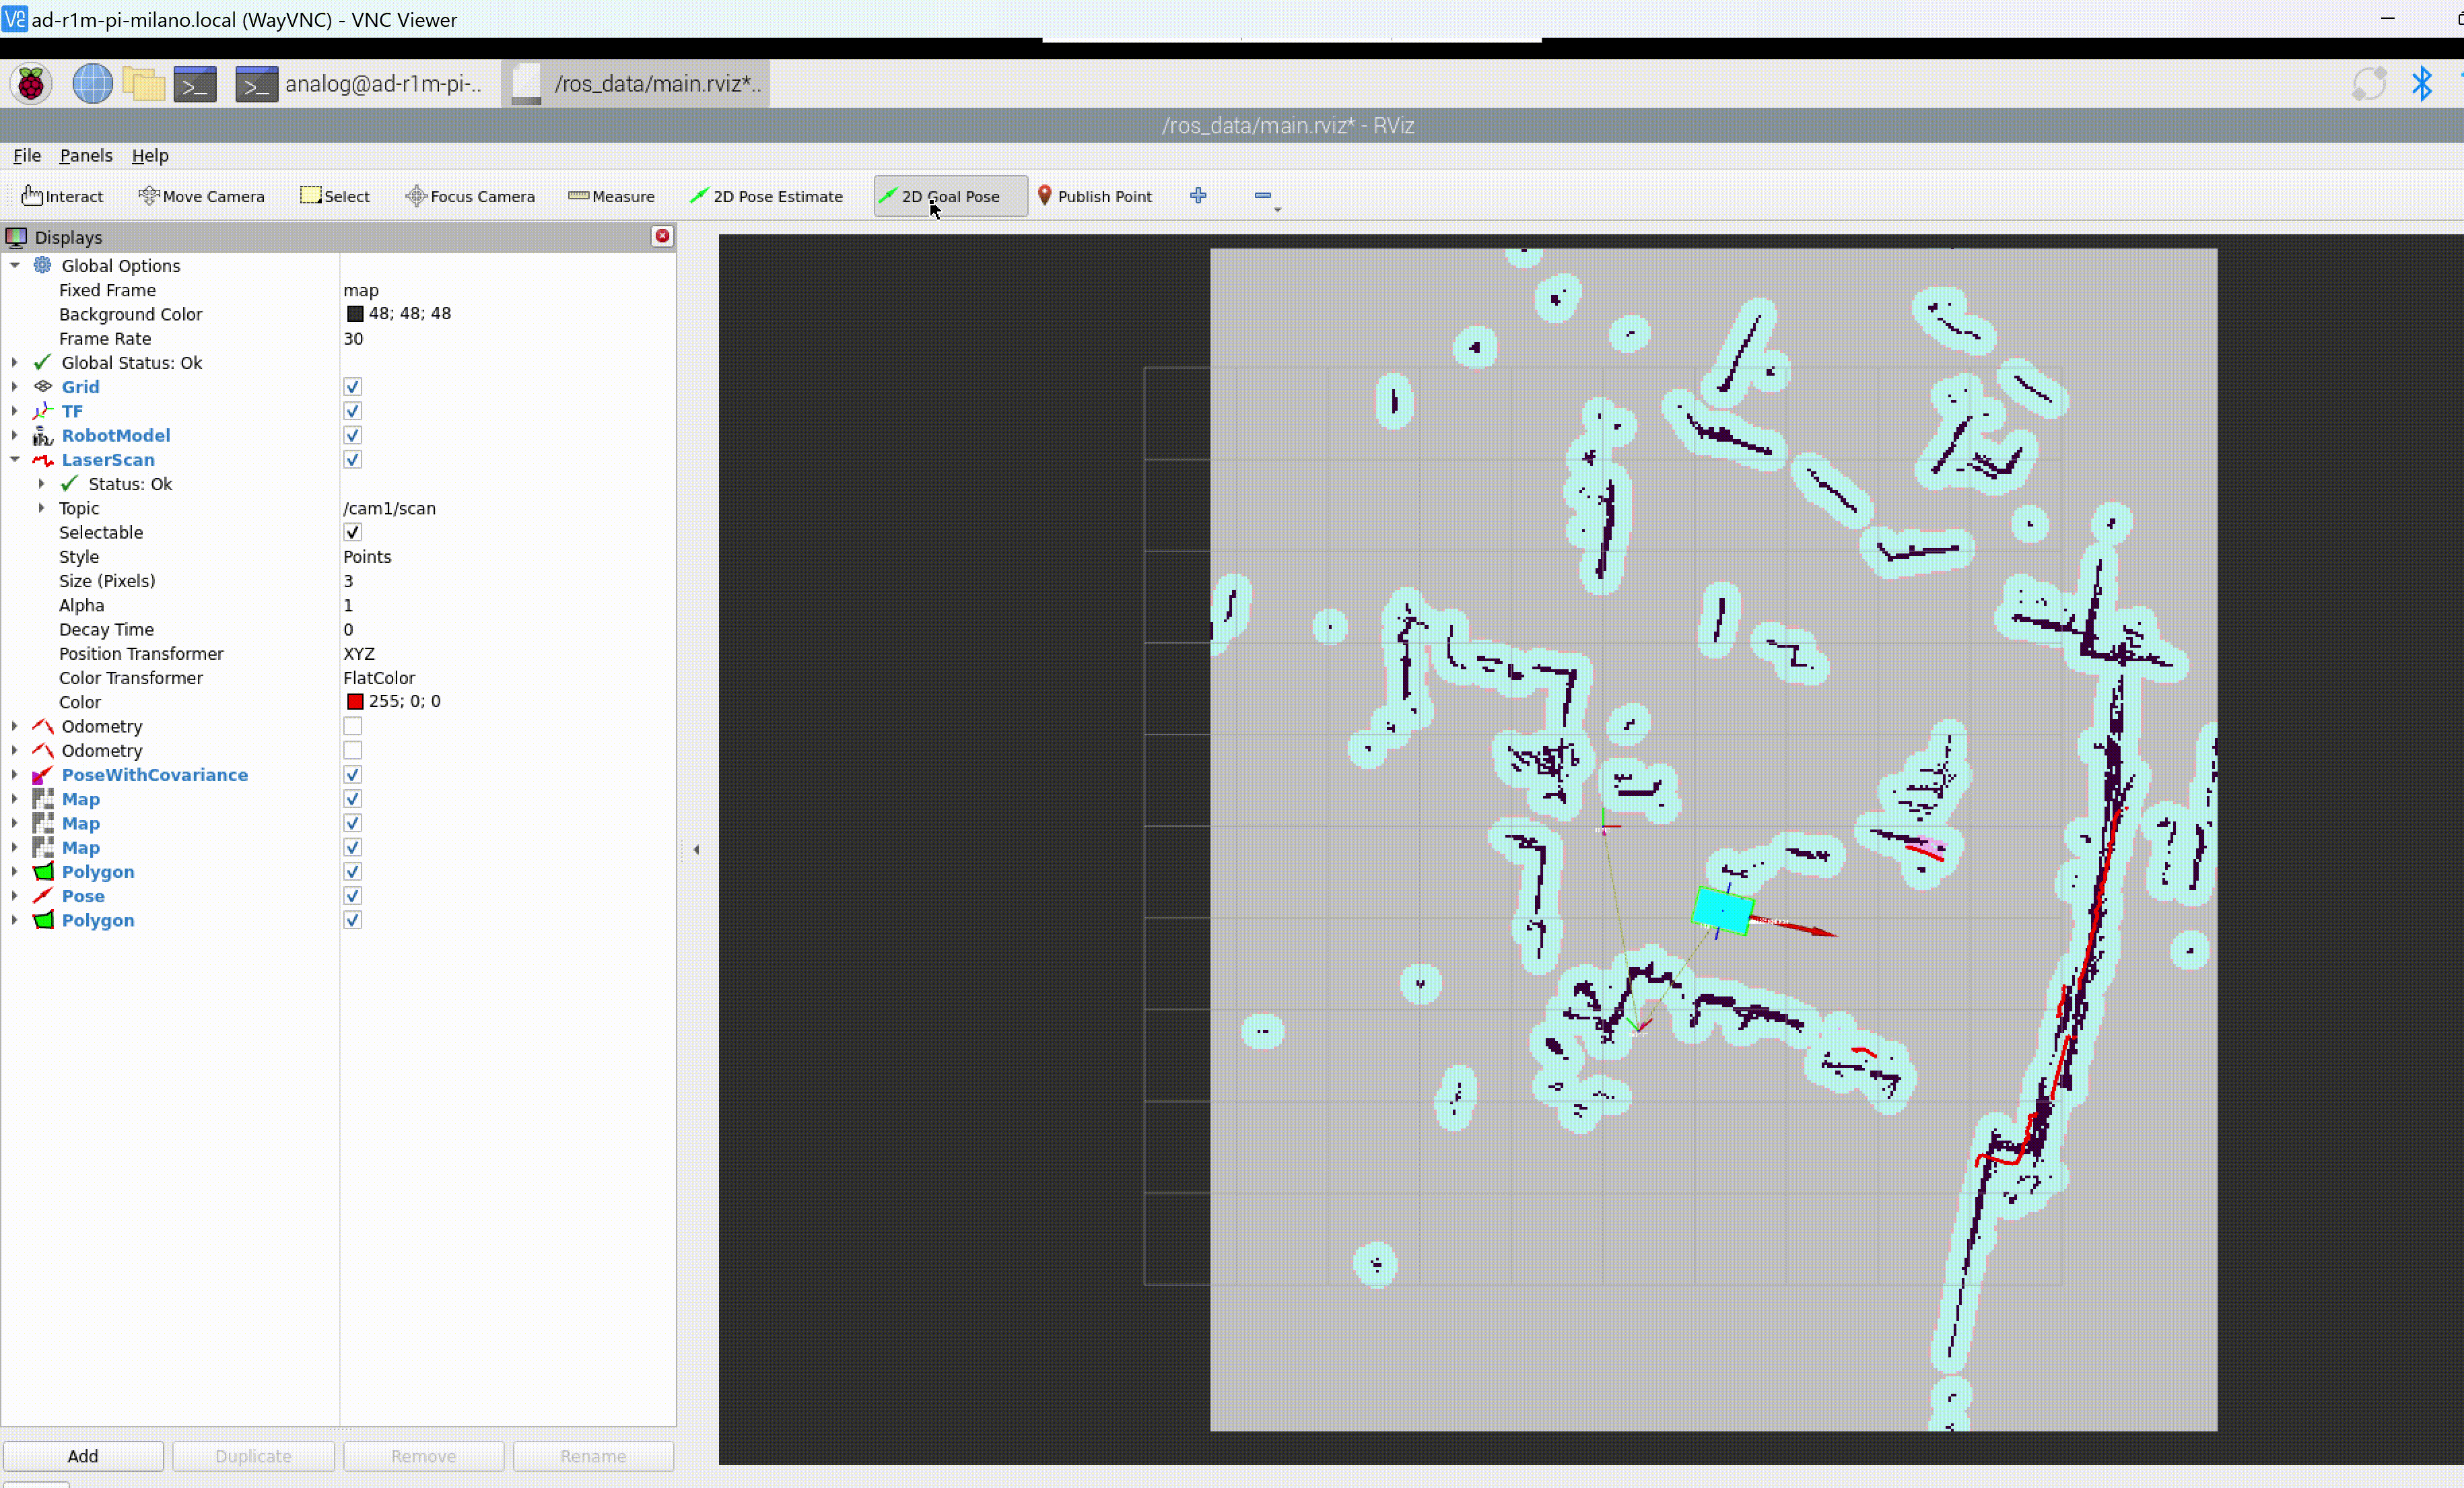
Navigation displays:
Green line - Global path plan
Colored regions - Costmap (inflation around obstacles)
Robot footprint - Current robot position
ROS 2 Topics Reference
Core sensor and control topics used by the AD-R1M:
Sensor Data
/cam1/scan- 2D laser scan (from ToF depth-to-laserscan)/cam1/depth_image- Raw depth image from ToF camera/imu- IMU data (angular velocities, linear accelerations)
Odometry and Localization
/diff_drive_controller/odom- Raw odometry from wheel encoders/odom- Fused odometry (encoder + IMU via EKF)/amcl_pose- AMCL localization pose estimate
Motion Control
/cmd_vel_joy- Velocity commands from RC handset/cmd_vel_nav- Velocity commands from Nav2/diff_drive_controller/cmd_vel_unstamped- Final commands to motors
Navigation
/goal_pose- Navigation goals/plan- Global path/map- Occupancy grid map
# List all active topics
ros2 topic list

# Echo a topic
ros2 topic echo /imu --once

# Check topic frequency
ros2 topic hz /cam1/scan
For detailed architecture information, see AD-R1M ROS2 Architecture.
<root main_tree_to_execute="MainTree">
  <BehaviorTree ID="MainTree">
    <Sequence name="navigate_sequence">
      <ComputePathToPose goal="{goal}" path="{path}" planner_id="GridBased"/>
      <FollowPath path="{path}" controller_id="FollowPath"/>
    </Sequence>
  </BehaviorTree>
</root>
Load custom behavior trees via the Nav2 parameters:
bt_navigator:
  ros__parameters:
    default_bt_xml_filename: "/path/to/custom_bt.xml"
Waypoint Following
For multi-waypoint missions, use the waypoint follower action.
Python Waypoint Example
from nav2_simple_commander.robot_navigator import BasicNavigator
from geometry_msgs.msg import PoseStamped

navigator = BasicNavigator()

# Define waypoints
waypoints = []

waypoint1 = PoseStamped()
waypoint1.header.frame_id = 'map'
waypoint1.pose.position.x = 1.0
waypoint1.pose.position.y = 0.0
waypoint1.pose.orientation.w = 1.0
waypoints.append(waypoint1)

waypoint2 = PoseStamped()
waypoint2.header.frame_id = 'map'
waypoint2.pose.position.x = 2.0
waypoint2.pose.position.y = 1.0
waypoint2.pose.orientation.w = 1.0
waypoints.append(waypoint2)

# Start waypoint following
navigator.followWaypoints(waypoints)

while not navigator.isTaskComplete():
    feedback = navigator.getFeedback()
    print(f'Current waypoint: {feedback.current_waypoint}')

result = navigator.getResult()
print(f'Navigation result: {result}')
Multi-Robot Setup
For multi-robot scenarios, use namespaces to separate robot topics and frames.
Launching Multiple Robots
# Robot 1
ROBOT_NAMESPACE=ad_r1m_0 ./bringup.sh

# Robot 2 (on different Raspberry Pi)
ROBOT_NAMESPACE=ad_r1m_1 ./bringup.sh
RViz for Multiple Robots
# View robot 0
./start_rviz.sh 0

# View robot 1
./start_rviz.sh 1
Each robot’s topics will be prefixed with its namespace (e.g., /ad_r1m_0/cmd_vel, /ad_r1m_1/cmd_vel).