Scopy Overview
About
Scopy is a multi-functional software toolset with strong capabilities for signal analysis.
Download
Tip
Scopy for Windows
Scopy for Linux
Download: Scopy Flatpak installer
Download: Scopy AppImage executable
Scopy for OSX
Download:OSX installer
Scopy for Android
APK soon available
ARM64
ARM32
Warning
In order to have Scopy working with ADALM2000 or ADALM-Pluto please make sure that the Device Drivers are installed. A guide on this topic can be found in the section:
What’s new
Scopy 2.0 is a complete overhaul from the previous version of Scopy introducing a completely new infrastructure and interaction mechanism for any IIO device through generic instruments. While retaining the core functionality of Scopy v1 - support for ADALM2000 devices - this update significantly expands its capabilities.
Features added in Scopy 2.0 - Multiple device support - control multiple devices from the same Scopy instance - IIO device support - support for IIO devices through IIO instruments - ADC/DAC/Debugger/Register Map - ADI Harmonic design style - Light and Dark themes as well as a styling engine - Plugin system - support for devices other than the ADALM2000
Warning
Preferences and saved Scopy configurations from version 1.x are no longer compatible with Scopy v2.0. For more information click here
Installation
Scopy for Windows
Once you downloaded the installer, run it and follow all the required steps. After completion, system reboot is required.
Video installation guide:
AppImage
Make the application executable by running:
chmod +x ./Scopy.AppImage
Then run Scopy as any other Linux executable. These steps are applicable for ARM64 and ARM32 also.
To install the AppImage inside the system and create a quick access icon in the app launcher, run:
INSTALL=ON ./Scopy.AppImage
To remove all the files installed by the AppImage, run:
UNINSTALL=ON ./Scopy.AppImage
Flatpak
Before downloading and extracting the scopy-flatpak.zip archive, you need to setup Flatpak using this setup guide for your Linux distribution.
For Ubuntu, you can use the following steps:
sudo add-apt-repository ppa:alexlarsson/flatpak

sudo apt update

sudo apt install flatpak

flatpak remote-add --if-not-exists flathub https://flathub.org/repo/flathub.flatpakrepo
After this, get the Scopy.flatpak file from the downloaded archive and run:
flatpak install Scopy.flatpak
Video installation guide:
Scopy for OSX
Double click the downloaded .dmg to make its content available. “Scopy” will show up in the Finder sidebar and a window showing the content should open up. Drag the application from the .dmg window into Applications to install and wait for the process to finish.
Video installation guide:
Tap on the downloaded .apk file to start the installation process and proceed by hitting the “Install” button. Optionally, you may be warned that this application comes from unknown sources, hit the “Install anyway” button. Now, you can find “Scopy” together with your other apps.
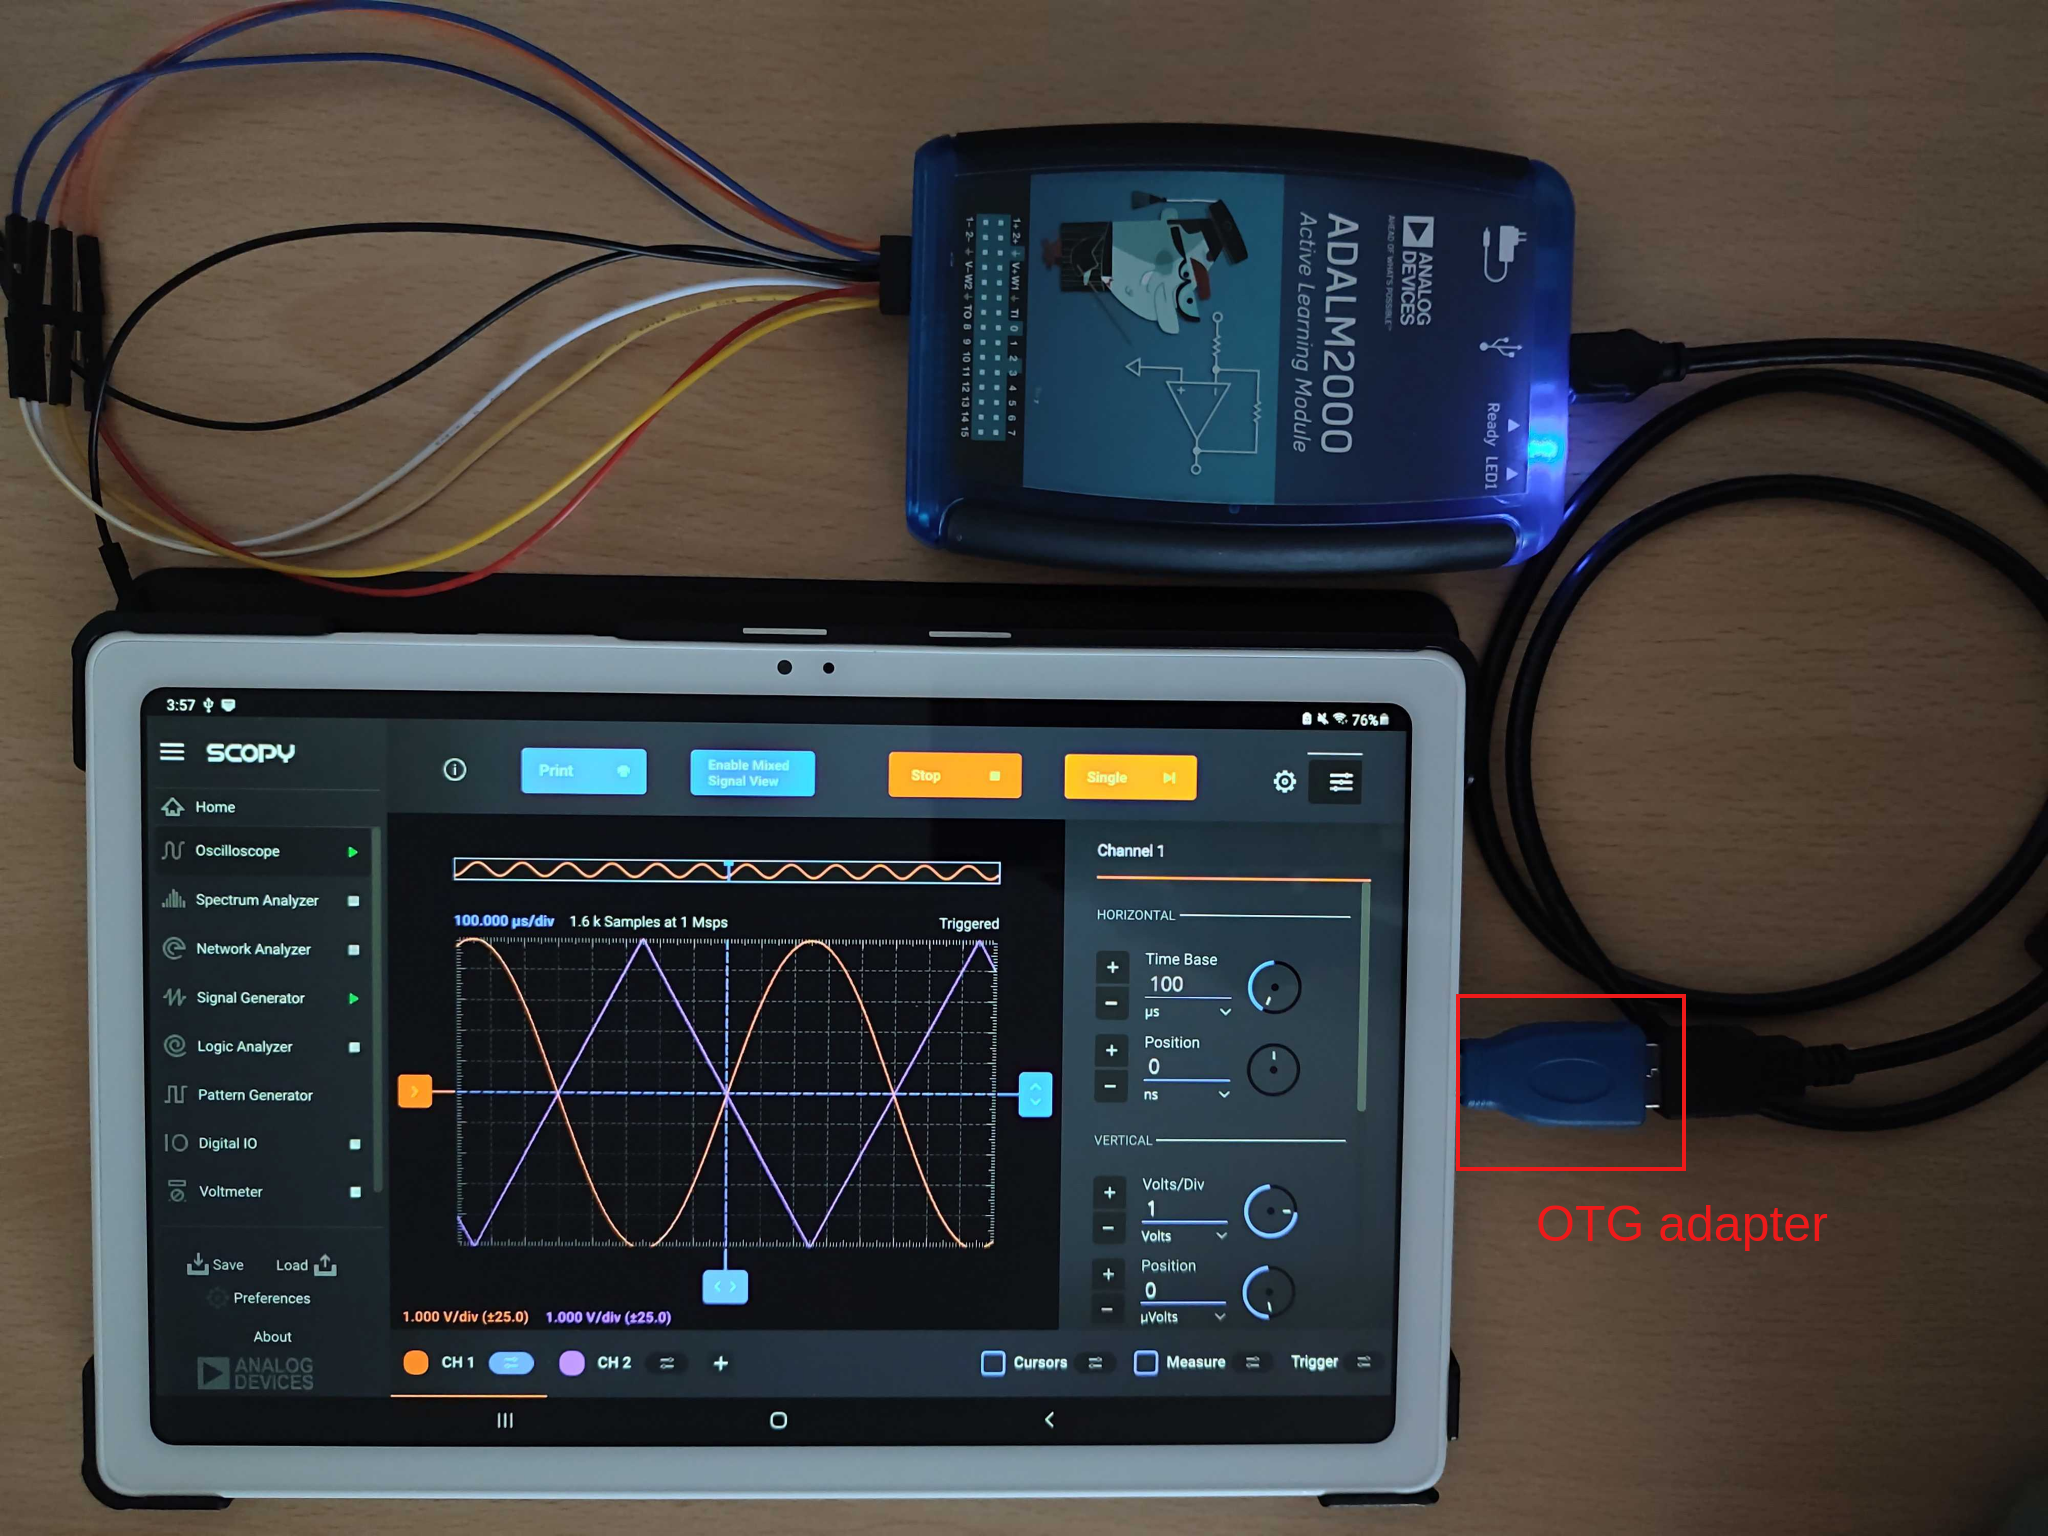
In order to connect ADALM2000 to your device, you will need an OTG adapter that will mediate the connection between your device and the USB cable, as shown in the image below.
Launch
Run Scopy from the Desktop Shortcut / Start Menu / Installation Folder.
On Linux, you can also run it using:
chmod +x Scopy.AppImage
./Scopy.AppImage
OR
flatpak run org.adi.Scopy
Tip
If the latter raises issues related to platform display plugins use the following modified command to solve it.
flatpak run –env=QT_QPA_PLATFORM=xcb org.adi.Scopy
QT_QPA_PLATFORM=xcb ./Scopy.AppImage
Running with elevated privileges on Linux
Some operations on local IIO devices (e.g. write, buffer access) require elevated (root) privileges. When Scopy detects a local IIO context and is not running as root, a dialog will inform you that certain operations may not be available. You can dismiss it with Continue as user and proceed with limited access.
To gain full access, launch Scopy with elevated privileges:
sudo ./Scopy.AppImage
ARM systems (.deb package)
When Scopy is installed, via the Debian package, a PolicyKit policy and a
wrapper script scopy-root are installed automatically.
Starting the application using the graphical interface or by running the wrapper
script will trigger a privilege prompt, allowing Scopy to be run with elevated
privileges without needing to use sudo in the terminal.
The privilege prompt will appear on application launch without any extra steps.
The wrapper script is located in /usr/bin/scopy-root. To launch Scopy with elevated privileges using the terminal, run:
scopy-root
Sudo can still be used to launch the application with elevated privileges:
sudo ./Scopy.AppImage
Warning
Running GUI applications as root can introduce security risks. Use elevated privileges only when required for local IIO device access.
Application Overview
Homepage layout
The Home view is divided into multiple sections:
Device browser
Contains a list of devices (USB/serial/network/emulated) that Scopy can connect to.
USB devices are scanned automatically at startup when the top right “Scan” switch is ON.
Add(+) device page
Can be used to connect to devices that are not automatically detected in the above mentioned list.
The interface has two tabs for device configuration:
IIO: adding and configuring IIO devices.
EMU: adding and configuring virtually emulated devices using the iio-emulator.
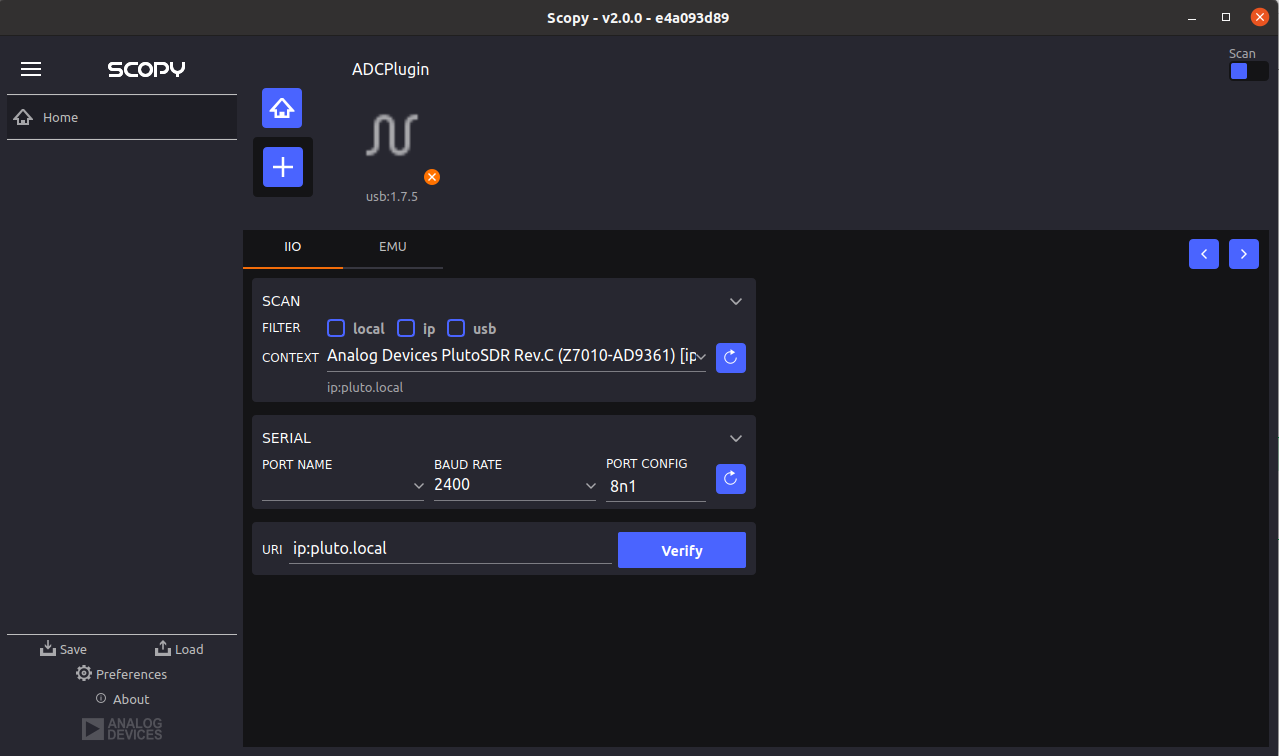
The IIO tab includes settings for scanning, connecting, and configuring various connected devices.
SCAN Section
Filter: Allows the user to choose which connection types to scan for.
If none is selected, the application will scan for all types.
A new scan is triggered every time one of the following options is selected.
Local: Scans local devices, usually on target.
IP: Scans network devices.
USB: Scans USB devices.
Context: List of currently scanned contexts.
Refresh: Button to re-scan and detect available devices.
SERIAL Section
Port Name: Drop-down to select available serial devices.
Baud Rate: Allows setting the communication speed.
Port Config: Specifies the data format and parity.
Refresh: Refreshes the list of available serial devices.
URI
URI Input: This is where the user specifies the connection URI. This field is automatically populated based on the selection from one of the previous sections but the user can manually input the URI of the required device.
Verify: Button to verify the connection based on the provided URI. This will display an error if no such context is available. On success a different page will be displayed allowing the user to configure compatible plugins.
The EMU tab includes settings for selecting the emulation mode, XML configuration files, RX/TX devices, and URI for the emulated device.
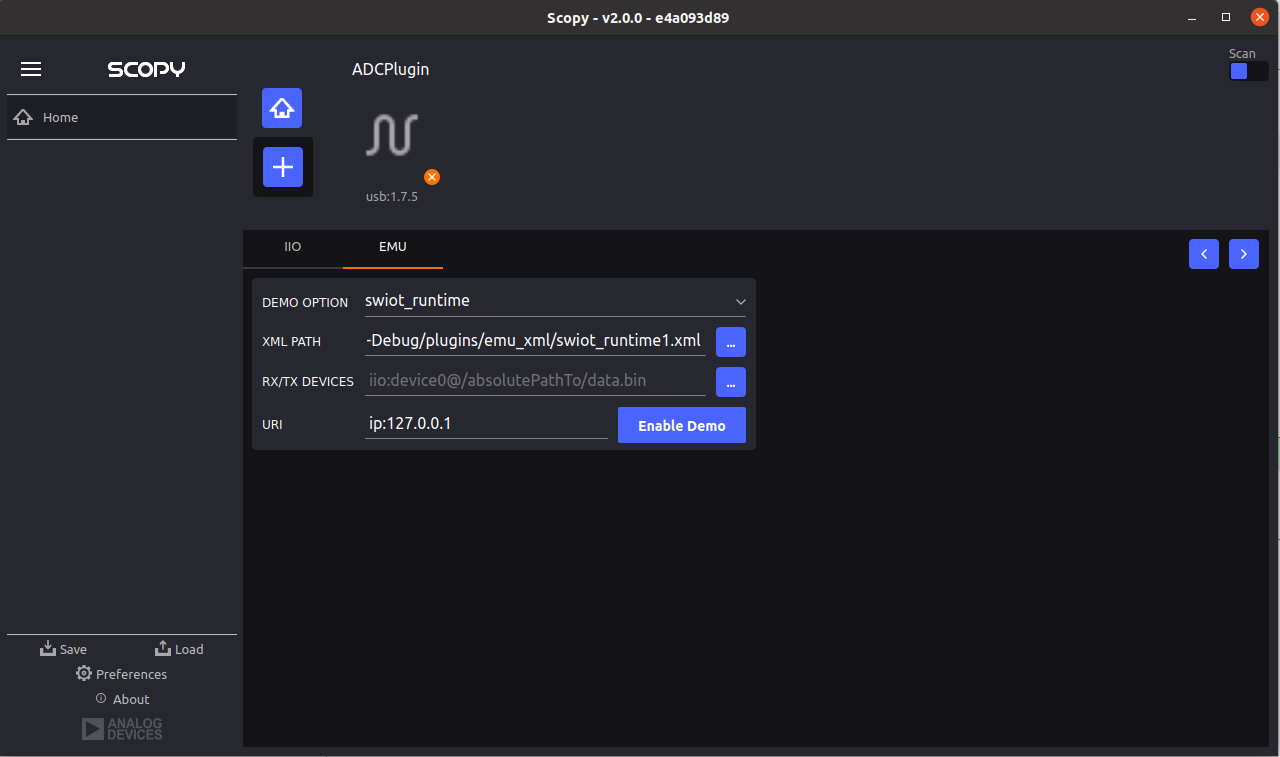
- DEMO OPTION:
Drop-down menu to select one of the predefined emulated devices.
Options are: adalm2000, pluto, swiot, pqm and generic. When using the generic option, the user must provide a path of the XML for the emulated device. If an existing option is selected, the XML path will be automatically completed in the field.
- XML PATH:
Specifies the path to the XML configuration file required for the emulation.
- RX/TX DEVICES:
Specifies the RX (receive) and TX (transmit) device files for the emulation mode. These are .bin files containing samples to be used on RX/TX devices.
For detailed examples check the official iio-emu Github docs .
- URI:
The URI is automatically set to ip:127.0.0.1 or ip:localhost.
- Enable Demo Button:
Validates and activates the demo mode based on the selected configuration.
Automatically displays the IIO tab and populates the URI field if the EMU validation is successful.
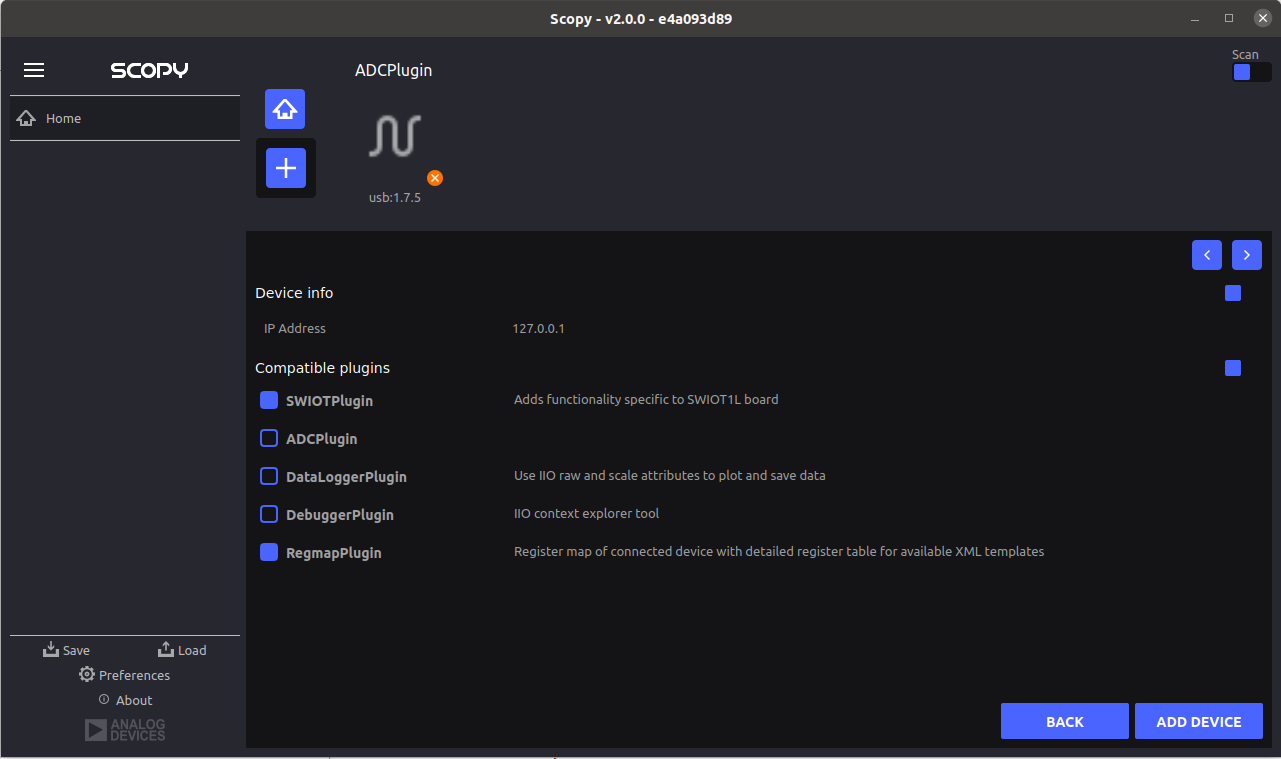
The add device plugin configuration page will allow the user to select compatible plugins for the newly added device.
By default, the plugins with the highest priority will be selected. Clicking the ADD DEVICE button will finalize the process and create a new device entry in the device browser.
Tip
Scopy can be connected to multiple IIO devices simultaneously starting with v2.0. All the connected or available IIO devices will be available in the device browser.
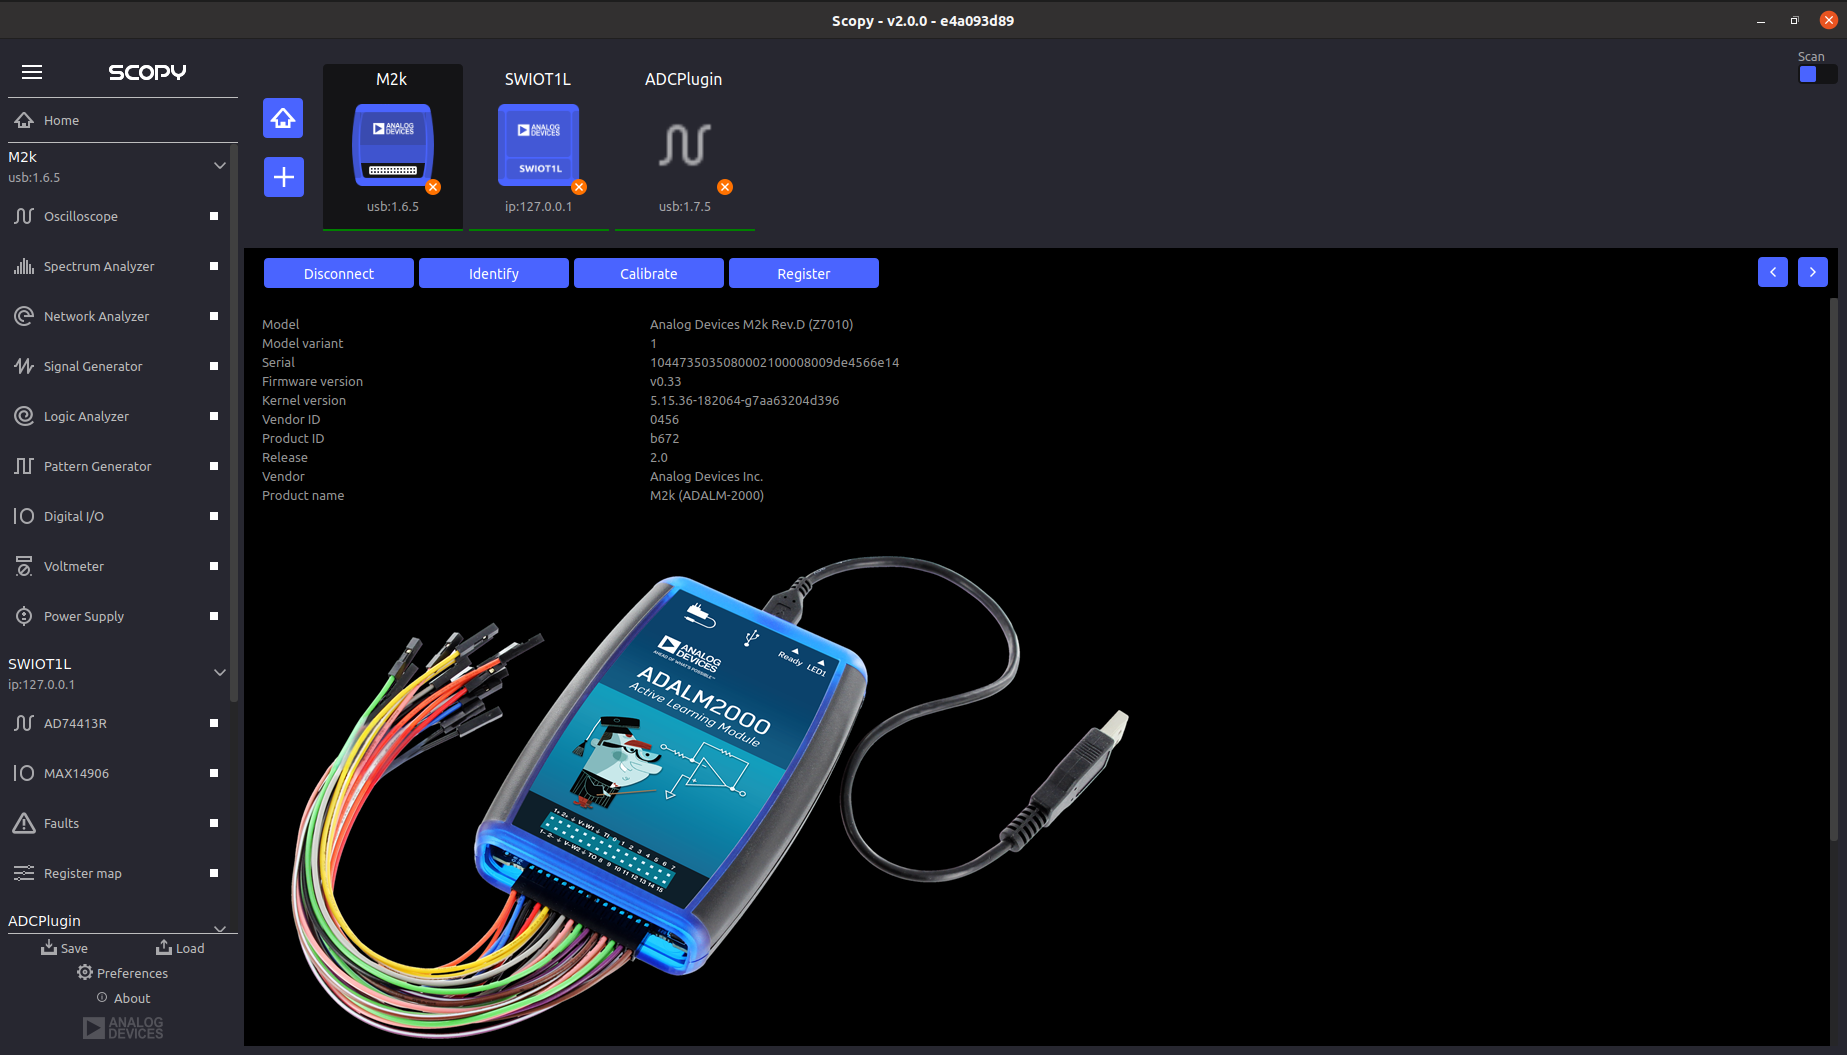
Information Window
This area contains the welcome page, add device page and for each device a device page.
The device page will contain context attributes extracted from the IIO context, as well as specific buttons or controls that can be provided by any compatible plugin (Example: The ADALM2000 has a “Calibrate” button which is only specific to this type of device).
Save & Load session
Scopy can save or load different configurations in an .ini file format.
Preferences
Scopy allows multiple application specific user preference configurations described in the Scopy general preferences page
About page
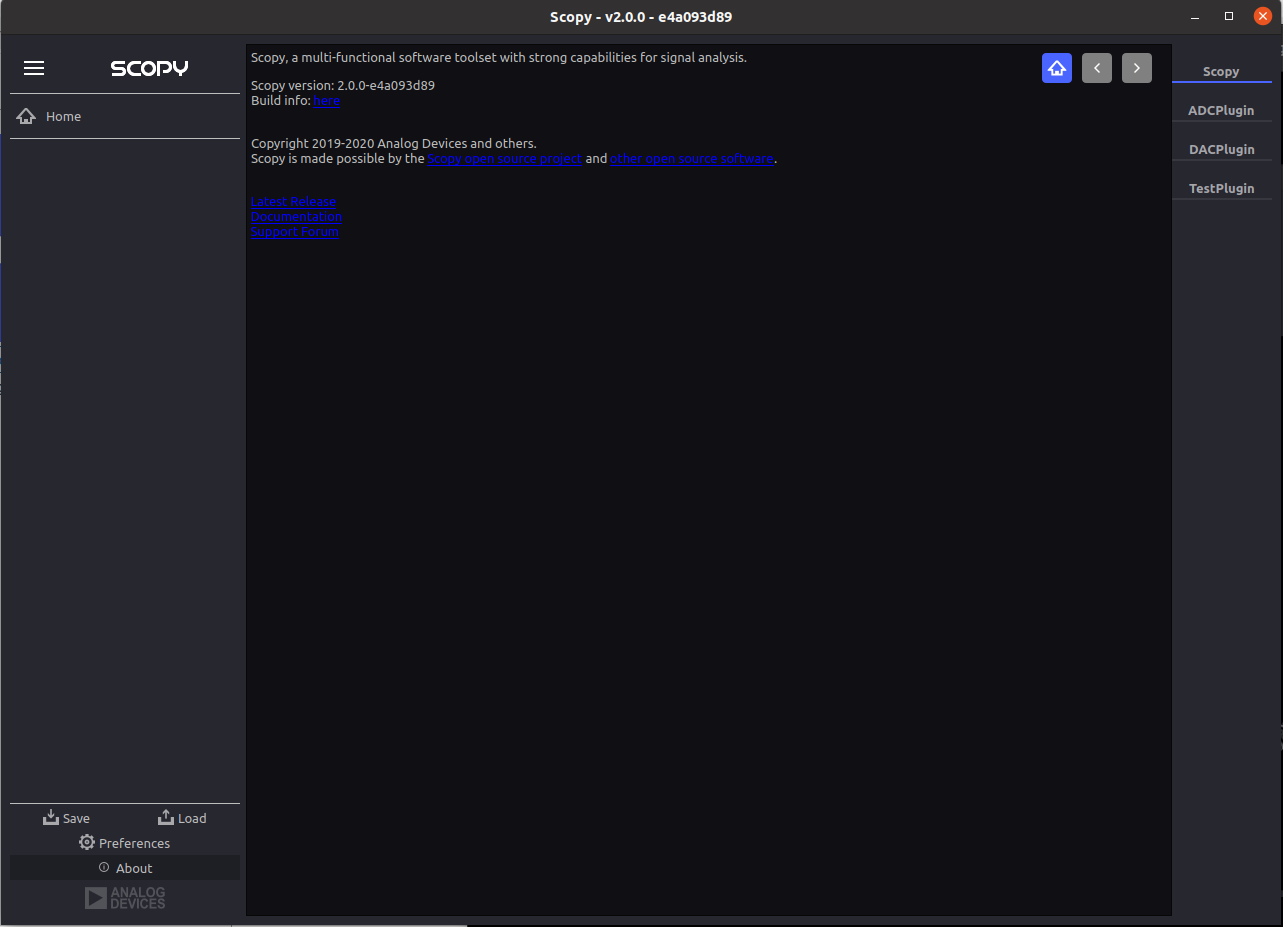
Scopy About page can be accessed using the bottom left side about button. On the right side of the page, about pages specific for each plugin are available if necessary. More details can be found in their specific plugin documentation section.
The General About page contains different useful links:
Build info will display the application version, Git commit, build date and whether it was created locally or in a continuous integration environment, a list of dependencies and their specific versions or Git commit hashes, a list of the last 100 commits and the Scopy branch.
Warning
These are all important in the debugging process and most of this information should be specified when reporting an issue.
License link to the open-source LICENSE file in the Github repository.
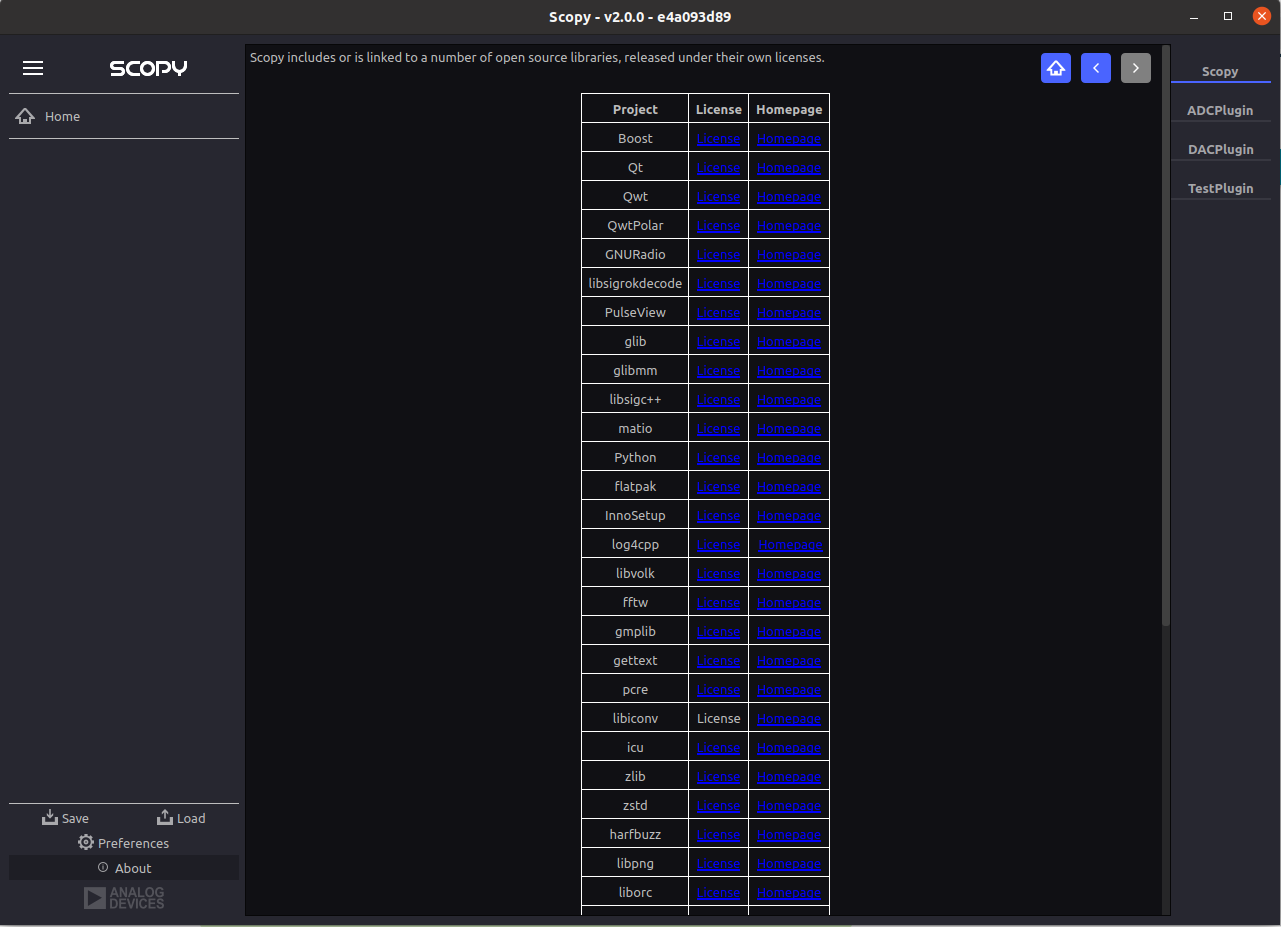
Open-source dependencies list of Scopy includes a number of open source libraries, released under their own licenses.
Latest release for quick access to the latest Github release page.
Documentation for quick access to this documentation.
Support forum for quick access to Engineer Zone.
Connecting to a device
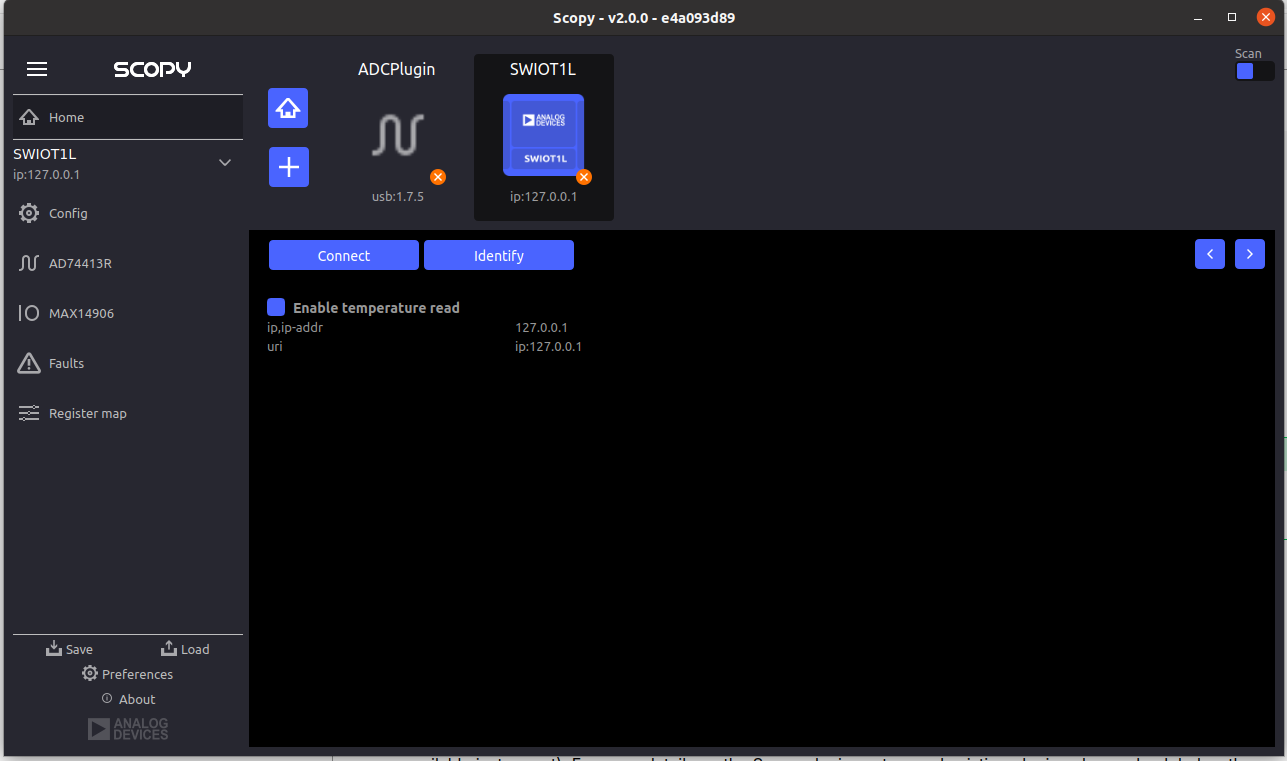
To connect to any device on the Device Browser click on the device and then click the Connect button in the Information Window.
If the connection was established, the device will have a green status line under it and you will be able to disconnect from it in the same Information Window.
Clicking the
 button will remove the device from the list.
The device title can be modified by hovering over the top right corner of the icon and clicking the
 pen icon.
If errors are encountered during the connection phase a warning sign
 will appear on the top right side of the
device icon.
will appear on the top right side of the
device icon.
Managing Device Plugins
Once connected to a device, you can manage which plugins are active without disconnecting from the device. Device pages now feature a streamlined tabbed interface at the bottom that makes it easier to configure device plugins.
New Tabbed Interface
Device pages include two dedicated tabs positioned at the bottom:
Device Info: Traditional device information display with Connect/Disconnect controls
Available Plugins: Complete overview of all compatible plugins for your device
How to Manage Plugins
To enable or disable plugins for a connected device:
Connect your device as usual from the device page.
Click on the Available plugins tab at the bottom of the device page.
Check or uncheck plugins to enable or disable them as needed.
Click the Reload button to apply your plugin configuration changes.
The device will be recreated with your selected plugins active.
Note
The device reload feature recreates the device connection with the new plugin configuration. Any active measurements or configurations within plugins will be reset during the reload process.
User Guides
Scopy can now interact with multiple hardware devices at a time. Once a device is selected to be used with the application, a list of instruments that are available for that device will be visible as a preview. Once connected to a device the instruments will be enabled and available.
Each instrument can be opened from the left menu. The icon on the right of the instrument name specifies that the instrument is enabled and provides a shortcut that allows an instrument to be turned on or off.
For each connected device, there is an entry in the left side menu, above all the instruments, displaying the Name and URI of the connected device.
The instruments menu can be minimized by clicking on the Scopy button near the top-left window.
Detaching Instruments
Scopy provides the detaching into multiple windows feature for each instrument available, providing a better view/manipulation.
This can be done by double clicking the instrument to detach it.
Please make sure that the Double click to detach a tool option is enabled in the Preferences menu.
Instruments Overview
Scopy provides a list of plugins and instruments described in the Plugins page
Scripting
User guide on how to use scripts with Scopy:
Building from source
Source code
The source code for the entire application can be found on github