SD card flashing
Follow the tutorial below based on your host system: Linux or Windows.
From Linux hosts
This section explains how you should go about formatting and flashing the SD card with the software required to use many of the platforms Analog Devices supports.
There are several steps that need to be completed before your SD card will be ready to use.
Download the file
Download the relevant SD card image file from the Kuiper Linux page. Please, get the latest if you can. This can be done with wget as well:
~$
time wget \
  https://swdownloads.analog.com/cse/kuiper/image_2021-07-28-ADI-Kuiper-full.zip
--2021-12-15 17:12:33--
http://swdownloads.analog.com/cse/image_2021-07-28-ADI-Kuiper-full.zip Resolving
swdownloads.analog.com (swdownloads.analog.com)... 81.196.26.153, 81.196.26.177
Connecting to swdownloads.analog.com
(swdownloads.analog.com)|81.196.26.153|:80... connected. HTTP request sent,
awaiting response... 200 OK Length: 15931539 (14.8 GB)
[application/octet-stream] Saving to: 'image_2021-07-28-ADI-Kuiper-full.zip'

100%[=======================================================================>]
15931539 1.94M/s in 6m 52s

2021-12-15 17:19:26 (1.83 MB/s) - 'image_2021-07-28-ADI-Kuiper-full.zip' saved
[15931539/15931539]

real 6m53.573s user 0m0.740s sys 0m32.342s
It should take about an hour (or more if your connection is slow).
Verify the download
Check the md5, to make sure you have the right file.
~$
md5sum image_2021-07-28-ADI-Kuiper-full.zip279097240dec7156ff5e15b7ce0b8a25 image_2021-07-28-ADI-Kuiper-full.zip
A
zipfile is a compressed file; you need to uncompress it, and check the md5sum on resulted file:~$
time unzip image_2021-07-28-ADI-Kuiper-full.zip real
1m17.40s user 74.44s sys 2.11s
Again, check the results:
~$
md5sum 2021-07-28-ADI-Kuiper-full.img
b160453396e482234094a92134769ec6 2021-07-28-ADI-Kuiper-full.img
Writing SD card GUI
Warning
This will overwrite your entire SD card completely. Backup anything from the card you want to keep.
It is recommended to use Etcher to write to your SD card, but other options exist. Only the process for Etcher is covered here.
Insert your target SD card into your computer, launch Etcher and do:
Select write image from file
Select the .img file that you have already extracted
Select the SD card that you inserted
Click flash
Wait for the card to be flashed and verified
At this point, the SD card is still not bootable, so follow the topics after Imaging your SD Card.
Writing SD card Command Line
Warning
This will overwrite your entire SD card completely. Backup anything from the card you want to keep.
Now that everything looks OK, write the file to your SD card.
This will depend on your system, where your SD card installed itself. You also need to do this as root, since normal users shouldn’t be able to randomly write files to block devices.
Plug the SD card into your SD-Writer. If this mounts the device (which many Linux distributions do), it is important that you unmount it.
sudo umount /dev/mmcblk0p1Write the file (input file or
if) to the storage device (output file orof).~$
time sudo dd \
     bs=4194304 \
     status=progress \
     of=/dev/mmcblk0 \
     if=2021-07-28-ADI-Kuiper-full.img
[sudo] password for user:
0+60640 records in 0+60640 records out 7948206080 bytes (7.9 GB) copied, 571.766 s, 13.9 MB/s
real 7m54.11s user 0.29s sys 8.94s
Now, you have that slice of pizza that you got too… :)
This section explains how you should go about formatting and flashing the SD card with the software required to use many of the platforms that Analog Devices supports.
There are several steps that need to be completed before your SD card will be ready to use.
Ensure the output buffers are flushed:
~$
sync
Unplug the SD card from your PC.
Verify
Since it’s possible that the write process of a disk image can have some issues (if the target had a sector marked as bad, dd will not notice, and will write on top of it), the safest thing to do is to run a file system consistency check on things.
If you are unsure of how to use this tool, check the man page.
Important
Most Linux kernels will need to have a physical eject between the steps above, and the steps below.
Unmount the file systems (fsck will not work on a mounted file system)
~$
sudo umount /dev/mmcblk0p1
~$
sudo umount /dev/mmcblk0p2
If it fails with a
umount: /dev/mmcblk0p2: not mountederror, that’s OK. If it fails with aumount: /dev/mmcblk0p2: not founderror, that means you have no disk inserted, or did a typo in the path.Perform the file system consistency check:
~$
sudo fsck -y /dev/mmcblk0p1
fsck from util-linux 2.20.1
dosfsck 3.0.13, 30 Jun 2012, FAT32, LFN
/dev/mmcblk0p1: 158 files, 76420/130812 clusters
~$
sudo fsck -y /dev/mmcblk0p2
fsck from util-linux 2.20.1
e2fsck 1.42.5 (29-Jul-2012)
/dev/mmcblk0p2: clean, 157918/452480 files, 717760/1808128 blocks
At this point, the SD card is still not bootable, so follow the topics after Imaging your SD Card.
From Windows hosts
This section explains how you should go about formatting and flashing the SD card with the software required to use many of the platforms that Analog Devices supports.
There are several steps that need to be completed before your SD card will be ready to use.
Using the ADI Kuiper Imager (RECOMMENDED)
Download the .exe file to install the ADI Kuiper Imager and run it
Connect the SD card to the computer (make sure it does not encrypt the files)
In the ADI Kuiper imager app:
select the Storage as your SD card partition;
select the Image source; this can be either:
our officially released image Image source > ADI Kuiper Linux > “ADI Kuiper Linux 2023_R2 Patch1” or whichever is the latest release you want to use. This will download the image from our sources, so you need access to the Internet;
in other instances, specialized pre-compiled images that are created for projects that are not yet included on the standard image.
select the Target: the FPGA vendor, then the family for it, and lastly the evaluation board configuration. This will write the appropriate boot files on the SD card once it’s done formatting and flashing the ADI Kuiper image first;
click the Write button from bottom right to start writing to the SD card. The whole process should take about 15 minutes, and you need access to the internet.
Using third party tools
Download the compressed software image file
Extract the software image file
Connect the SD card to the computer (make sure it does not encrypt the files)
Verify the software image file (optional)
Format the SD card (optional)
Flash the SD card
Download the SD card File
Download the software image file you want to write onto your SD card. Typically, this is going to be the standard Kuiper Linux, but in some instances, specialized pre-compiled images are created for projects that are not yet included on the standard image. So be sure you have the correct file.
Save the .Zip file or .Xz file to your local hard drive, and remember the file location.
Extract the Software Image File
This step will decompress the large software image file you downloaded. Ensure you have a decompression utility installed on your computer, capable of extracting .Zip file format or .Xz file format such as 7-Zip
Extract the software image file to a known location on your computer.
Connect the SD card to the Computer
Connect the SD card to either an internal or external SD card reader which is connected to your computer. Most newer computers have an SD card reader, but there are plenty of USB connectable SD card reader devices available.
Caution
Make sure your computer does not encrypt the files that are on the SD card!
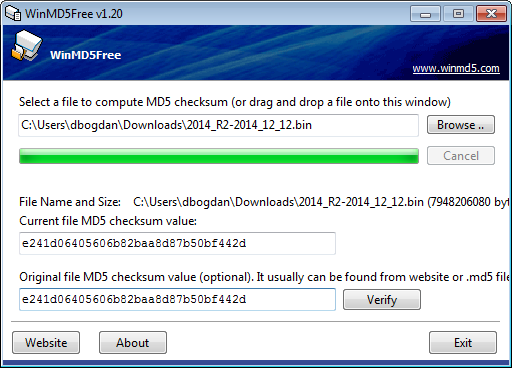
Verify the download (optional)
This step is used to validate the image you downloaded, ensuring that it is the correct version and that the software wasn’t corrupted during download.
Ensure you have the following application installed on your computer: WinMD5.
Open up WinMD5 application on your computer.
Browse to the extracted file location.
Check the m5dsum of the resulting file.
Format the SD card (optional)
This step should be used if the SD card format is unknown or needs to be reconfigured.
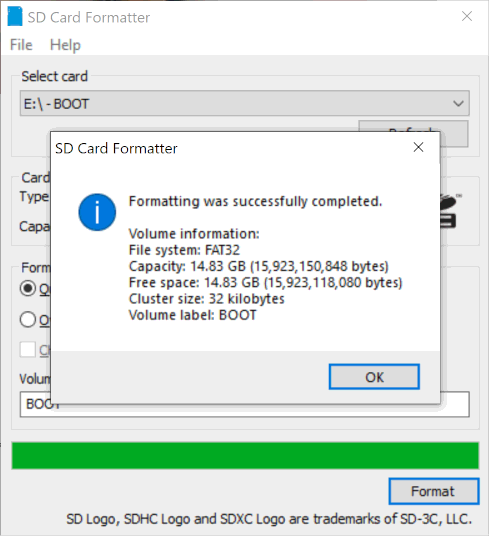
Using SD card Formatter
Ensure you have the following application installed on your computer: SD card Formatter.
Open the SD card Formatter application on your computer, and set the following fields:
Select Card = SD card drive you want to format (usually says “boot” or “volume”)
Card Information = Make sure the disc size approximately matches your SD Card capacity
Formatting Options = Select Quick Format
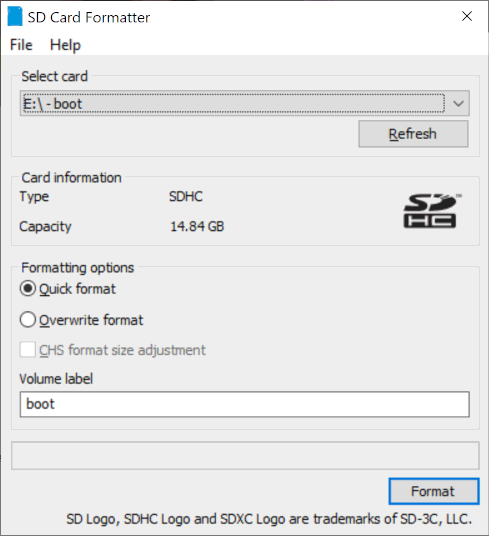
Once set, click the Format button
The program will notify you that the formatting is complete.(could take several minutes)
Using DISKPART via Windows command prompt
Windows command prompt has DISKPART that is also capable of reformatting SD cards and other drives.
Run Windows command prompt as administrator.
Type
list disk. All current dives will be shown.Type
select disk Xwhere X is the SD card drive number. (Do not mistake this part)Type
cleanto clean the drive. If an error occurs simply retry typingclean.Type
create partition primary.Type
format fs=FAT32. The formatting may take 45 minutes or so. FAT32 is the tested file system type.After the progress is at 100%, type
assignto finalize the drive letter for Windows.
Flash the SD card
This step will physically write the software image file onto the SD card, so it will be ready for use.
There are several Windows applications that can flash SD cards; we will describe how to do it using two common tools. Ensure you have at least one of the following tools installed on your computer:
Win32DiskImager from Sourceforge or Etcher from Sourceforge.
Important
If you are unsure, or don’t understand these directions - STOP. If you are not careful, you could accidentally write a Linux image to your PC hard drive.
Your PC will not function properly after this, and your IT department should not blame ADI.
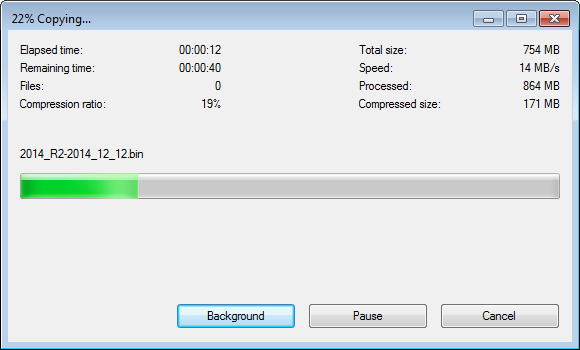
Win32DiskImager
Open up the Win32DiskImager application on your PC

Using the small folder button in the Image File section, navigate to the location of your software image file you want to flash and select it.
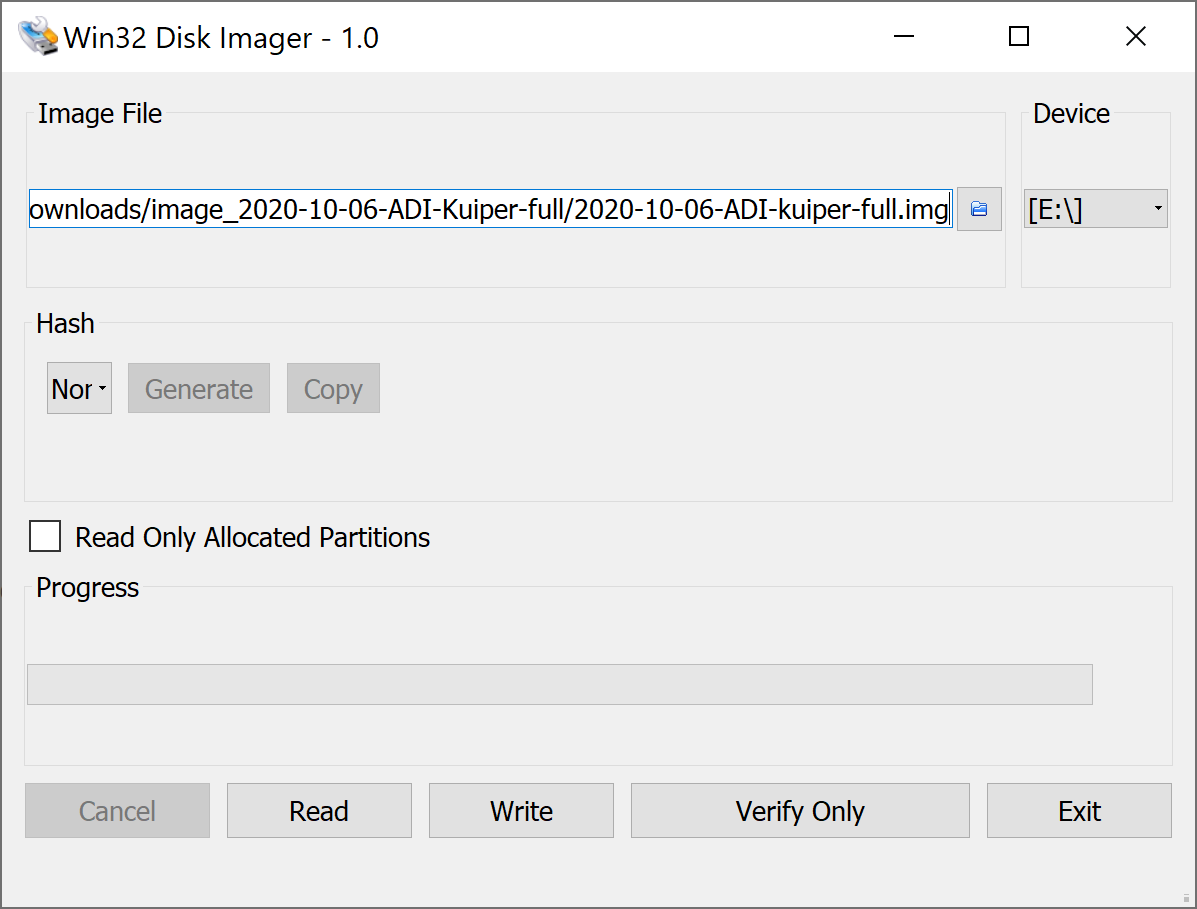
Double check that the Device location in the upper-right corner, matches the SD card drive location.
Attention
You DO NOT want to accidentally re-image your hard drive, so this step is critical to ensure you are flashing the SD card and not anything else.
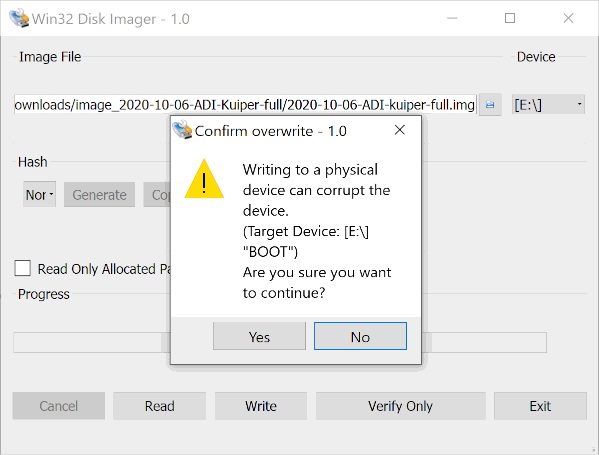
When you are ready to flash the SD card, click on the “Write” button.
Win32DiskImager will also alert you to make sure you want to write to this drive, acting as another failsafe so that you don’t accidentally image the wrong drive.
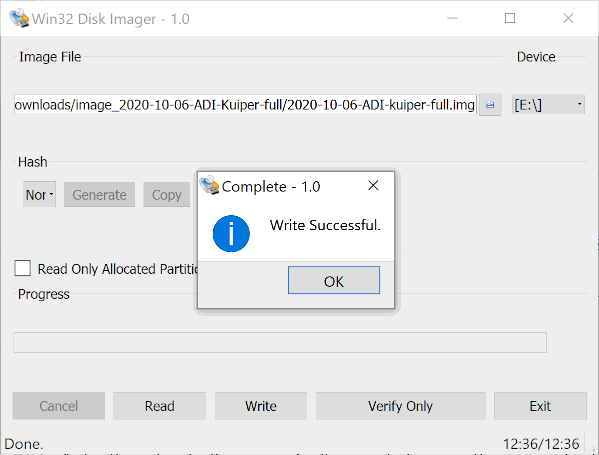
Flashing the image to the SD card typically take 10-15 minutes, but a progress bar is provided during the process. So grab yourself a coffee.
“Write Successful” will appear when the program is finished, letting you know the SD card is ready.
Exit the Win32DiskImager program, and use the Windows “safely remove hardware” function to eject the disk, before physically removing the SD card from the reader.
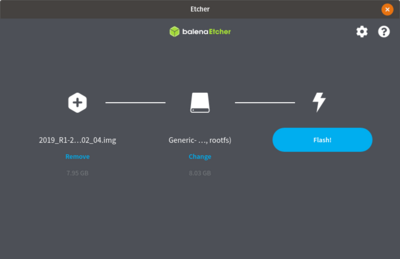
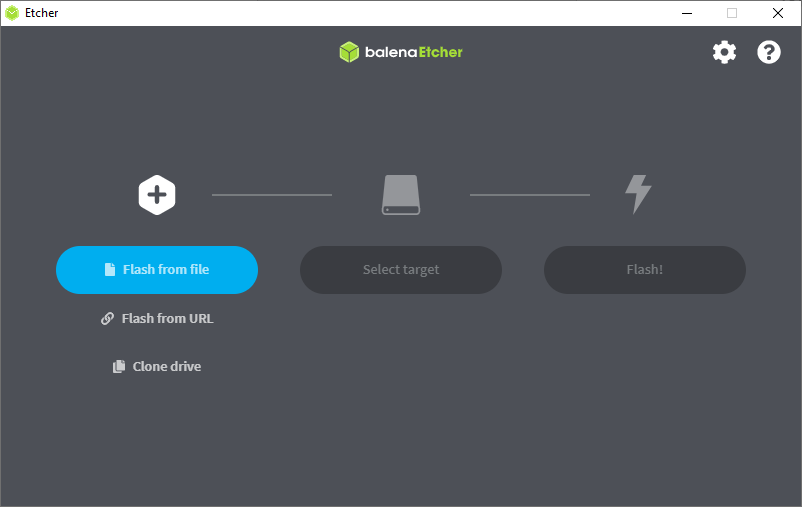
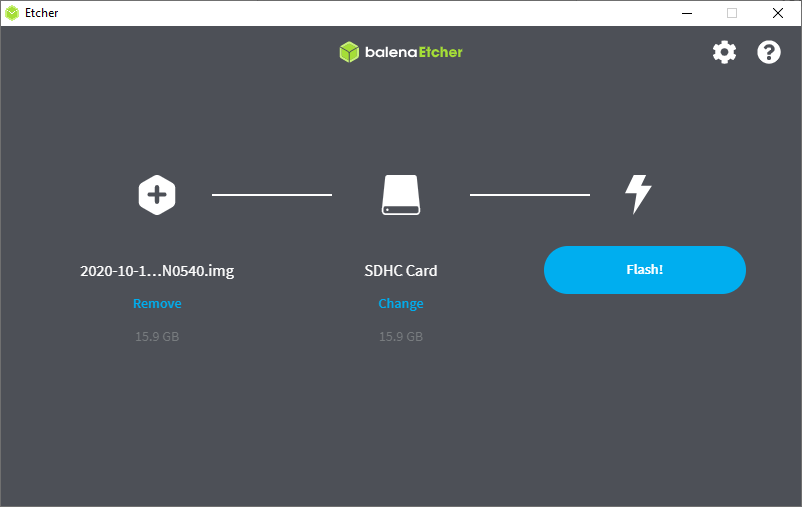
Etcher
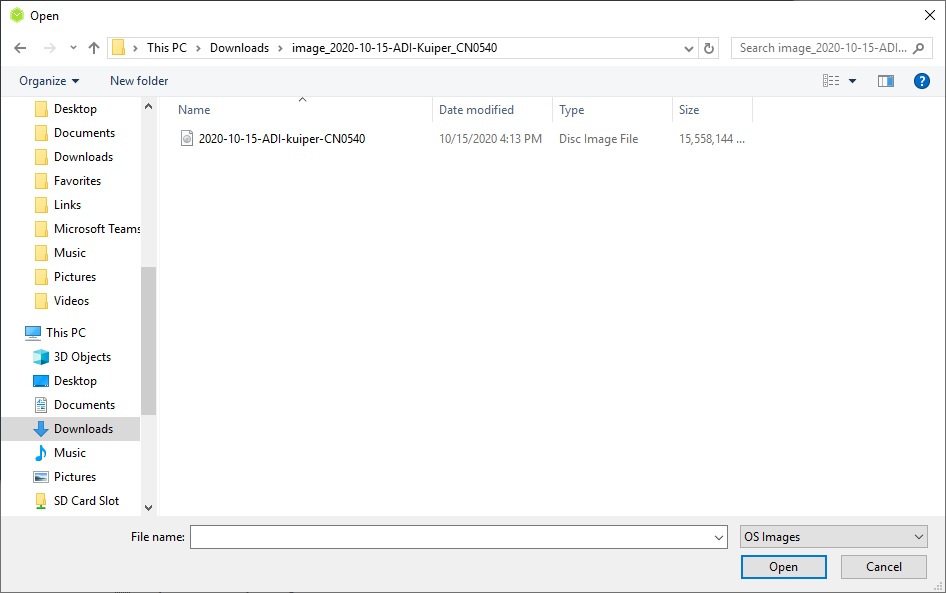
Open Balena Etcher and select the .img file you want to write to the SD card.
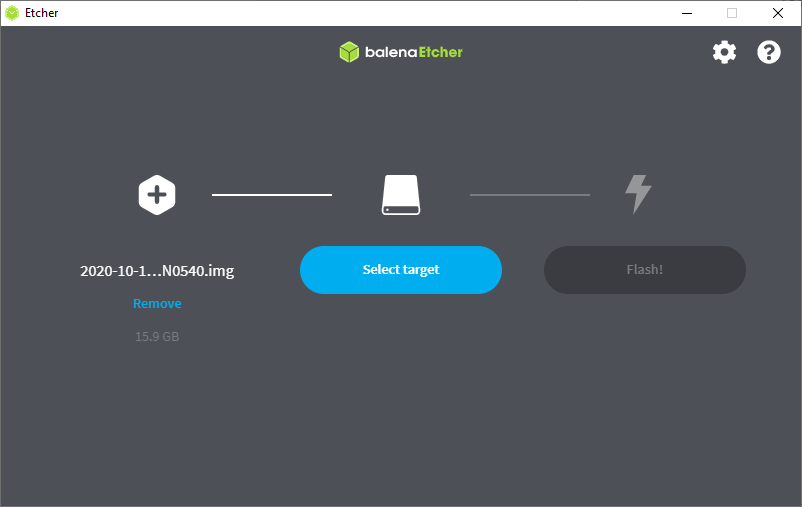
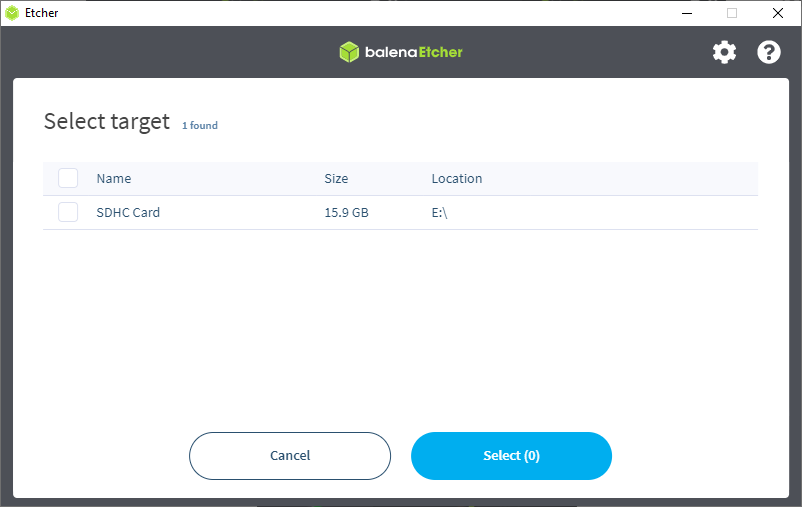
Select the drive you want to write your image to.(should display as an SD Card)
Review your selections and click ‘Flash!’ to begin writing data to the SD card.
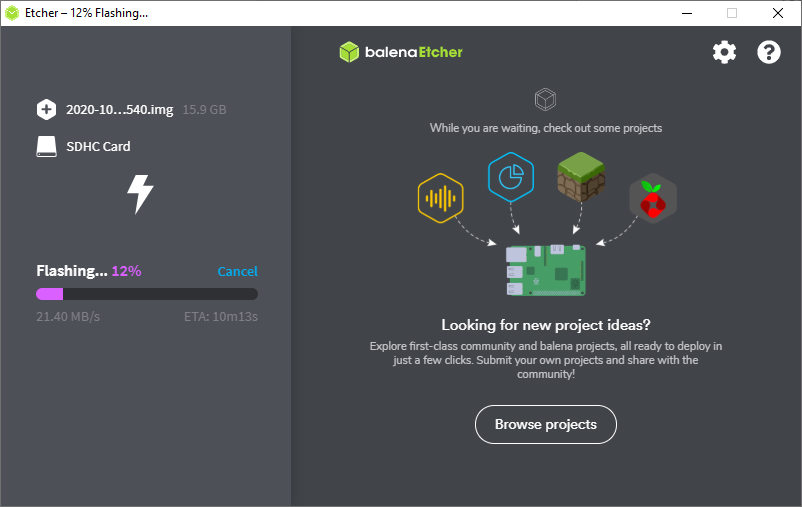
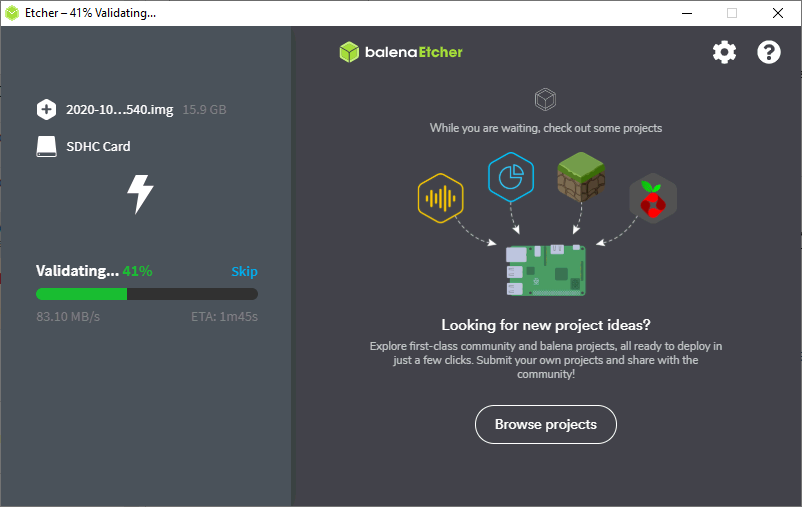
After flashing, Etcher will automatically validate the image flash correctly. You can either wait for this to finish or click skip.
After the validation is complete, your SD card is finished and ready for use.
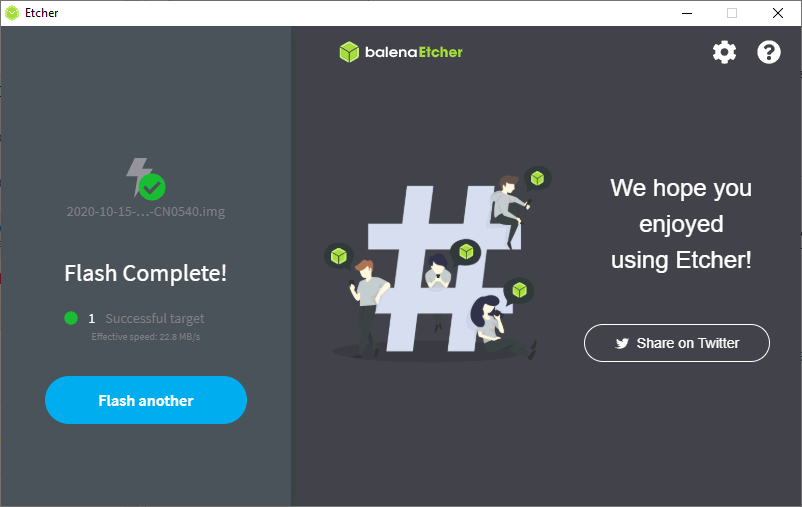
Go to the toolbar of your Windows OS, and click on “safely remove hardware”, and remove your completed SD card.