Using with AMD Kria
Required Hardware
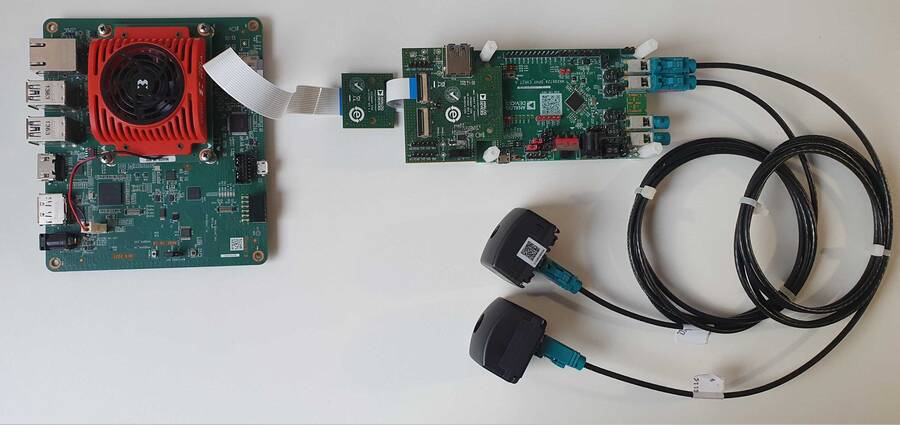
Development kits
Supported image sensors & cameras
Cables
15 pin same-side ribbon cable, P/N: MP-FFCA10152003A or similar
Hardware changes
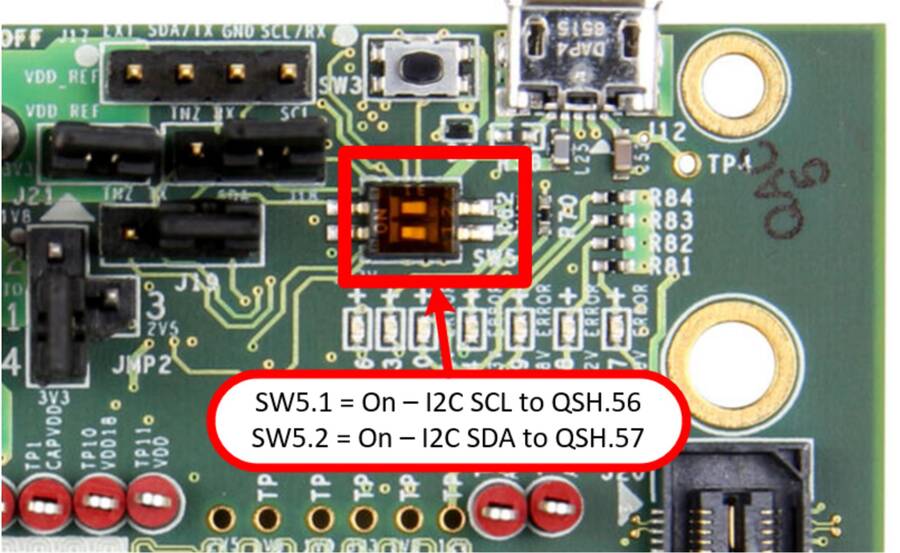
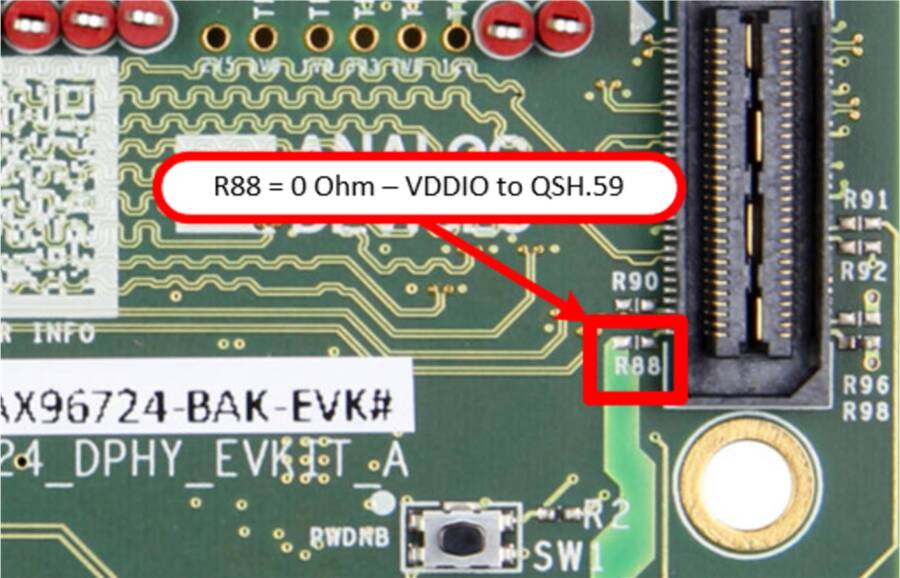
GMSL Deserializer Evaluation Kit
Flip the SW5 switches to the ON position to enable I2C communication over the CSI bus
Bridge R88 - provides VDDIO to the adapter
AD-GMSLCAMRPI-ADP# Adapter
Configure the switches on the GMSL Deserializer adapter for CAM2.
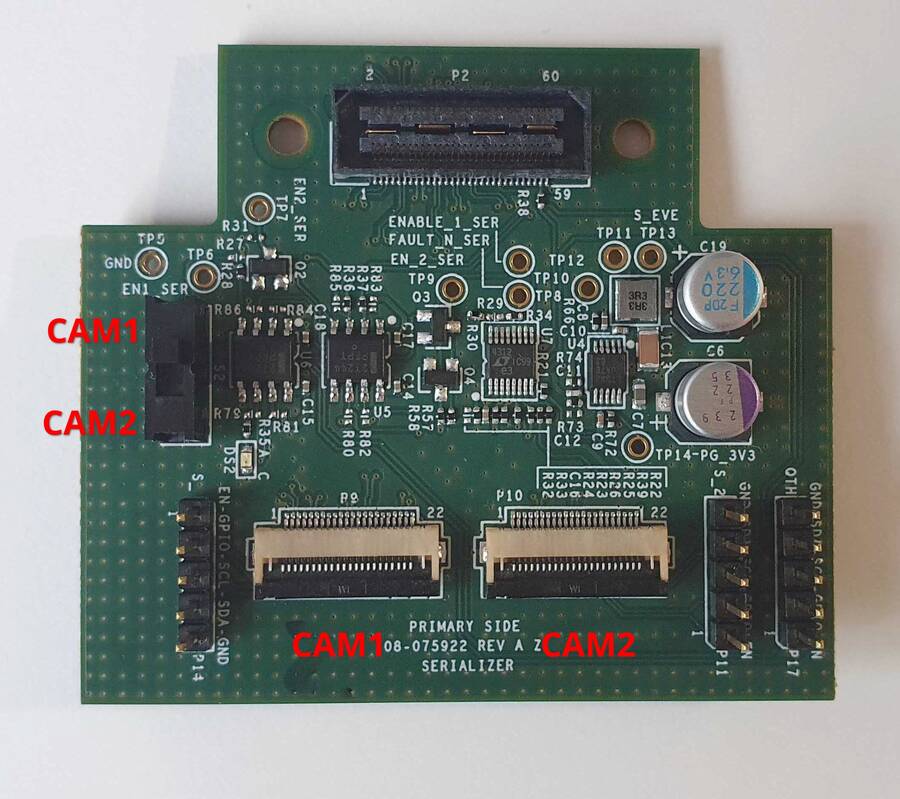
Serializer adapter
Deserializer adapter

System Setup
Write the AMD Kria latest SD card image on a 8GB (or more) SD card
Plug the SD card into the Kria SD card slot.
Connect the HDMI cable from the monitor to the Kria HDMI connector.
Connect the 2 Tier 4 C1 cameras to INA and INB of the deserializer board.
Connect the 15 pins camera cable between the Kria and the P1 connector of the interposer. Make sure to use the cable with contacts on the same sides.
Connect the 22 pin flex cable.
Connect the Kria to the power supply.
Kria will boot by default from QSPI. It must be forced to boot from SD card to correctly load the custom BOOT.BIN. For this please follow the guide here and run boot_sd boot mode.
Connect a USB mouse and keyboard to the Kria. It’s possible to use either a mouse and keyboard combo or a separate mouse and keyboard.
Note
Ubuntu credentials
user:analog
pass:analog
Note
To change the number of cameras that would be used in the setup, you would need to change the default devicetree binary that is located in the boot partition of the SD card to the corresponding number of cameras (between 1 and 2), by overwriting the system.dtb to an one from the corresponding directory.
The devicetree binary options are located in the bootfs partiiton (in nr_cams/1cam or 2cams directory/system.dtb). The bootfs partition can be mounted by using the mount utility: e.g., mount /dev/mmcblk1p1 /mnt.
Running the Evaluation Application
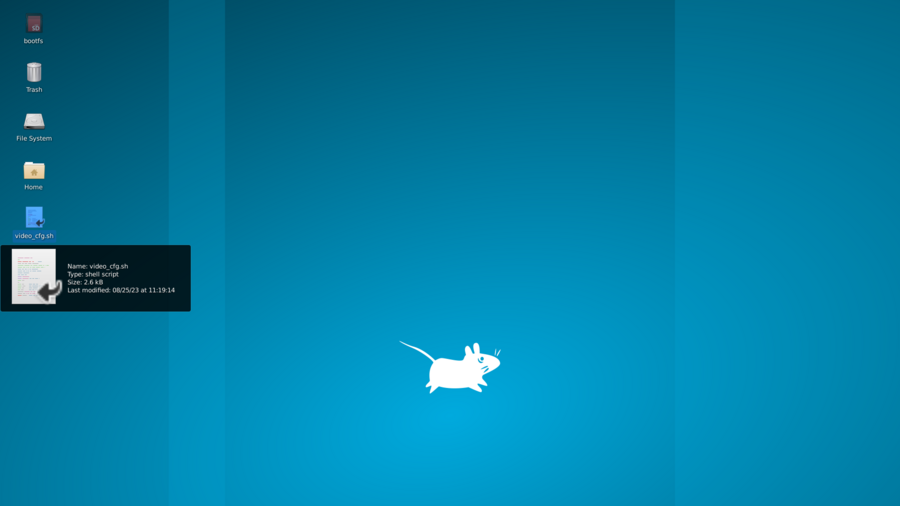
Once Linux boots, you’ll see on the HDMI monitor the Linux desktop and on the top left corner a shortcut to the script named video_cfg.sh. Double-clicking on the icon will start the media-ctl configuration script. The script is running in background without any pop-ups.
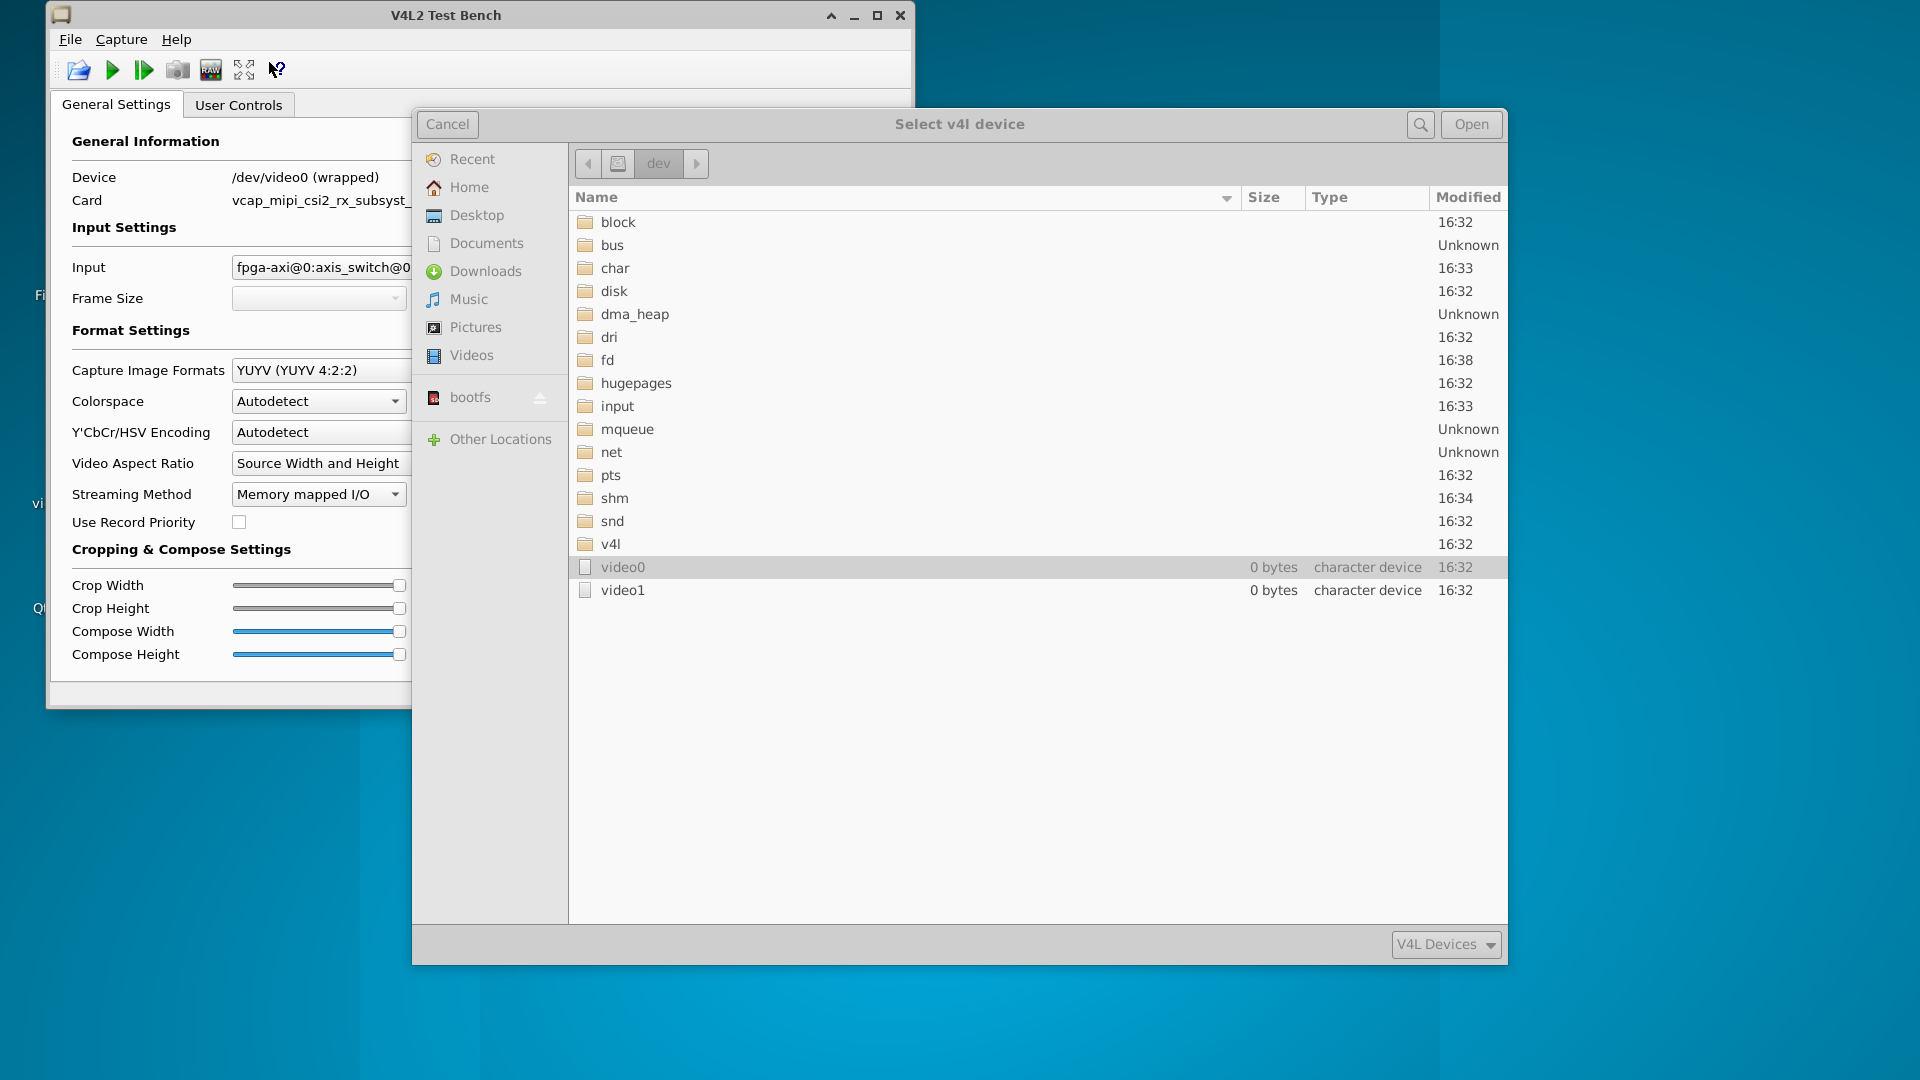
After the script was executed once, one should double-click on Qt V4L2 test Utility icon to start the video capture application. A window like below should open. First, the user must select video0 device by clicking the open icon.
A new instance of Qt V4L2 test Utility should be started and selected video1 this time. After this step the play button should be pressed on both Qt V4L2 test Utility instances. Video should be visible on the 2 windows.
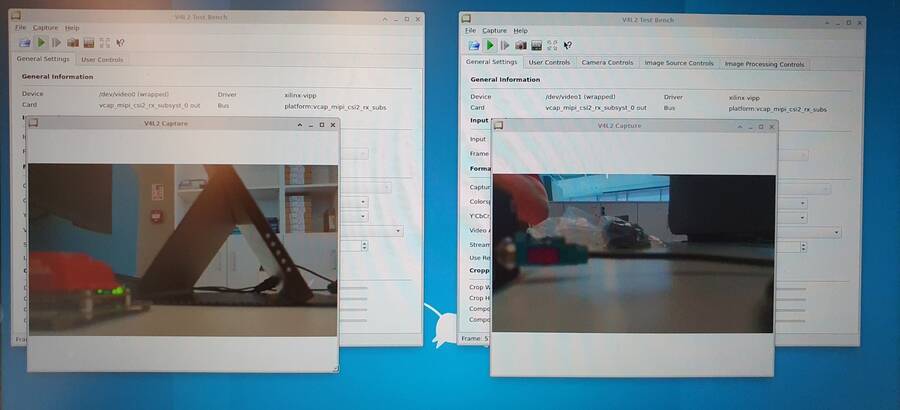
OpenGL rendering is recommended to be disabled by accessing Qt V4L2 test Utility capture menu. Capture will start only if both Qt V4L2 test Utility instances are on play state. This is a current HDL limitation.
Power off sequence
Open a terminal and type sudo poweroff. This will safely power off the Kria and ensure that the SD card is properly unmounted.
Getting the Software
The GMSL Linux kernel drivers, the complete Linux distributions for the supported processing platforms, and software user guides can be found on the ADI gmsl repository.
HDL Projects
The project and the project’s overview can be found at the following links: