Using with Nvidia Jetson Orin Nano
Note
The default username and password for the device are as follows:
Username: analog
Password: analog
Required Hardware
Development kits
MAX96717 GMSL Serializer Evaluation Kit (EVK) or GMSL camera
Supported image sensors & cameras
Cables
15 pin same-side ribbon cable, P/N: MP-FFCA10152003A or similar
22 pin opposite-side ribbon cable, P/N: MP-FFCA05222002B or similar
22 pin same-side ribbon cable, P/N: MP-FFCA05222002A or similar
FAKRA Jack to FAKRA Jack coaxial cable
Hardware Changes
GMSL Deserializer Evaluation Kit
Note
The CFG pins settings for deserializer are:
CFG0: 0
CFG1: 0
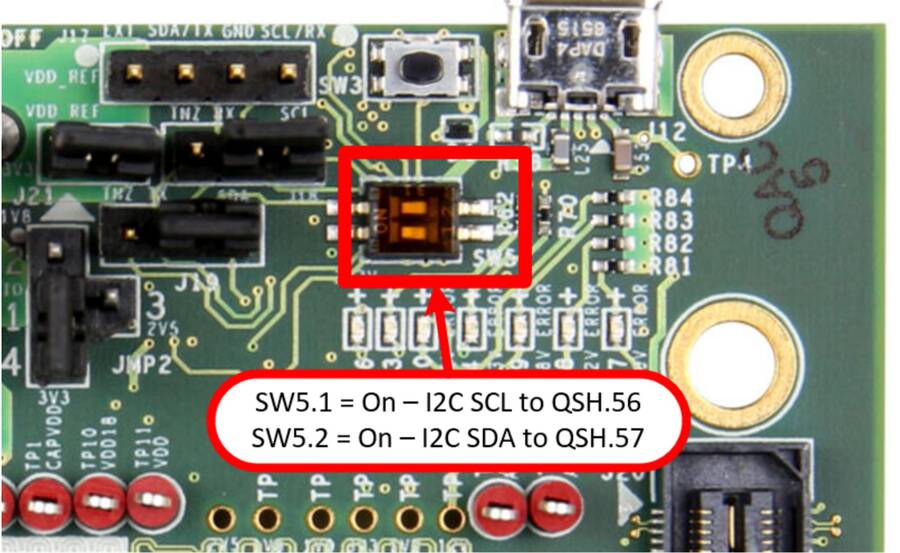
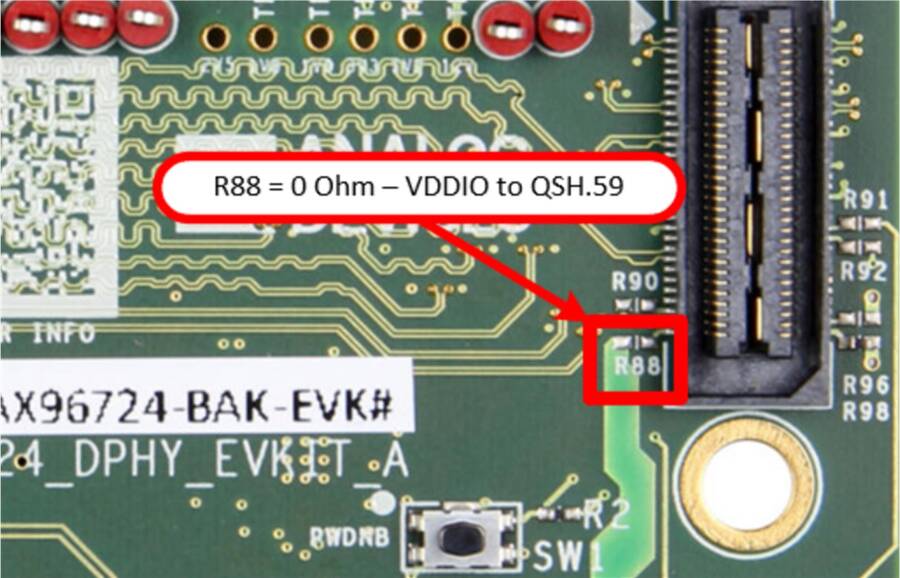
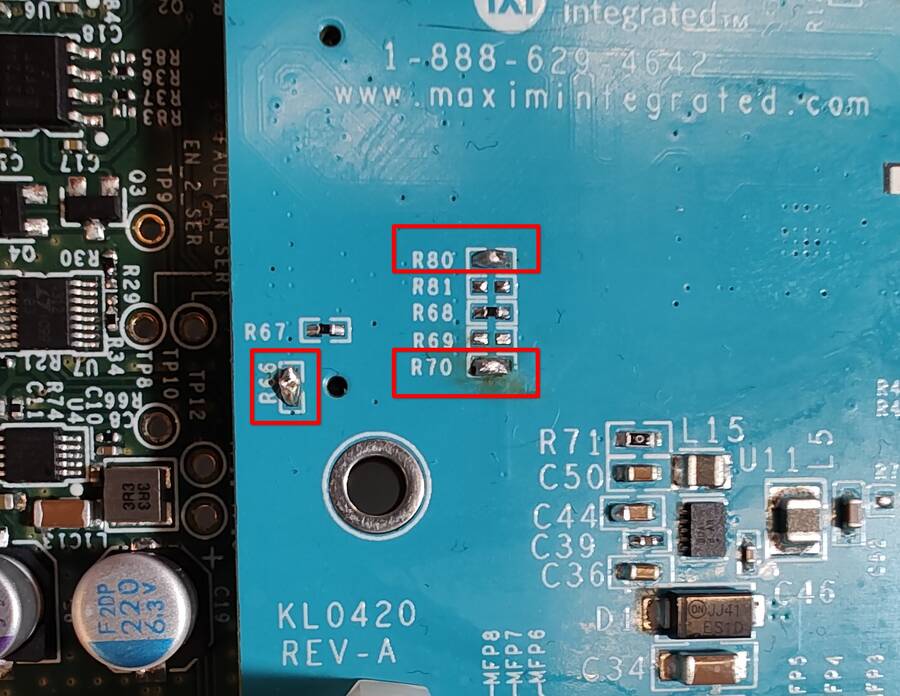
GMSL Serializer Evaluation Kit
Bridge R70 - provides 12V to the adapter
Bridge R80 - connects MFP2 to the adapter for IMX219
Bridge R66 - provides VDDIO to the adapter
Note
The CFG pins settings for serializer are:
CFG0: 0
CFG1: 7
AD-GMSLCAMRPI-ADP# Adapter
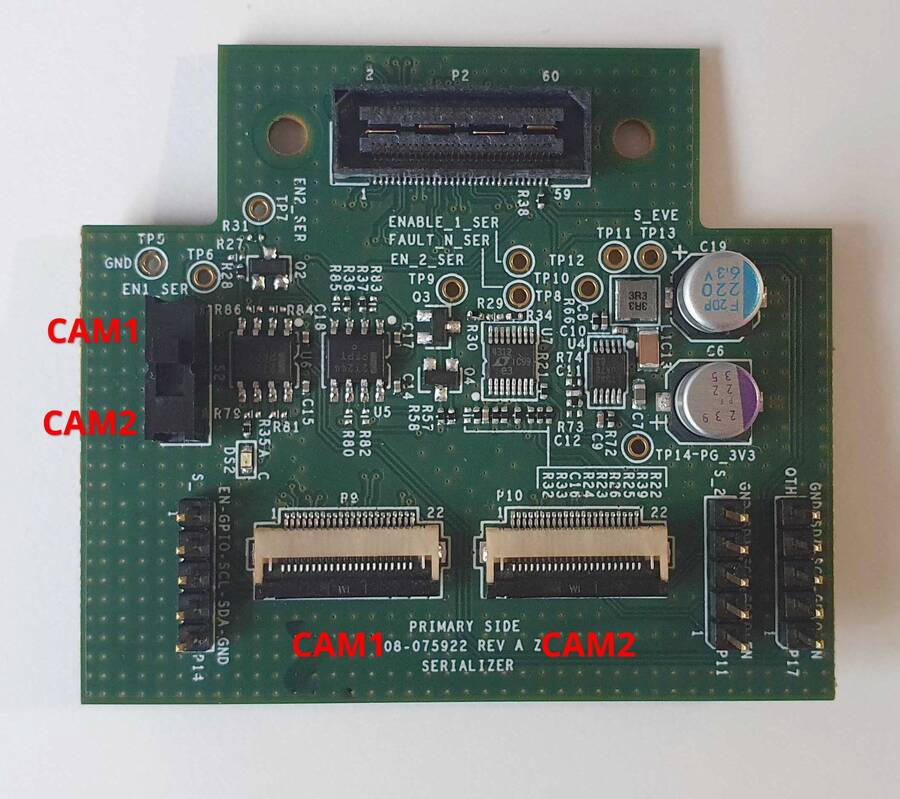
Configure the switches on the GMSL Serializer and the GMSL Deserializer adapters for CAM1.
Serializer Adapter
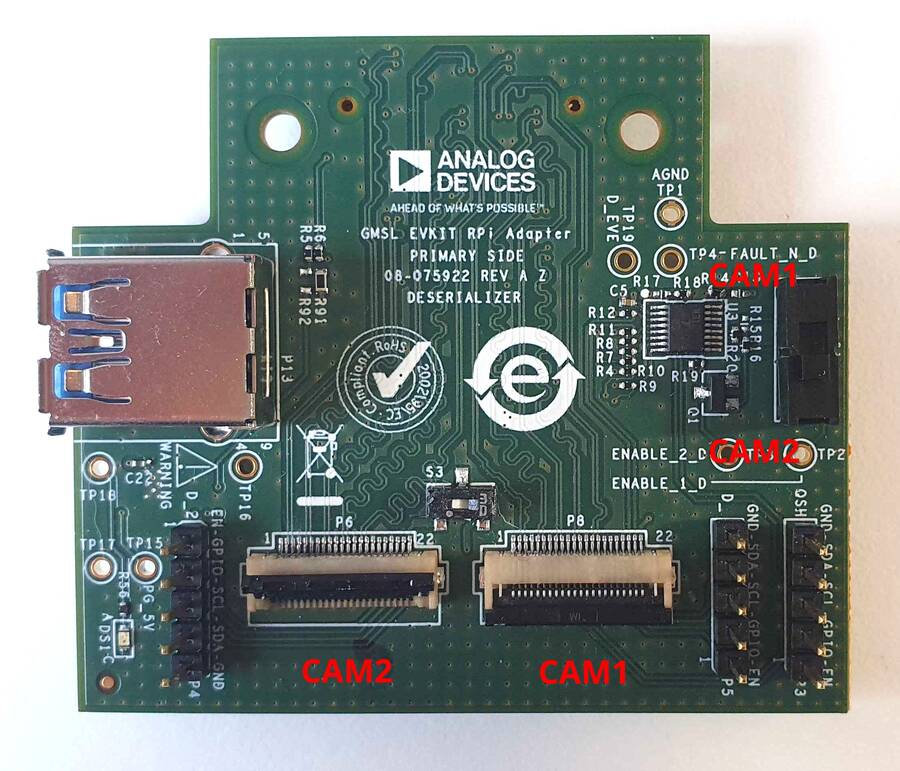
Deserializer Adapter
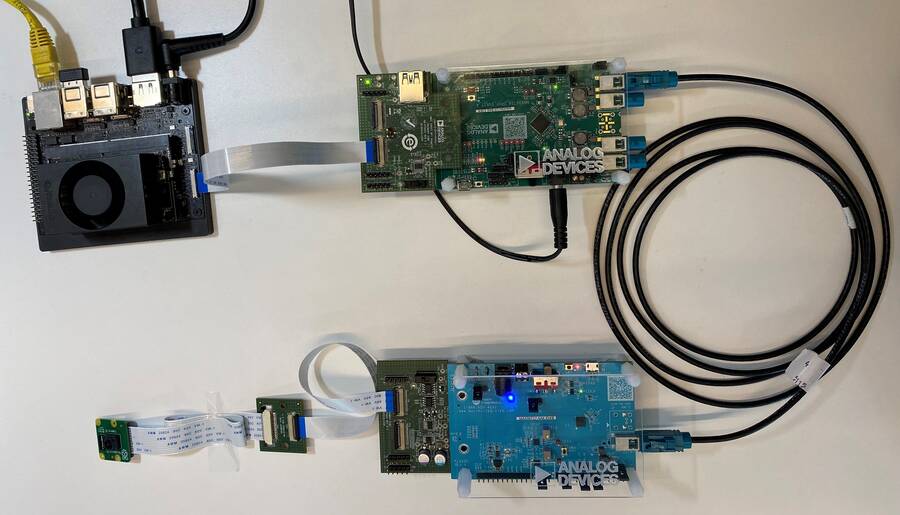
System Setup
Write the Nvidia Orin Nano latest SD card image on a 64 GB SD card.
Plug the SD card into the Nvidia Orin Nano Developer Kit SD card slot.
Connect a USB mouse and keyboard to the Nvidia Orin Nano Developer Kit.
Connect a Display Port (DP) cable from the monitor to the Nvidia Orin Nano Developer Kit DP connector.
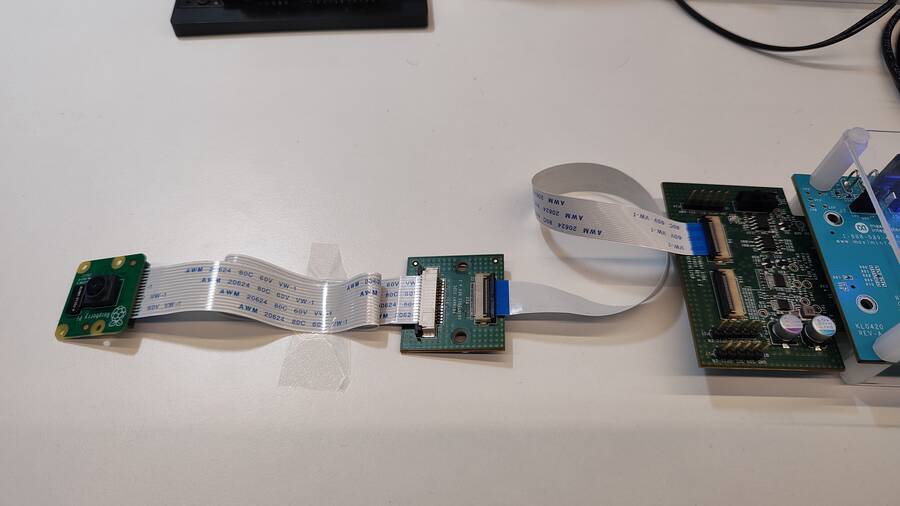
Connect a 15 pins same-side flex cable between the camera and the ribbon cable adapter.
Connect a 22 pins opposite-side flex cable between the ribbon cable adapter and the GMSL Serializer EVK Adapter on port P9.
Connect the GMSL Serializer EVK Adapter to the GMSL Serializer EVK using the FAKRA coaxial cable.
Connect a Coaxial cable between the GMSL Serializer EVK and the GMSL Deserializer EVK.
Connect the GMSL Deserializer EVK Adapter to the GMSL Deserializer EVK.
Connect a 22 pins same-side flex cable between the GMSL Deserializer EVK Adapter on port P8 and the Nvidia Orin Nano Developer Kit on port CAM0.
Connect the power supply to the GMSL Deserializer EVK.
Flip the power switch labeled S1 to the ON position on the GMSL Serializer EVK.
Flip the power switch labeled S4 to the ON position on the GMSL Deserializer EVK.
Connect the power supply to the Nvidia Orin Nano Developer Kit.
Running the Evaluation Application
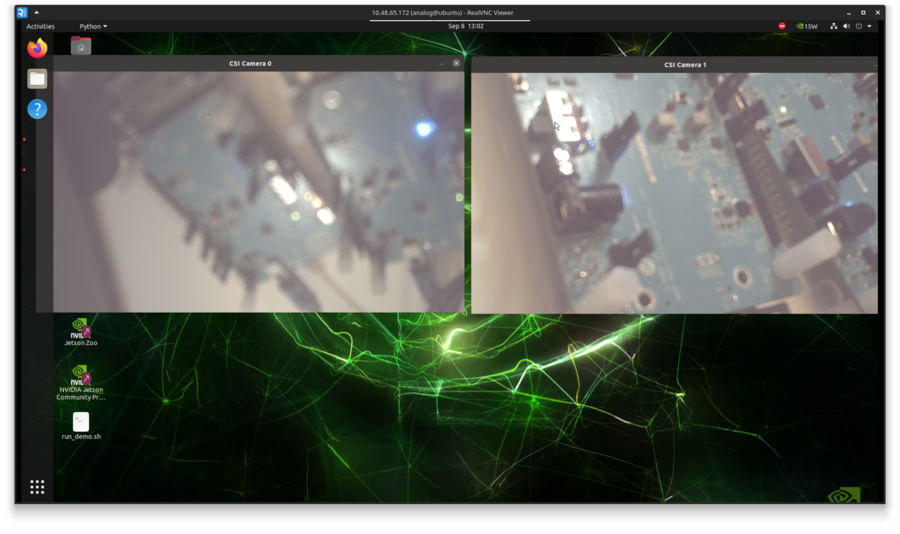
Once Linux boots, you’ll see on the DP monitor the Linux desktop and a shortcut named run_demo.sh. Double-clicking on the icon will start the evaluation application. The evaluation application GUI will be displayed like in the figure below.
Power off Sequence
Open a terminal and type sudo poweroff. This will safely power off the Nvidia Orin Nano Developer Kit and ensure that the SD card is properly unmounted.
Remove the power supply from the Nvidia Orin Nano Developer Kit.
Flip the power switch labeled S1 to the OFF position on the GMSL Serializer Evaluation Kit.
Flip the power switch labeled S4 to the OFF position on the GMSL Deserializer Evaluation Kit.
Remove the power supply from the GMSL Deserializer Evaluation Kit.
Getting the Software
The GMSL Linux kernel drivers, the complete Linux distributions for the supported processing platforms, and software user guides can be found on the Analog Devices GMSL GitHub repository.