Quick start
The Quick start guides provide simple step by step instructions on how to do an initial system setup for the EVAL-ADRV9026/ADRV9029 boards on various FPGA development boards. In these guides, we will discuss how to program the bitstream, run a no-OS program or boot a Linux distribution.
Supported carriers
The EVAL-ADRV9026/ADRV9029, is, by definition a “FPGA mezzanine card” (FMC); that means it needs a carrier to plug into.
The carriers we support are listed below, as well as the FMC port where to connect the evaluation board:
FPGA board |
EVAL-ADRV9026 |
EVAL-ADRV9029 |
|---|---|---|
FMCA |
FMCA |
|
FMCP1 |
FMCP1 |
|
FMCP |
FMCP |
|
FMC HPC1 |
FMC HPC1 |
Supported Environments
The supported OS are:
FPGA board |
HDL |
Linux software |
No-OS software |
|---|---|---|---|
Yes |
Yes |
— |
|
Yes |
Yes |
Yes |
|
Yes |
Yes |
Yes |
|
Yes |
Yes |
Yes |
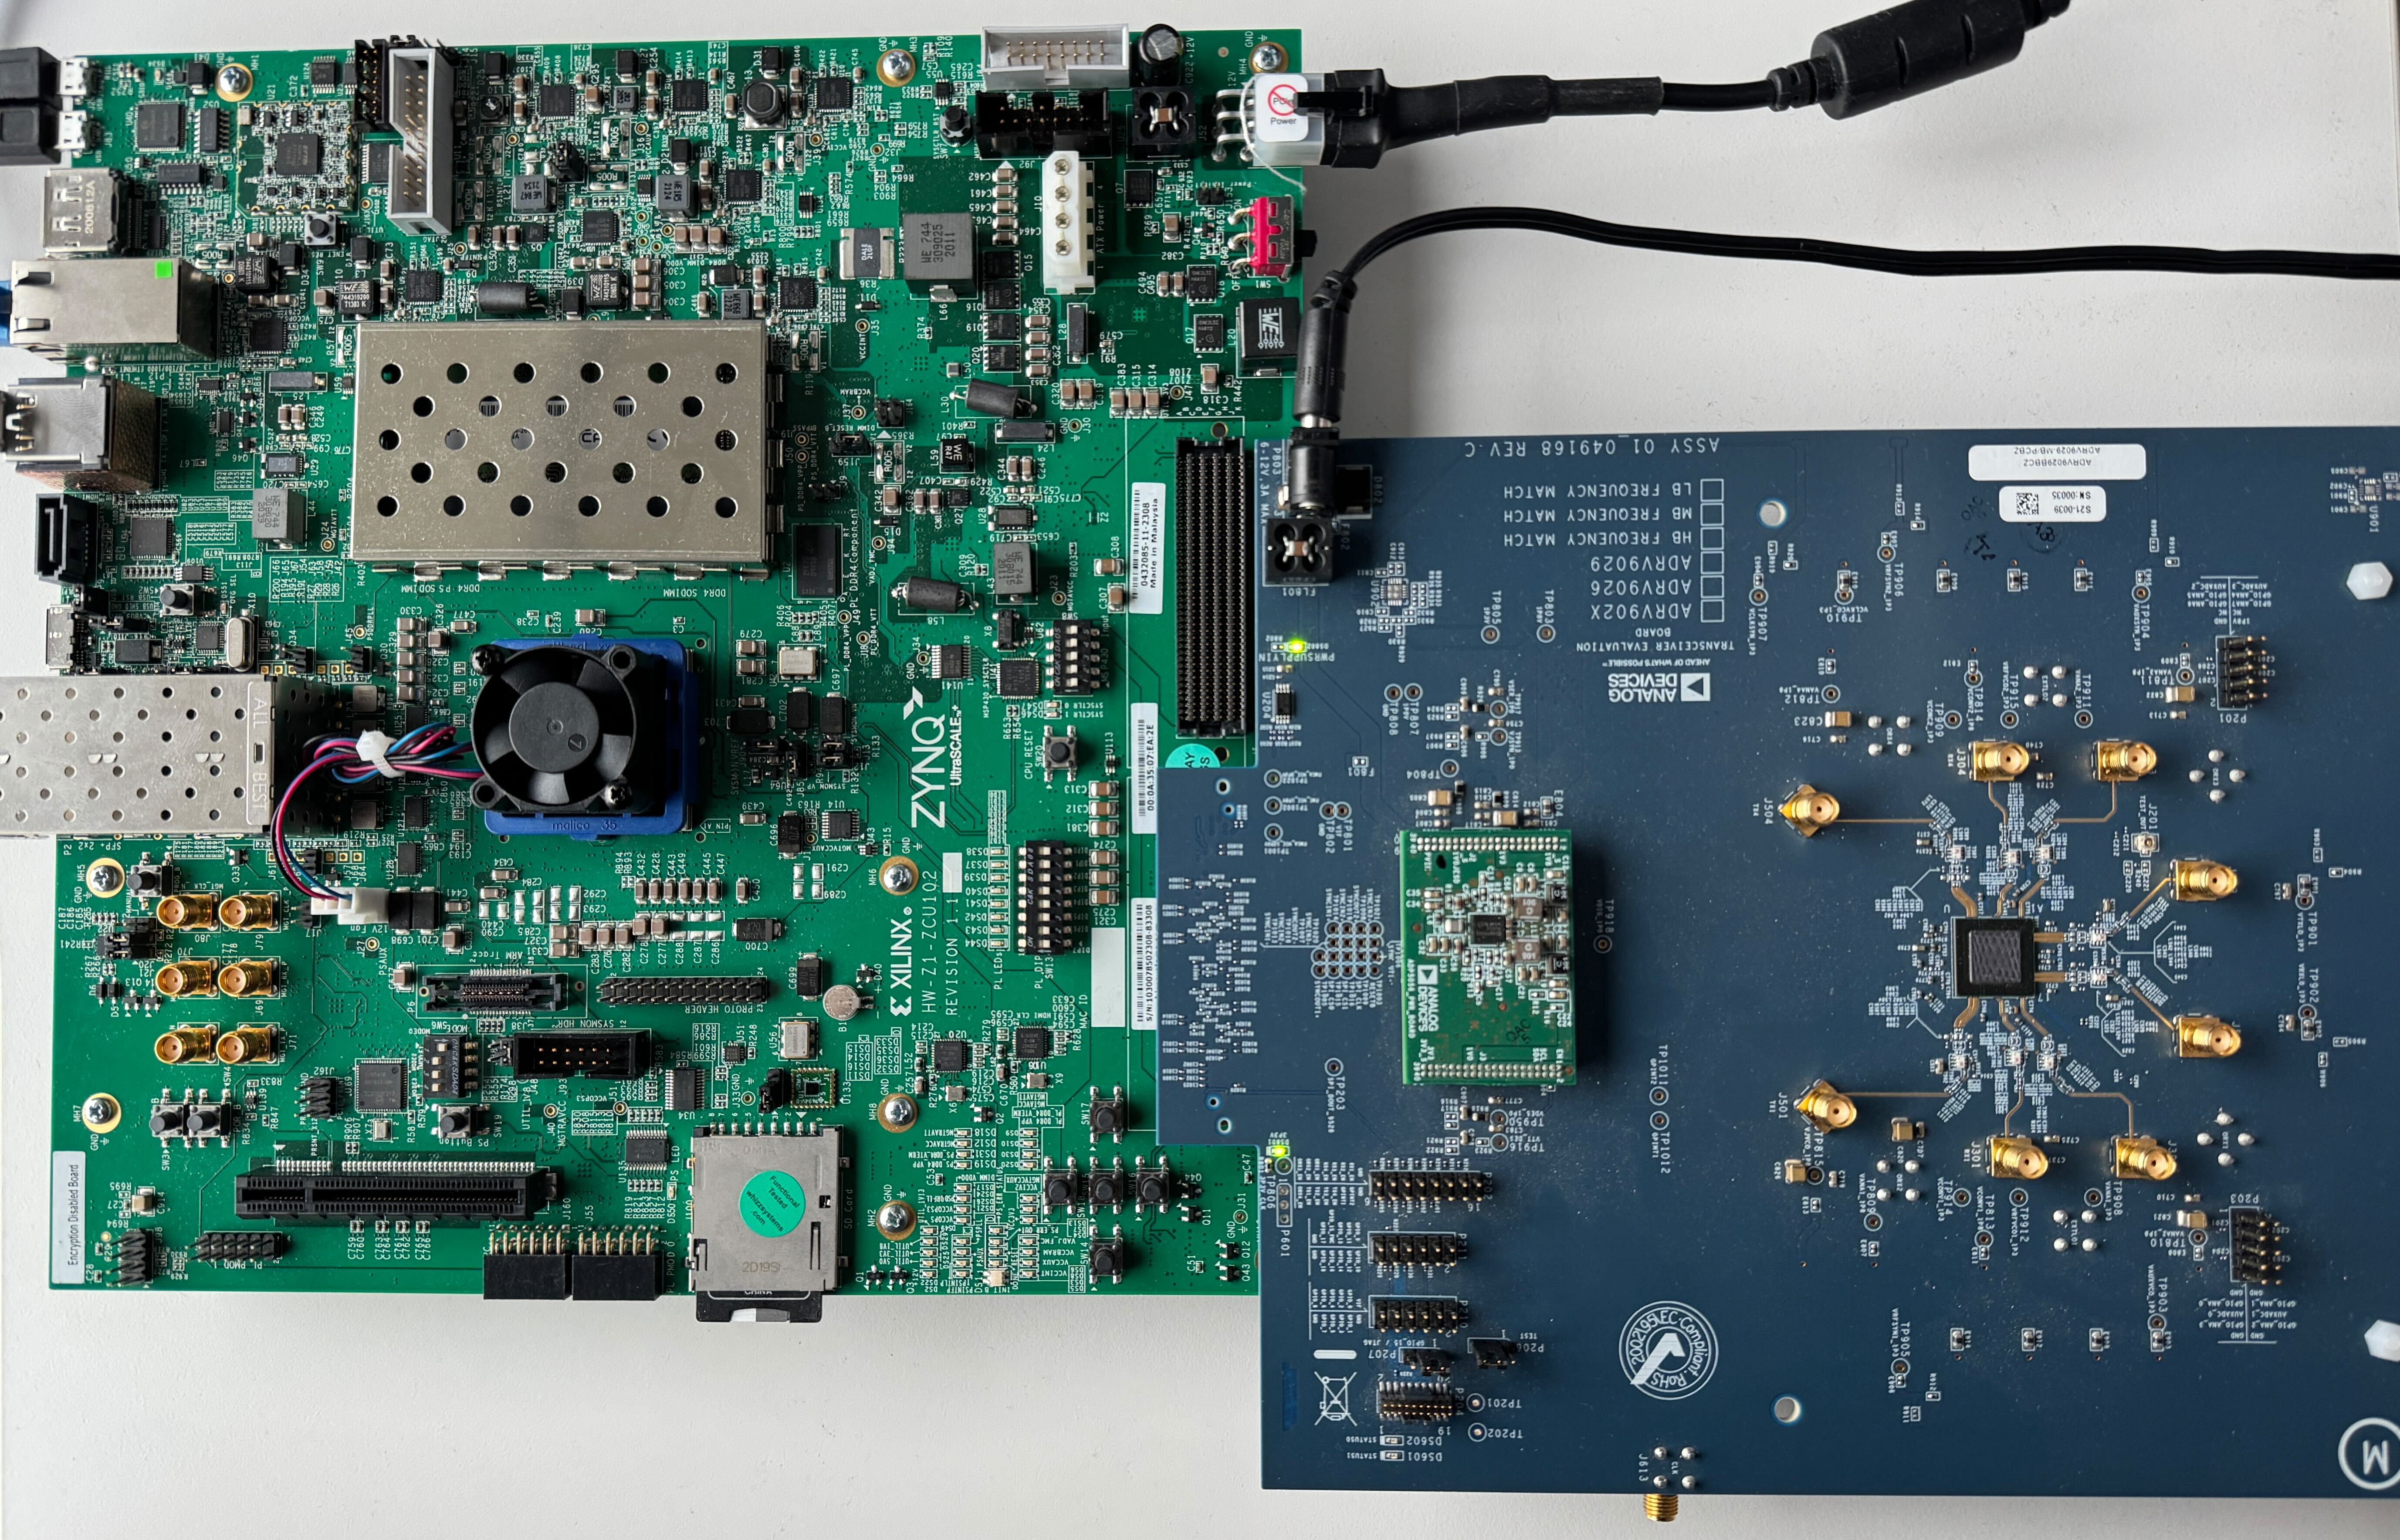
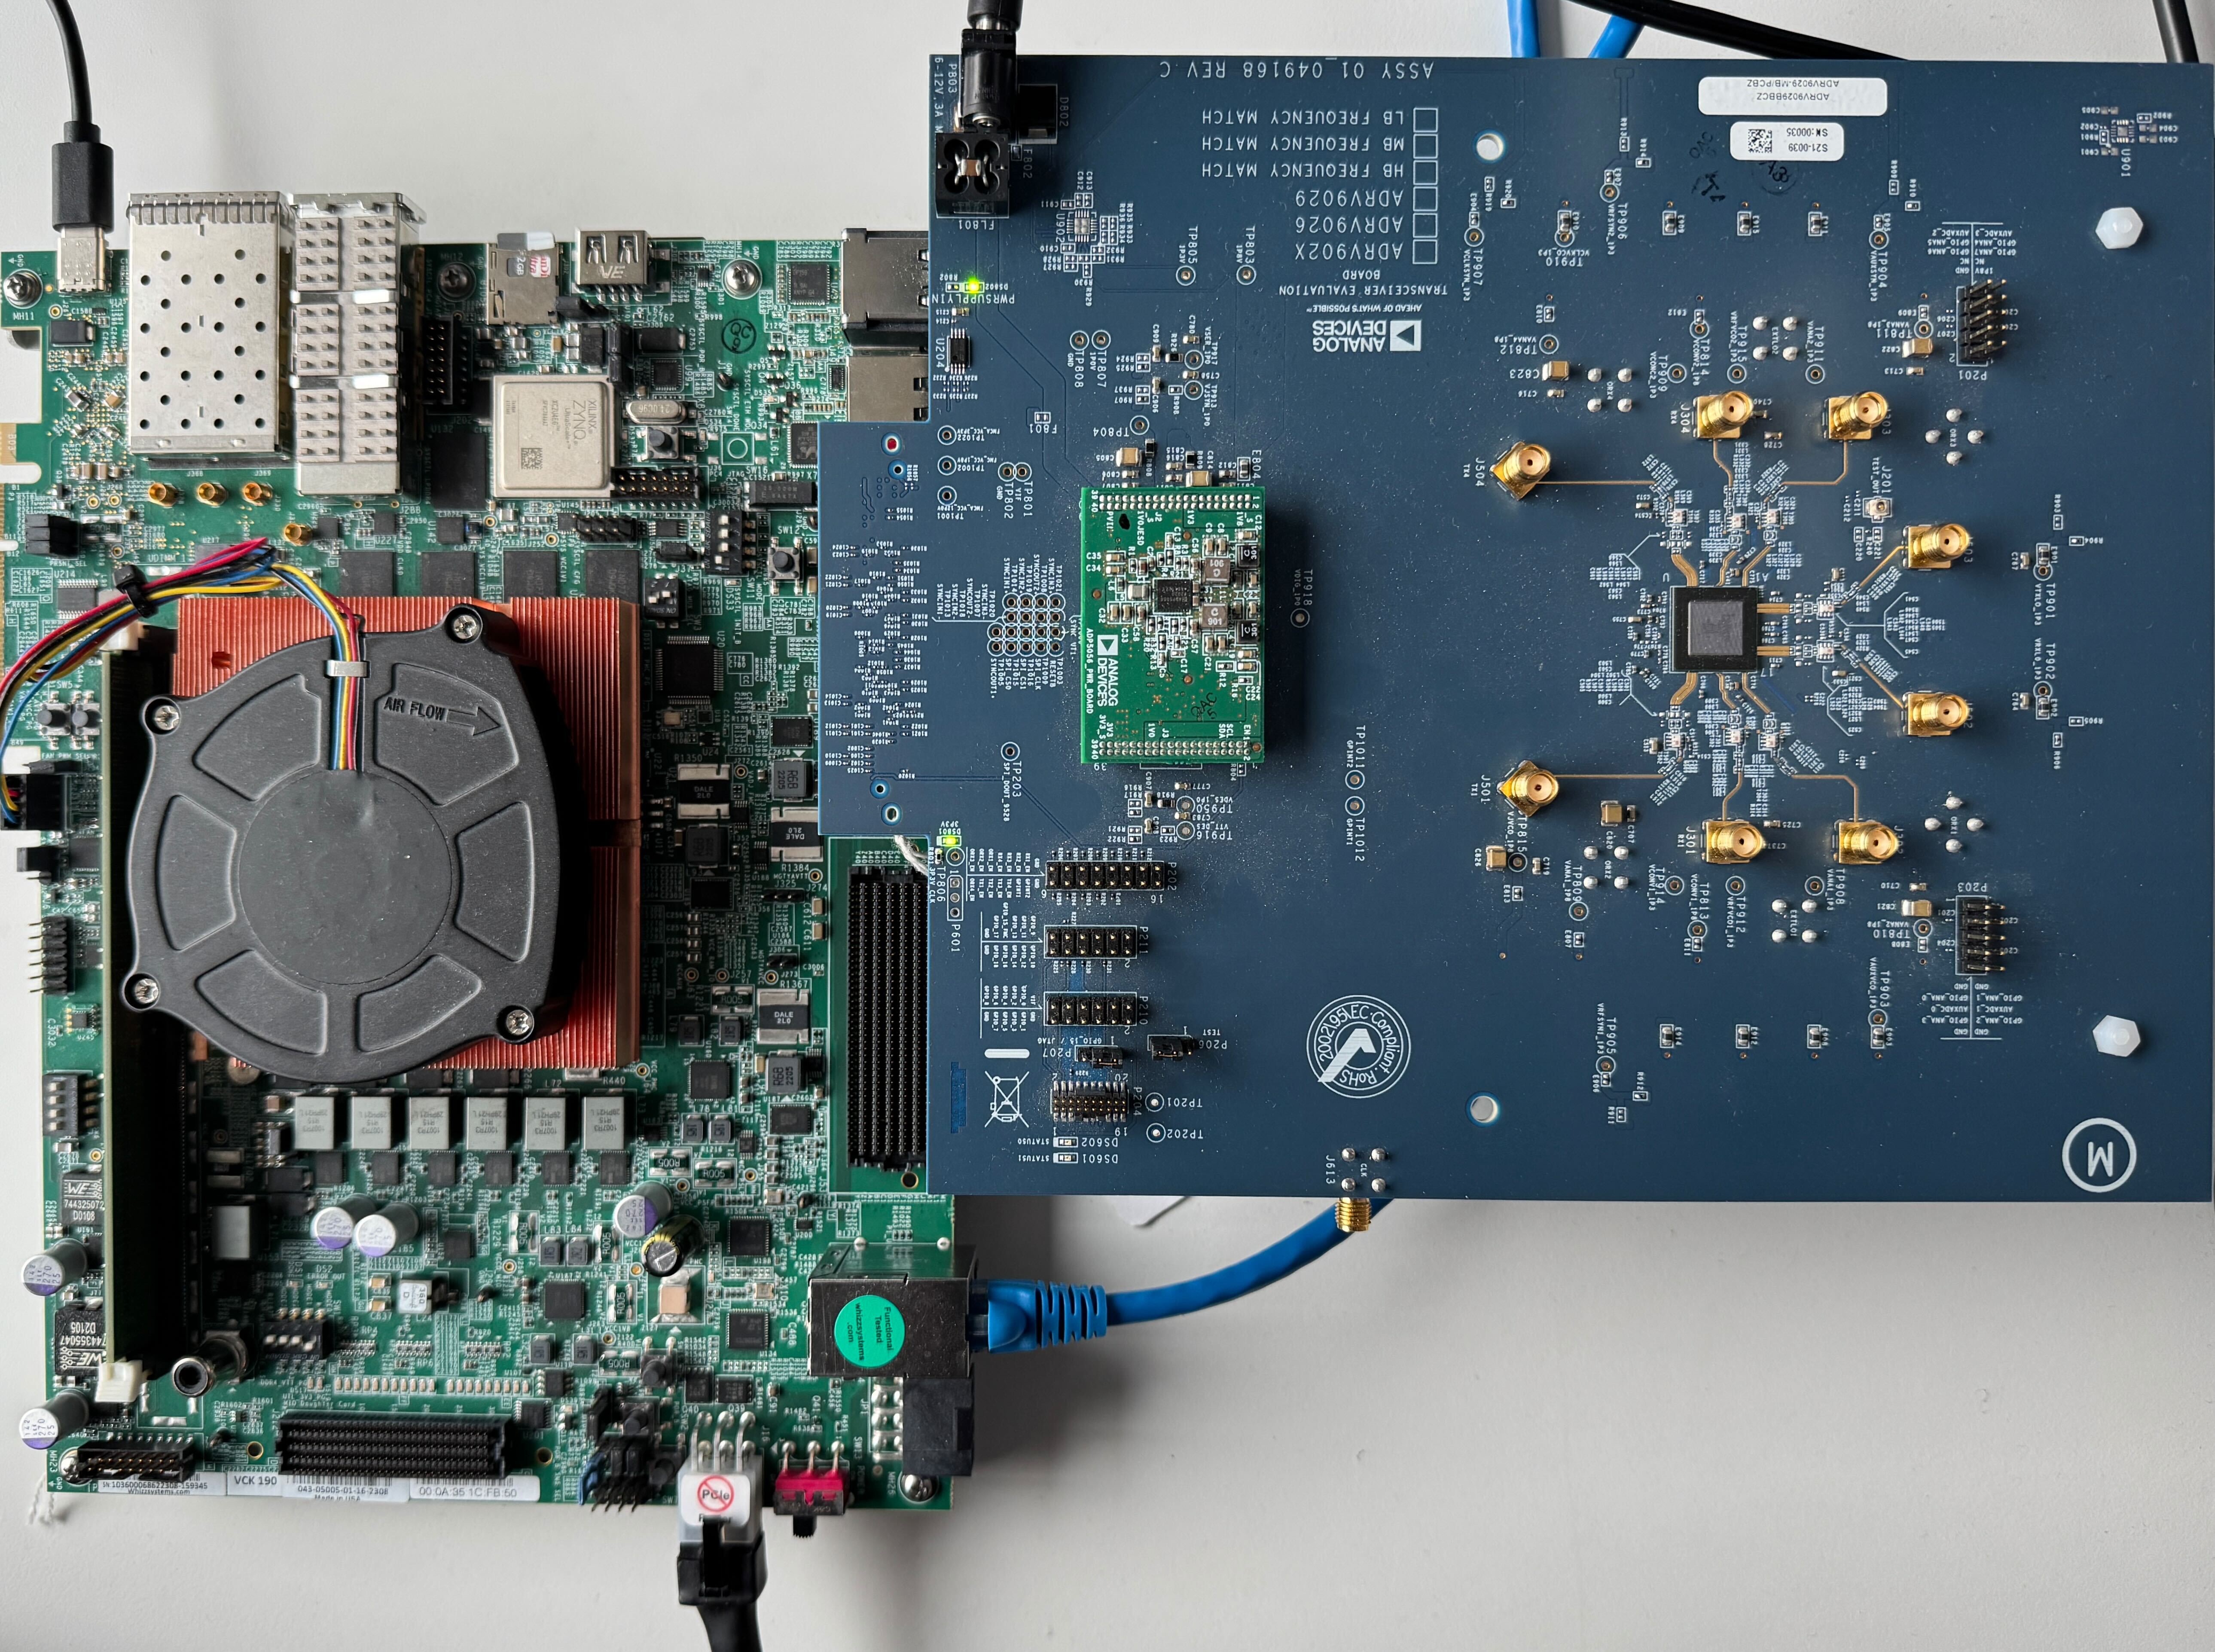
Hardware Setup
On most carriers, the EVAL-ADRV9026/ADRV9029 boards connects to the HPC1 connector (unless otherwise noted). The carrier setup requires power, UART (115200), Ethernet (Linux), HDMI (if available) and/or JTAG (no-OS) connections. A few typical setups are shown below.
A10SoC + EVAL-ADRV9026/ADRV9029
TO BE ADDED
VCK190 + EVAL-ADRV9026/ADRV9029
VCU118 + EVAL-ADRV9026/ADRV9029
TO BE ADDED
ZCU102 + EVAL-ADRV9026/ADRV9029