DE10-Nano Quickstart
Requirements
Hardware
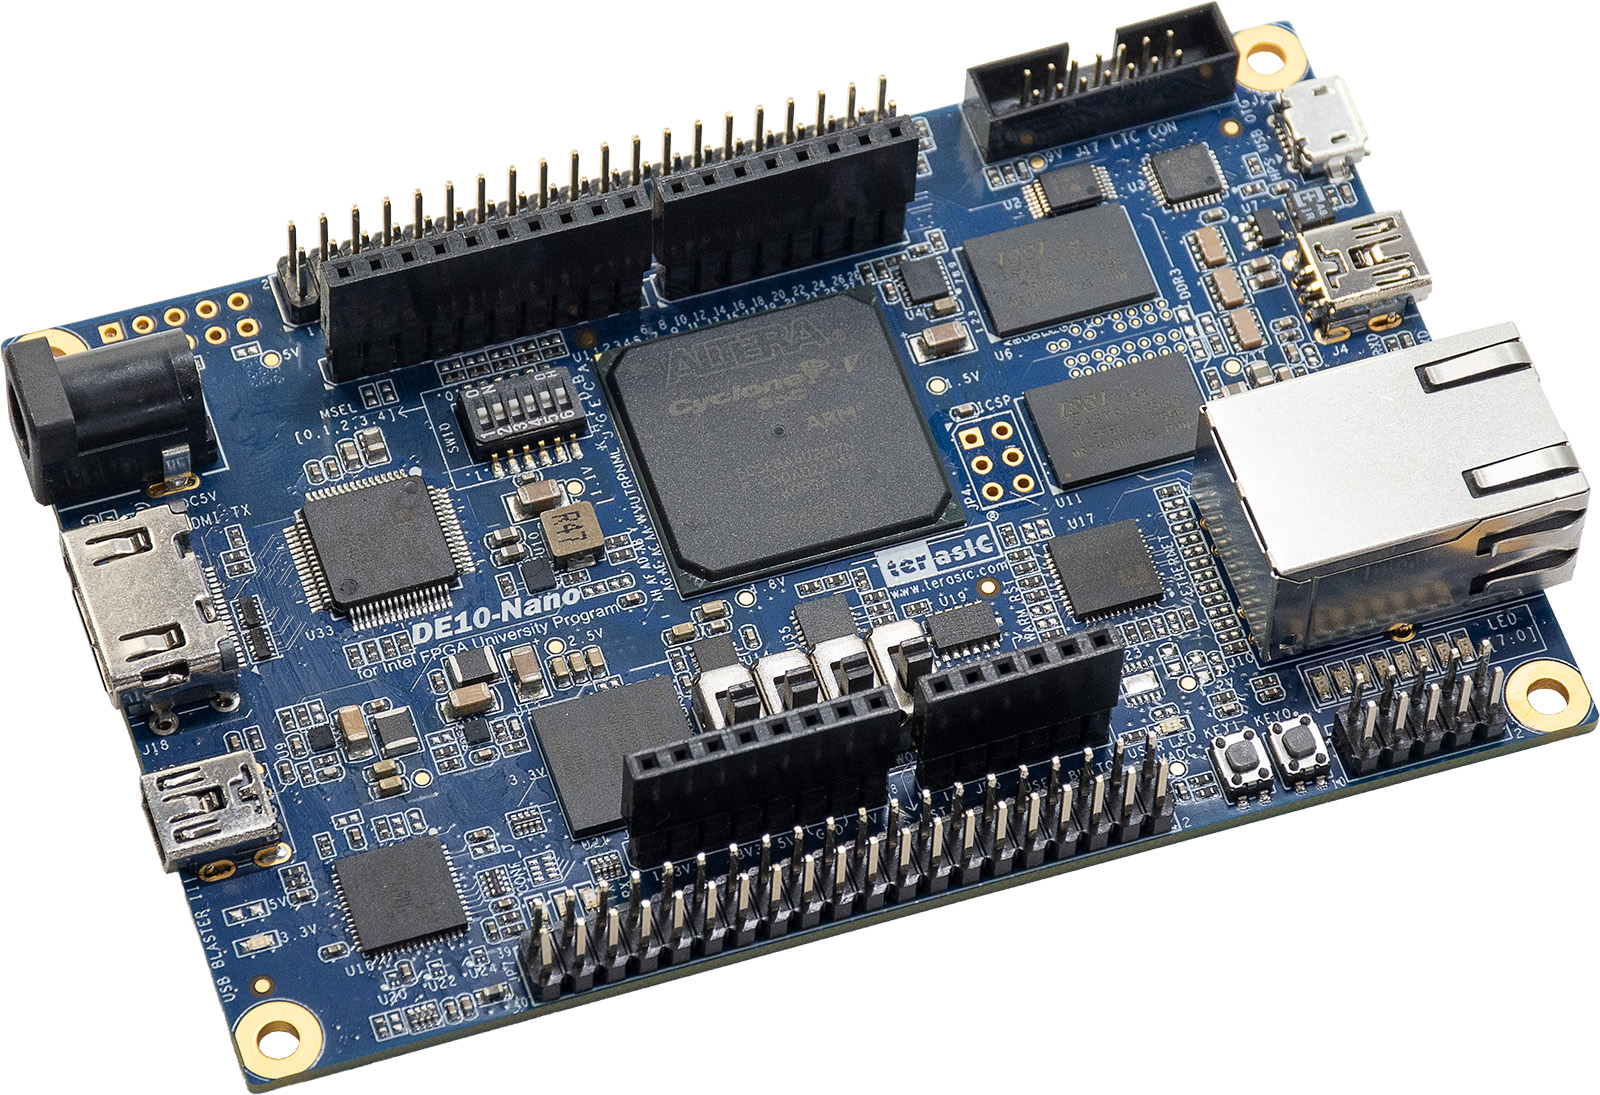
DE10-Nano on Arduino shield connector
5V/2A Wall Power supply with barrel jack (comes with DE10-Nano)
mini USB to USB Type A (comes with DE10-Nano)
Class 10 16GB SD Card
Ethernet cable
IEPE Compatible Sensor
Software
Setup
SD-Card
To prepare the SD-card for the DE10-Nano board:
Validate, Format, and Flash the SD Card
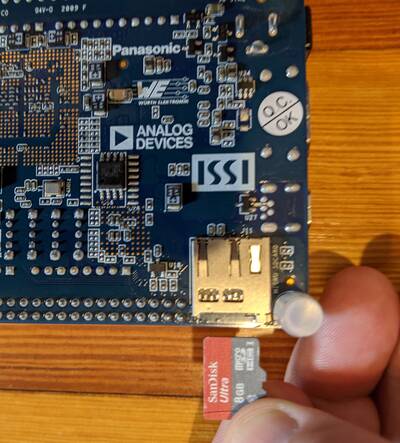
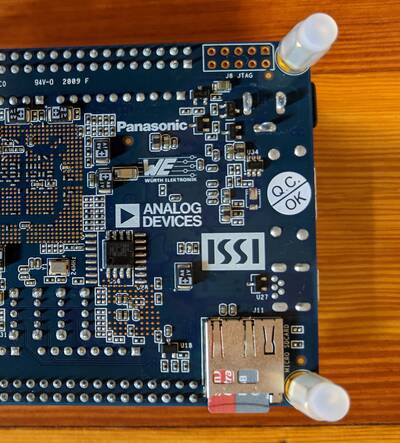
Once microSD card has been imaged, safely remove the hardware from the SD card writer, and insert the card directly into the microSD card slot on the DE10-Nano.
|
|
Download and Install IIO-Oscilloscope
Download the latest IIO-Oscilloscope release from Github, and install it on your PC. (You may need to right-click the installer, and run as “Elevated” in order to get it to install.)
DE10-Nano Hardware Configuration
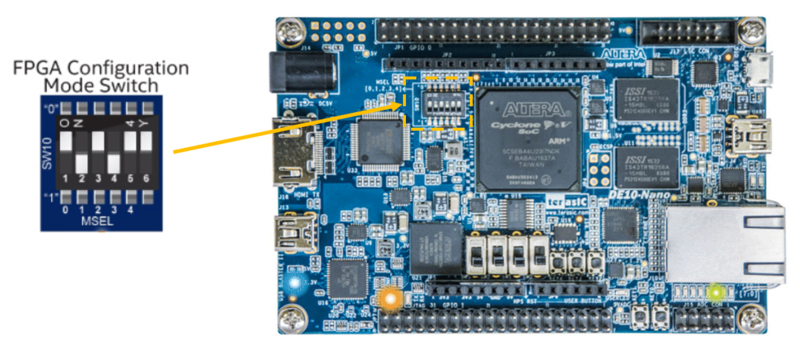
The DE10-Nano comes ready to use out of the box, but it is important to double check that the FPGA Configuration Mode Switch (S10) is configured properly. See the image below for the proper configuration, and if more information is needed, check out the DE10‑Nano Getting Started Guide
Cable & Connectors
Connect the power, cables, and sensor according to the diagram below.
Ethernet cable
Sensor Input
Miniusb cable
Power cable
Boot Sequencing
Once the microSD card and cables have been connected to the DE10-Nano and EVAL-CN0540-ARDZ, it’s now time to boot the system.
Connect the other end of the Ethernet cable into a router or other network connection. This will be the easiest way to stream and save the data.
Info
If you don’t have a network available and want to stream data directly from the Ethernet port of the DE10-Nano to the Ethernet port of your PC, that is still possible, but requires some extra configuration. Please see the [Wiki] Network Configuration page for complete details.
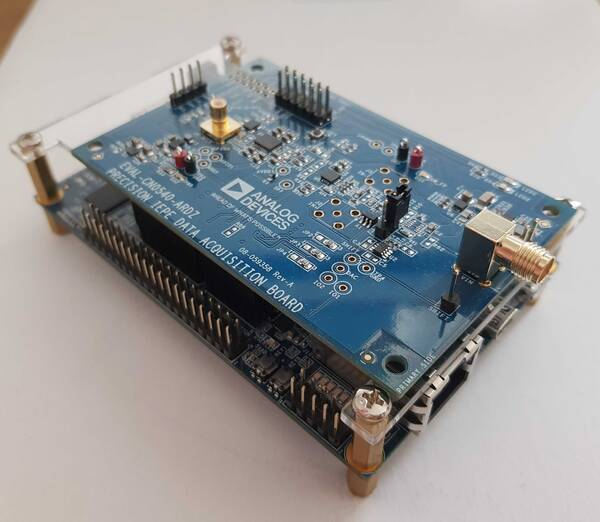
Using the Arduino pins, plug in the EVAL-CN0540-ARDZ on top of the DE10-Nano.
Note
You may leave the plexiglass as is — the EVAL-CN0540-ARDZ board will plug in without issue.
Plug your sensor into the SMA connector on the EVAL-CN0540-ARDZ.
You may also connect your sensor into the 2‑pin header at P1 if your sensor does not have an SMA output.
Plug the UART cable into your PC’s USB port.
A driver for the board should automatically be detected and installed. If this does not happen, you may need to manually install the driver.
Here is a link to the UART Serial Driver.
Plug the power supply into the wall outlet and power up the setup.
Finding your CN0540
Before you can start gathering data, you first must locate the EVAL-CN0540-ARDZ on your network.
Set up UART serial communication between your PC and the DE10-Nano board using the micro USB to USB Type‑A cable.
Using your Device Manager, locate the COM port assigned to the DE10-Nano board.
Open PuTTY, Tera Term, or another serial terminal program. Open a terminal to the COM port of the DE10‑Nano by setting the baud rate to 115200, then connect.
The serial terminal connection will auto‑login and place you in the root directory of the SD card.
From here, it’s a good idea to check whether your devices can be detected by typing iio_info into the terminal and pressing Enter.
This should provide a list of devices along with their channels and attributes.
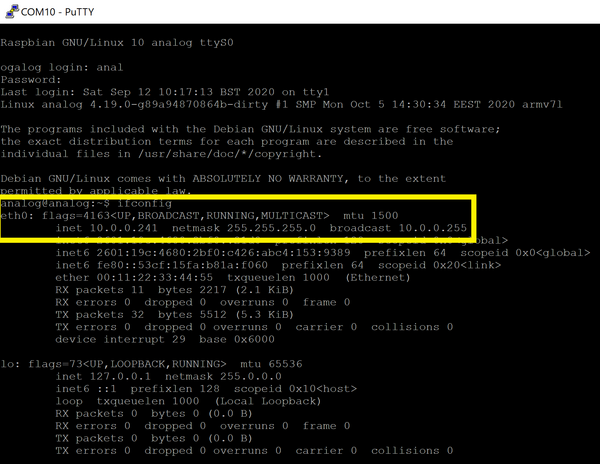
Type ifconfig into the terminal and press Enter.
The command output will include the network information for the DE10‑Nano. From there, locate the inet address of eth0.
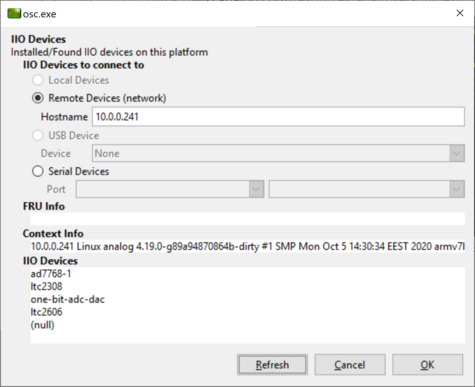
Open up the IIO-Oscilloscope application on your PC
Set the radio button for “Remote Devices” and type the inet address you just found, hit the “Refresh” button, and then click “Ok”.