Geiger Counter demo (EVAL-CN0536-ADRZ)
The ADuCM3029_demo_cn0536 project provides a solution to measure radiation levels using most of Geiger-Muller tube sensors available in the market. It uses the precision programmable oscillator LTC6906 to generate high voltage output for the tube and the LTC1540 nano power comparator to set and regulate it. With the LTC1441 ultralow power dual comparator the Geiger pulse is translated to logic level 3V or 5V and the LTC6994 robust built in delay block timer chip will generate a Geiger clicking sound to a regular buzzer.
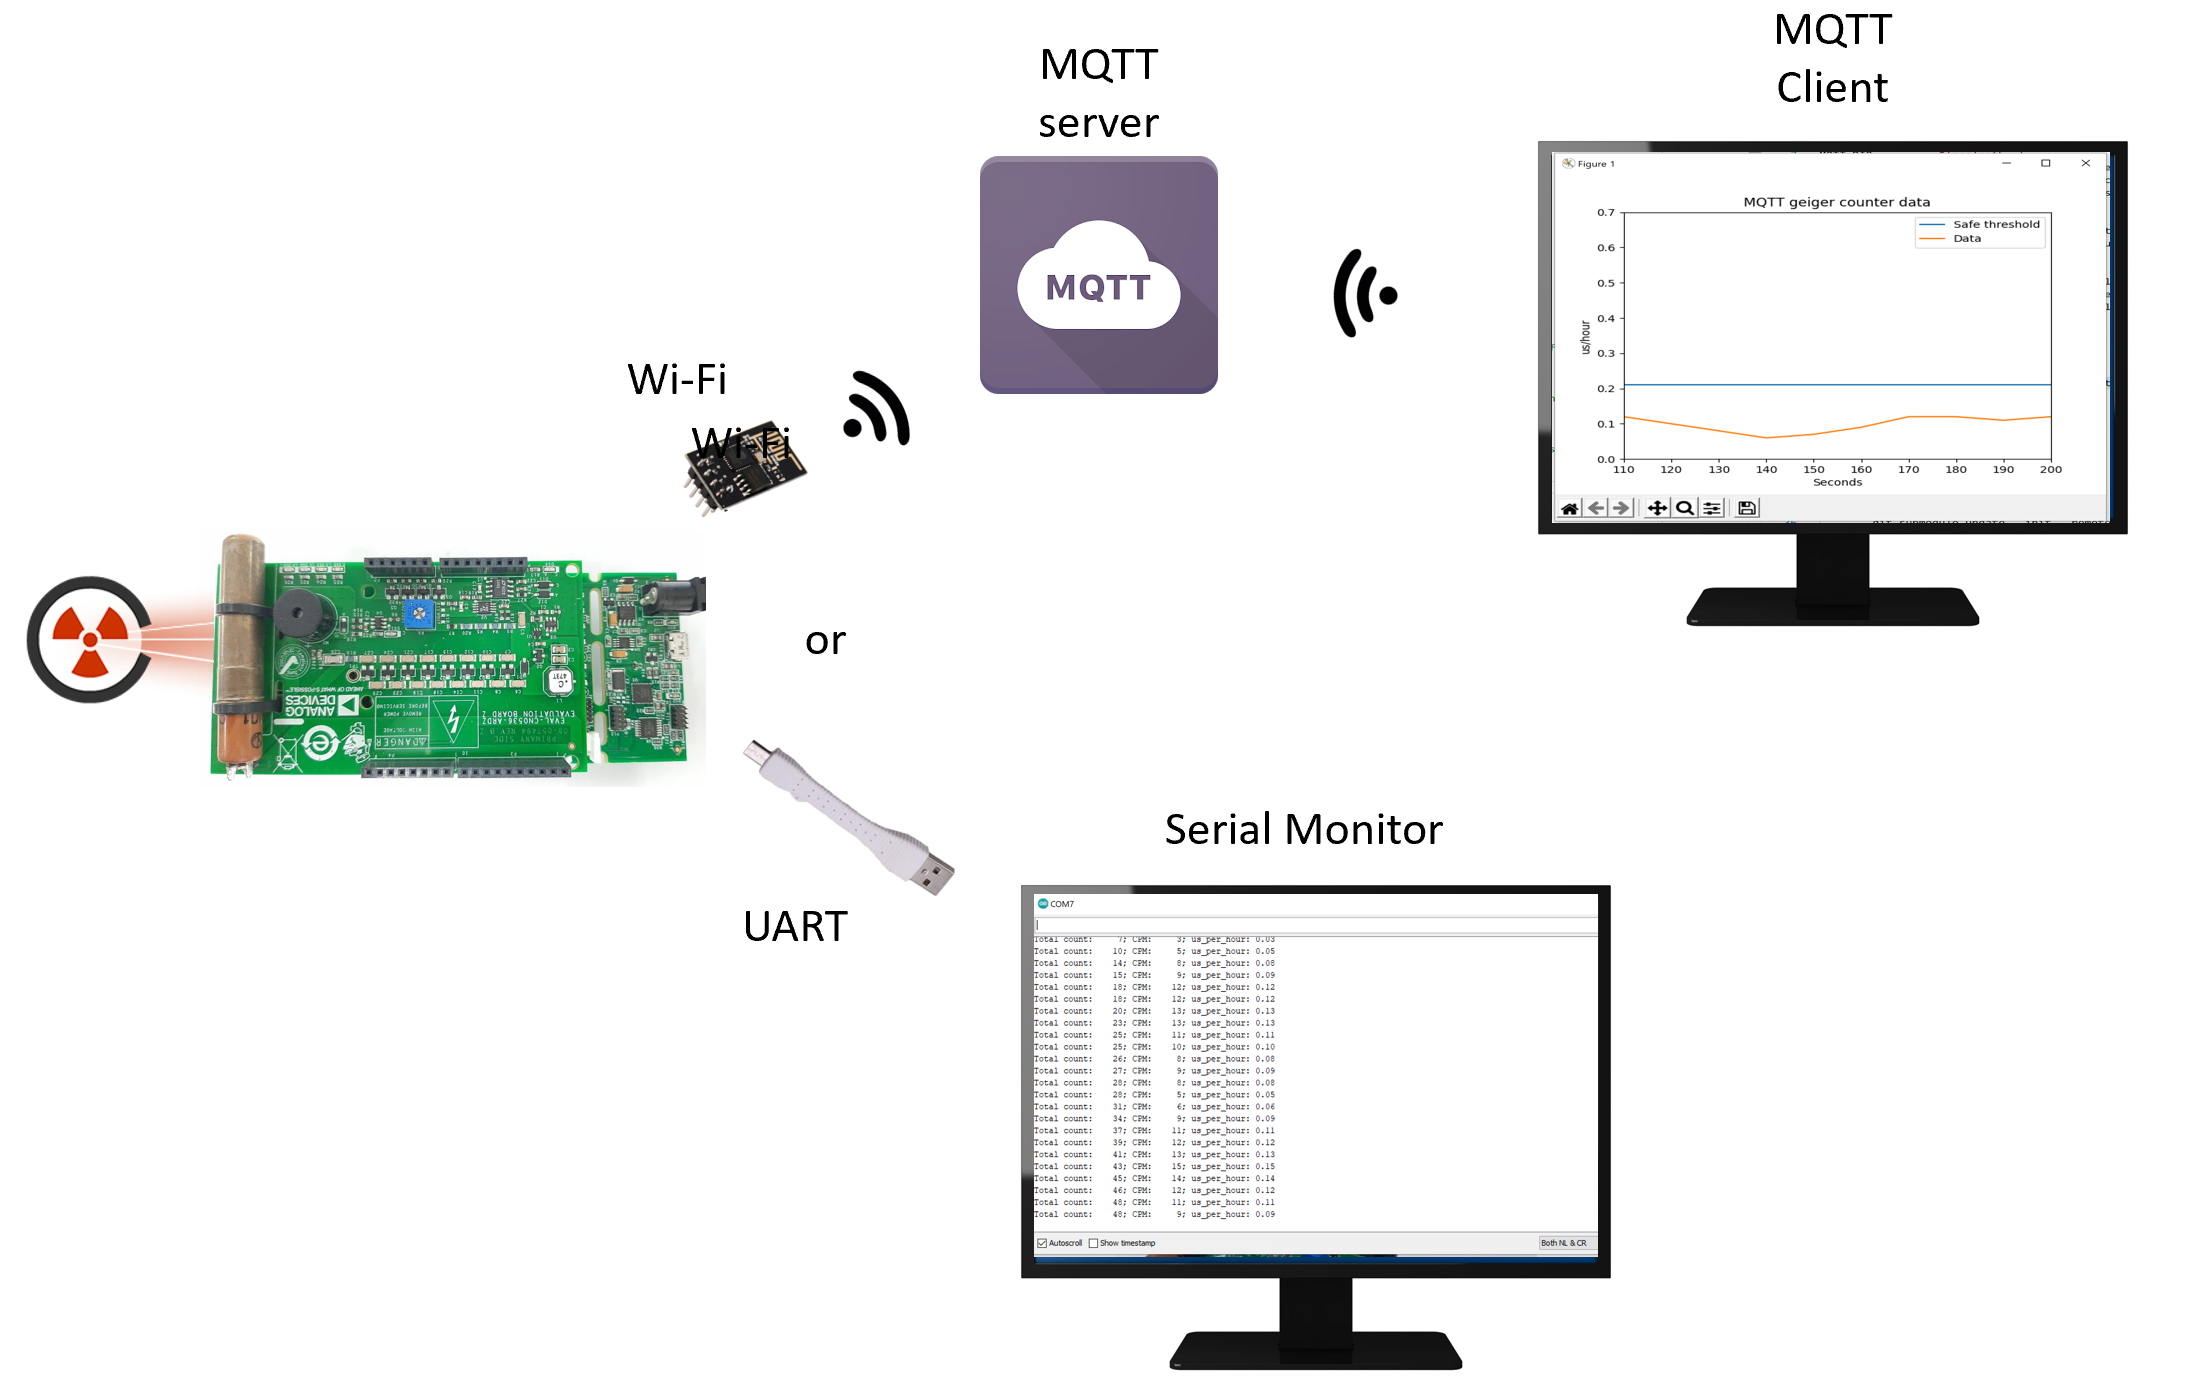
Also, onboard LEDs are used to indicate radiation levels and information about the counts per minute and microSieverts per minute are sent over UART or over the internet through MQTT.
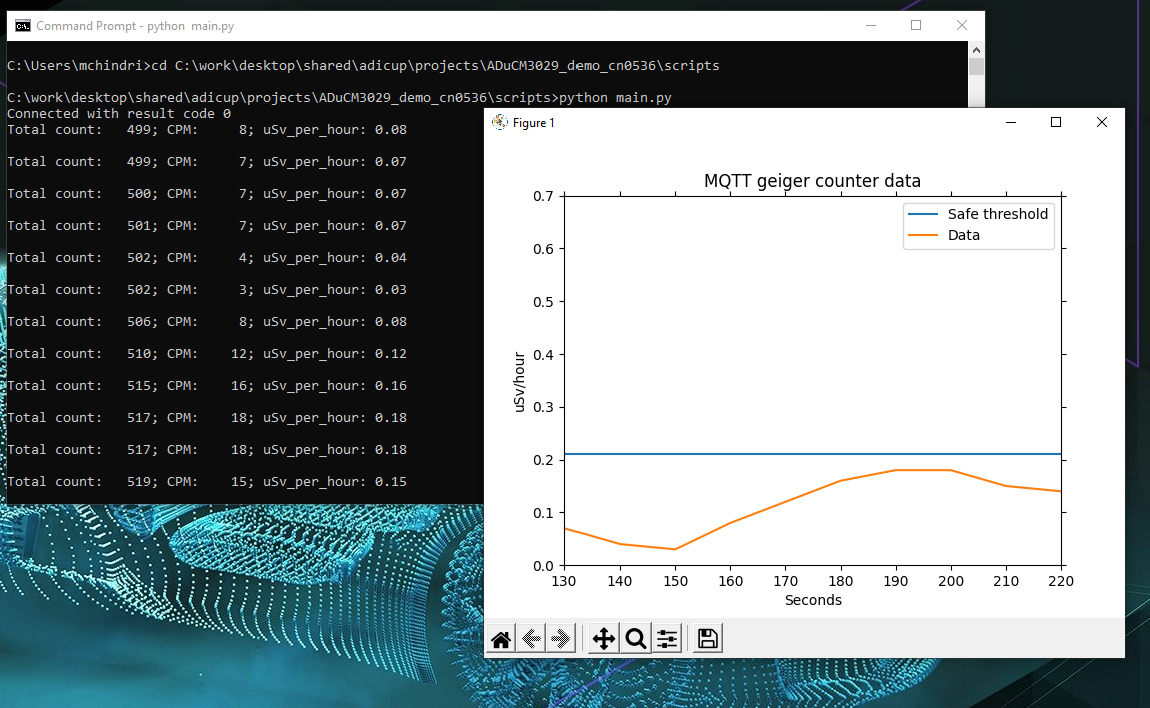
A sample python code is available to plot MQTT data into a graph with a radiation threshold.
The ADuCM3029_demo_cn0536 project is using the the CN0536 and EVAL-ADICUP3029 prototyping board.
This page will go through how to build and run the demo from the software point of view and for more detailed information about the CN0536 from the hardware side can be found here.
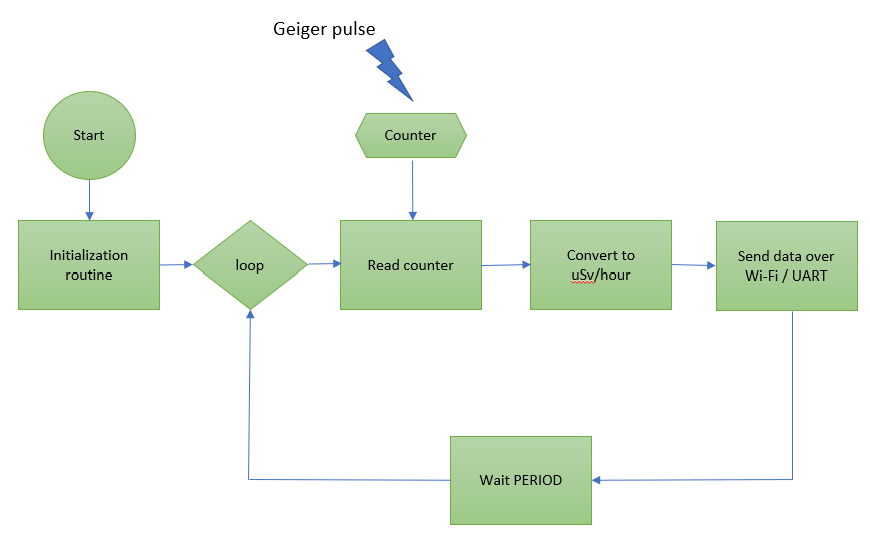
An overview about the theme can be seen in the following diagram:
Software flow
Demo Video
Demo Requirements
The following is a list of items needed in order to replicate this demo.
Hardware
EVAL-ADICUP3029 (optional with ESP8266)
Mirco USB to USB cable
PC or Laptop with a USB port
24V and 1A limited power supply (optional)
Software
Serial Terminal Program (for UART demo) such as:
Arduino Serial Monitor from Arduino IDE
CrossCore Embedded Studio (Installation wiki) (Optional to edit the software)
ADuCM302x DFP and ADICUP3029 BSP (see this guide) (Optional to edit the software)
AduCM3029_demo_cn0536 demo application (Optional, software code)
Python 3 (Optional, to plot MQTT data)
UART demo with precompiled program
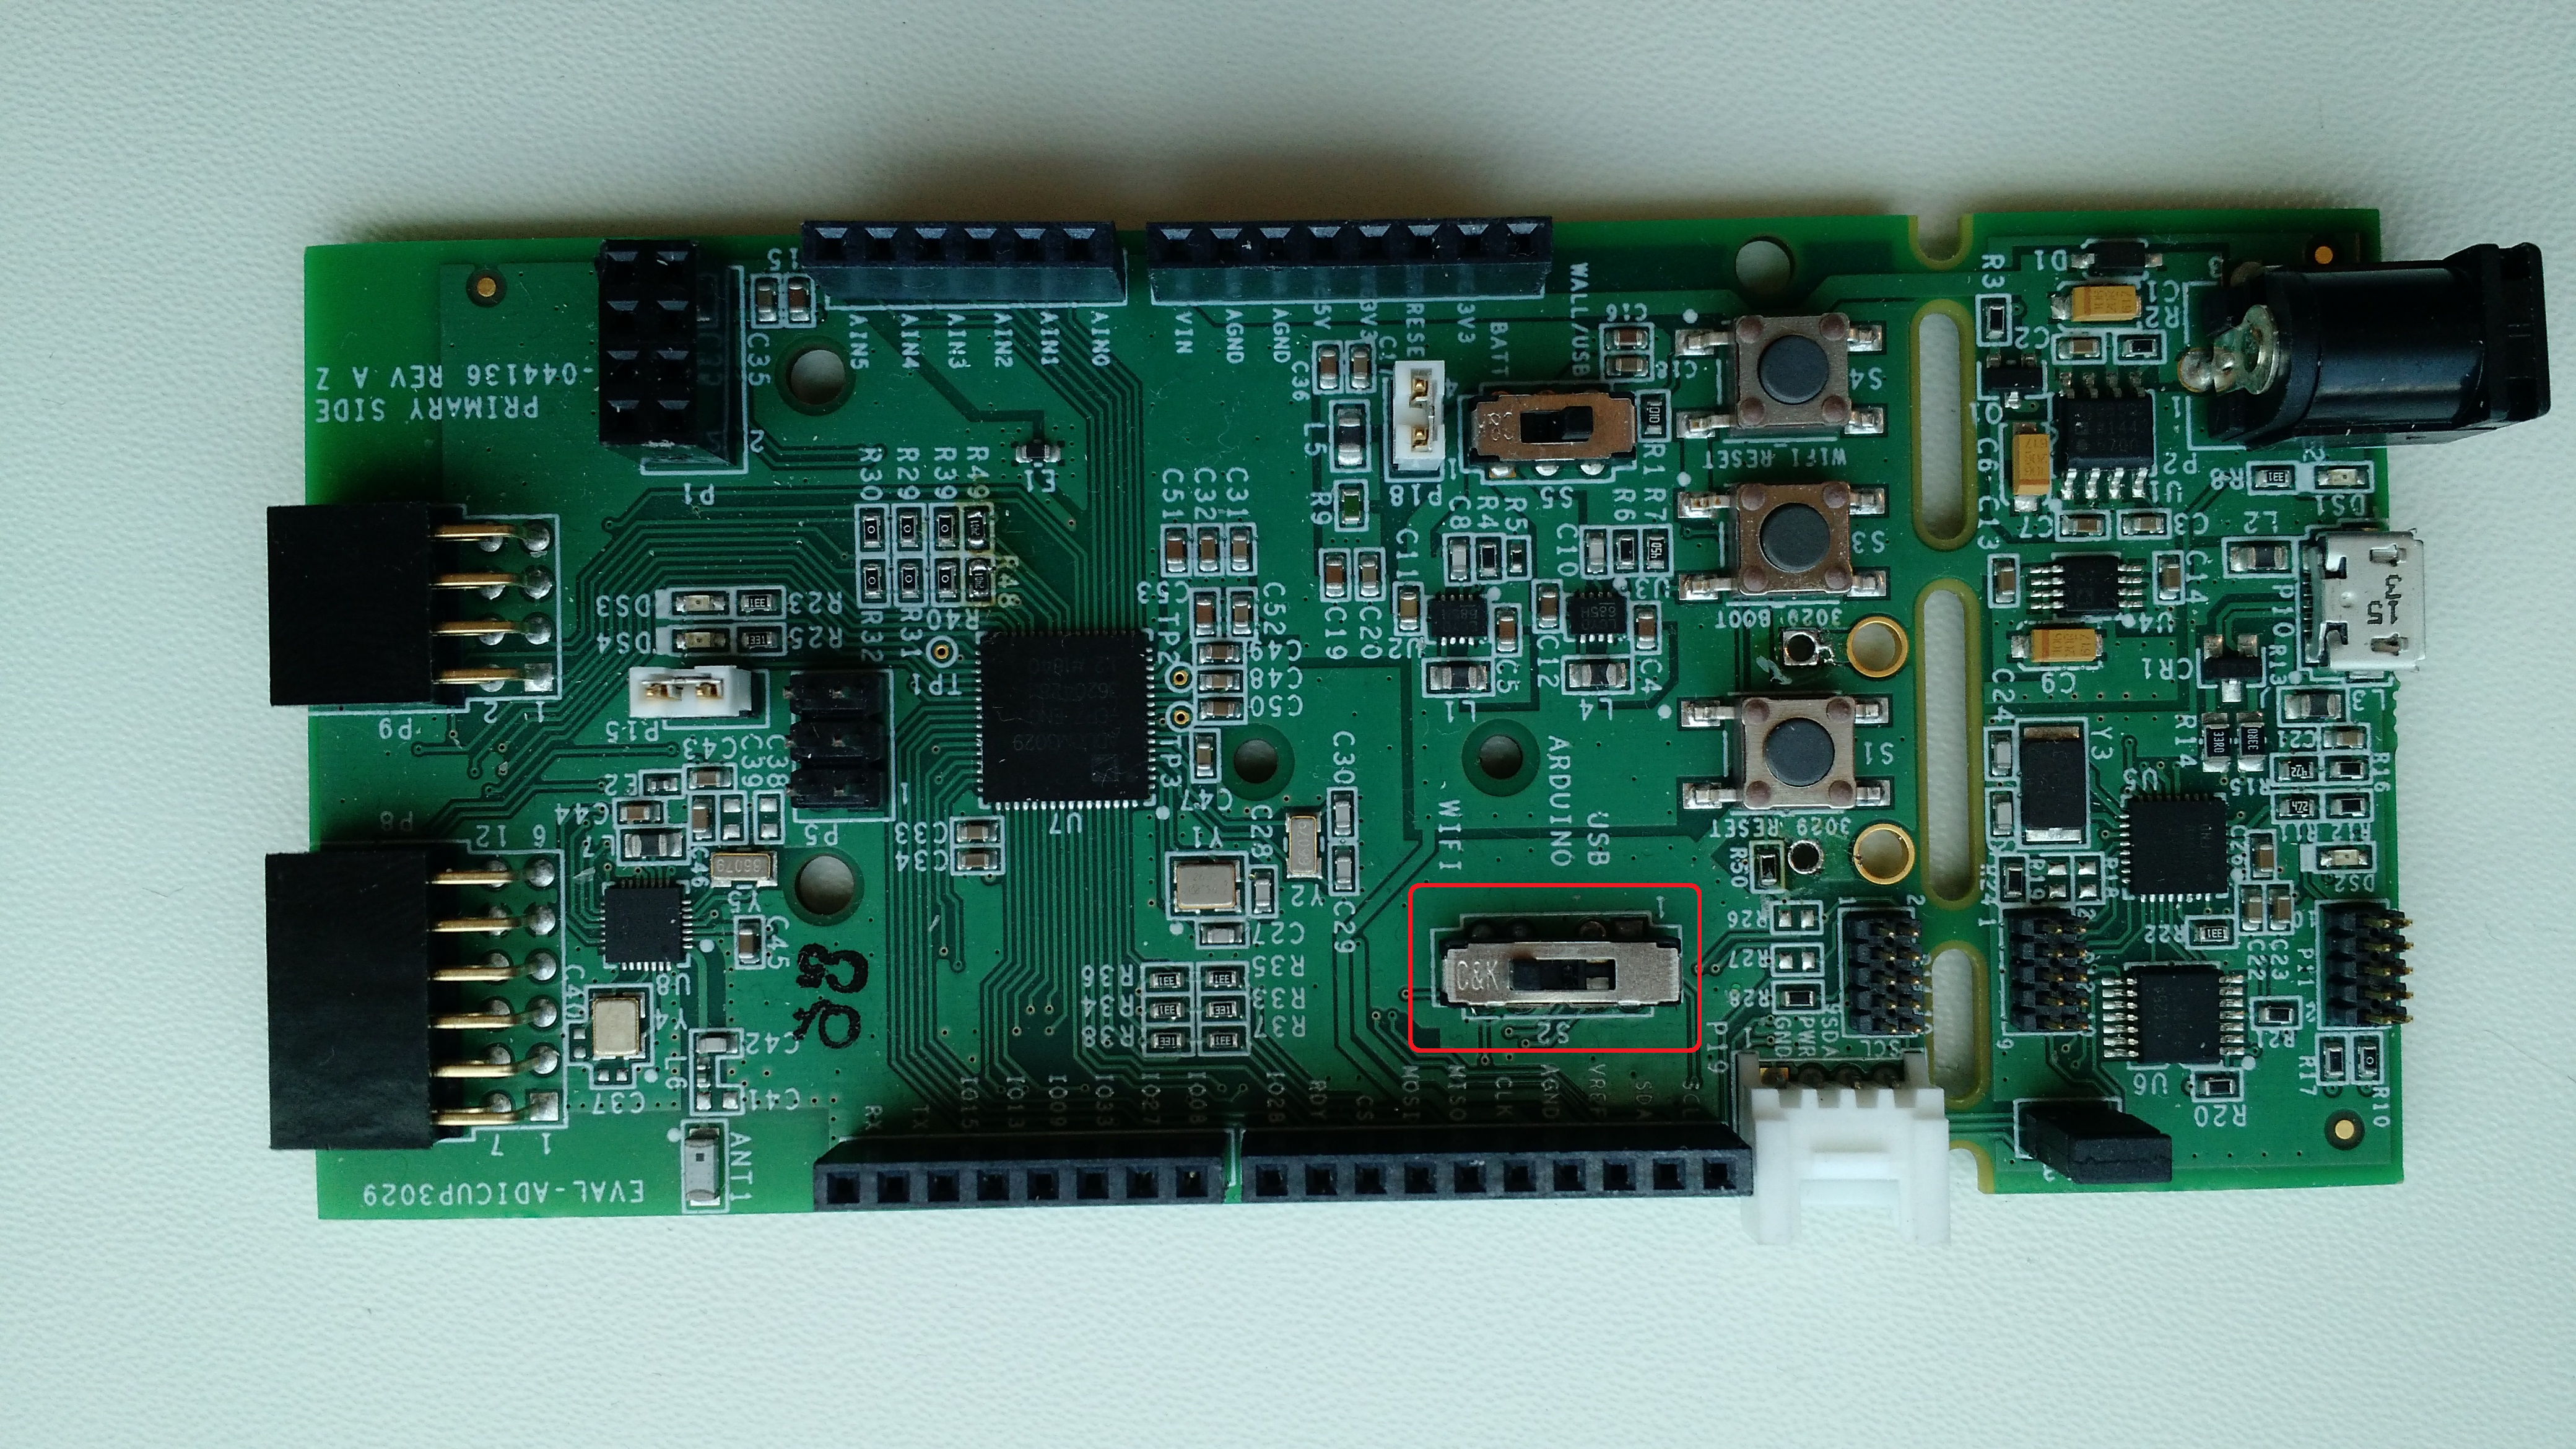
Set the UART switch to USB.
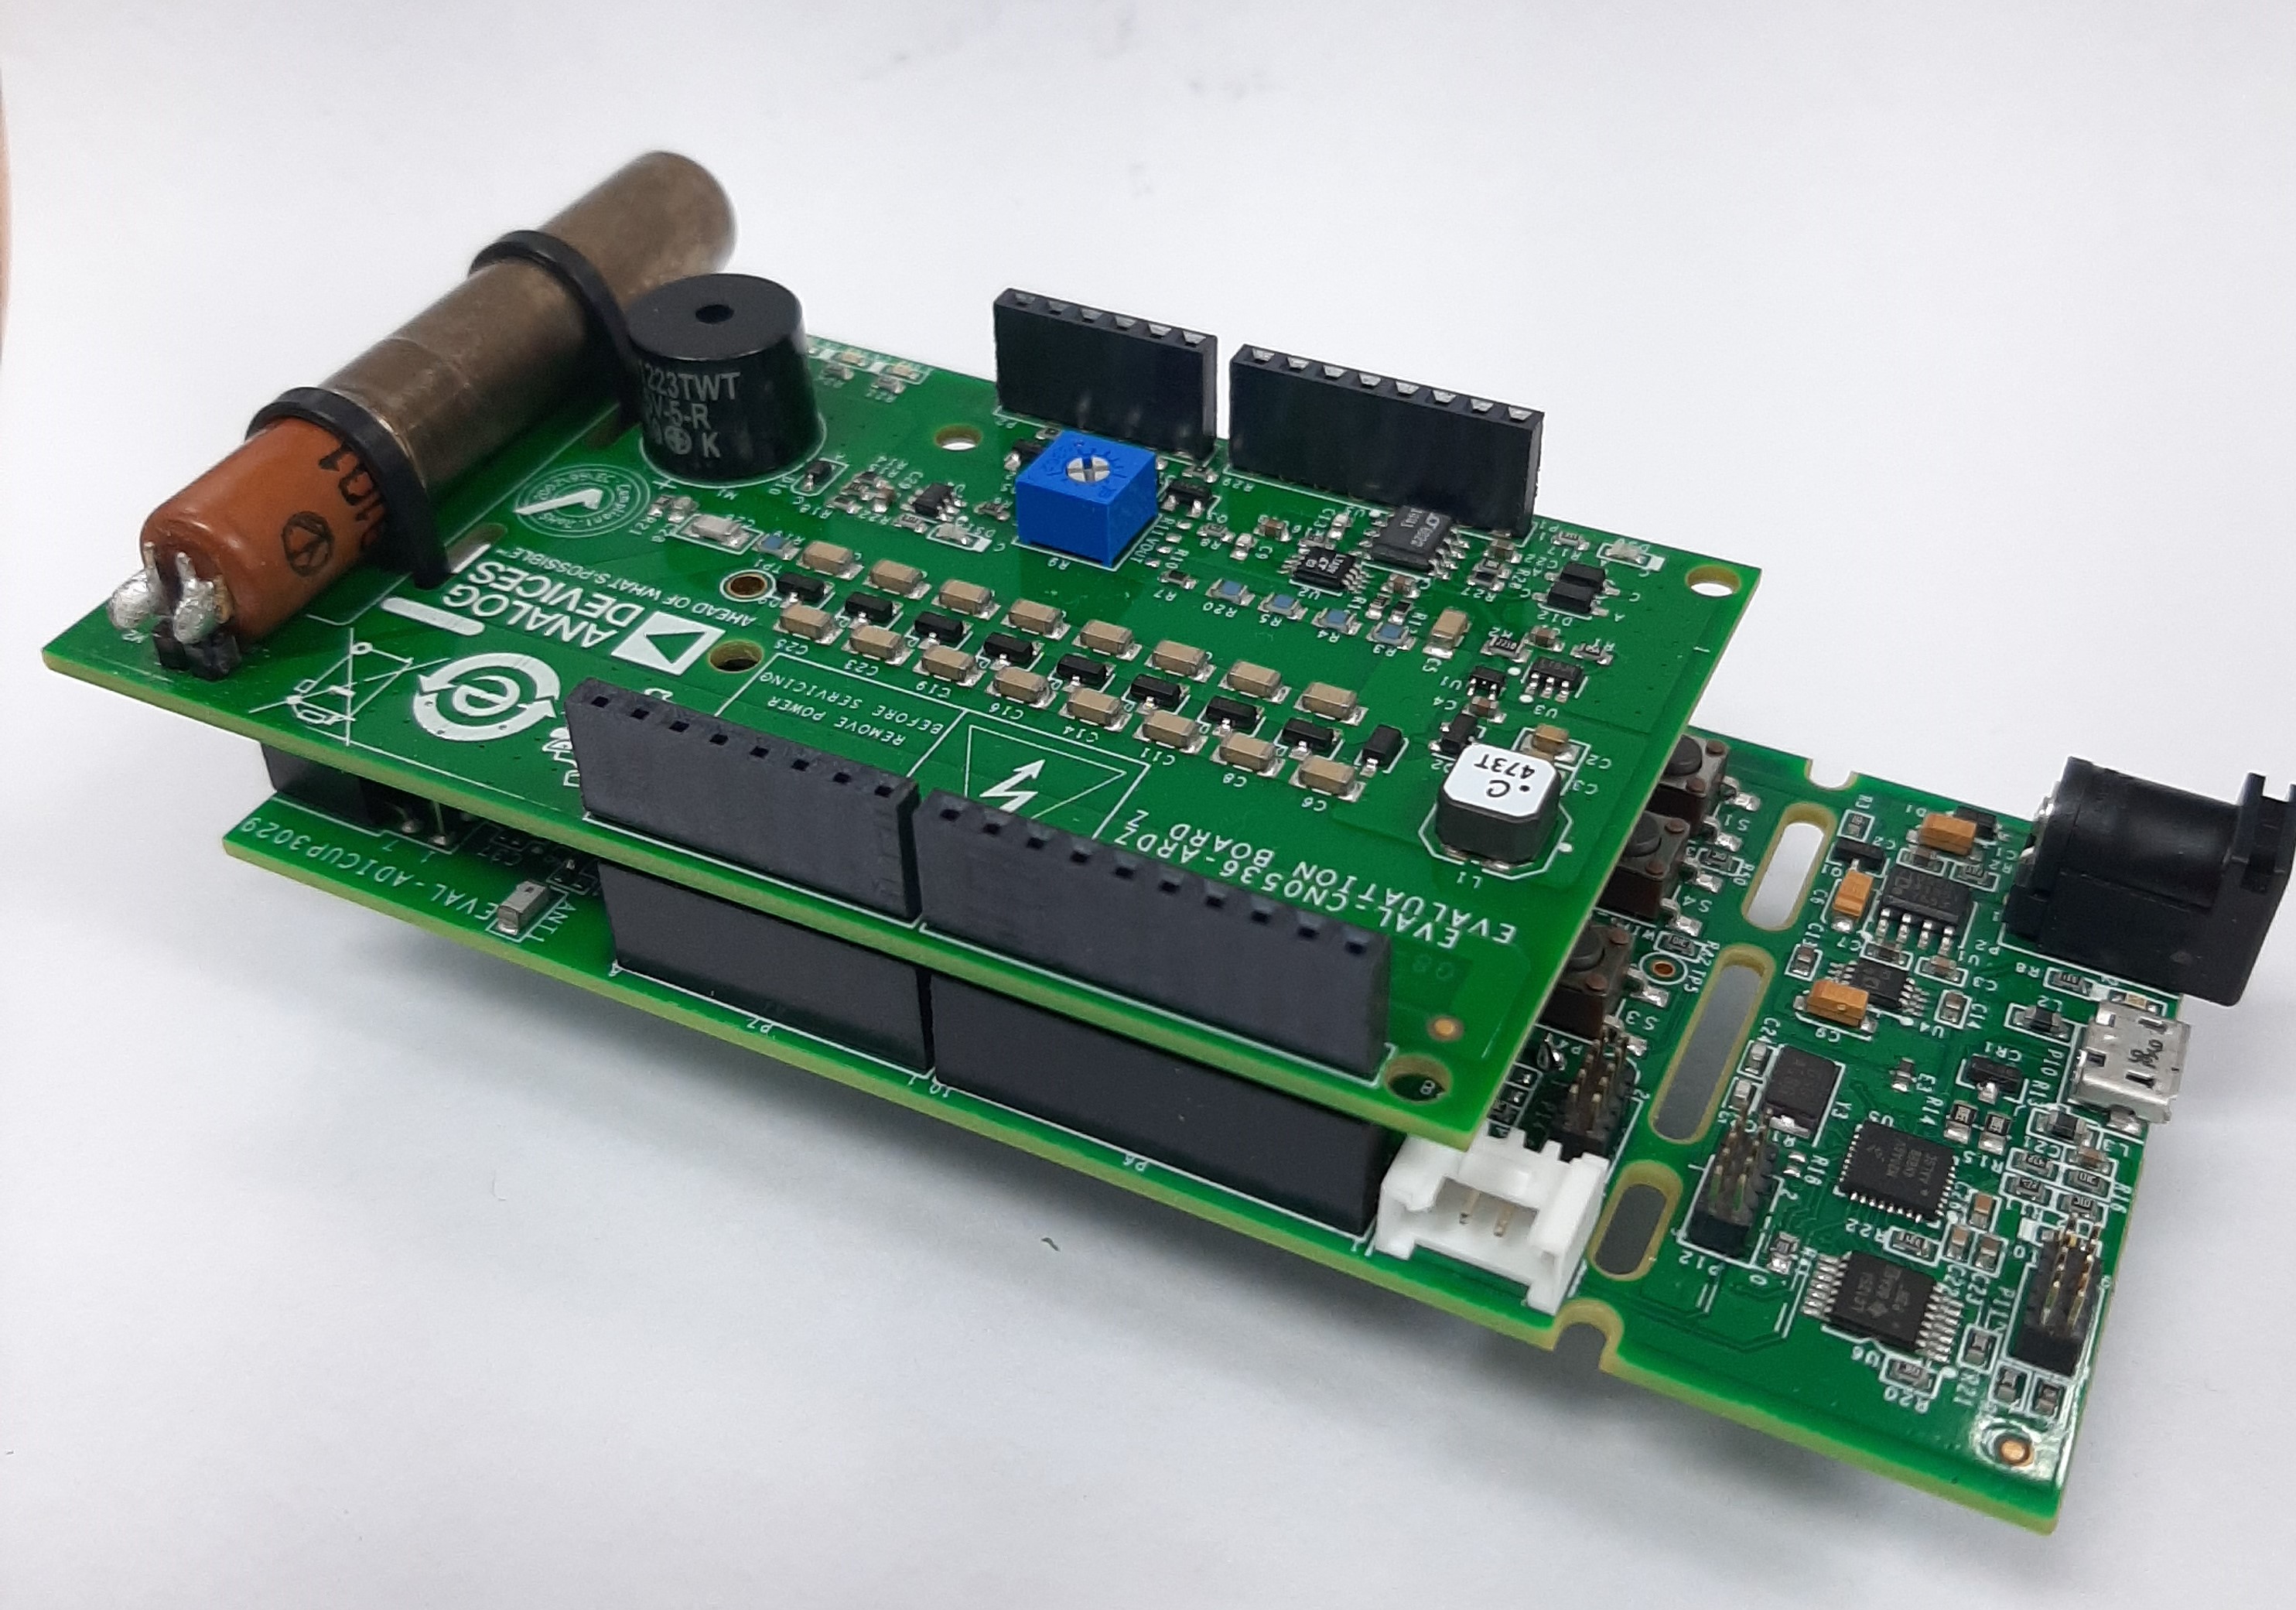
Place the EVAL-CN0536-ARDZ on top of the EVAL-ADICUP3029.
Connect a micro-USB cable to the USB connector and then to the PC.
Download the UART precompiled program
Download
Precompiled ADuCM3029_demo_cn0536 project with UART communication:
Upload the precompiled .hex file to the board. (Copy the .hex file to the DAPLINK drive)
Reset the board from the RESET push button.
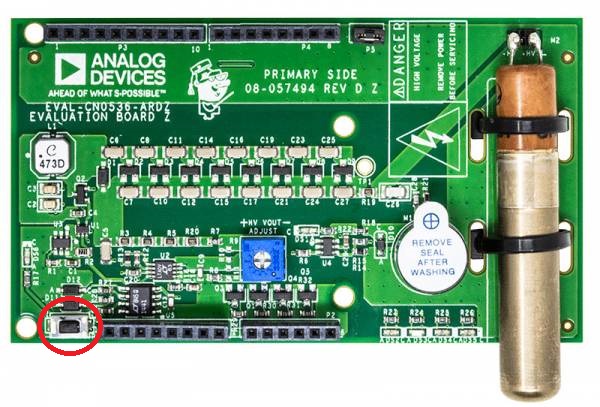
Start the serial terminal program.
Connect it to the desired port. Eg. COM4, check step by step guide if needed.
Set the BAUDRATE to 115200
Watch the output. Data will be send every 10 seconds by default.
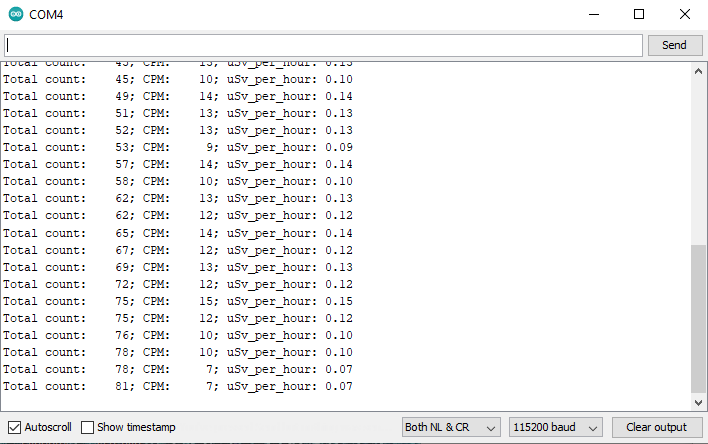
MQTT (Wi-Fi) demo with precompiled program
Set the UART switch to ARDUINO.
Place the EVAL-CN0536-ARDZ on top of the EVAL-ADICUP3029.
Connect the ESP8266 EN pin to 3.3V or solder it like below.
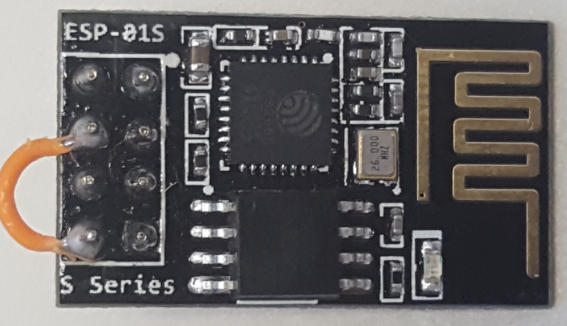
Connect the ESP8266 module to the Arduino Header.
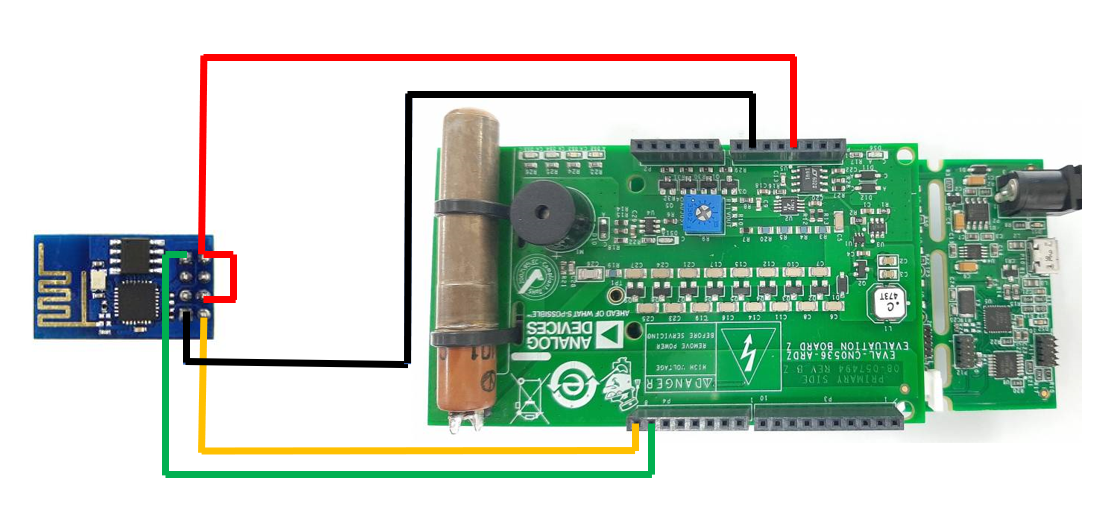
Connect a micro-USB cable to the USB connector and then to the PC.
Download the MQTT precompiled program
Download
Precompiled ADuCM3029_demo_cn0536 project with MQTT communication:
Create a hotspot or set a WiFi network with the following values (It must have Internet connection):
SSID: analog_hotspot
Password: 12345678
Reset the board from the RESET push button.
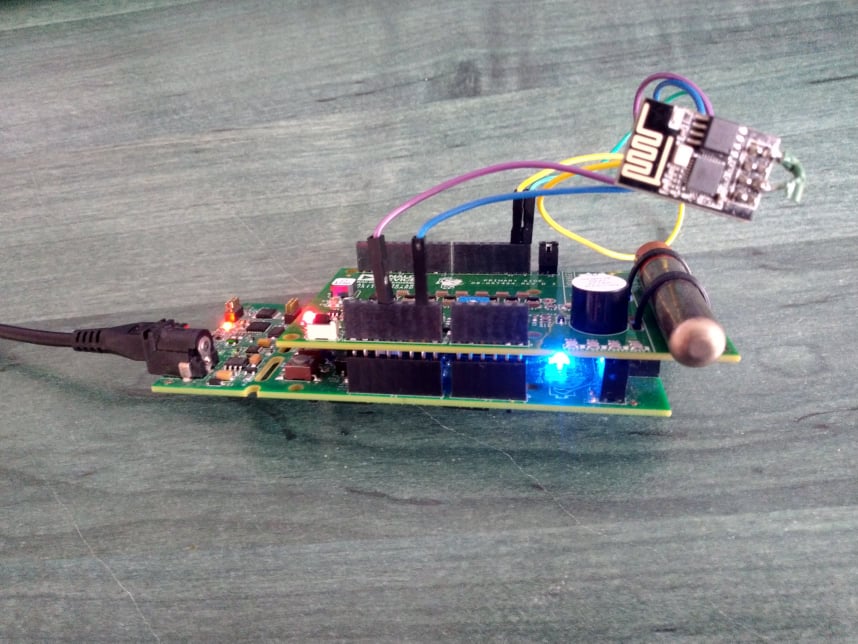
During setup the blue led will be turned on:
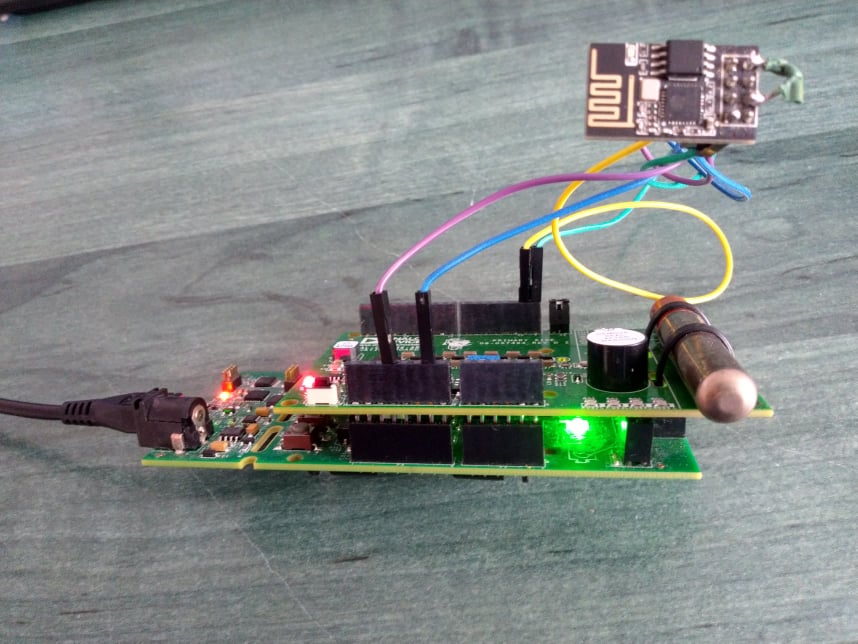
If the setup completed succesfully, the green led will be turned on (blue will be turned off). This means that the program is sending data to the server.
In case of an error during setup or during program execution, both leds will blink alternated with a 1 second period.
Data will be sent to:
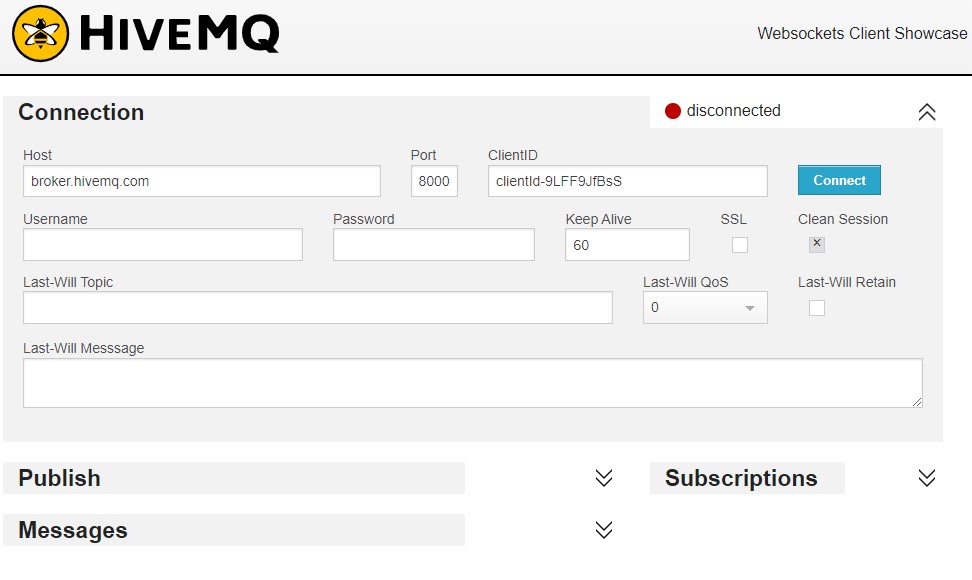
MQTT Server: broker.hivemq.com
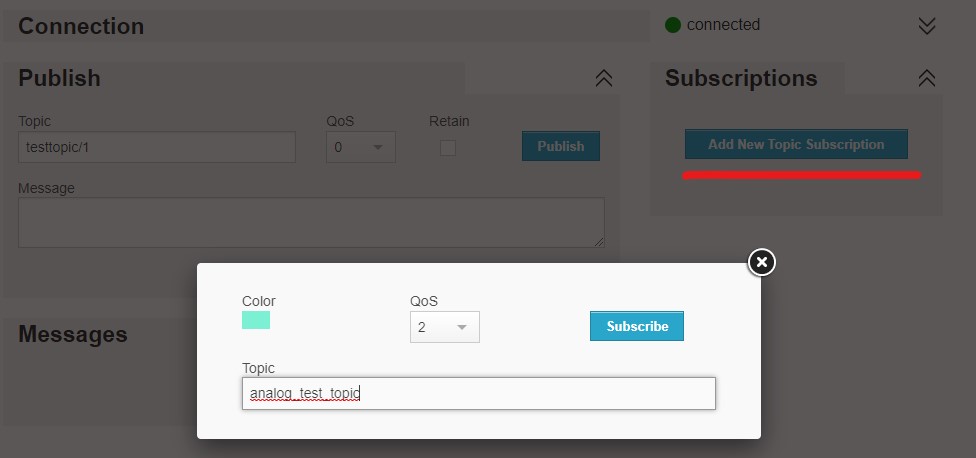
MQTT Topic: analog_test_topic
Use one of the below methods to view the data
XHIDDENSTART Use MQTT Web Client to view data initialState=”visible” XHIDDENSTARTSTOP
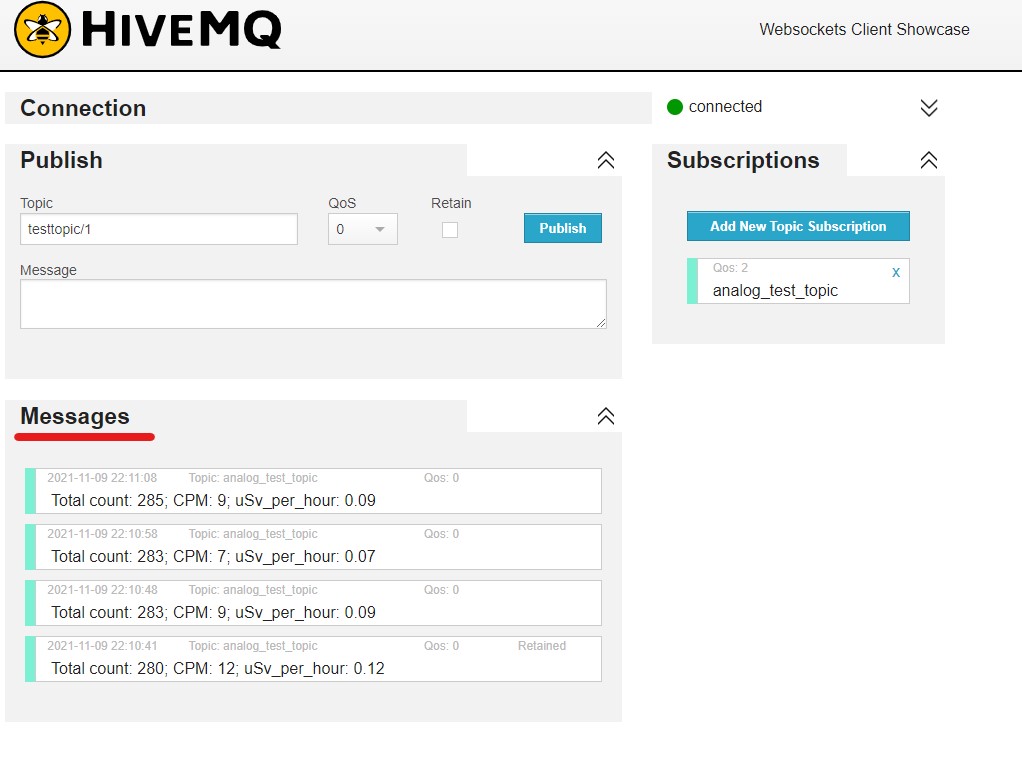
Open the MQTT Web Client
Set the above server to connect to:
After succesfull connection, subscribe to the mentioned topic:
View the published data under messages:
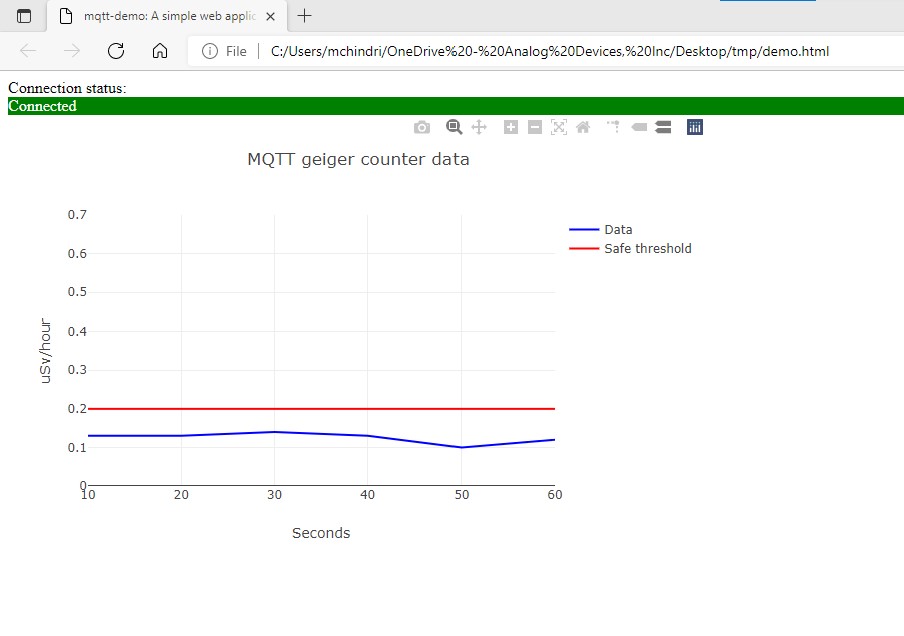
Download the HTML MQTT client (Rigth click on the link -> Save link as…)
Open the saved file into your browser.
In the upper of the page the server connection status is shown
A Graph with the data sent by the Geiger Counter is ploted:
Get the python script (Rigth click on the link -> Save link as…).
Run a terminal (cmd in windows) where the file was downloaded.
Install the needed python dependencies with:
python -m pip install paho-mqtt matplotlib parseRun the python sample script:
python main.pyA new plot windows will be created and the recieved data will be printed also in to the terminal:
XHIDDENEND
Working with the software
Make program should be installed and available in the path.
Open a terminal (linux) or a cmd (windows) and navigate to a directory where to start working.
Download the EVAL-ADICUP3029 repository with
git clone --recursive `EVAL-ADICUP3029 <https://github.com/analogdevicesinc/EVAL-ADICUP3029>`_.gitUsing the –recursive is important in order for the submodules to be initialized.
Go to project directory.
cd projects\ADuCM3029_demo_cn0536Follow this guide to create a CCES project. This command should be enough:
make update_srcsA folder build will be created and inside it the CCES project.
Import the new generated project into your workspace. See wiki
Now the project structure should look like this:
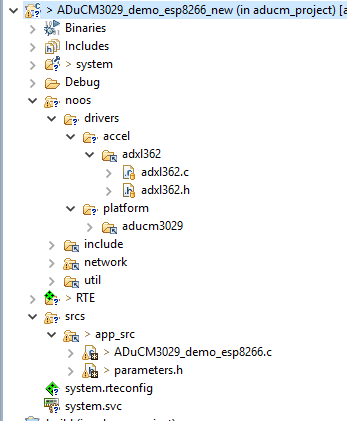
For Geiger Counter configuration see geiger_counter.h. The default configuration means:
Output data will be calculated at each 10 seconds
A average filter is applied on the last 5 samples
us_per_min = c_per_min * CONVERSION_FACTOR
Jumper 2 is solder on the back of the CN0536
/* Number of seconds between each measurement */
#define SAMPLING_PERIOD     10//seconds
/* Number of measurements used for average filtering */
#define NB_AVARGE_SAMPLES   5
/* Conversion factor from counts/minute -> microSieverts/minute */
#define CONVERSION_FACTOR   0.01

/*
 * Depending of the jumper soldered on the board one of these 3 options is
 * available for reading the Geiger pulses.
 * Avaliable options are:
 *     - 2 : JP2 soldered (default on board)
 *     - 3 : JP3 soldered
 *     - 4 : JP4 soldered
 */
#define JUMPER_CONFIG   2
For communication configuration see communication.h: The default configuration means:
MQTT is used as default communication method. If something goes wrong with Wi-fi, communication will start over UART. In order to use UART from the beginning, set the COMUNICATION_METHOD macro to UART
The program will try to connect to a wifi network with name analog_hotspot and password 12345678
The program will try to publish the data to test.mosquitto.org MQTT broker at the topic analog_test_topic
#ifndef COMUNICATION_METHOD
#define COMUNICATION_METHOD MQTT
//#define COMUNICATION_METHOD   UART
#endif

/* UART configuration parameters */
#define CONFIG_UART_PARITY  UART_NO_PARITY
#define CONFIG_UART_STOPBITS    UART_ONE_STOPBIT
#define CONFIG_UART_WORD_LEN    UART_WORDLEN_8BITS
#define CONFIG_UART_BAUDRATE    BD_115200

/* WIFI */
#define WIFI_SSID       "analog_hotspot"
#define WIFI_PASS       "12345678"

/* MQTT Server */
#define MQTT_SERVER_ADDRESS "test.mosquitto.org"
#ifndef DISABLE_SECURE_SOCKET
#define SERVER_PORT     8883
#else
#define SERVER_PORT     1883
#endif

/* MQTT Client */
#define MQTT_BUFFER_SIZE    500
#define MQTT_TIMEOUT        20000 //ms
#define MQTT_KEEPALIVE      7200 //ms
#define MQTT_CLIENT_NAME    "analog_client"
#define MQTT_PUBLISH_TOPIC  "analog_test_topic"
End of Document