Using Keil or IAR Tools with ADICUP3029
This will be a paragraph talk about why you might want to use Keil or IAR with the ADICUP3029. Perhaps you like the other tool chains and are familiar with them. Perhaps you have a full license and your company requires the work to be done using Keil or IAR. Please feel free to update and expand this paragraph.
How to use ADICUP3029 with Keil
In order to use ADICUP3029 board with Keil, you will need to replicate the following steps.
Install mBed windows serial driver from
Open any example-workspace and project from the ADuCM3029 BSP(board support package). I used the SysTick example in the below images
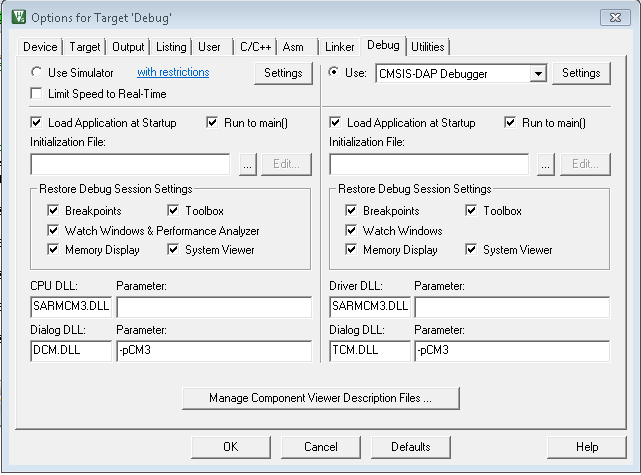
In the Keil toolbar select Project → Options → Debug, and select the “CMSIS DAP” option
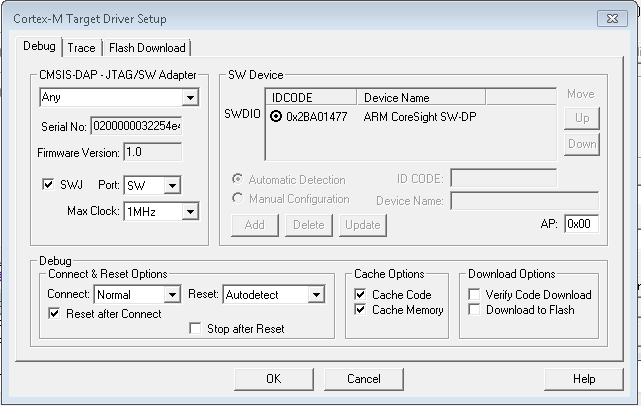
Under the CMSIS DAP Settings, select the SW option
Push Crtl+F5 or in the Keil toolbar select Debug → Start/Stop Debug Session
That’s it – You are ready to go.
How to use ADICUP3029 with IAR
In order to use ADICUP3029 board with IAR, you will need to replicate the following steps.
Install mBed windows serial driver from
Open any example-workspace and project from the ADuCM3029 BSP(board support package). I used the Timer example in the below images
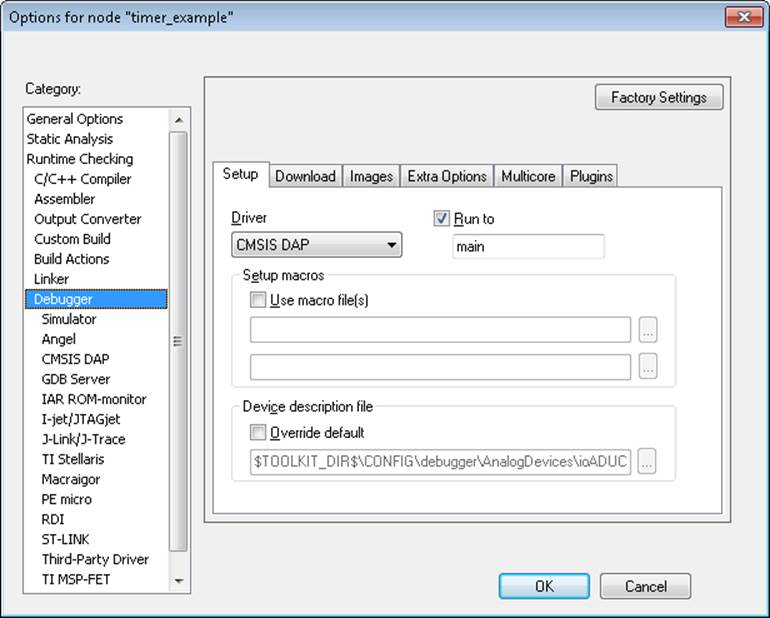
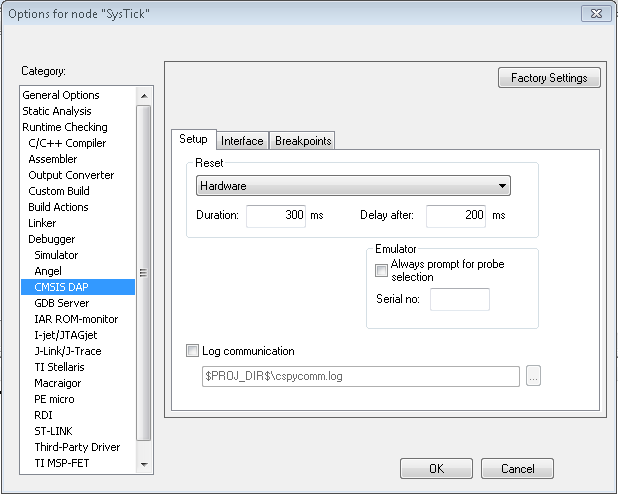
In the IAR toolbar select Project → Options → Debugger, and select the “CMSIS DAP” option
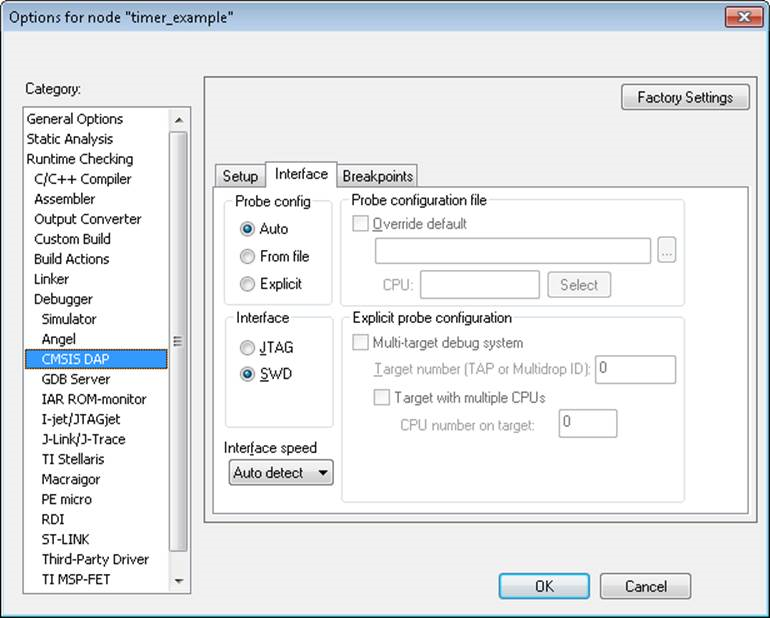
Under the Debugger-CMSIS DAP tab, select the SWD option
Under the Debugger-CMSIS DAP tab, select Hardware for the reset type
Push the Green-Button – “Download and debug” – Another popup for C-SPY configuration opens up, just press “OK”
That’s it – You are ready to go.
End of Document