Accessing Pluto’s FPGA Over JTAG
Connecting to Pluto over JTAG requires a standard JTAG programmer from AMD Xilinx or a simpler solution like the JTAG-HS3+JTAGUART programmer. We will be using the JTAG-HS3+JTAGUART in this guide.
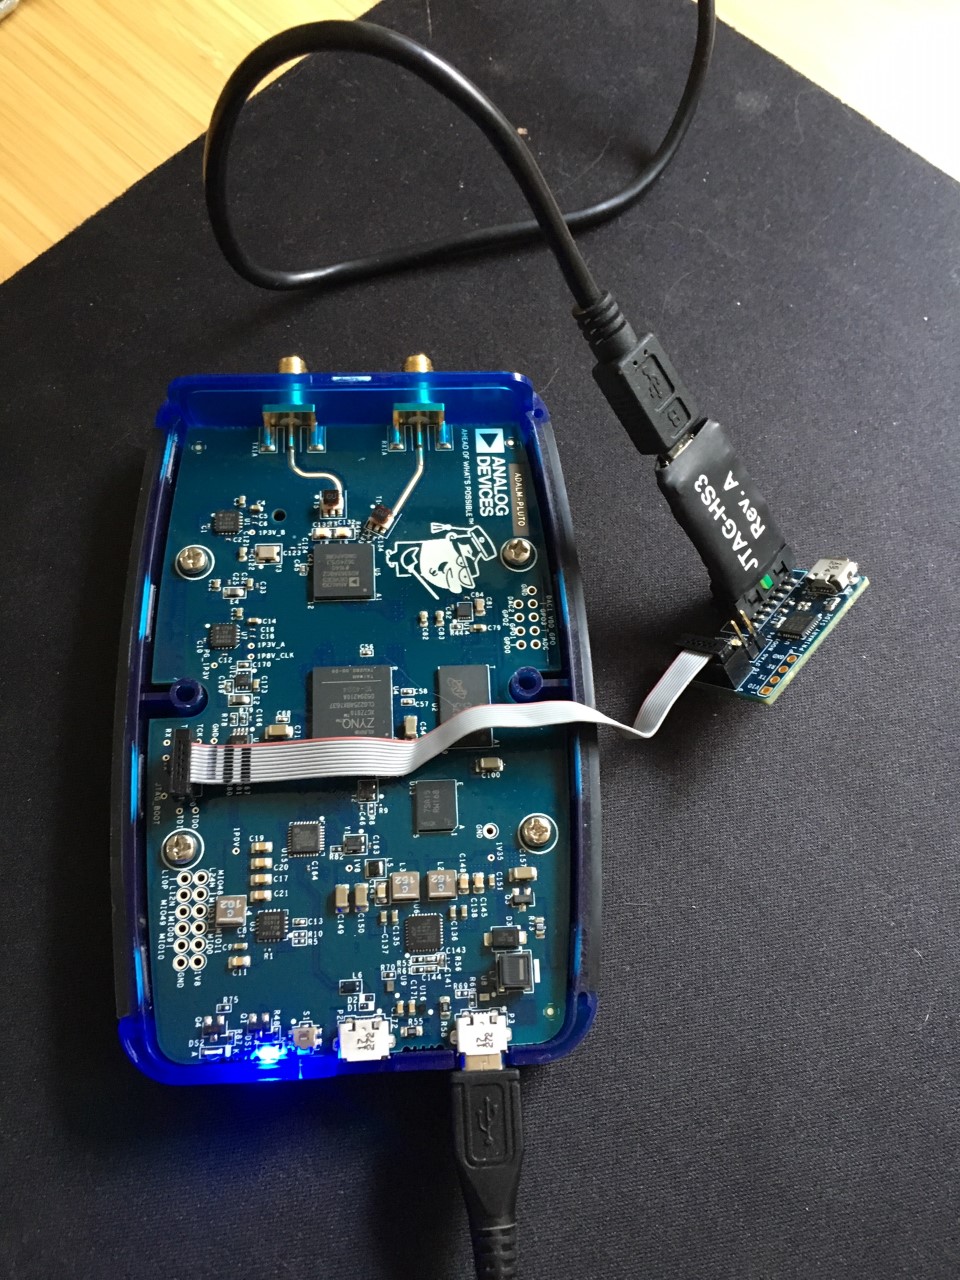
First, open up PlutoSDR’s case and locate the JTAG_BOOT connector holes on
the bottom left portion of the PCB. Using an 8 pin ribbon cable from your JTAG
programmer connect to those pins as shown in the figure below.
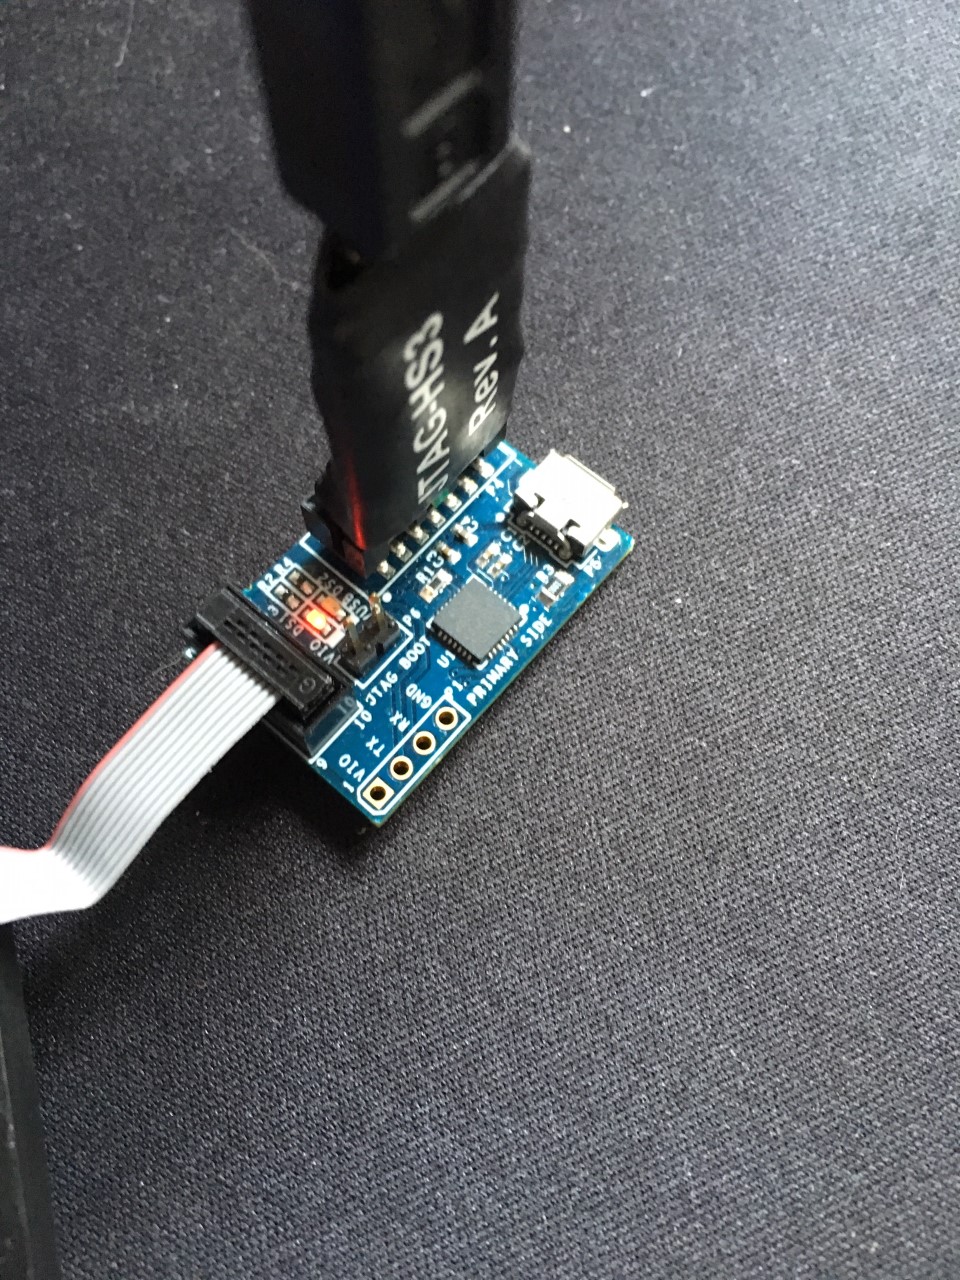
After the JTAG programmer is connected, provide power to PlutoSDR using either of its USB connectors. Once powered the D5 led should illuminate to signal the JTAG connection to the programmer is alive. This will appear like the figure below.
Next we can go into Vivado and check the hardware manager for connectivity.
This can be done with xsct as follows:
tcollins@winston:/tmp$ xsct
rlwrap: warning: your $TERM is 'xterm' but rlwrap couldn't find it in the terminfo database. Expect some problems.
****** Xilinx Software Commandline Tool (XSCT) v2017.4.1
 **** Build date : Jan 30 2018-15:42:35
   ** Copyright 1986-2017 Xilinx, Inc. All Rights Reserved.
xsct% connect -host localhost -port 3121
tcfchan#0
xsct% targets
 1  APU
    2  ARM Cortex-A9 MPCore #0 (Running)
    3  ARM Cortex-A9 MPCore #1 (Running)
 4  xc7z010
xsct%
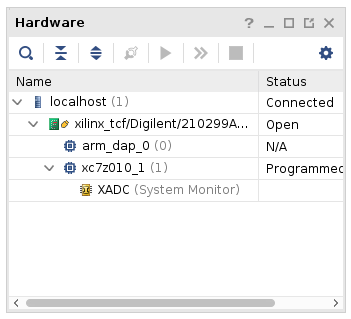
Alternatively in the GUI, PlutoSDR should appear as so:
udev Rules
udev rules may be required to access the USB device.
Find the device with lsusb:
dbezborodov@ubuntu-vivado:~$ lsusb
Bus 001 Device 001: ID 1d6b:0002 Linux Foundation 2.0 root hub
Bus 001 Device 002: ID 046d:c318 Logitech, Inc. Illuminated Keyboard
Bus 001 Device 003: ID 046d:c548 Logitech, Inc. Logi Bolt Receiver
Bus 001 Device 004: ID 194f:0302 PreSonus Audio Electronics, Inc. AudioBox USB
Bus 001 Device 006: ID 0403:6015 Future Technology Devices International, Ltd Bridge(I2C/SPI/UART/FIFO)
Bus 001 Device 008: ID 0403:6014 Future Technology Devices International, Ltd FT232H Single HS USB-UART/FIFO IC
Bus 002 Device 001: ID 1d6b:0003 Linux Foundation 3.0 root hub
In this case, it is 0403:6014 (it is the FT232H programmer from Digilent.)
Then add a new rule under /etc/udev/rules.d/:
# This is the JTAG programmer for the Pluto.
SUBSYSTEM=="usb", ATTR{idVendor}=="0403", ATTR{idProduct}=="6014", GROUP="plugdev", MODE="0660"
Be sure to match the vendor and product IDs of your device. Then do:
sudo udevadm control --reload-rules
sudo udevadm trigger
Ensure that you are in the group plugdev. Run the command groups. If
not, add yourself to the plugdev group and logout and back in afterwards.
Unbricking PlutoSDR
If for some reason PlutoSDR does not boot, if the firmware update failed for example, the device will appear in DFU mode (1 solid LED and no blinking LED) but not actually boot into DFU. This happens when u-boot or the FSBL is corrupted. This is unlikely but can happen. To fix this you can leverage the JTAG bootstrap zip part of each release. To do so perform the following:
Plug in JTAG as documented above into Pluto and verify you can connect with Vivado
Download the JTAG bootstrap zip from the firmware release page (
plutosdr-jtag-bootstrap-<Firmware Version>.zip)Unzip the zip then source the
run.tclinside withxmdfrom the AMD Xilinx tools (xmd -tcl run.tcl). We are done with JTAG nowNext plugin a USB cable to the UART port of the ADALM-UARTJTAG connector and open a serial session (Putty or screen or …)
At this point you should have access to the u-boot menu. Directly from u-boot serial console type:
run dfu_sf. This will put PlutoSDR into DFU mode.Now plugin PlutoSDR’s data USB port to your PC and it should appear as a DFU device
Flash the firmware as usual with the DFU utils as documented here