ADIToFGUI
ADIToFGUI is the ToF module viewer application for the following modules:
EVAL-ADSD3100-NXZ
EVAL-ADTF3175-NXZ
EVAL-ADTF3175D-NXZ
Eval Kit 5.0.0 or later
With Eval Kit software 5.0.0 there have been some major updates to ADIToFGUI, starting with the UX.
Usage
Connecting
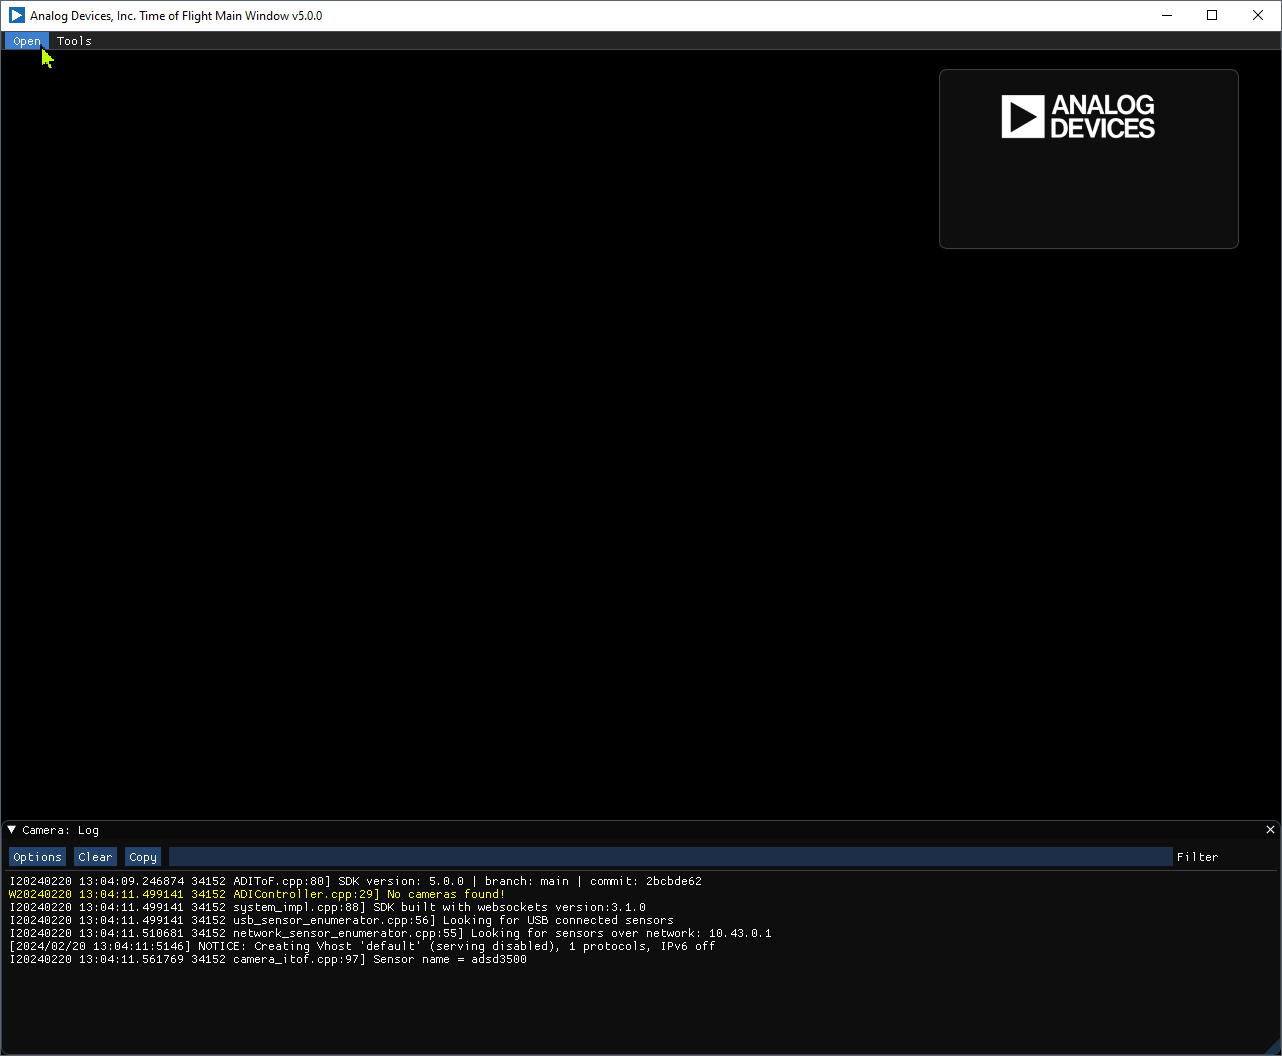
Open ADIToFGUI located in the installation “bin” folder.
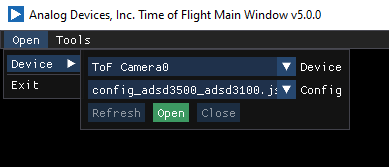
Select “config_adsd3500_adsd3100.json” and click Open.
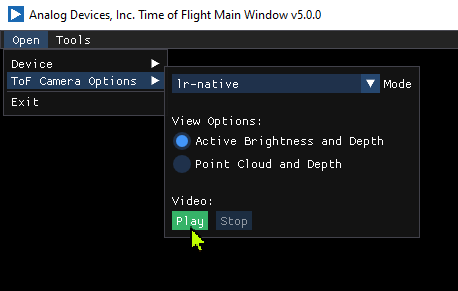
Select the desired mode and click Play.
Streaming frames.
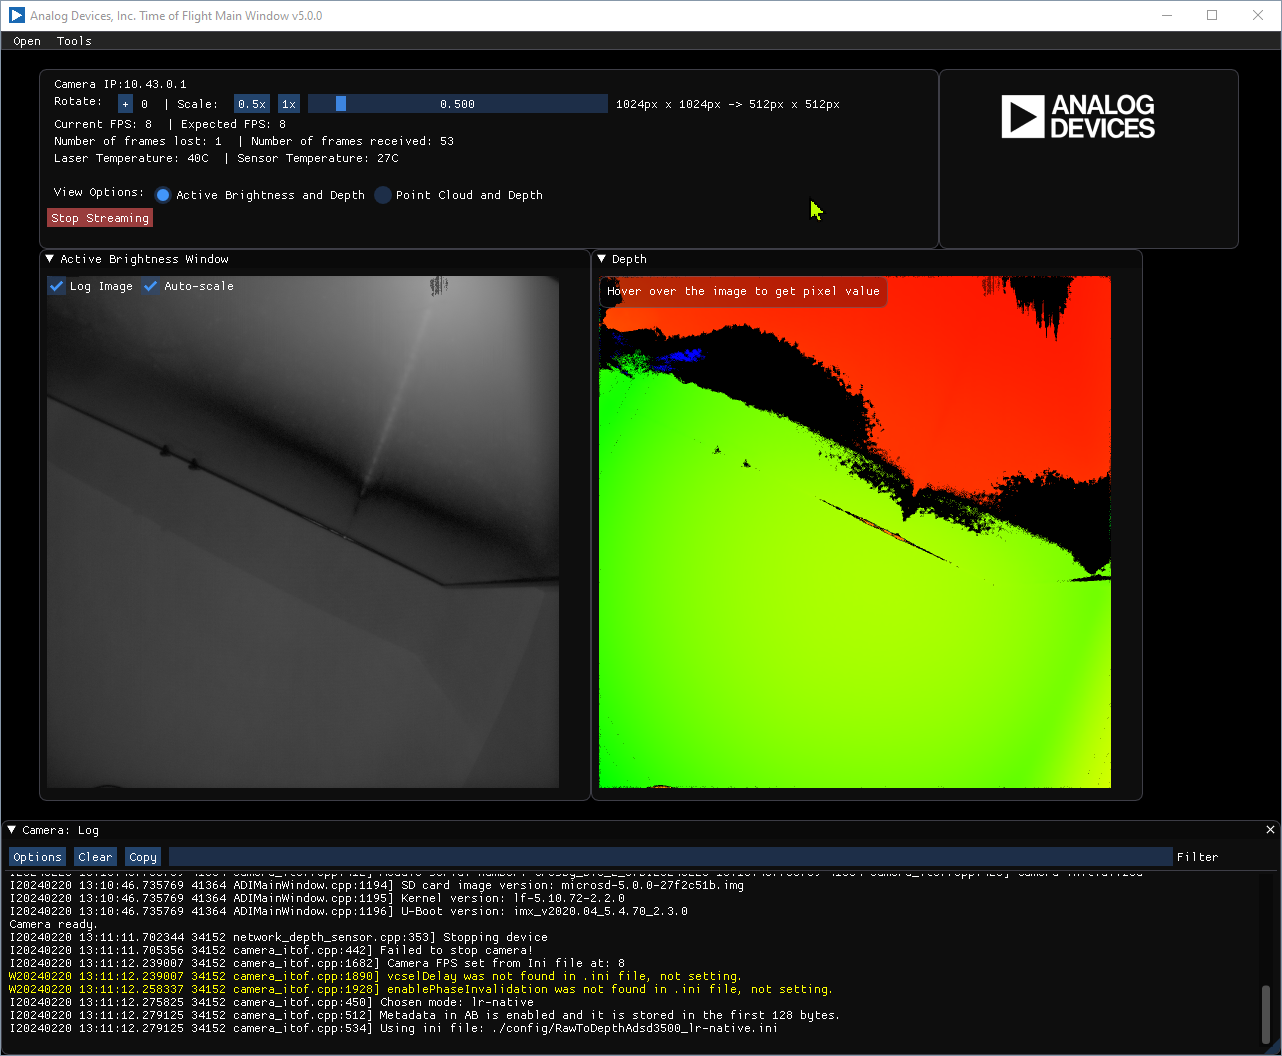
New Features
Adjusting the Ini Parameters
It is now possible to adjust some of the configuration parameters during use. These parameters are generally stored in ini/JSON files on a per mode basis. The ADSD3500 and depth compute libraries receive the changed parameter values.
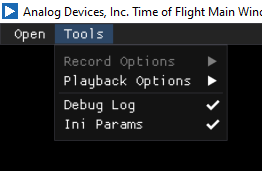
The Ini Parameter window can be selected at any point. Select Ini Params in the Tools menu.
Once opened the Ini Parameter window can be used to adjust the parameters.
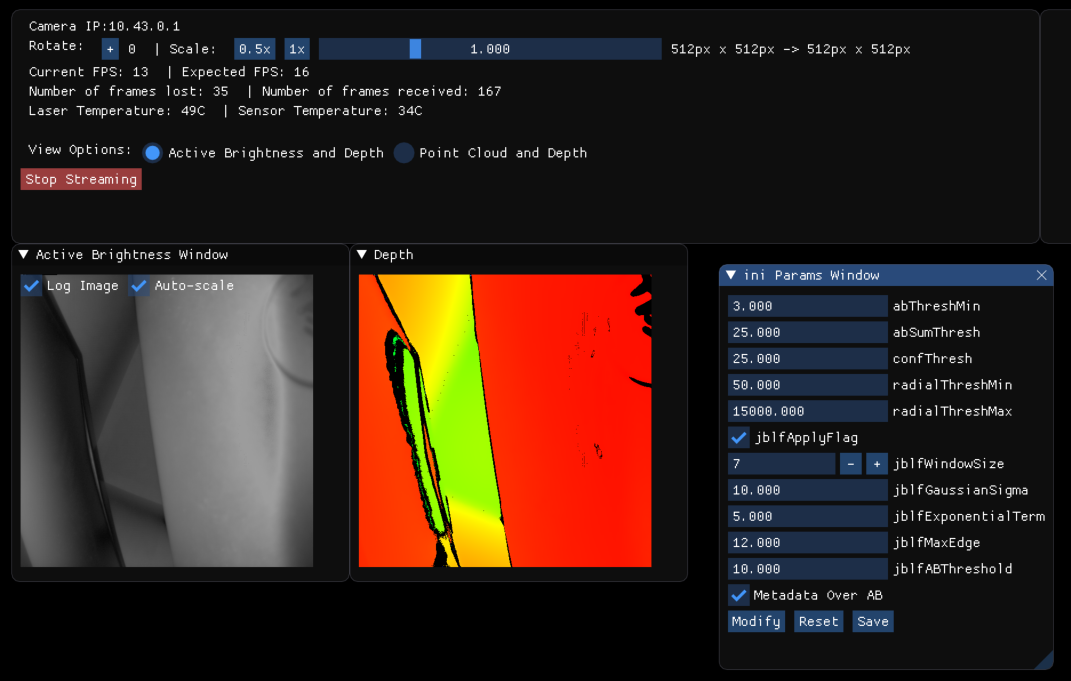
Modify - Write parameters to the device. The stream is stopped, the ADSD3500 and depth compute library updated, then the stream is restarted.
Reset - Set the values back to those from the original ini file.
Save - Save the parameters to a file.
Troubleshooting
Slow Point Cloud Rendering
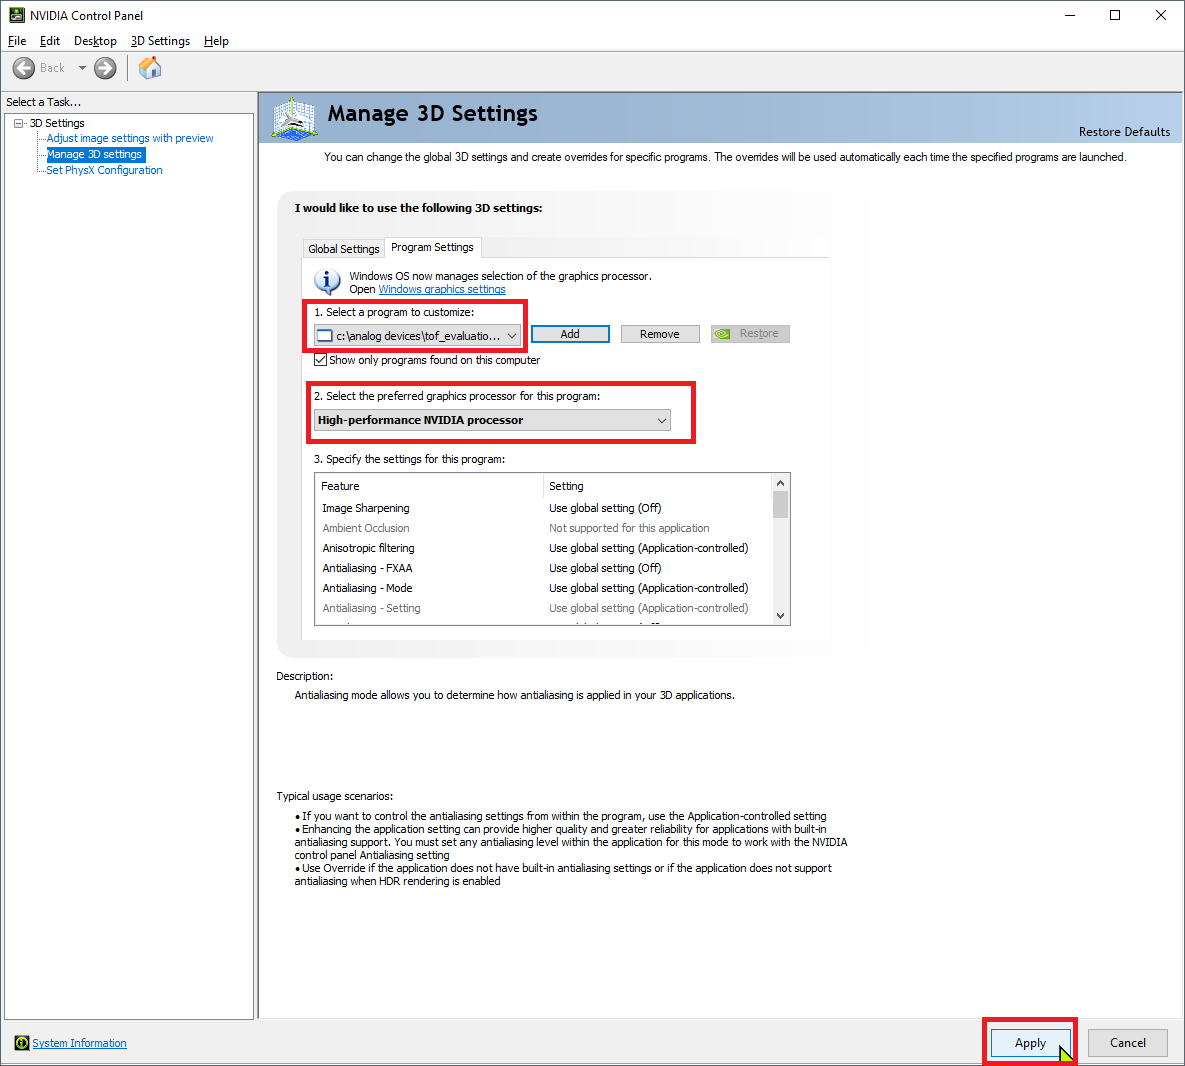
If rendering of the point cloud is slow, it may be necessary to ensure the GPU is rendering and not the CPU. With an NVIDIA GPU you can do the following:
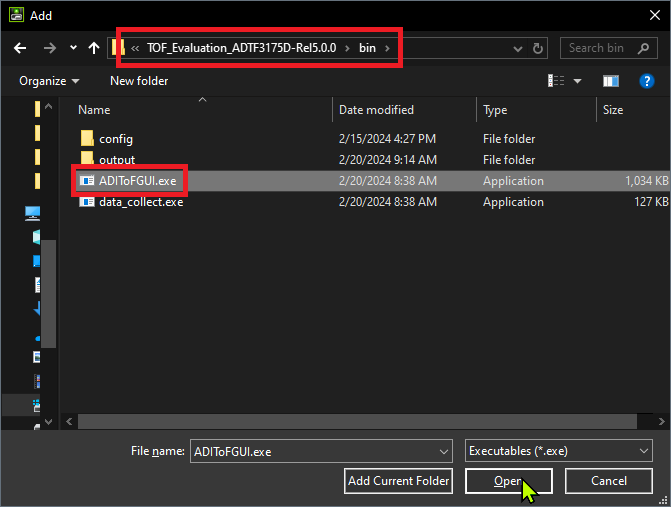
Open NVIDIA Control Panel -> Manage 3D Settings -> Program Settings -> Add
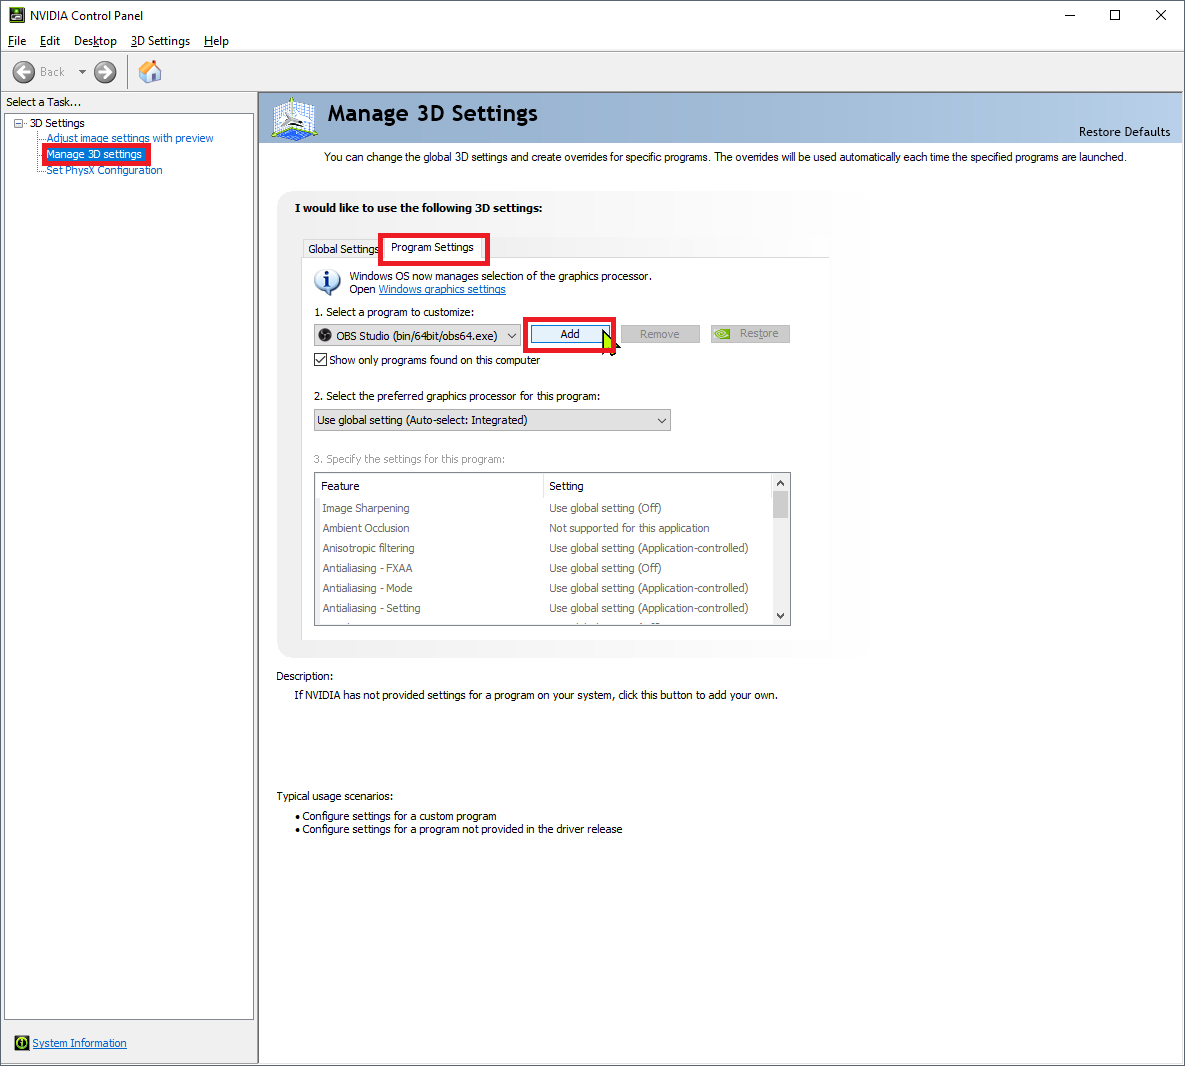
Click Browse
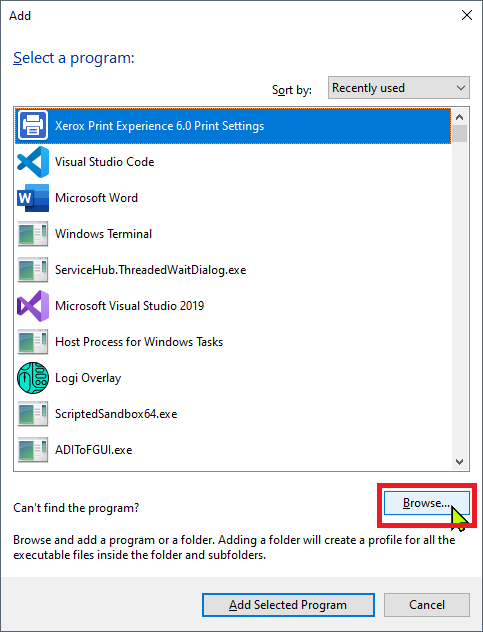
Navigate to the installation bin folder and select ADIToFGUI.exe
For the selected program “ADIToFGUI” -> Select “High-performance NVIDIA processor” -> Apply
Eval Kit 4.3.0 or earlier
Start
Locate ADIToFGUI.exe in the ‘viewer’ or ‘bin’ folder at the install location:
v2.x.x: Default location:
C:\Analog Devices\TOF_Evaluation_BM-RelX.X.X\viewer\v3.x.x: Default location:
C:\Analog Devices\TOF_Evaluation_BM-RelX.X.X\bin\
For EVAL-ADTF3175D-NXZ:
Confirm that an unidentified local network has been discovered by the PC (IP address = 10.42.0.1)
Run the application
Hit refresh until a Device is found
Select .json file based on your kit’s serial number (Software Release version 4.2.0+):
If your serial number starts with ‘DV11’ or ‘CR’ select tof-viewer_config.json
If your serial number starts with ‘am’ select tof_crosby_adsd3500_new_modes_config.json
For EVAL-ADTF3175-NXZ or EVAL-ADSD3100-NXZ (only supported with software release 2.1.1):
Start the viewer
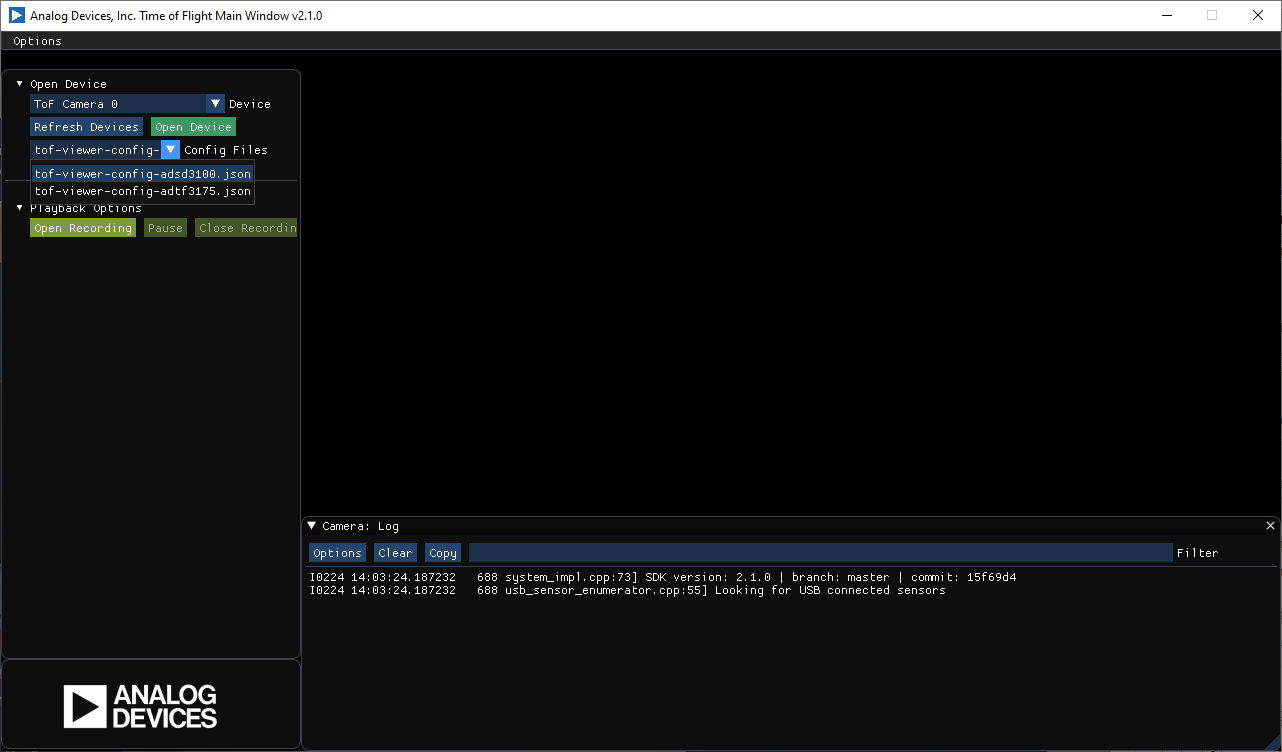
If a camera is connected it should show up in the ‘Device’ drop down menu
Select your device
Select correct config file:
EVAL-ADTF3175-NXZ: tof-viewer-config-adtf3175.json
EVAL-ADSD3100-NXZ: tof-viewer-config-adsd3100.json
Click ‘Open Device’
Run Camera
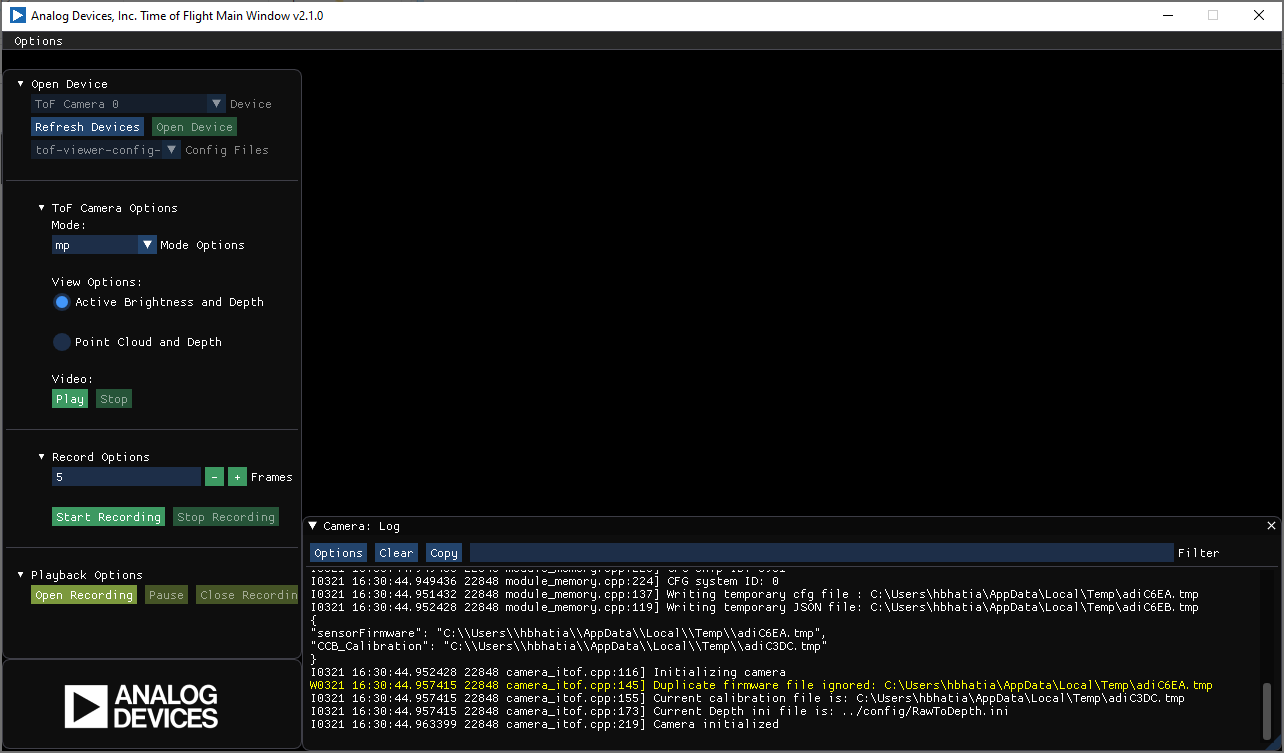
Once the device has been initialized the ‘ToF Camera Options’ menu should be available. Available modes will depend on the module serial number (see Mode Table in the main page).
Select preferred view option and click play to run camera.
Important
If the user disconnects the camera via USB-C cable while the GUI has initialized the camera, the user must restart the GUI.
Active Brightness and Depth
If this option is selected:
The first window shows active brightness/intensity
The second window shows depth (in mm)
The user can hover over the image to see real-time depth data.
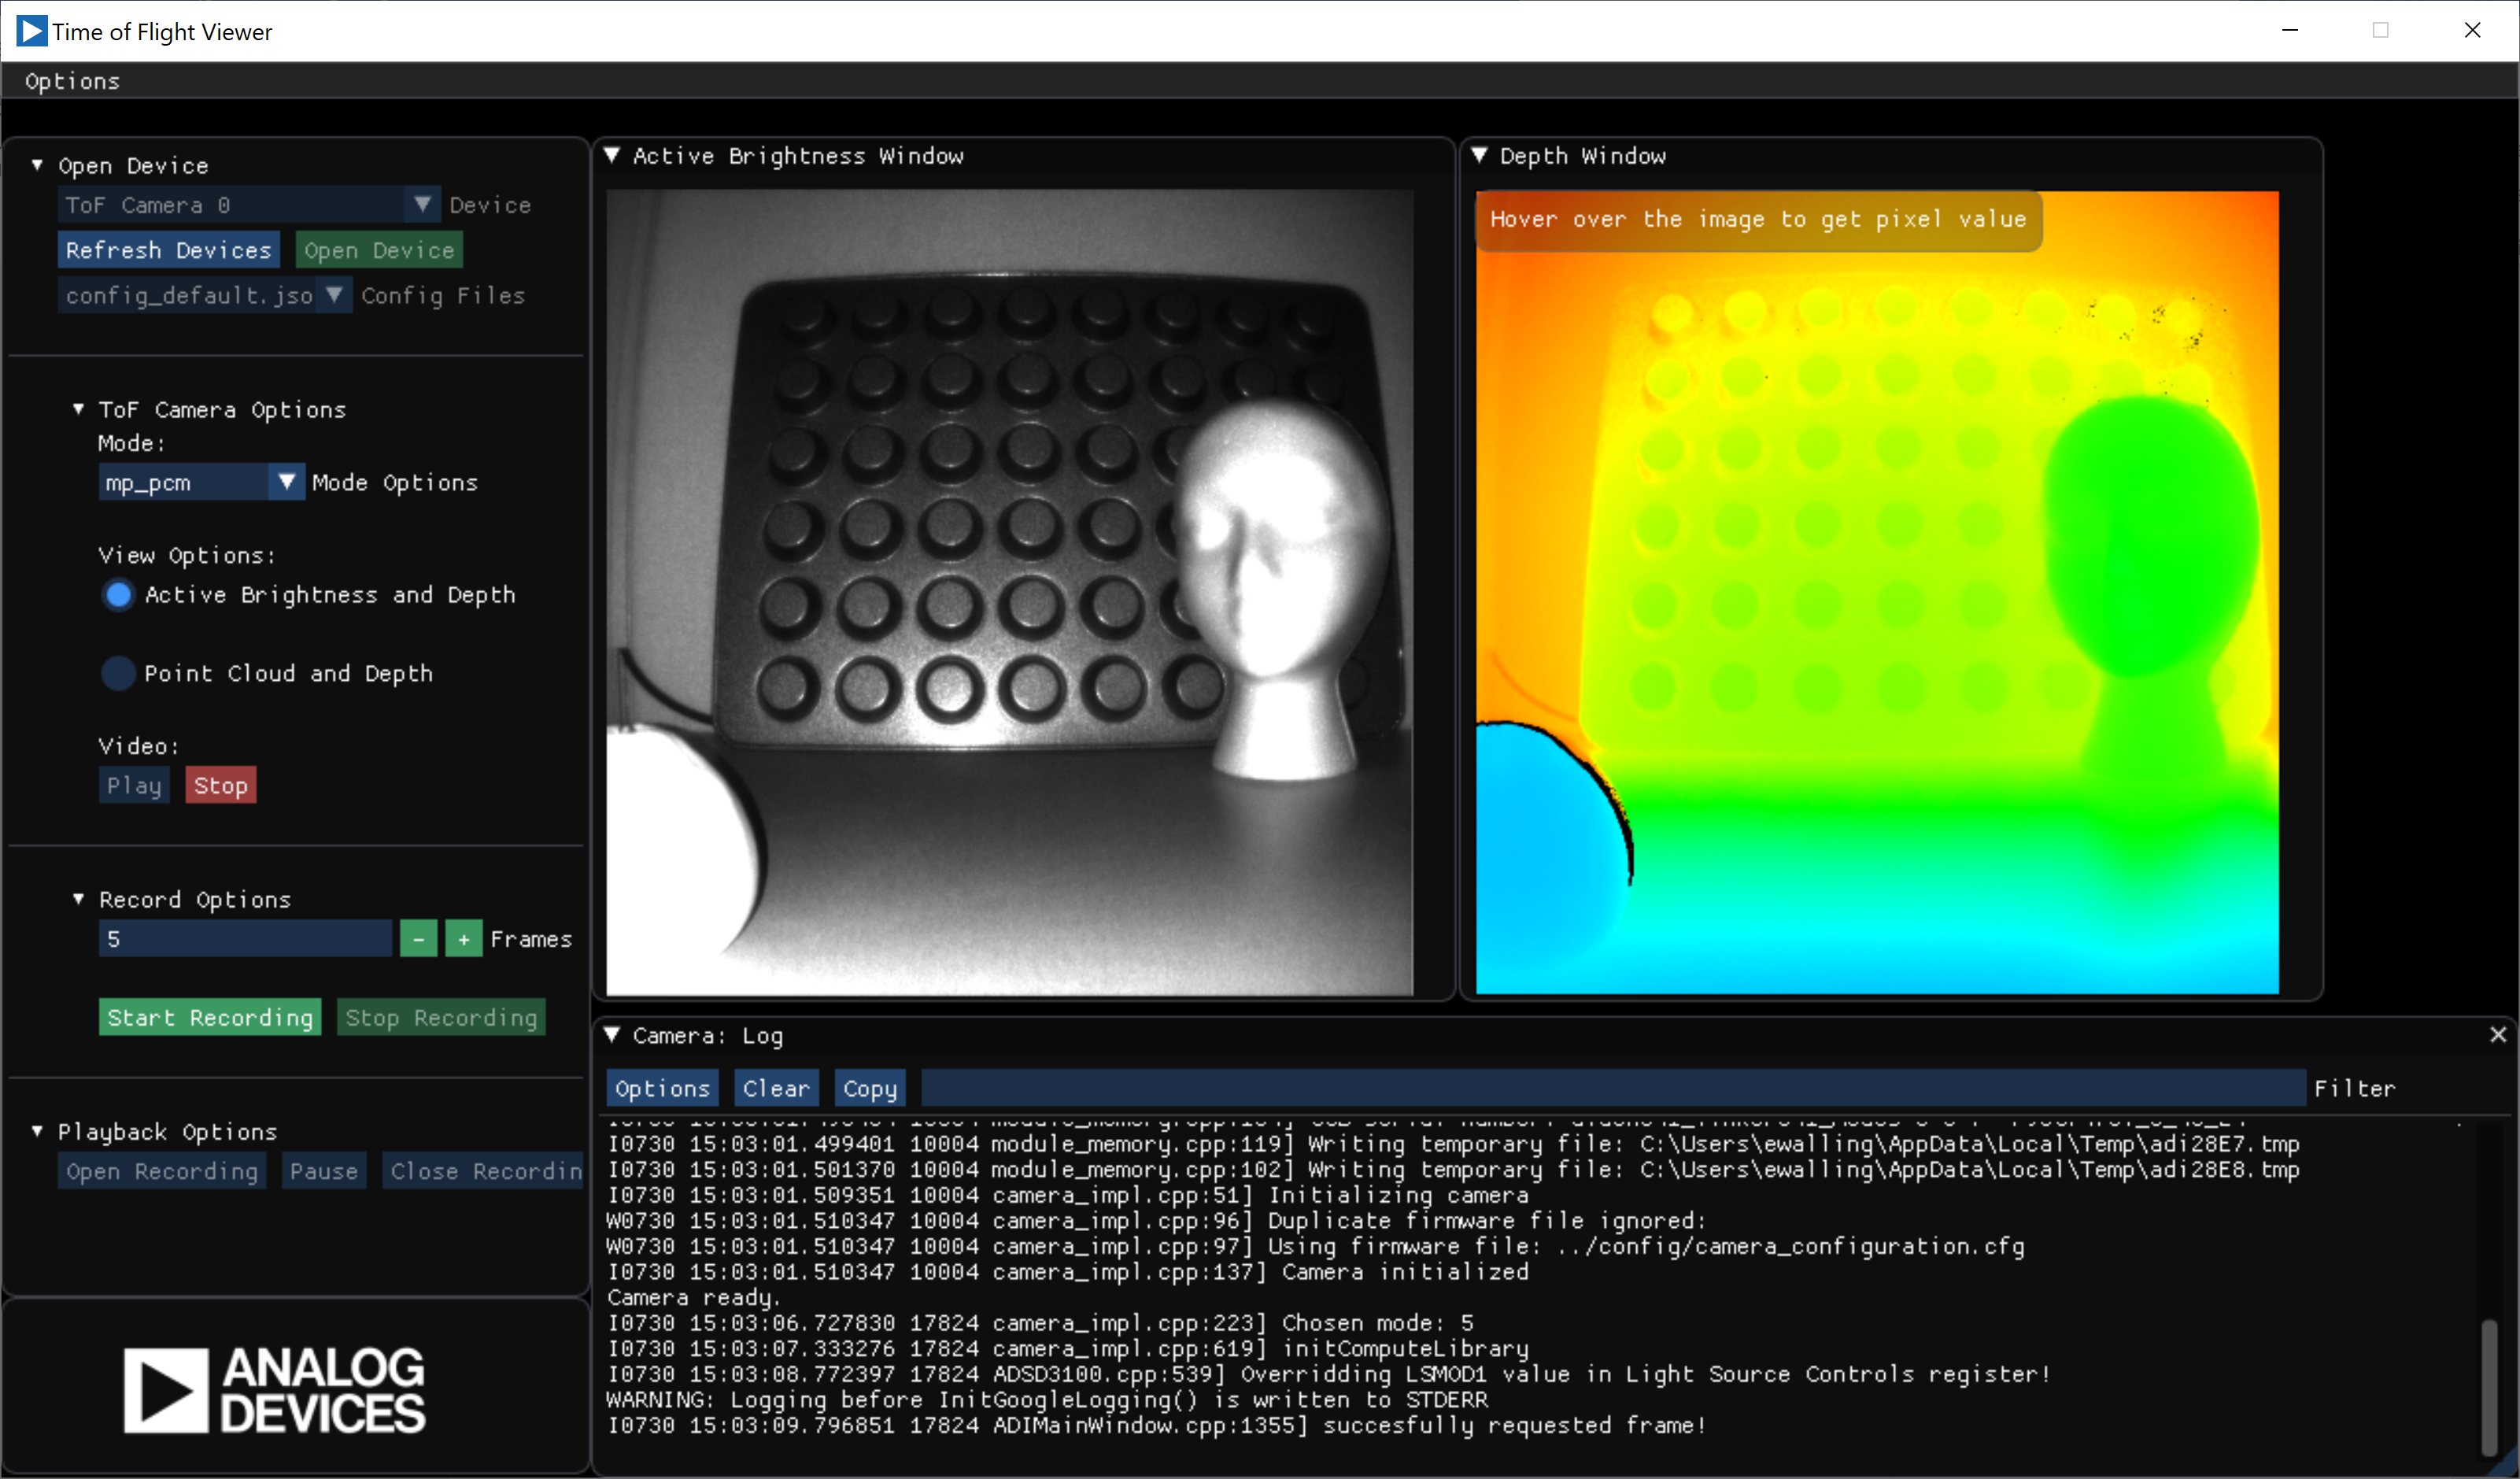
Mode Switching
To switch modes while the camera is running:
Click ‘Stop’
Select mode in drop down menu
Click ‘Play’
Point Cloud and Depth
To switch to Point Cloud view:
Click ‘Stop’
Select ‘Point Cloud and Depth’
Click ‘Play’
The first window shows a point-cloud generated from the depth on the second window.
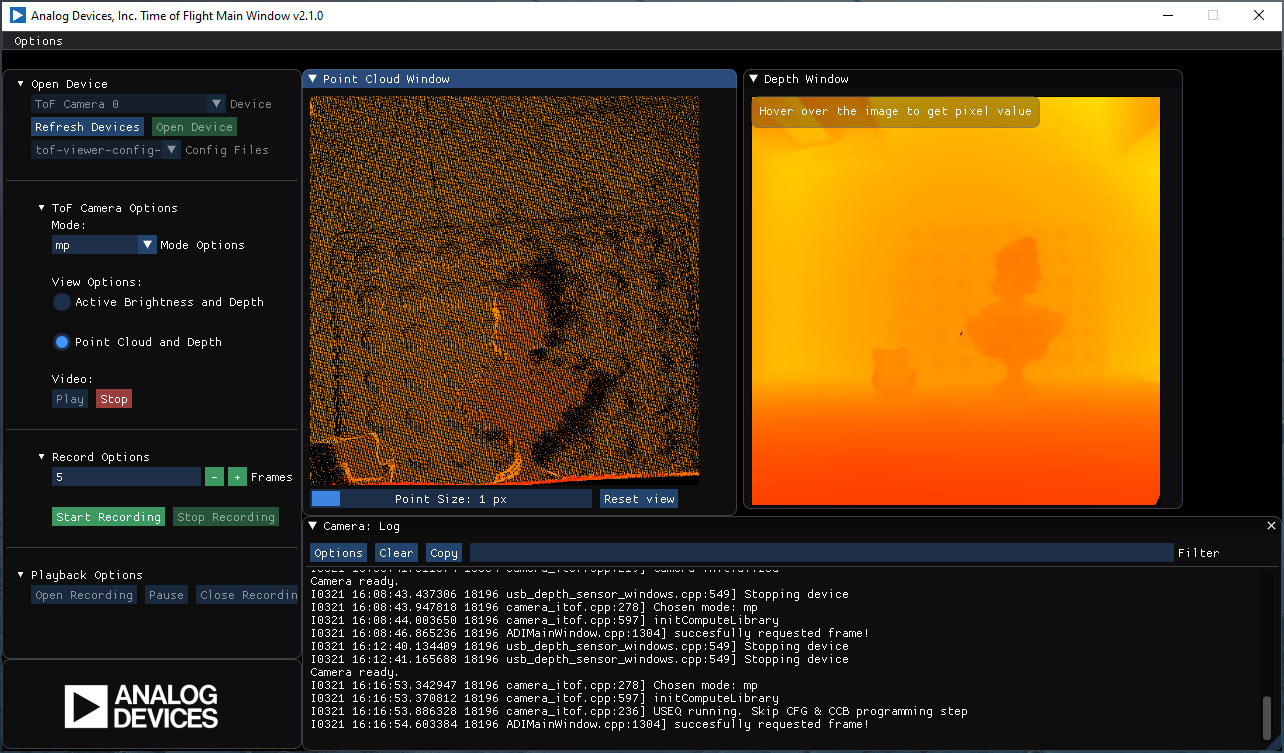
Point Cloud Controls:
Zoom In/Out - Use the mouse wheel
Pan - Drag the mouse while pressing the right mouse button
Rotate - Drag the mouse while pressing the left mouse button
Point Size - Use the slider at the bottom of the Point Cloud window
Reset View - Press the “Reset View” button
Recording
Important
Recording via the GUI is deprecated. Please use Data Collect CLI for recording data during evaluation.