Using EVAL-ADICUP360 with IAR and Keil IDEs
This page provides detailed information about using the EVAL-ADICUP360 board with other IDEs than Eclipse, such as IAR Embedded Workbench and Keil µVision. You can find here how to import, build and debug existing IAR/Keil project and how to create your own projects for ADuCM360.
Note
Our intent is to keep the same structure as for Eclipse project so the user does not have to do more than IDE specific configuration.
This page will outline:
How to import and run an existing project
How to create a new project for ADuCM360
Important
Before using below steps check your IAR and Keil software package version. If you want to use CMSIS-DAP interface you need to use the latest versions that have support for CMSIS-DAP Debugger.
How to import and run an existing project
You can find the already created IAR and Keil projects on the EVAL-ADICUP360 Git repository, together with Eclipse project. Further it will be used as example the ADuCM360_demo_blink projects. Please use the link below to download the package:
Download
Inside of the ADuCM360_demo_blink folder find ADuCM360_demo_blink.eww for IAR and ADuCM360_demo_blink.uvprojx for Keil.
Run an existing IAR project
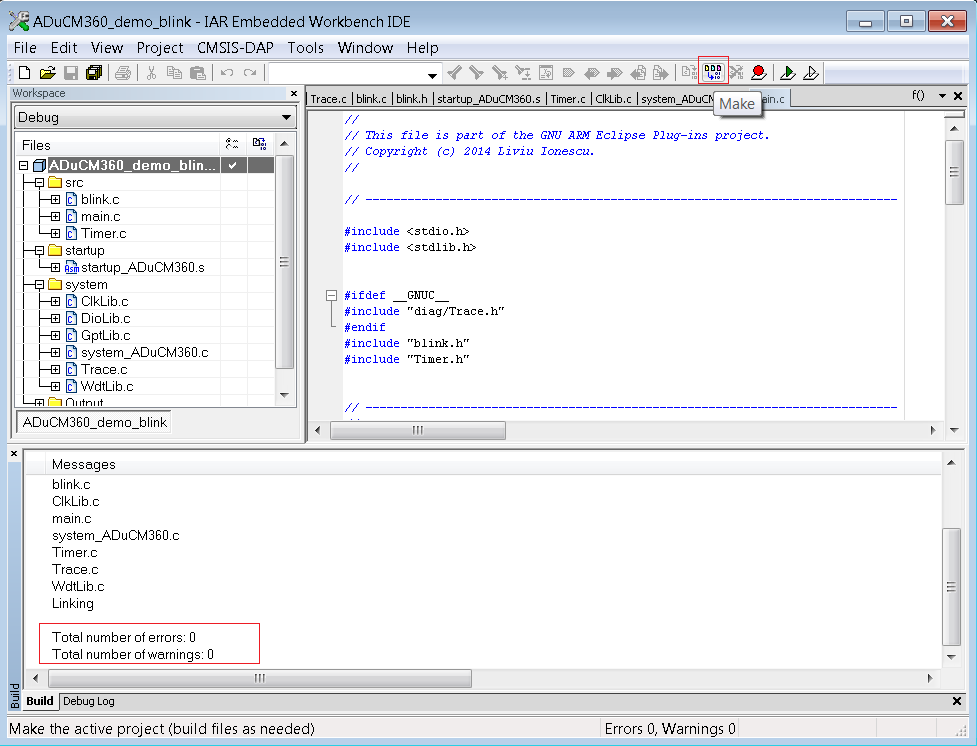
Open ADuCM360_demo_blink.eww project and press Make button:
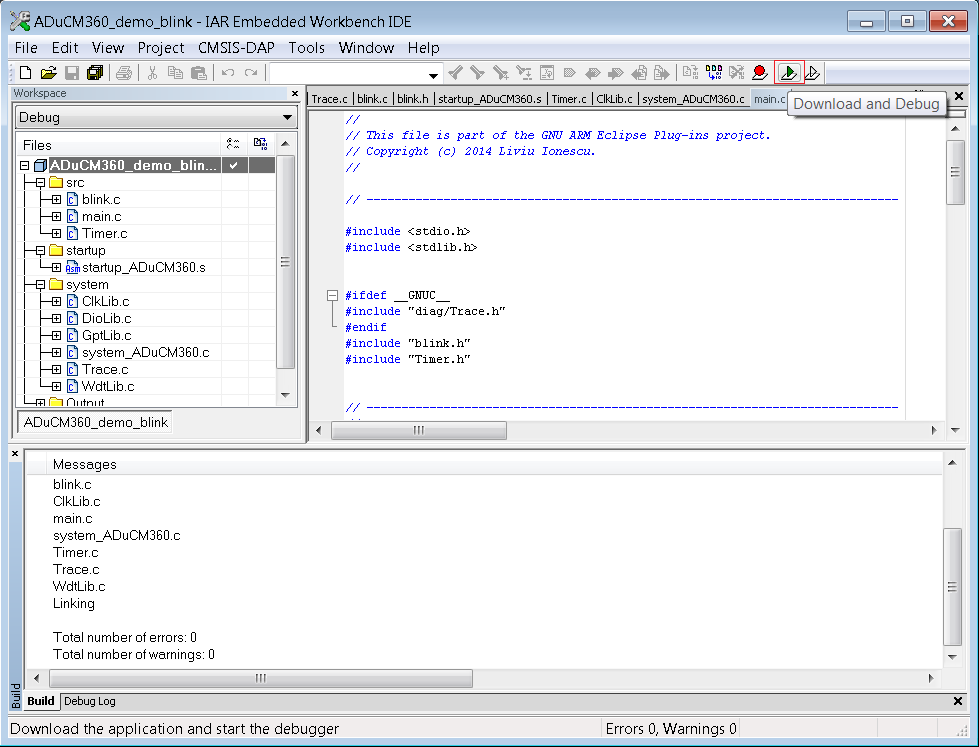
Connect EVAL-ADICUP360 via DEBUG USB and press Download and Debug button:
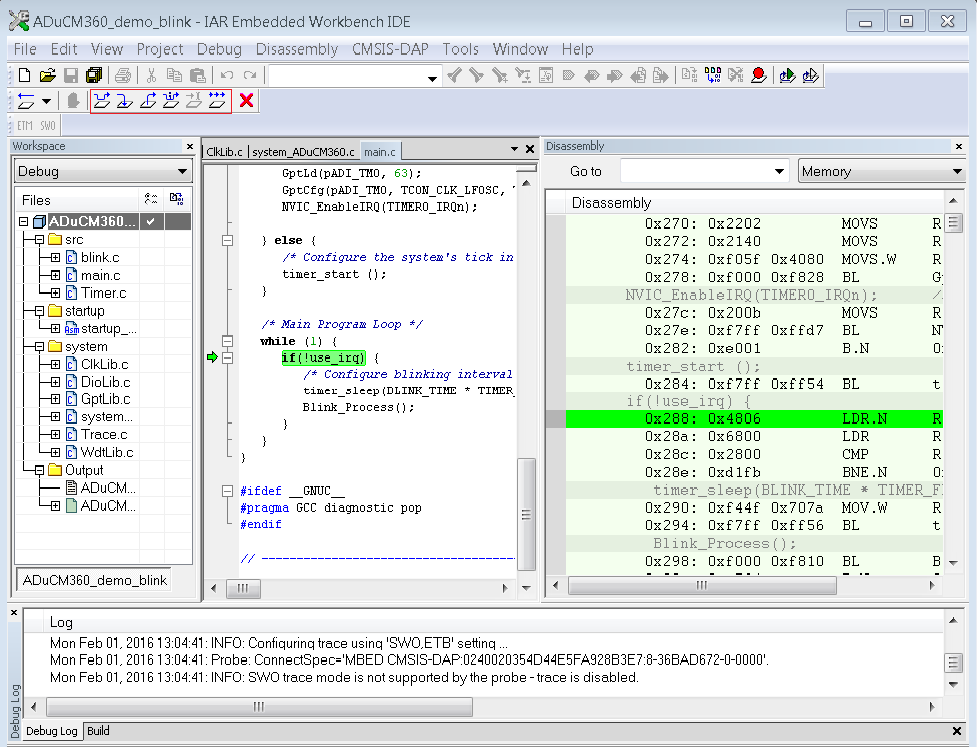
A Debug session will open. You can run the program or can debug step by step:
Run an existing Keil project
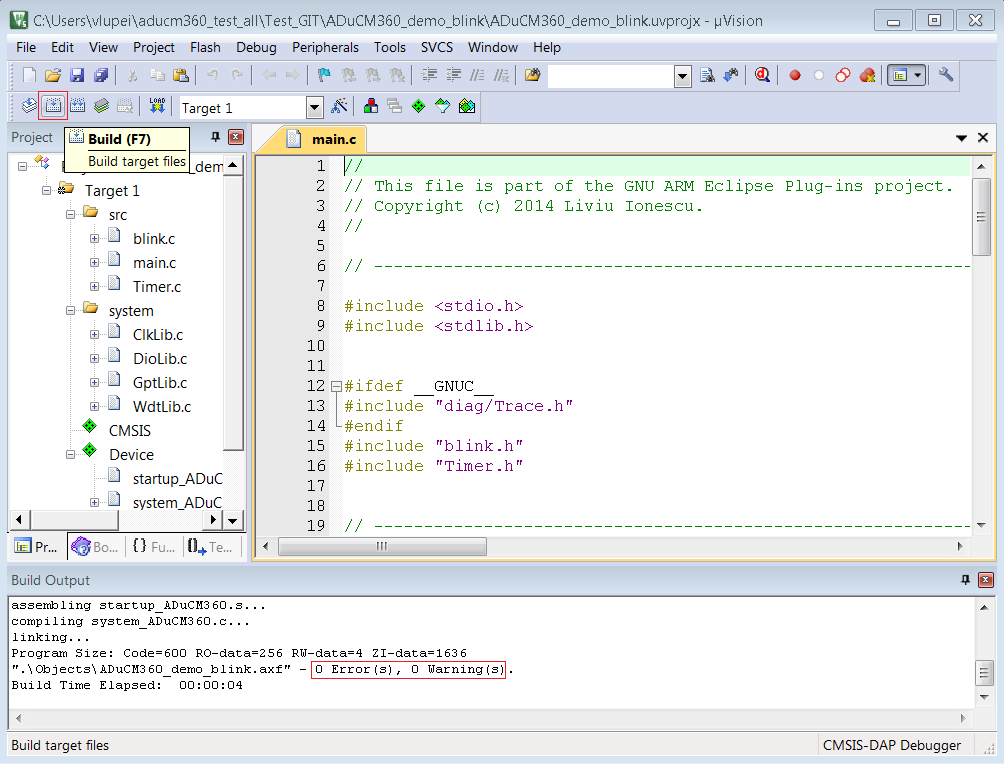
Open ADuCM360_demo_blink.uvprojx project and press Build button:
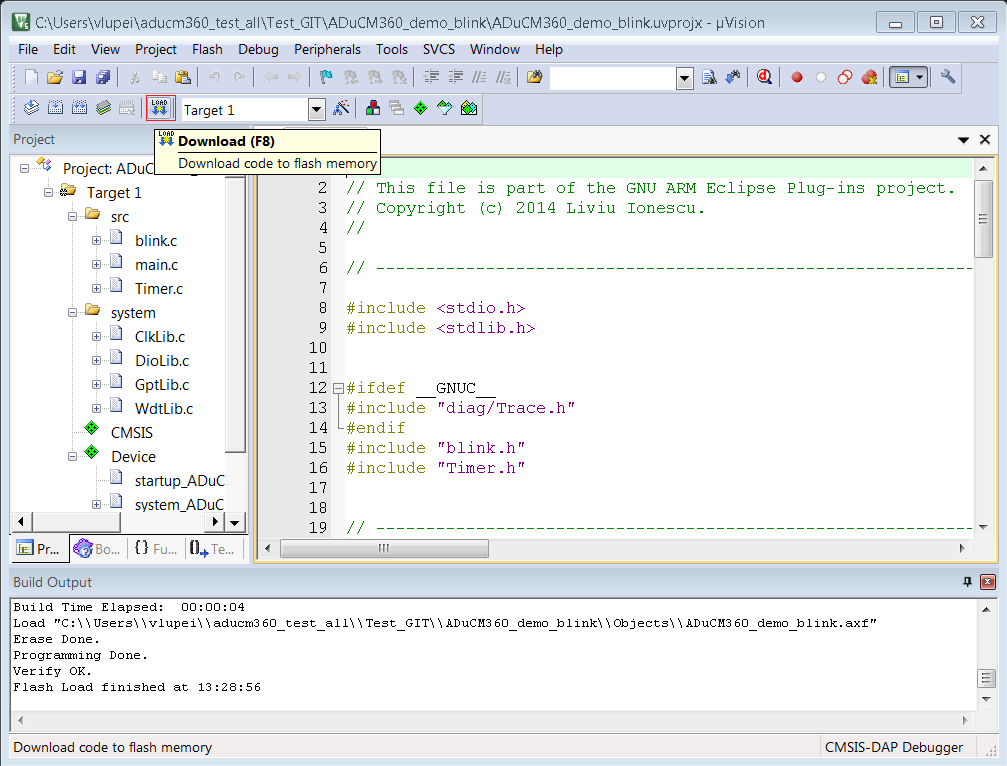
Connect EVAL-ADICUP360 via DEBUG USB and press Download button:
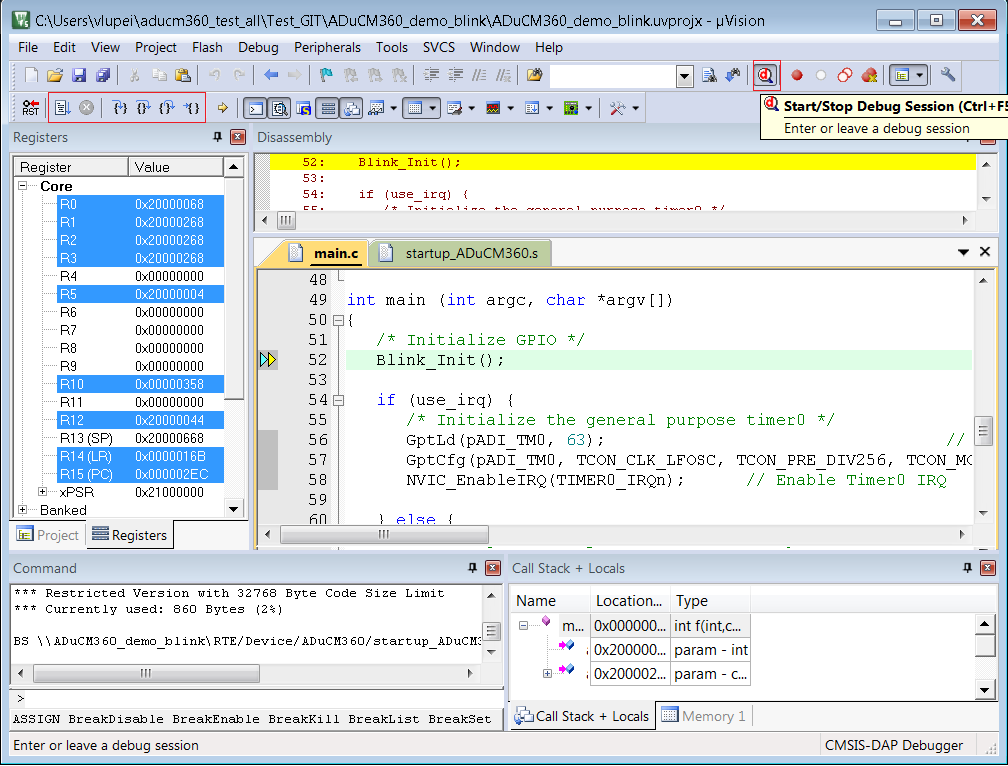
A Debug session will open. You can run the program or can debug step by step:
How to create a new project for ADuCM360
Both IDEs offer support for ADuCM360 microcontroller which make it very easy to use them with EVAL-ADICUP360 board. In this chapter will be presented basic setup how to create a new ADuCM360 project. The build, download and debug steps were already explained above.
Create IAR new project
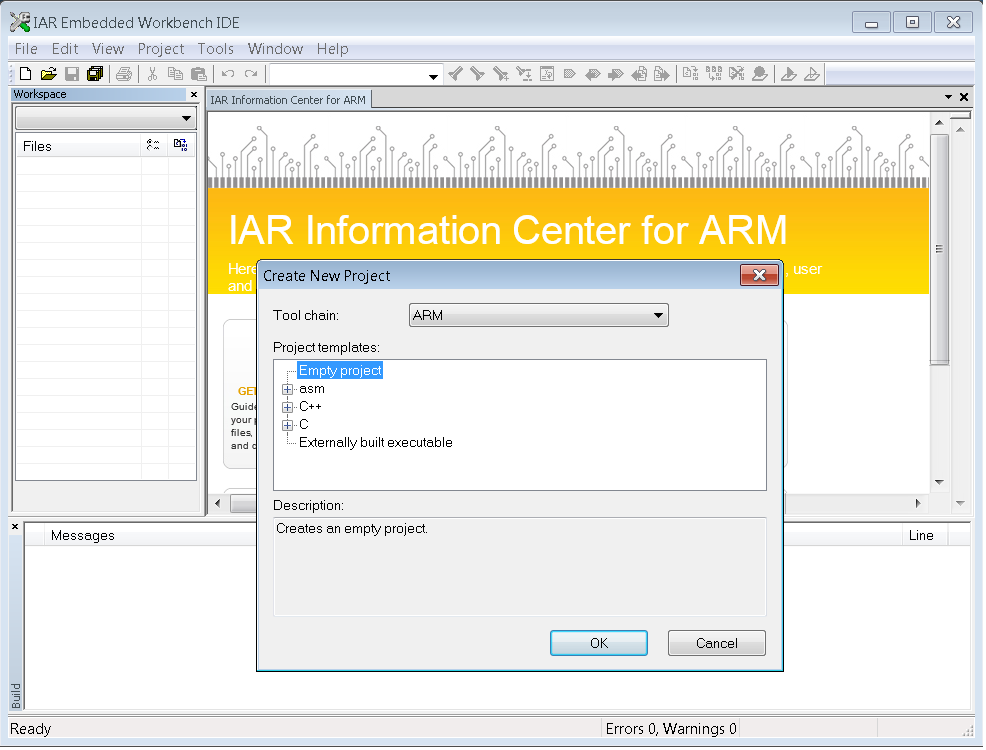
Open IAR Embedded Workbench, go to Project tab and select Create New Project -> select an Empty project as Project Template -> press OK and save the project on your drive:
Select project in left window -> Project and select Add Group - to create project folders and for each folder create new files (File -> New -> File) or you can add files (Project -> Add files):
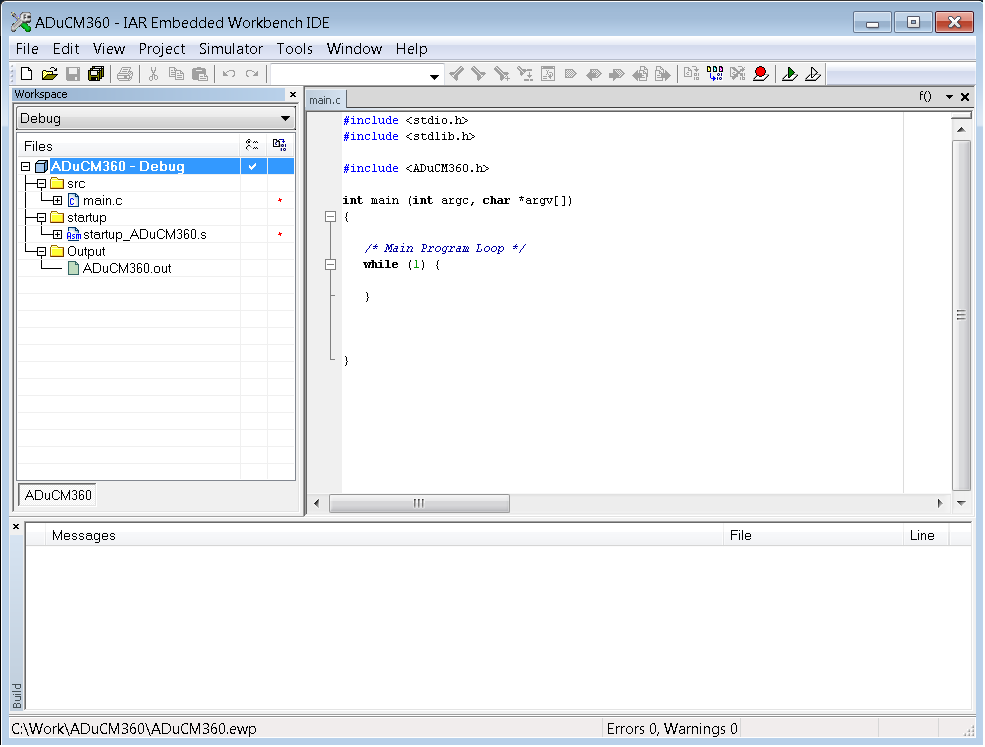
Note
You need to have a startup code for ADuCM360 microcontroller. Write your own or just use the startup_ADuCM360.s file that we provide (How to import and run an existing project).
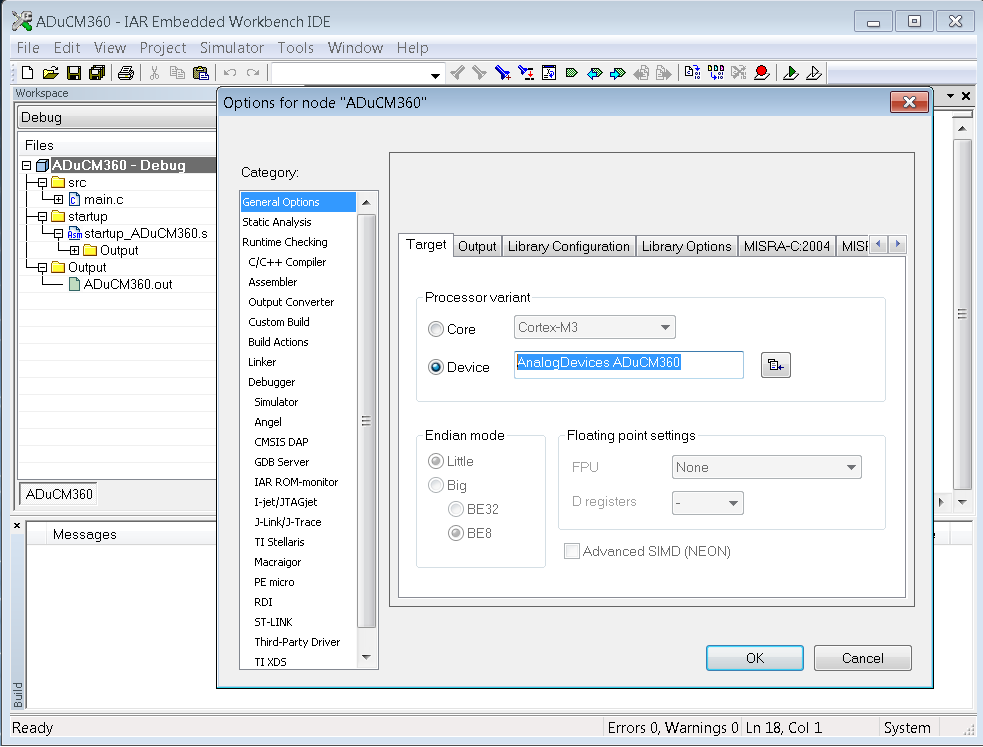
Select project in the left window -> Project -> Options:
General Options ->Target tab -> select Device -> AnalogDevices ADuCM360
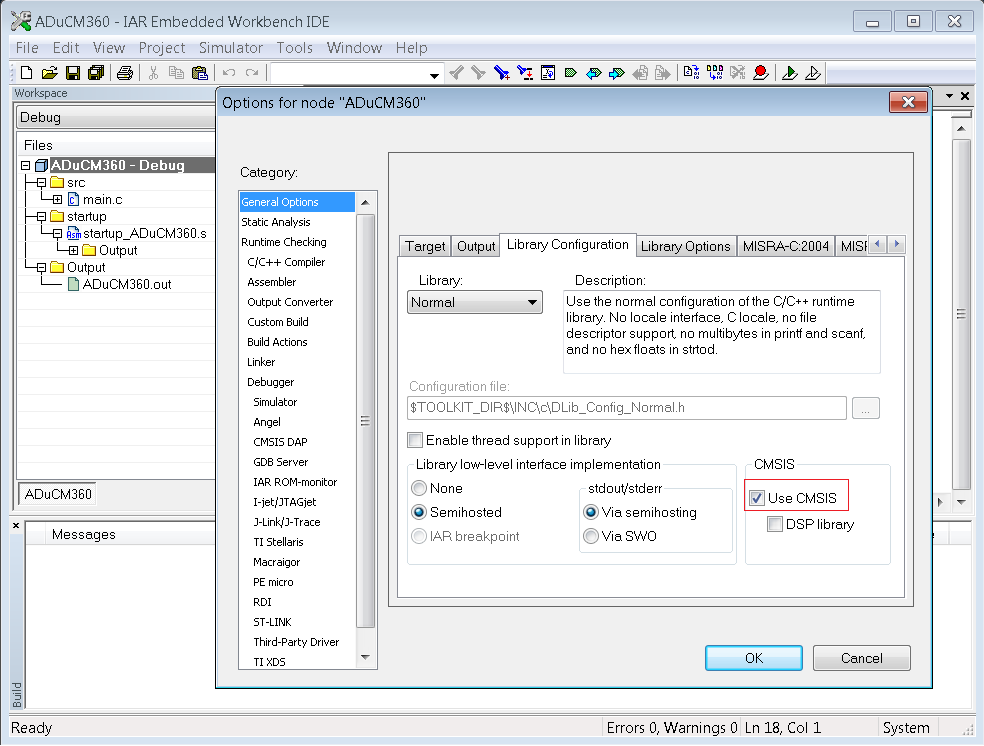
General Options -> Library Configuration tab -> check Use CMSIS
C/C++ Compiler -> Preprocessor tab -> Additional include directories - add path for all include files that will be used in the project:
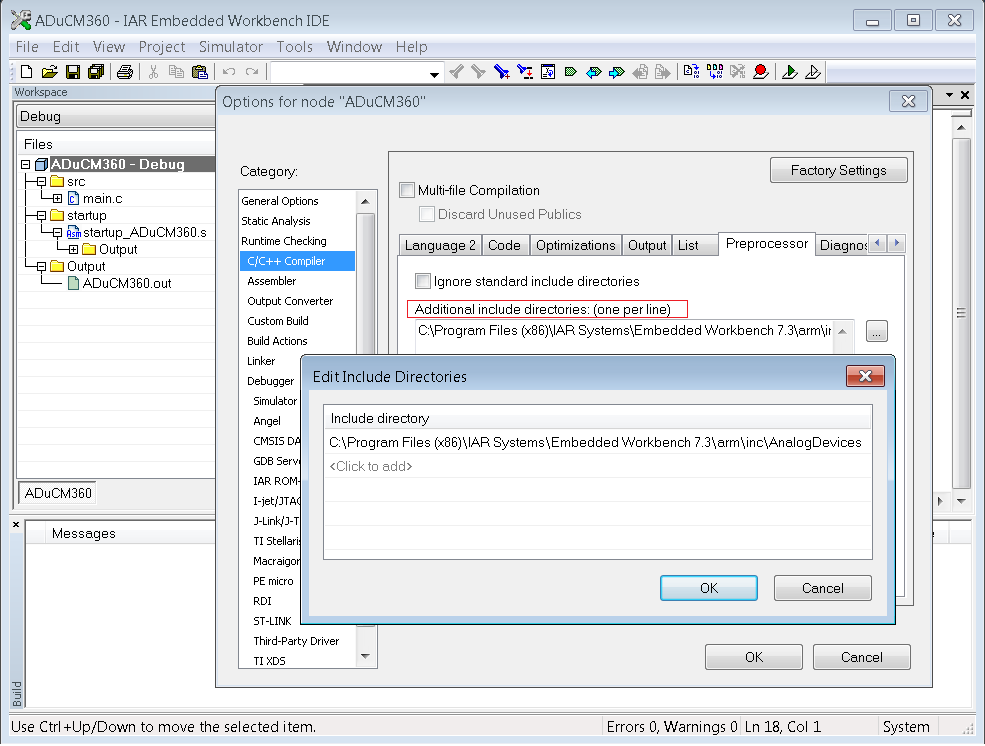
Note
For debugger configuration you can select: CMSIS-DAP or J-Link interface (depending on your hardware possibilities).
Debugger -> Setup tab -> Driver -> CMSIS DAP:
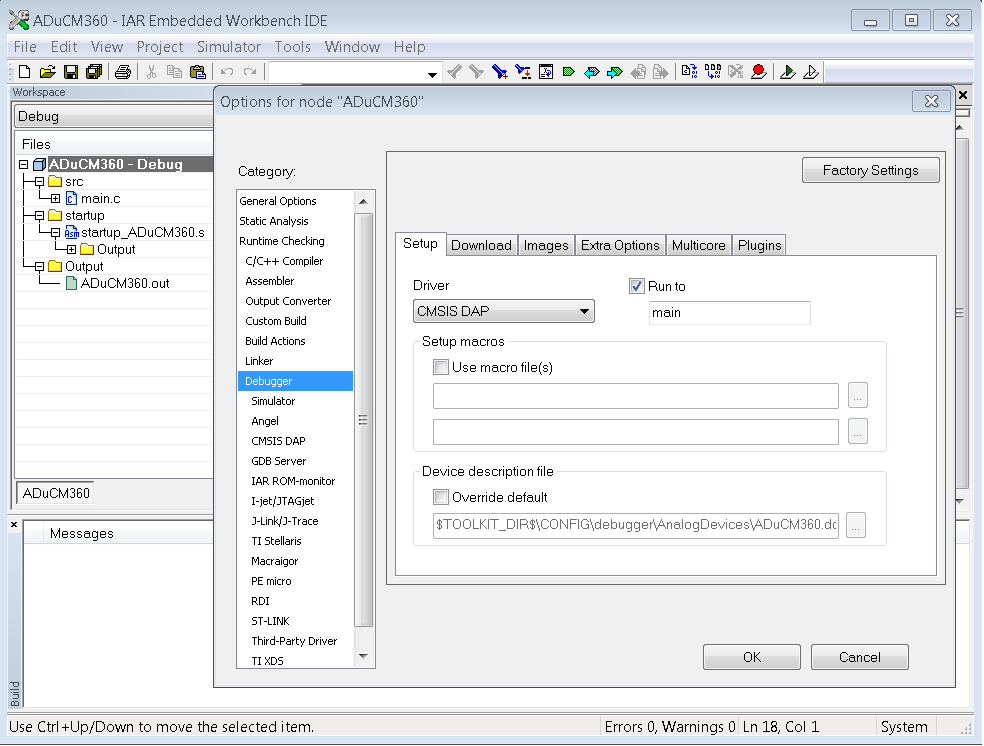
Note
You can use CMSIS-DAP interface with default settings and only connecting an USB cable to ADICUP360 board using DEBUG USB.
Debugger -> Setup tab -> Driver -> J-Link/J-Trace:
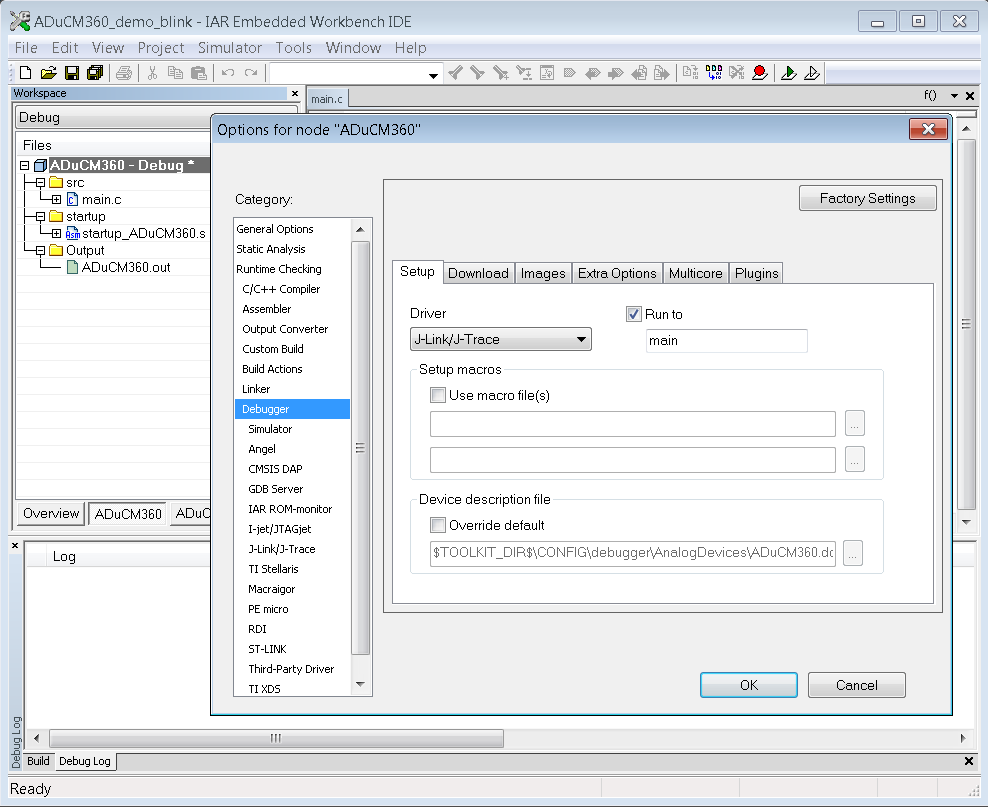
Note
You can use J-Link interface with default settings and with J-Link adapter connected to ADICUP360 board using P16 connector.
Debugger -> Download tab -> check Use flash loader(s):
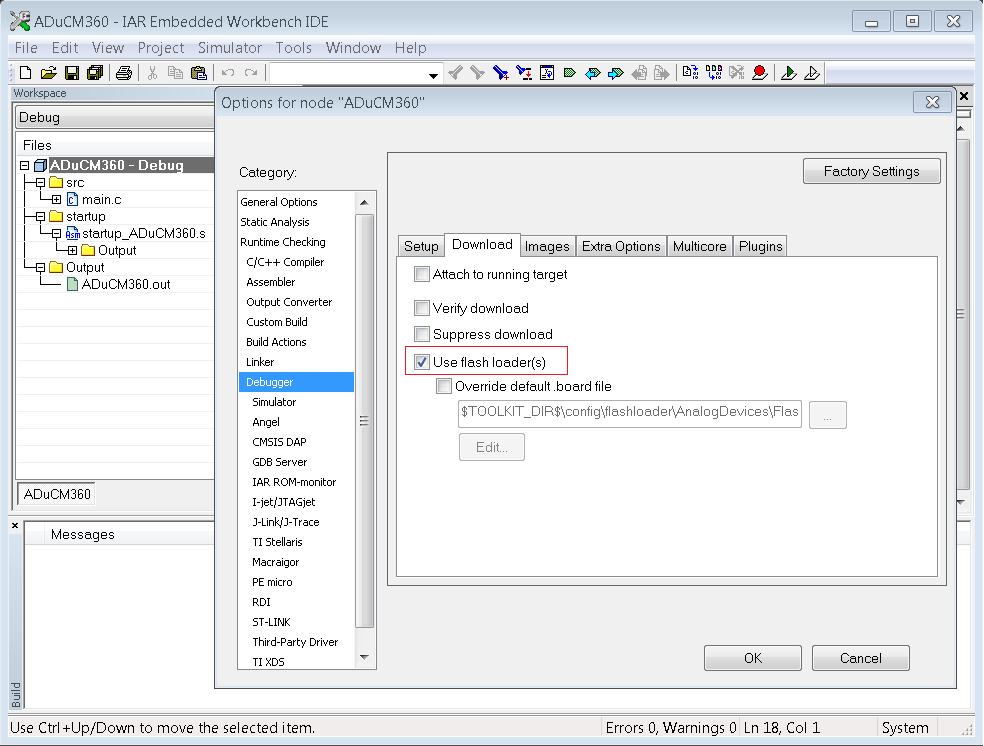
Create Keil new project
Open Keil µVision, go to Project tab and select New µVision Project -> give a name -> select in the Device window -> ADuCM360 -> press OK:
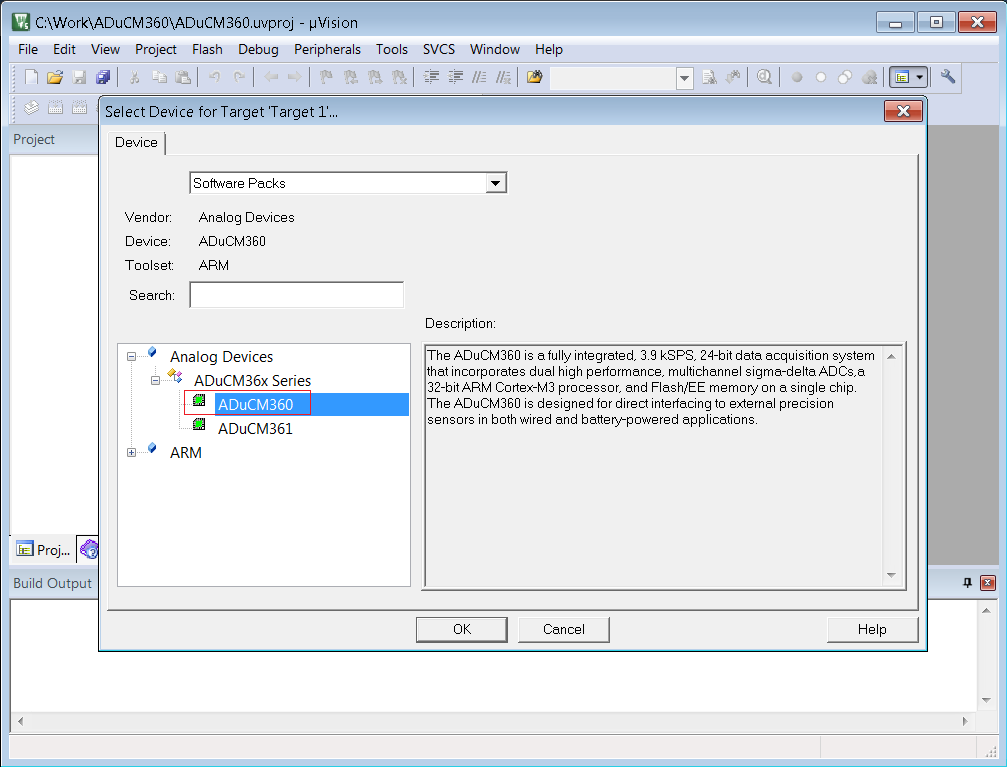
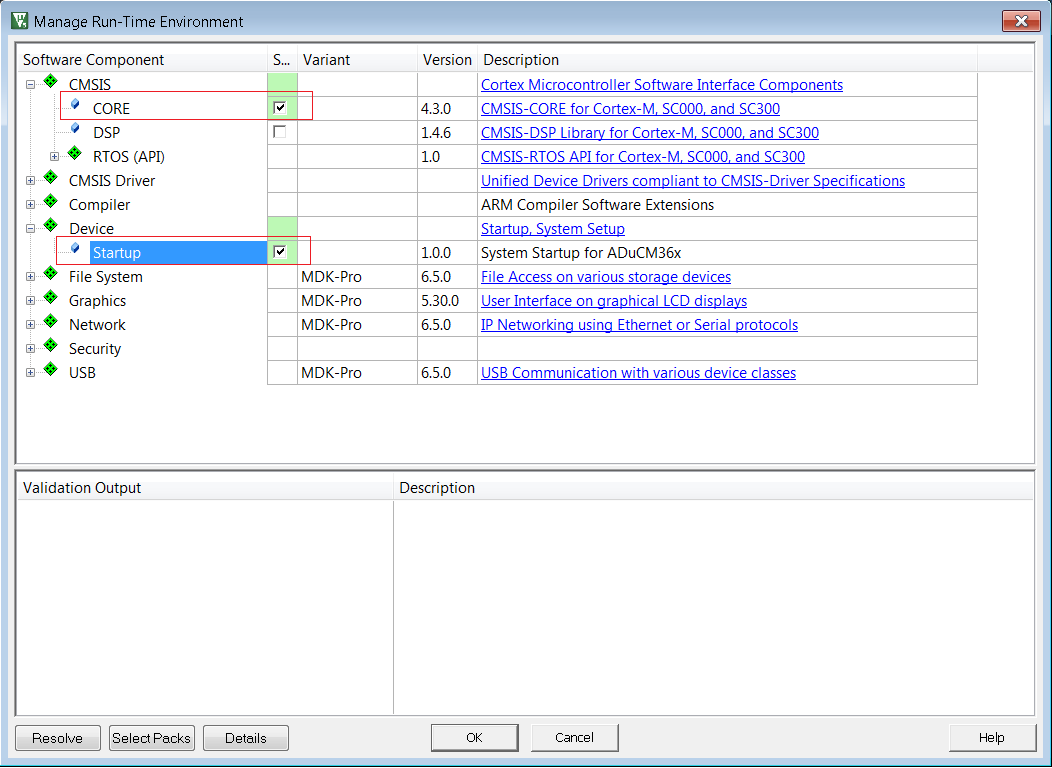
In the pop-up window check under CMSIS -> CORE and under Device -> Startup:
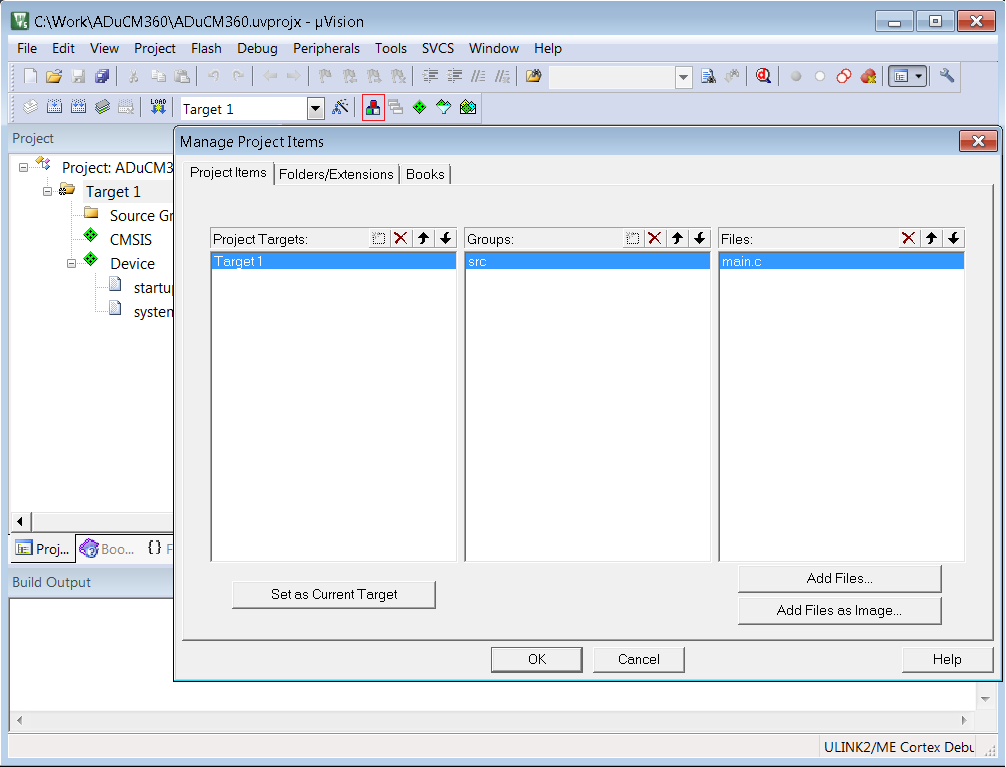
Select Target 1 -> go to Manage Project Items button and add your project folders and necessary files:
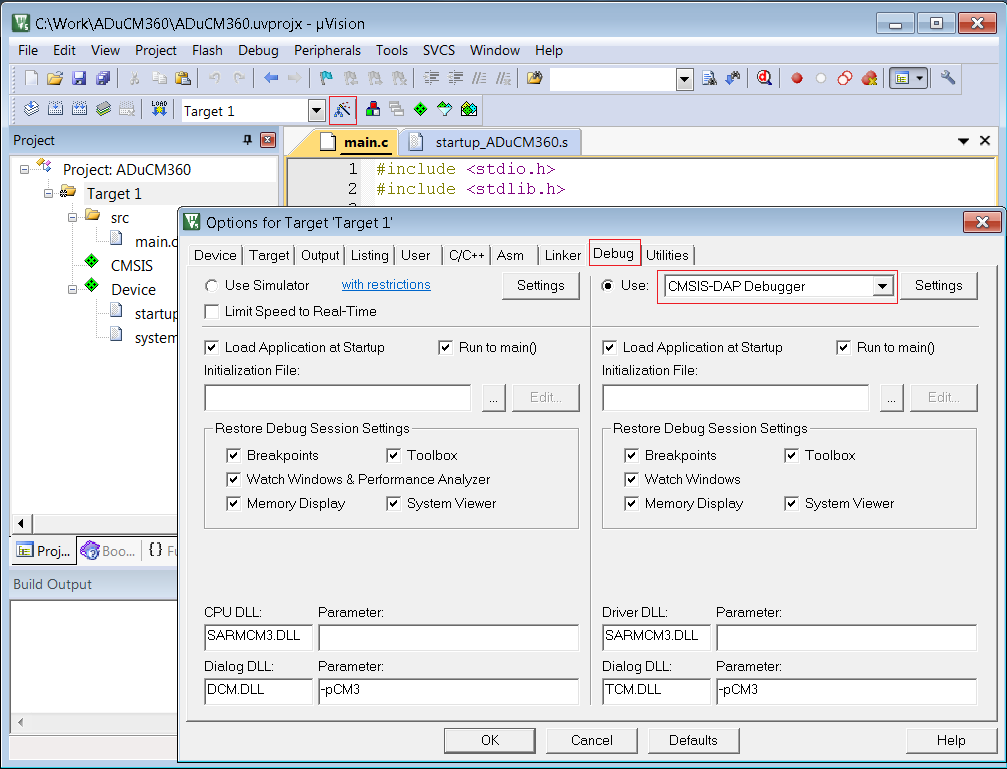
Select Target 1 -> go to Options button -> Debug tab -> select CMSIS-DAP Debugger: