Startup Guide
This guide will help you get started with the EVAL-ADSD3100-NXZ evaluation kit.
Kit Contents
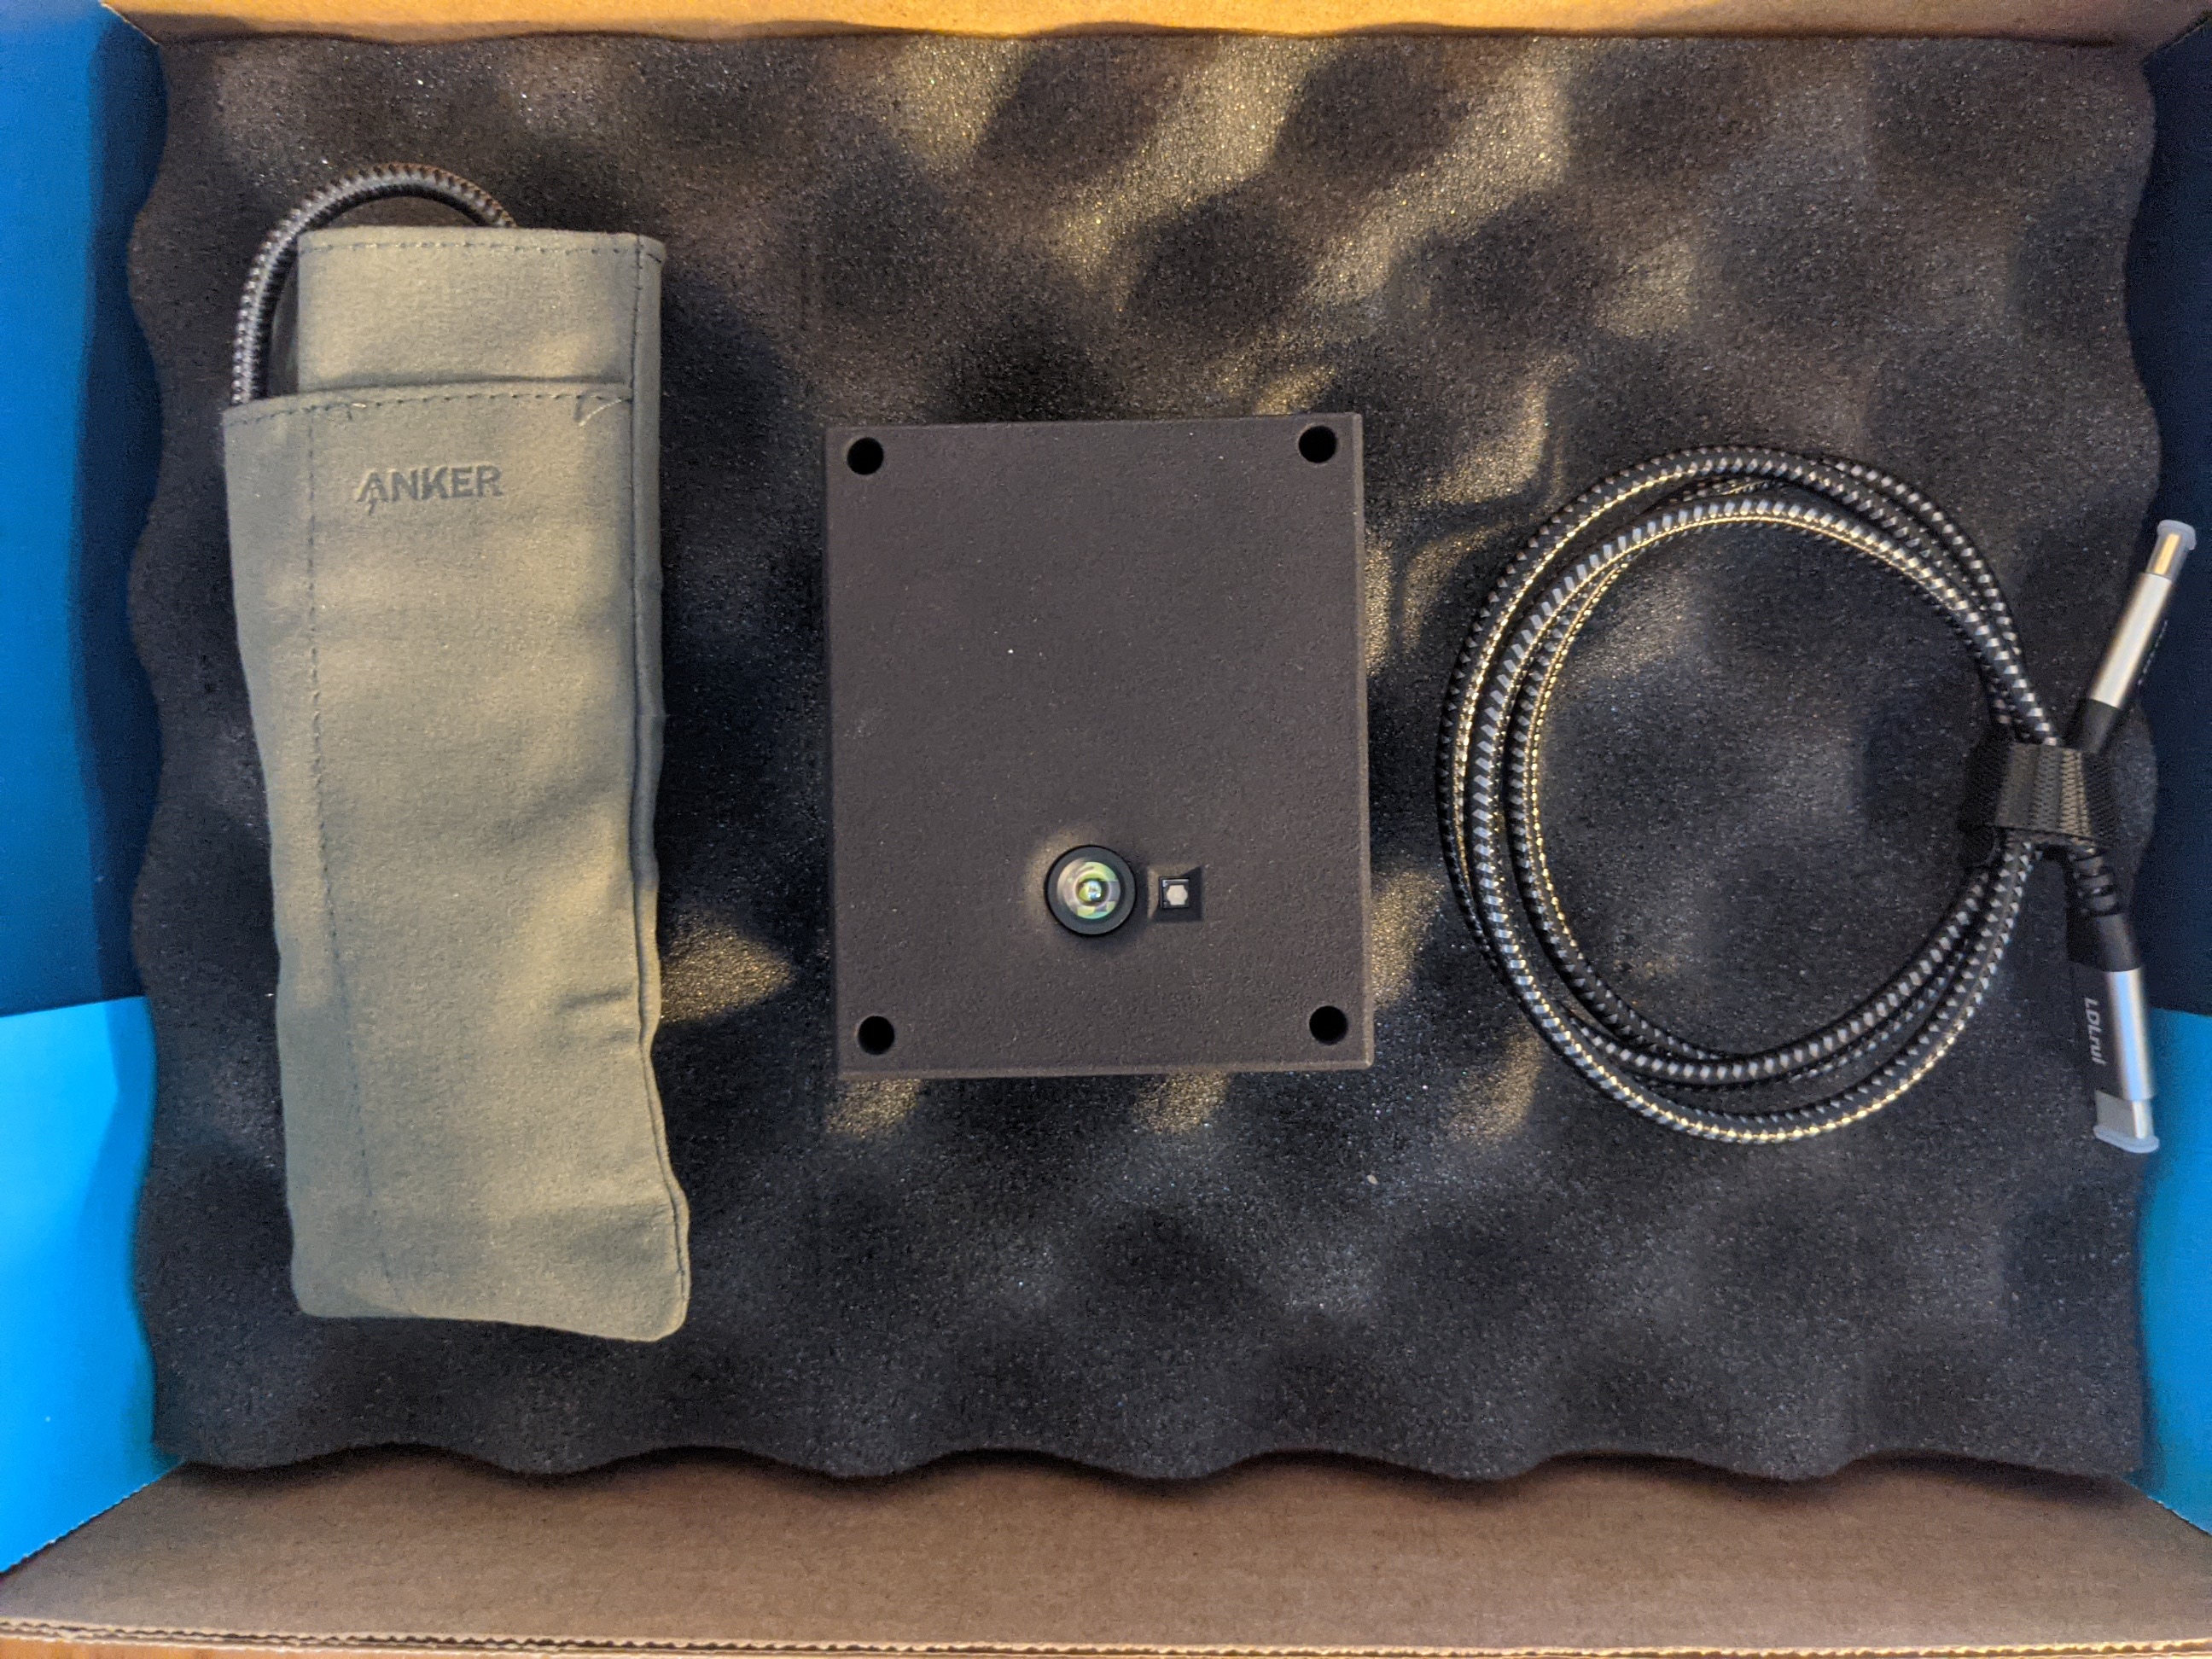
The package includes:
ADSD3100-NXZ Evaluation Module
ADSD3100 Imager Module
i.MX8 M Plus SOM (SolidRun)
Camera Interface Board
16GB flashed microSD card (Inserted in module SD card slot)
Anker USB Hub
USB-C to USB-C cable (Supports PD 2.0, and USB 3.1)
Software Download
Before starting, download and install the software package. See the Software Installation Guide for detailed instructions.
Startup Instructions
Follow these steps to get the camera up and running:
Install the software package
Remove camera from packaging
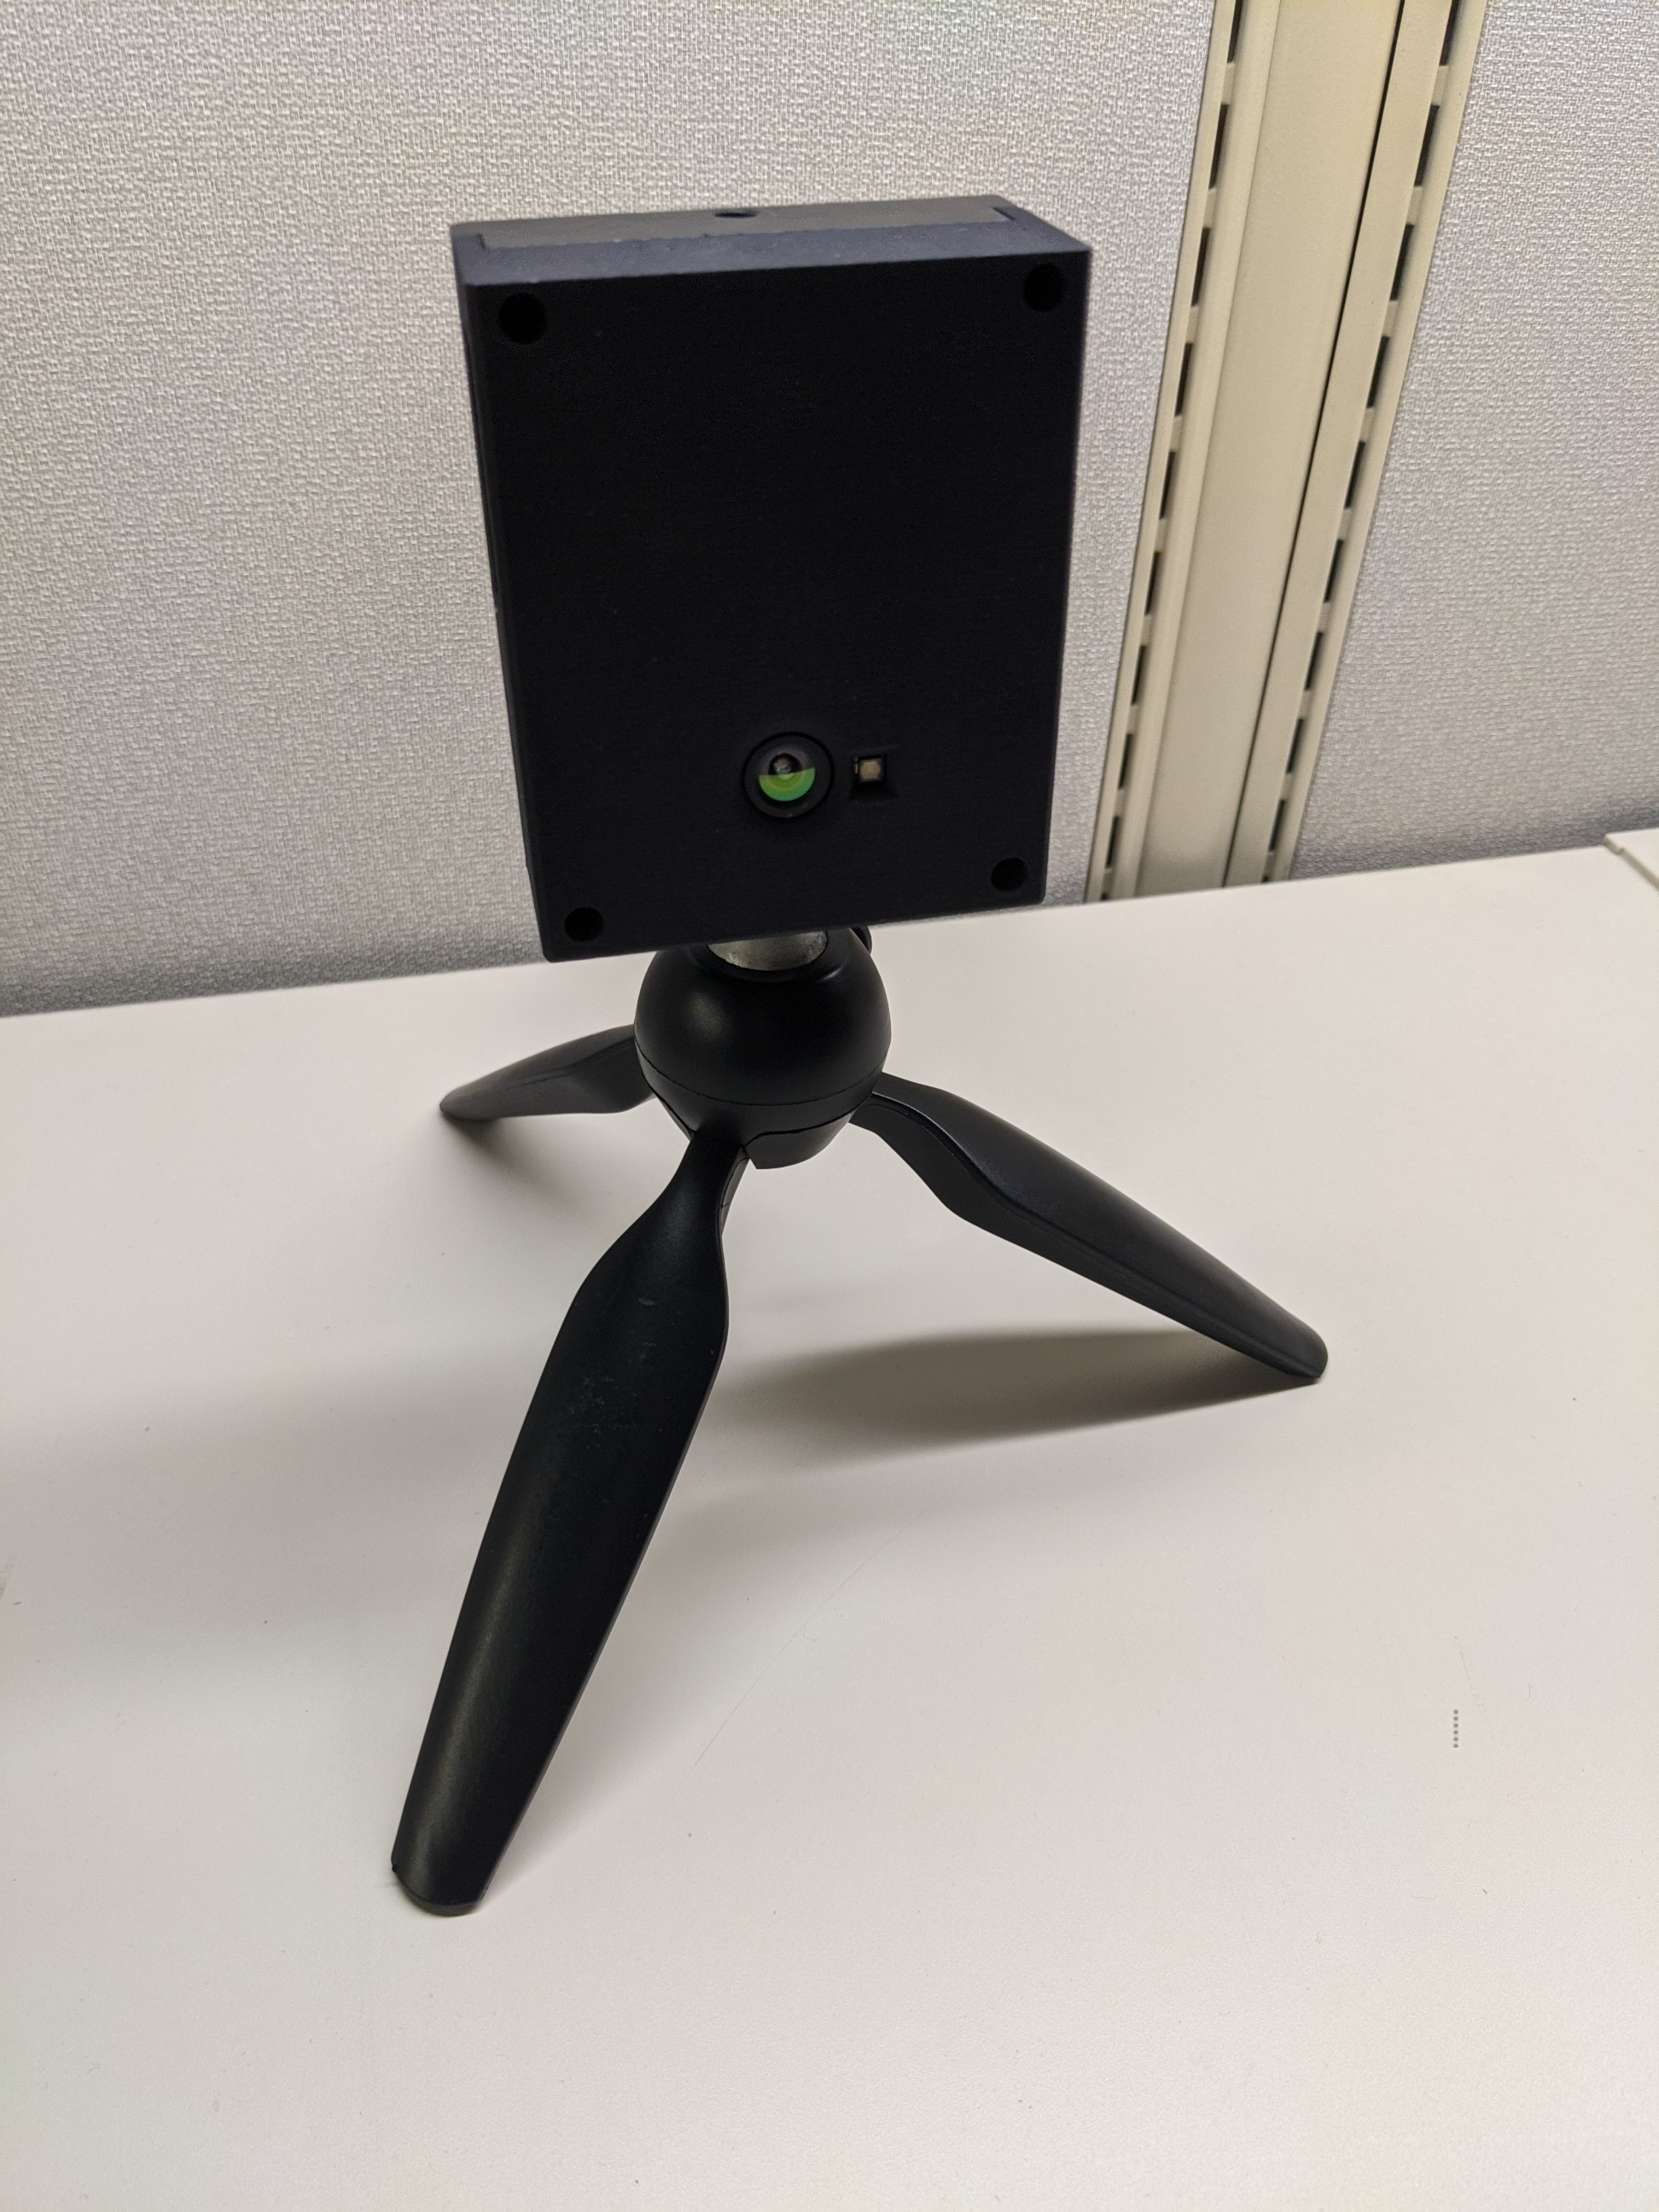
Mount camera. Orientation shown in image below
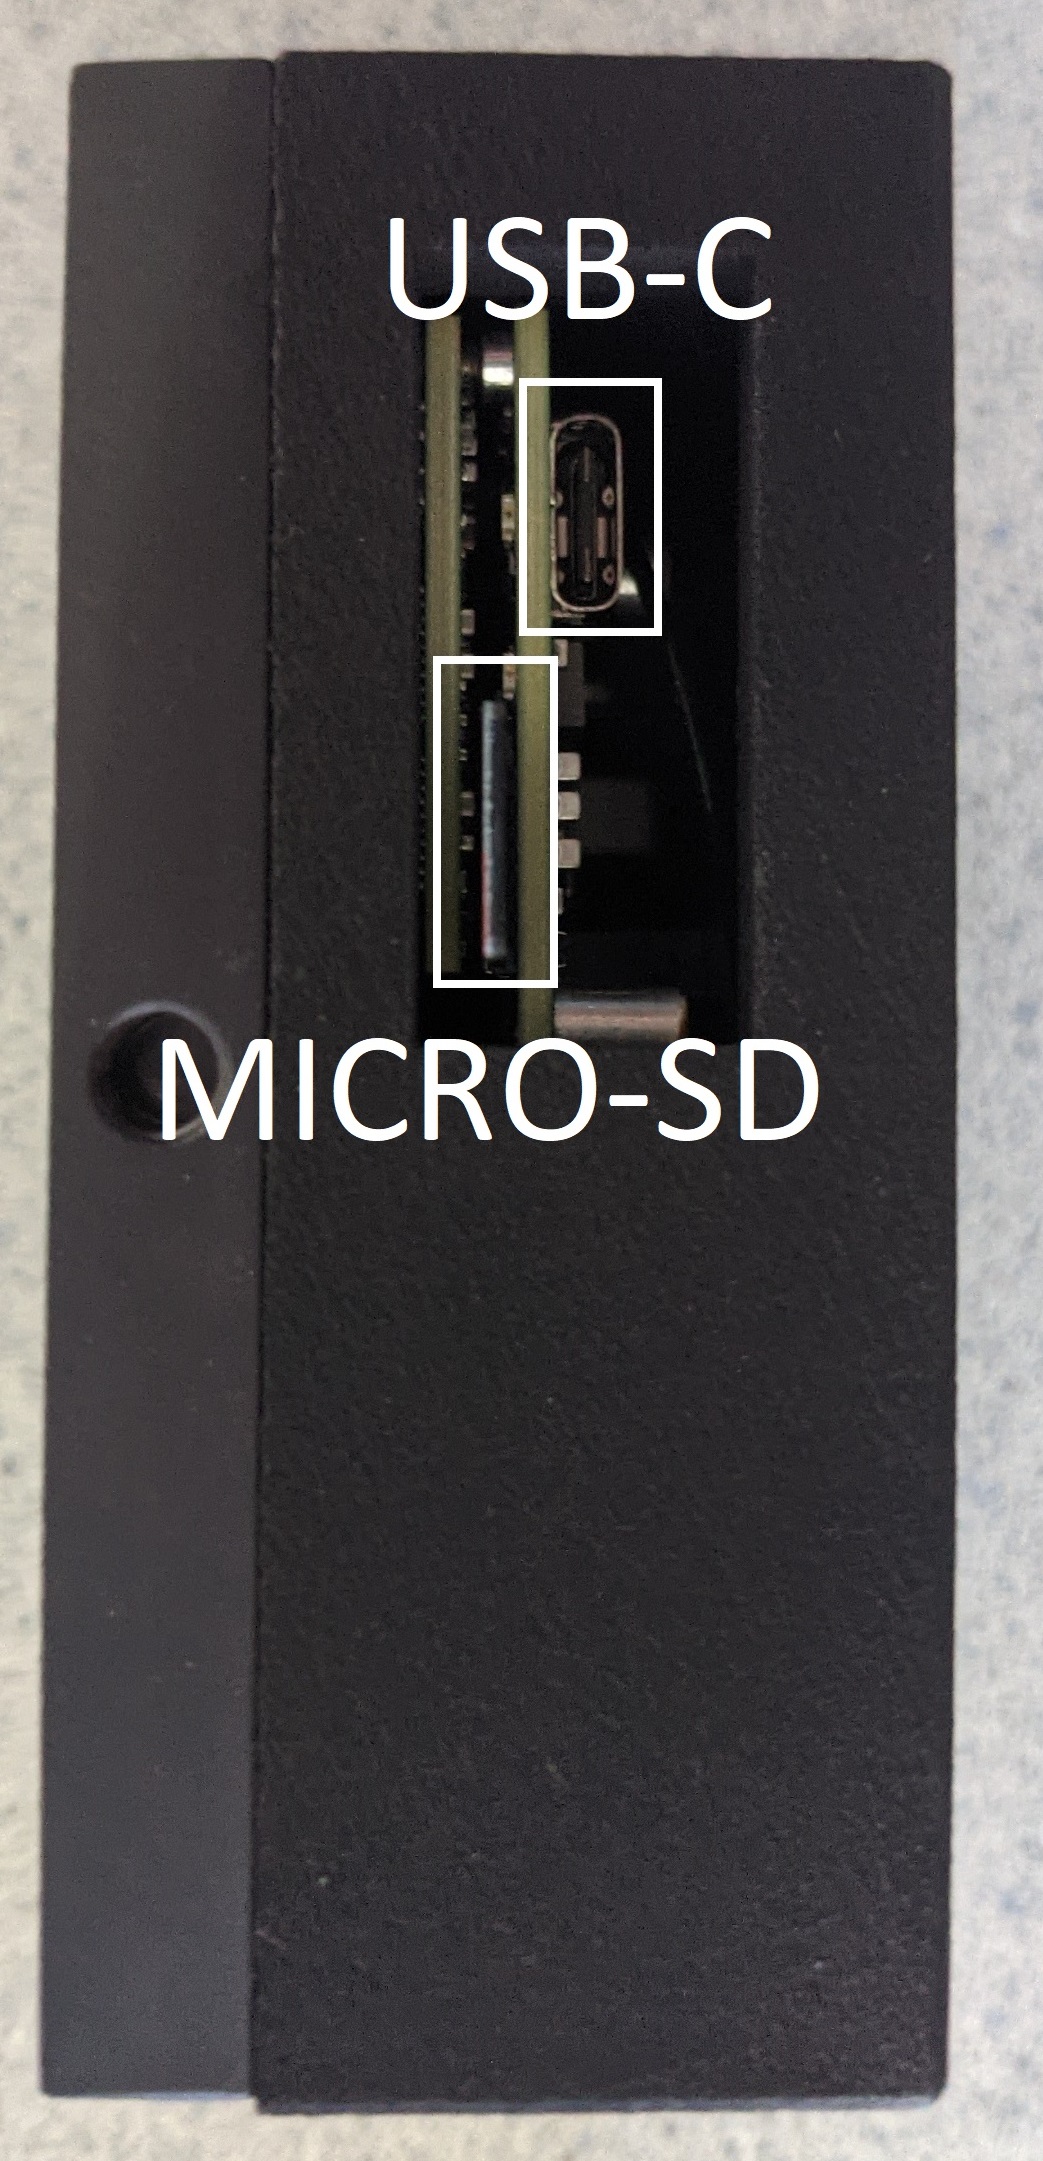
Connect USB-C cable to module
Connect to laptop
Wait for green light under the USB-C connector on the module to light up
Run the GUI
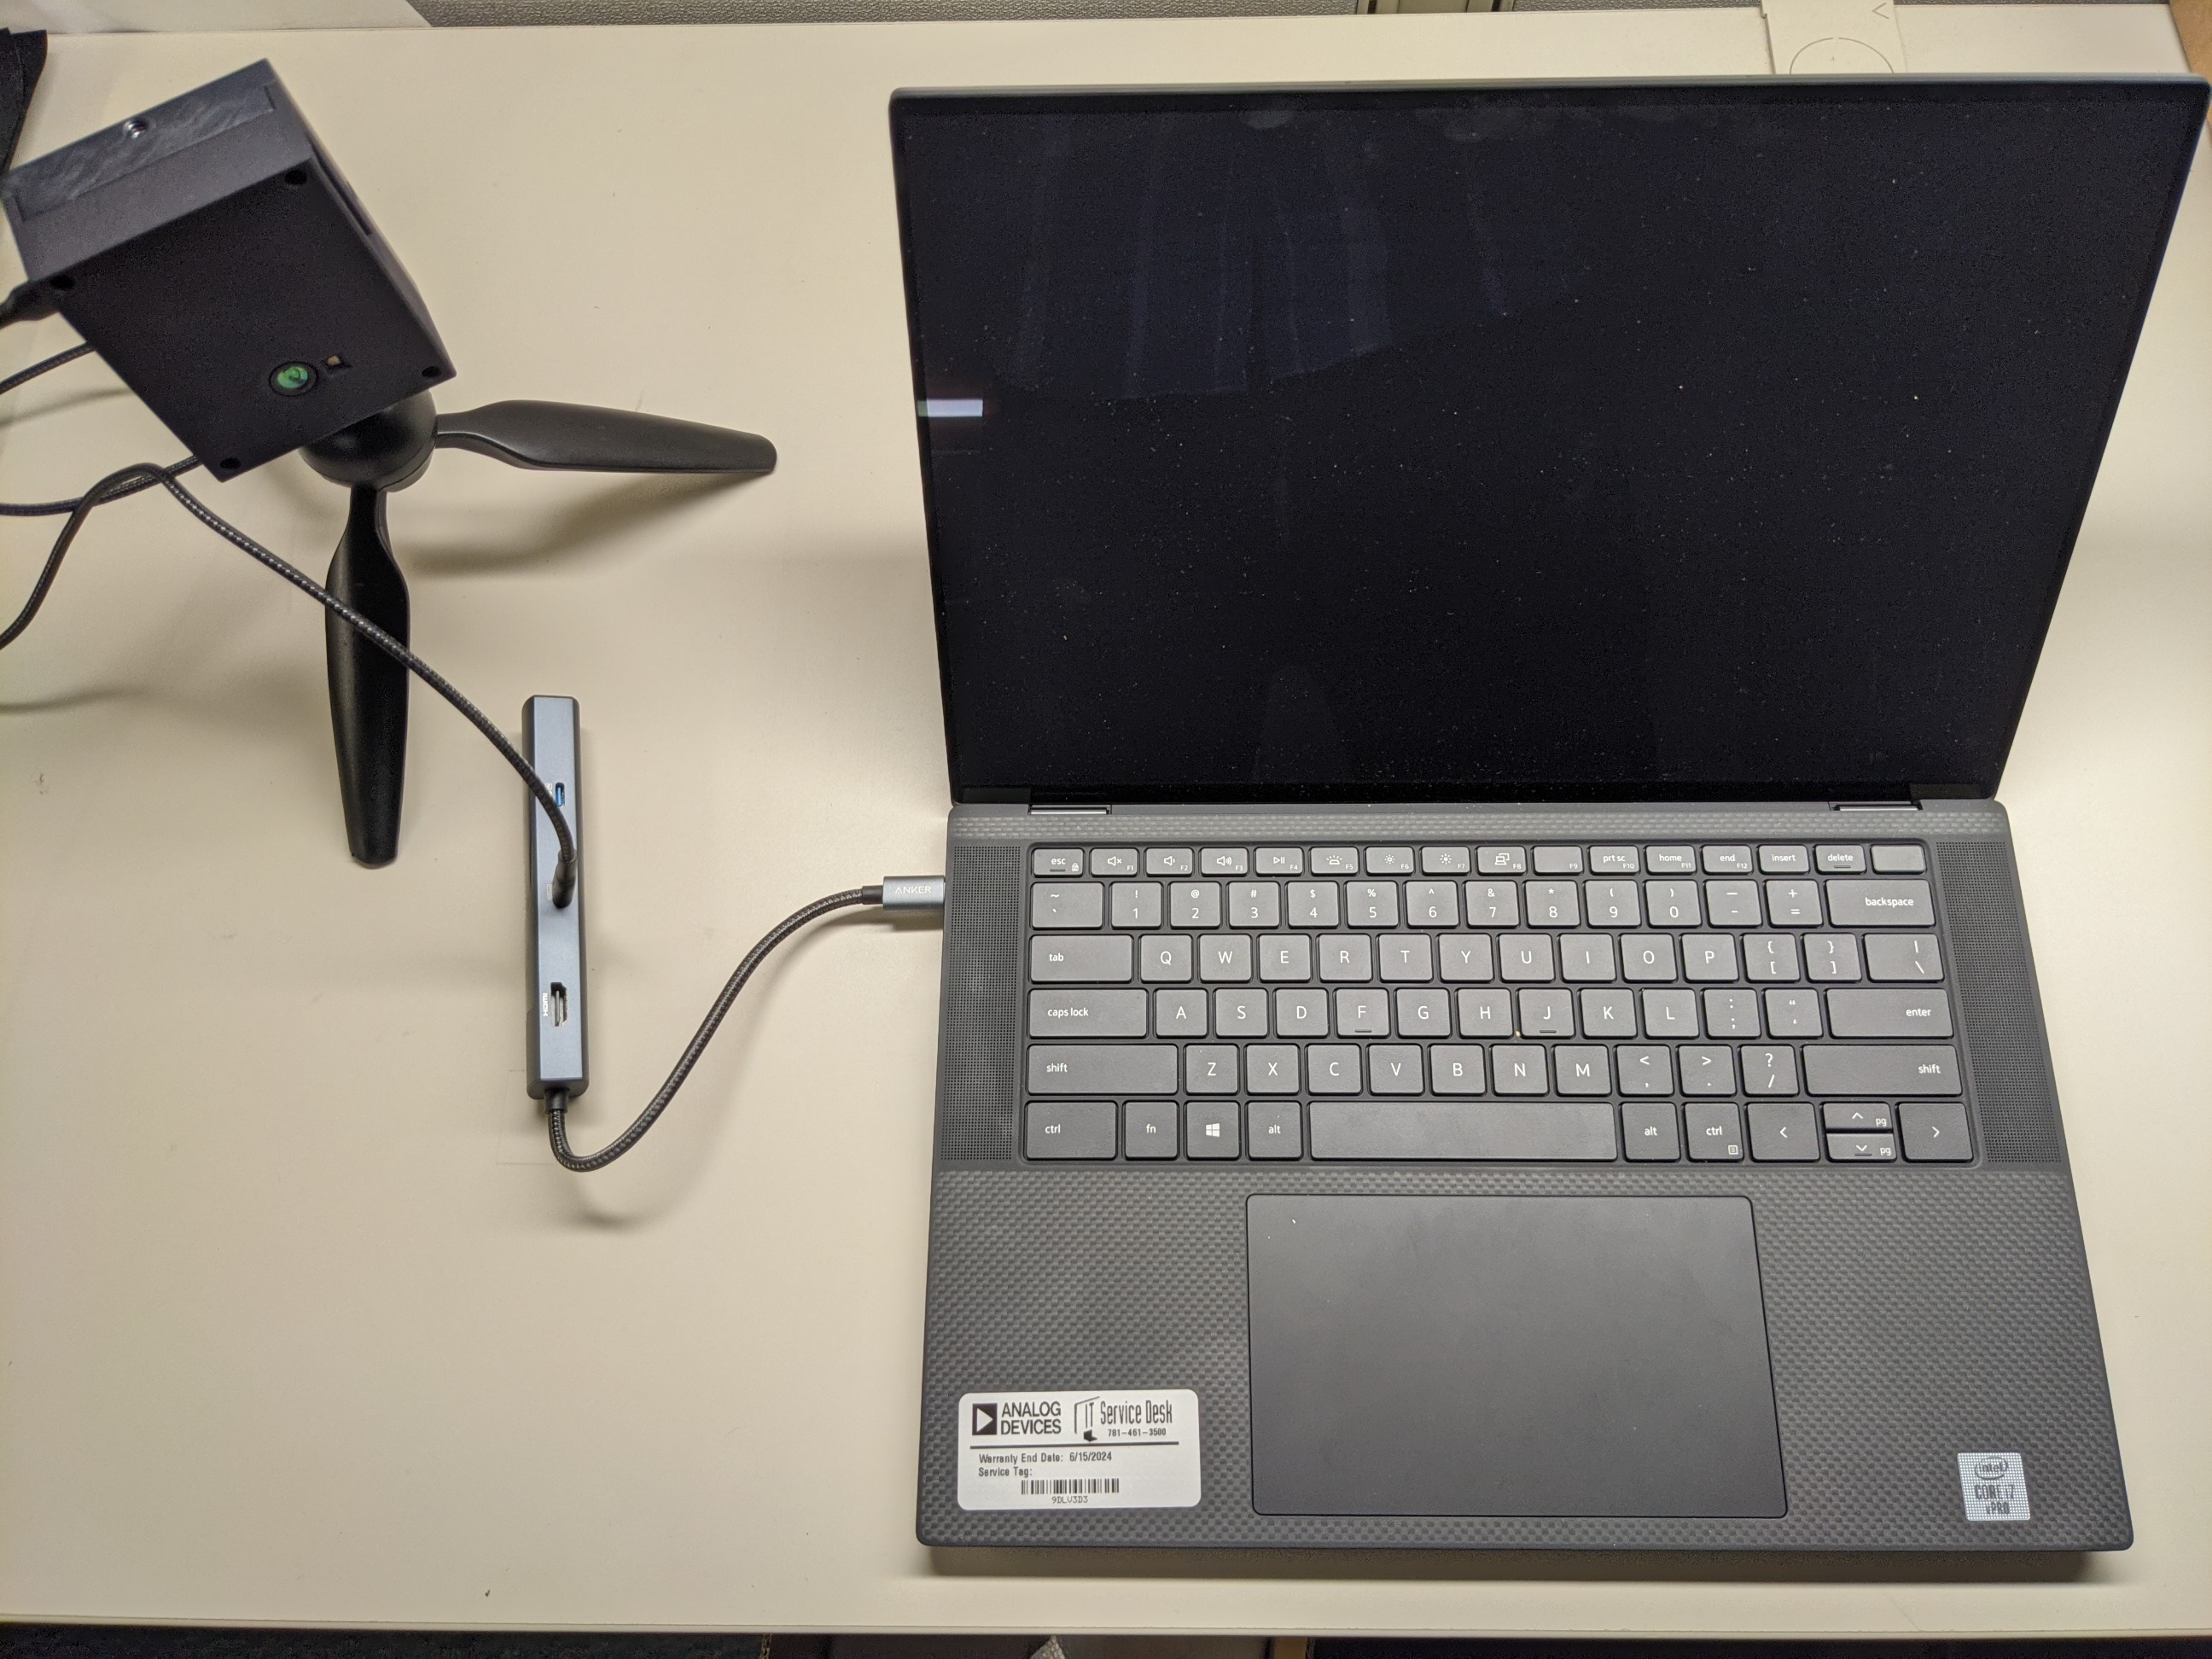
Using the USB Hub
If mp_pcm mode fails, connect the module to USB-C hub 5Gbps port (highlighted by white box), and connect hub to PC.

Troubleshooting
GUI Crash
Ensure that mode switching is done after module is stopped
If crashes persist, there may be power insufficiency, especially with mp_pcm mode
Try using the USB hub connected to external power
Green Light Not Activating
SD-Card could be corrupted
See Flashing Image Instructions to reflash the firmware