AD-GMSL792MIPI-EVK Production Testing
Overview
The purpose of the test procedure is to identify connectivity issues, poor soldering, and potential manufacturing defects. Some of the issues are directly identified by explicit part-targeted tests, others are implicit, by running adjacent tests.
Test Duration
Step Description |
Estimated Time (minutes) |
|---|---|
Test bench setup |
4 min |
Software test |
4 min |
Total time |
8 min |
Test Requirements
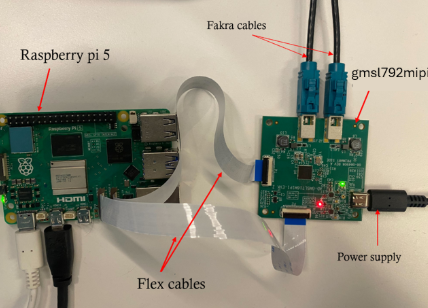
Required Hardware
Raspberry Pi 5 + HDMI cable + power supply
Mouse and keyboard
2 x IMX219 cameras
2 x flex cables
2 x FAKRA cables
Device under test: AD-GMSL792MIPI-EVK
Power supply with USB Type-C for AD-GMSL792MIPI-EVK board
Required Software
SD card with the test image (provided for the Raspberry Pi)
Required Setup
No. |
Steps |
|---|---|
1 |
Insert the SD card into the Raspberry Pi 5. |
2 |
Connect the Raspberry Pi to a monitor and power it. |
3 |
Connect the FAKRA cables to the cameras on AD-GMSL793MIPI-EVK. |
4 |
Connect the camera cables to the AD-GMSL792MIPI-EVK. |
5 |
Connect the P1 and P2 connectors of the D.U.T. using flex cables to P0 and P1 on the Raspberry Pi 5. |
6 |
Power the D.U.T. |

Test Process
Wi-Fi Setup
Ensure the Raspberry Pi is connected to Wi-Fi before starting the tests.
Power on the Raspberry Pi. If the test screen appears automatically, press CTRL+C to exit the test application.
Click on the Wi-Fi network you want to connect to.
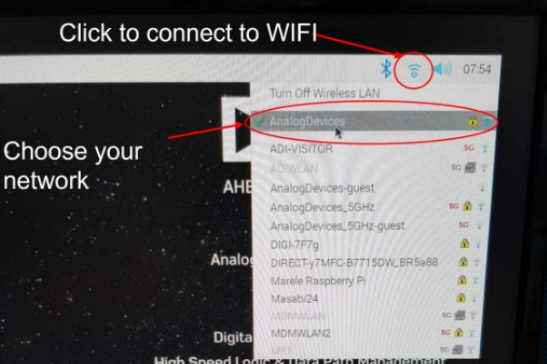
Enter the password when prompted.
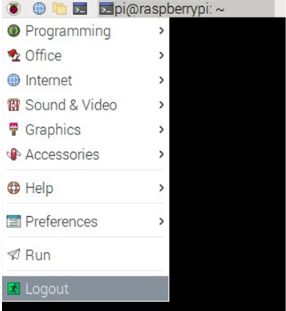
After connecting successfully, reboot the Raspberry Pi. Navigate to the application menu and select Logout.
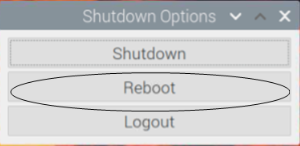
Select Reboot from the shutdown options.
Running the Tests

Communication Test


Data Streaming Test
Type 2 from the keyboard to start 2) Data streaming test.
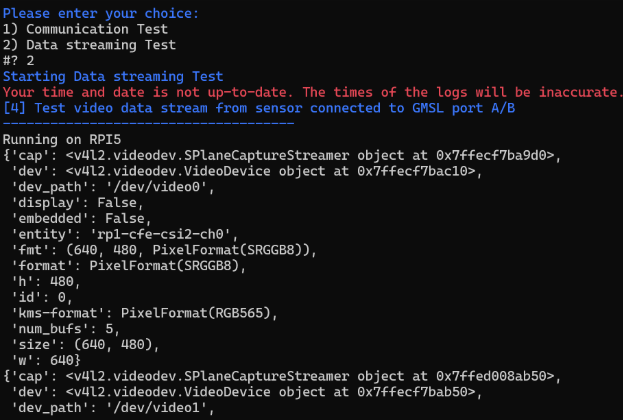
Connect the cameras as shown above.
If the test passes, you will see a PASSED message.
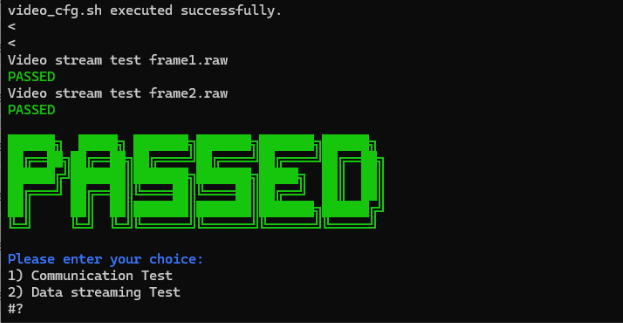
If the test is successful, you can consider the device under test functional and continue testing the next boards.