EVAL-ADPAQ3029 - Firmware development
1. Overview
The firmware consists of 3 parts:
Bootloader,
MDK (Moduware Developers Kit) and
main application.
The bootloader carries out different system initialization functions and module application upgrades. The MDK is the window of communication between the module application and the gateway. The communication between the module application and the gateway is facilitated by MDK APIs. The MDK also processes the message received from the application by invoking the callback functions.
Mainly, the following MDK APIs have been used in the ADPAQ projects:
unsigned char np_api_register(): This API is used to register the command and the function. When the MDK receives a command/message, it calls the associated callback function.void np_api_setup(): It consists of initial functions of the module application. For example, this API may contain a timer initialization functionvoid np_api_loop(): It consists of the code which implements the module functionality.
Important
Whenever a command is registered, it is important to make sure that it is within 0x2700 to 0x27ff as defined in the MDK standard.
2. Memory map
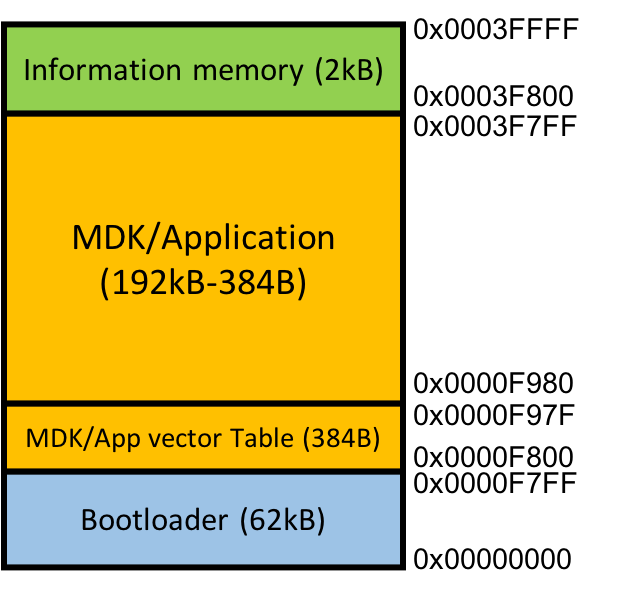
The ADuCM3029 Microcontroller has 256KB of Flash Memory, 32KB of Data SRAM and 32KB of Instruction SRAM. The memory map of the moduware framework is depicted in the current section. Inside the Flash Memory,
62KB is reserved for the Bootloader
384 Bytes is reserved for the MDK/app vector table
192KB-384 bytes (63,487 bytes) is reserved for the MDK/Application
2KB is reserved as Information Memory which contains the UUID of ADPAQ.
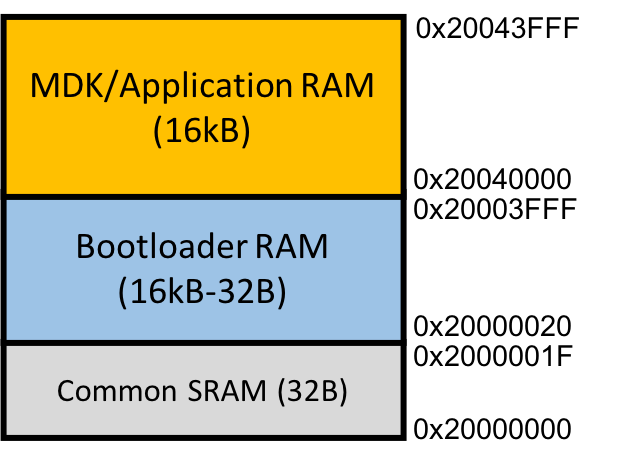
The 32KB Data SRAM is divided into 2 parts, 16KB for the Bootloader and 16KB for the MDK/Application.
3. MDK library
As explained previously, MDK library provides an interface for application (firmware) running on ADuCM3029 to control Gateway through SPI commands. The Gateway on the other end, controls the Tile Application (explained in next section) running on smartphone through BLE (Bluetooth) interface.
The following API’s must be implemented by Application:
extern void np_api_setup(void);Runs once on module power-upextern void np_api_loop(void);Non-command callback function – runs several times
The following API’s can be optionally implemented by Application:
void np_api_start(void);Runs when operation startsvoid np_api_stop(void);Runs when operation stops
Other API’s available for application:
void np_api_set_app_version(uint8_t major, uint8_t minor, uint8_t revision);Let the user set their own app version (optional)uint8_t np_api_register(MDK_REGISTER_CMD *table, uint8_t size);Register the user’s command callback functionsuint8_t np_api_upload(uint16_t command, uint8_t *data, uint8_t length);Send data to the last sourcevoid np_api_pm_automode_set(void);Enable power management modevoid np_api_pm_automode_clear(void);Disable power management modeuint8_t np_api_run_loop_once(void);Run the loop again before sleeping (unnecessary for free running mode)
4. Application development
This is the main application running on ADuCM3029. Below are the steps that will help you in writing your own application using MDK library. Please see resources section to download source code.
Guide to import the source code and setup library paths
Declare any functions and global variables in the Dev Module header (*.h) file.
Program the newly declared function in the corresponding source (*.c) file. The function can be now be referenced from the continuously looping main function used by Modpack.
The mdk files reference all Modpack related functionality. Within the header file all modpack specific functions are declared.
In the mdk.c file the system functions are given register addresses from 0x2700-0x27FF. The function addresses are referenced directly within the continuous main loop or from the tile side.
Create the program function in
np_api_loop(). The continuous function will check any conditions set or poll any hardware via access to the functions created in the modules .c file mentioned in part 2.Initialize any values or hardware in
np_api_setup()np_api_loop(): continuous loop retrieving data and uploading that data to Nexpaq API (np_api_upload(0x2800,[data],size). The data sent is retrieved on the tile side based on the addresses specified (source 0x2800+).
Building
In order to build the project, click
Project->Build Projector press F7.In order to generate executable binary file (*.bin) for ADuCM3029, Right click on
Dev Moduleproject ->properties.In the properties tab go to
C/C++ Build->Settings->Cross Core GCC ARM Embedded C Linker->Libraries.Select build steps. Type
arm-none-eabi-objcopy -O binary ${ProjName} ${ProjName}.binin the command of post build steps. Click on OK.
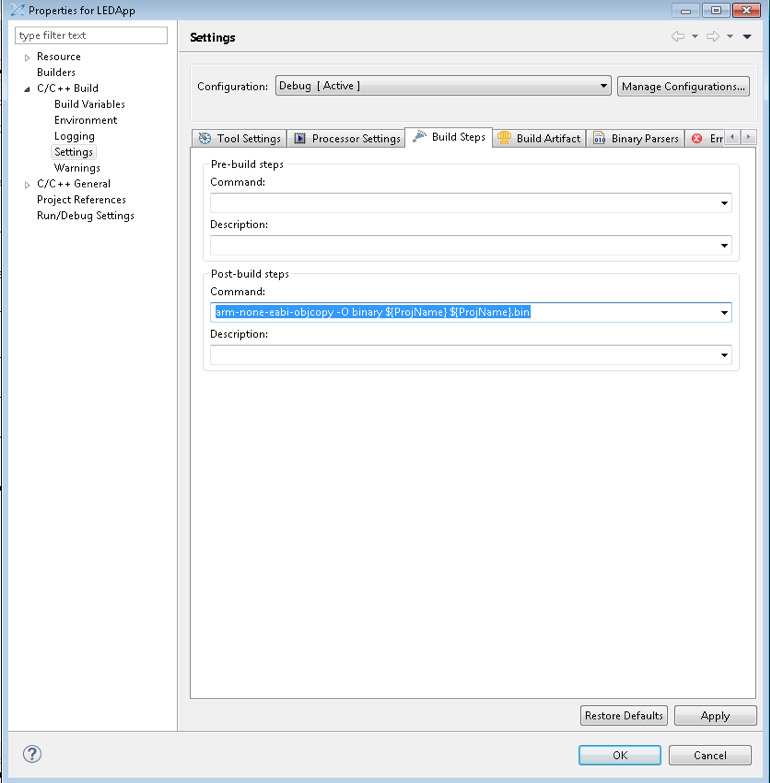
Now, building the project again should generate the binary (*.bin) file in the same directory as makefile
Important
It is advised to clean the project before building by right clicking project -> Clean Project. This deletes old build files.
Debugging
As shown in hardware setup section, connect the debugger between PC and Dev Module.
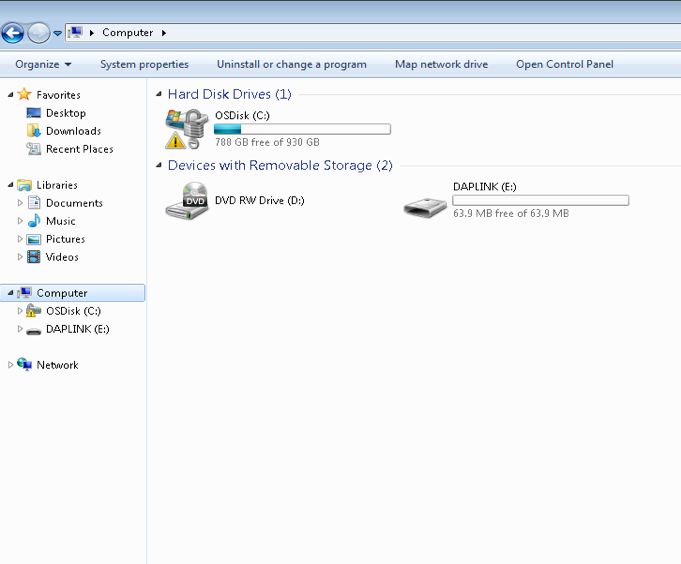
The debugger should show up as
DAPLINK.
Go to Run -> Debug Configurations.
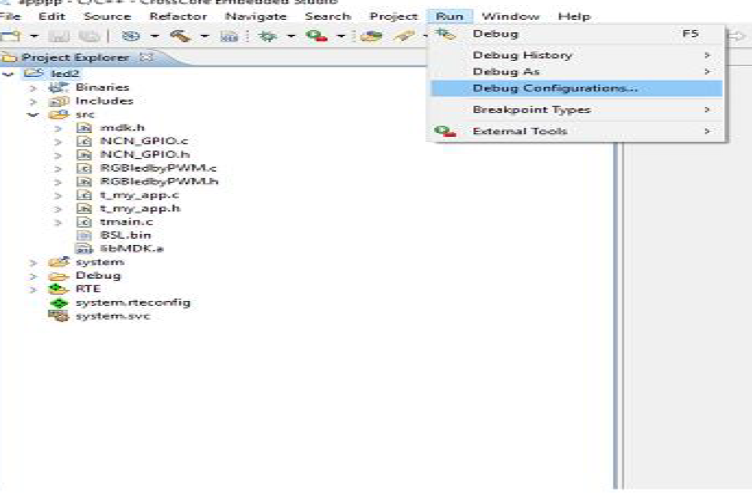
In the Debug Configurations window, select Application with GDB and OpenOCD(Emulator) on the left.
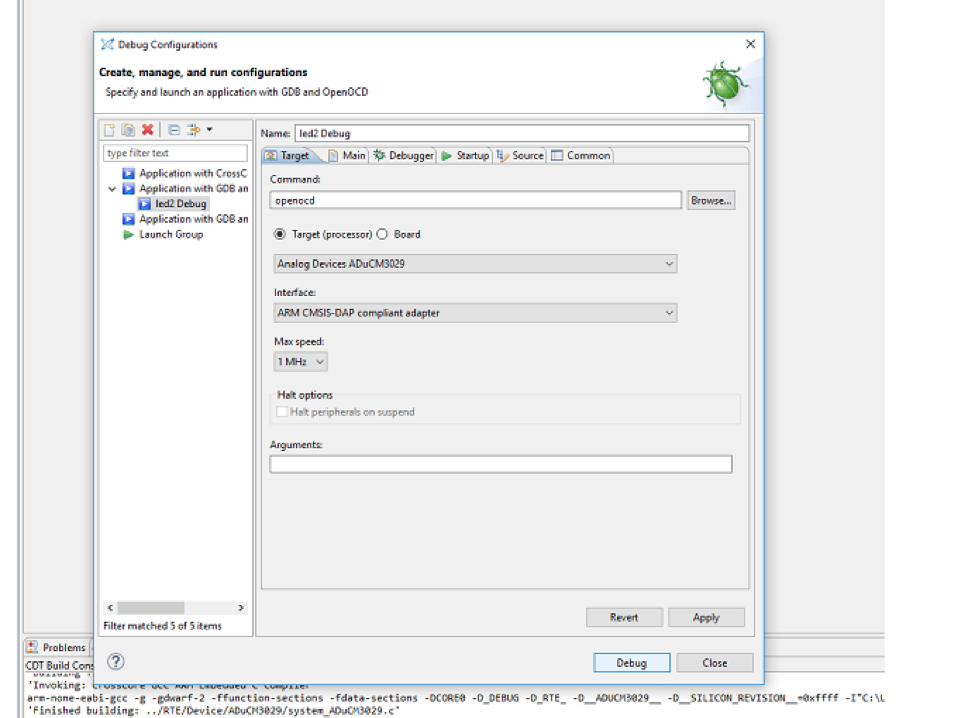
In the Target tab, set the Target (Processor) to Analog Devices ADuCM3029 and the Interface to ARM CMSIS-DAP complaint adapter and click
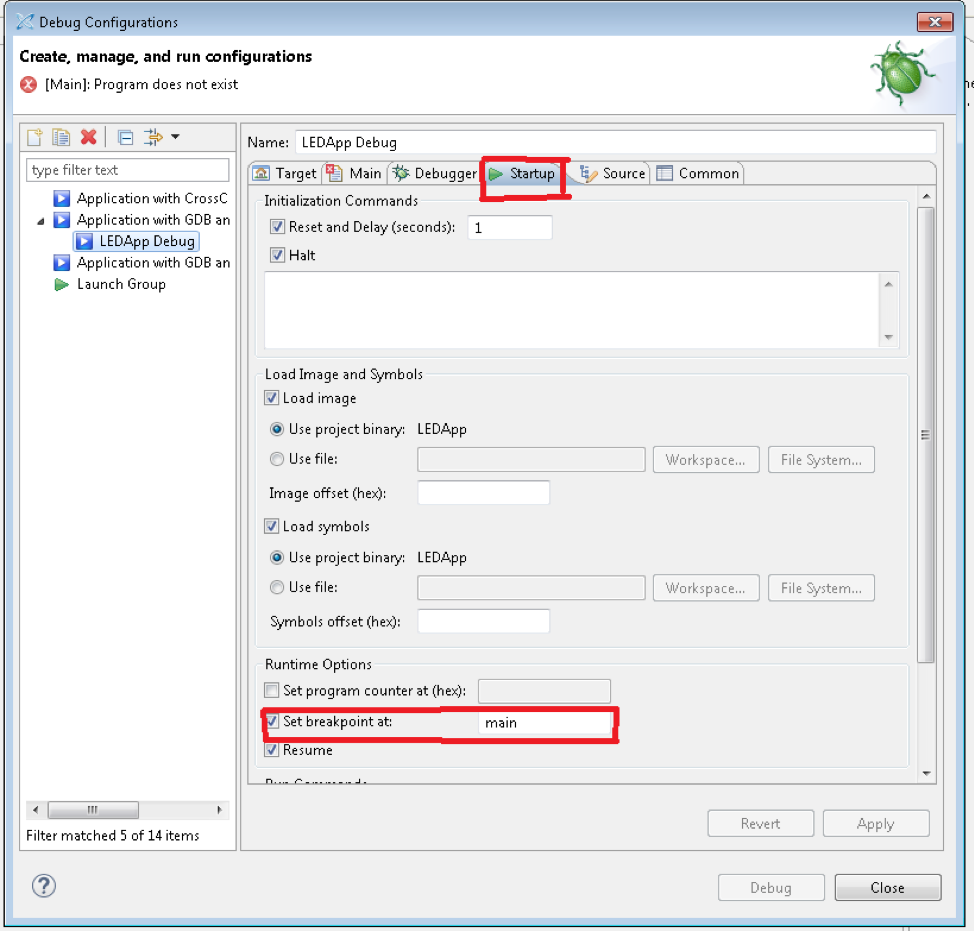
Applyand then onDebug.The debug perspective is opened. By default, the breakpoint will be inserted at the main function.
To change the default breakpoint settings, goto
Startuptab in the same window as target tab, change “Set breakpoint at” option. (Example, reset_handler).
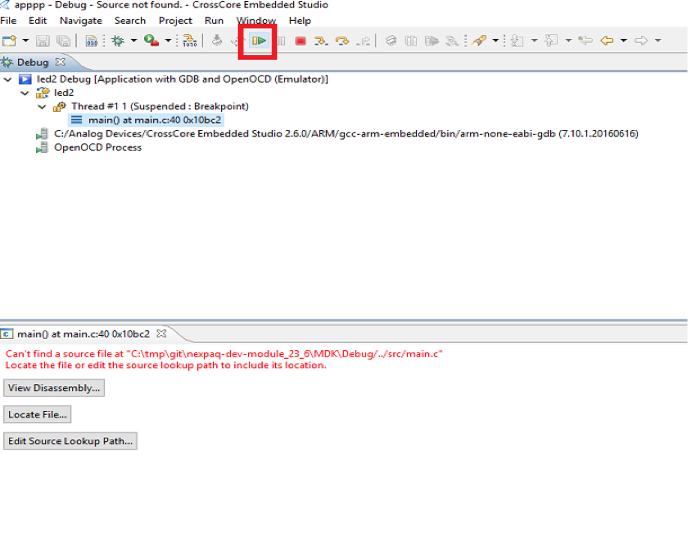
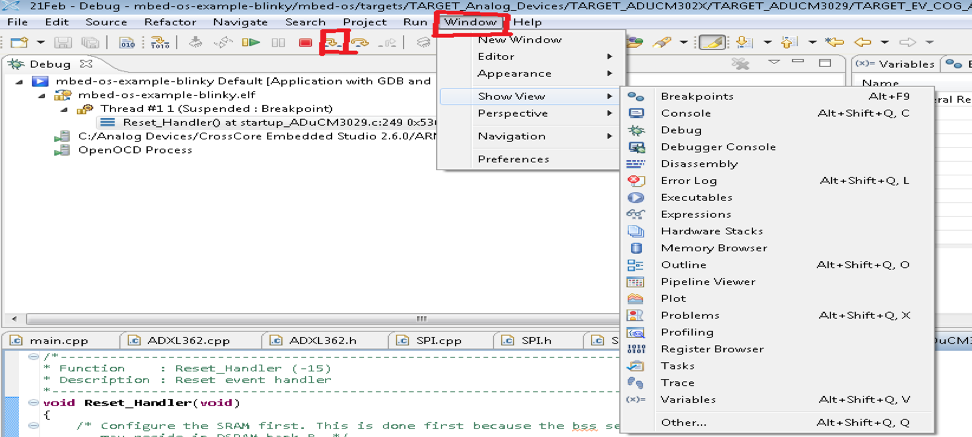
The execution halts when it hits the breakpoint. The execution can be resumed by clicking on the resume button as shown in the image.
The breakpoints can be inserted (or removed) to (or from) any line of the code by double clicking on the beginning of the line. The “step into” function can be used to execute the code step by step. By clicking on the window->show view, the values associated with different expressions, registers, memory etc can be observed.
Firmware deployment/flashing
After successful building/debugging, the generated executable binary file (*.bin) should be copied to
DAPLINKUSB drive.After copying, the USB driver will automatically flash the copied binary file to the ADuCM3029 microcontroller.
Then USB drive gets refreshed and opens again. If the copied binary file is not visible, then flashing is successful, if the file is still visible then flashing is not successful.
Important
Many a times, the modules may not be recognized as DAPLINK but will be shown as MAINTENANCE. In this case, just disconnect the power cable from the modules and connect them back again.