Scopy
This page details how to download Scopy 2.0 as well as a walkthrough example with the Jupiter SDR. Scopy is is a free, open-source, multi-functional software toolset designed for signal analysis.
Installation
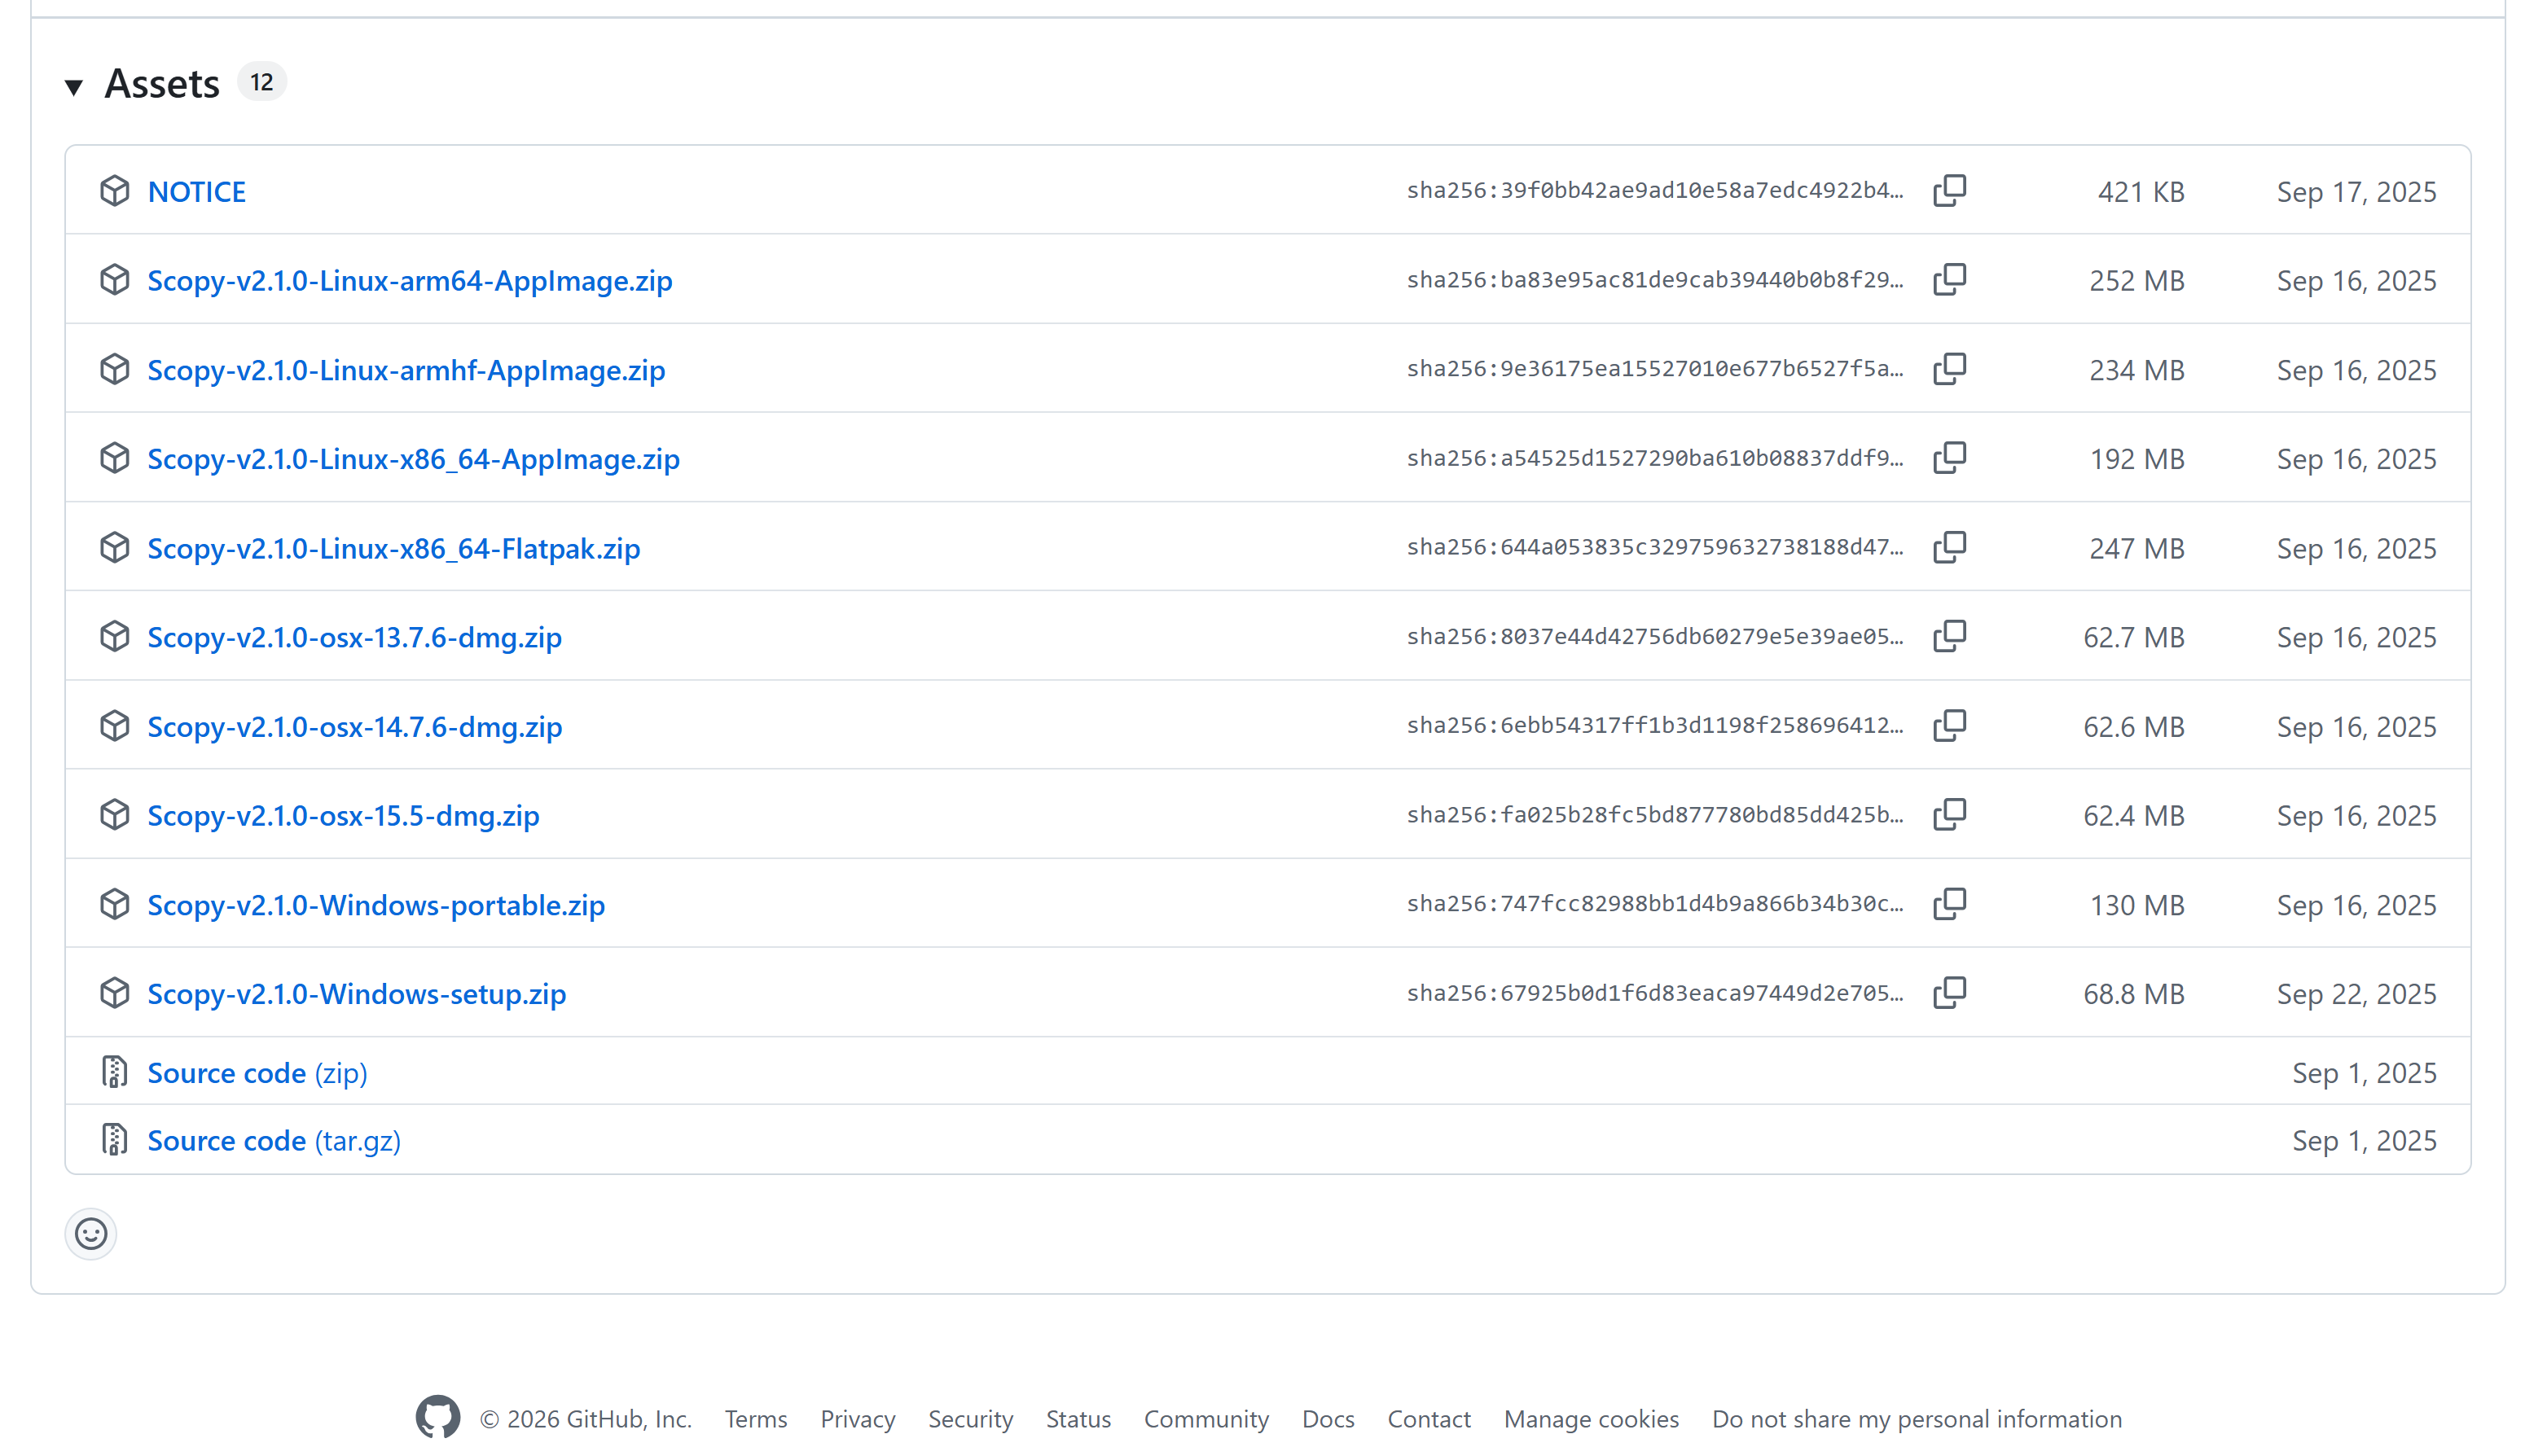
To download Scopy navigate to the Scopy V2.1.0 release page and scroll to the bottom of the page. At the bottom of the page there will be several download links, download the version appropriate for your system.
The ADRV9002 plugin is already integrated into Scopy’s core plugin set, not distributed as an external package. Therefore, it does not appear as an add-on package. To use Jupiter the IIO Emulator and Generic-Plugins are needed. Follow the screenshot below.
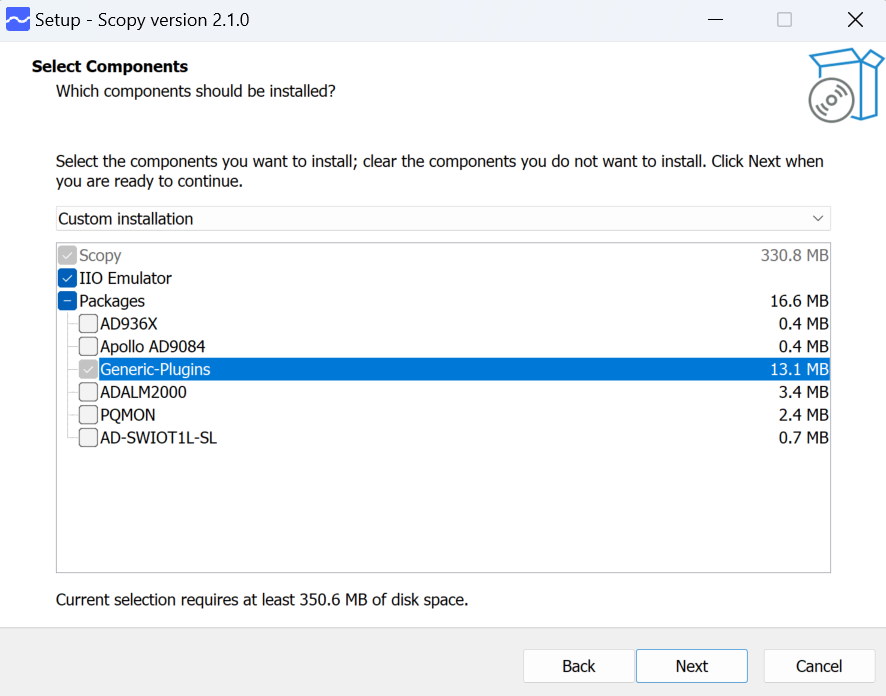
Continue to press the “Next” button through the rest of the setup. After you complete the setup, it will prompt you to restart the computer. Once the computer is restarted, reopen Scopy.
Running Scopy
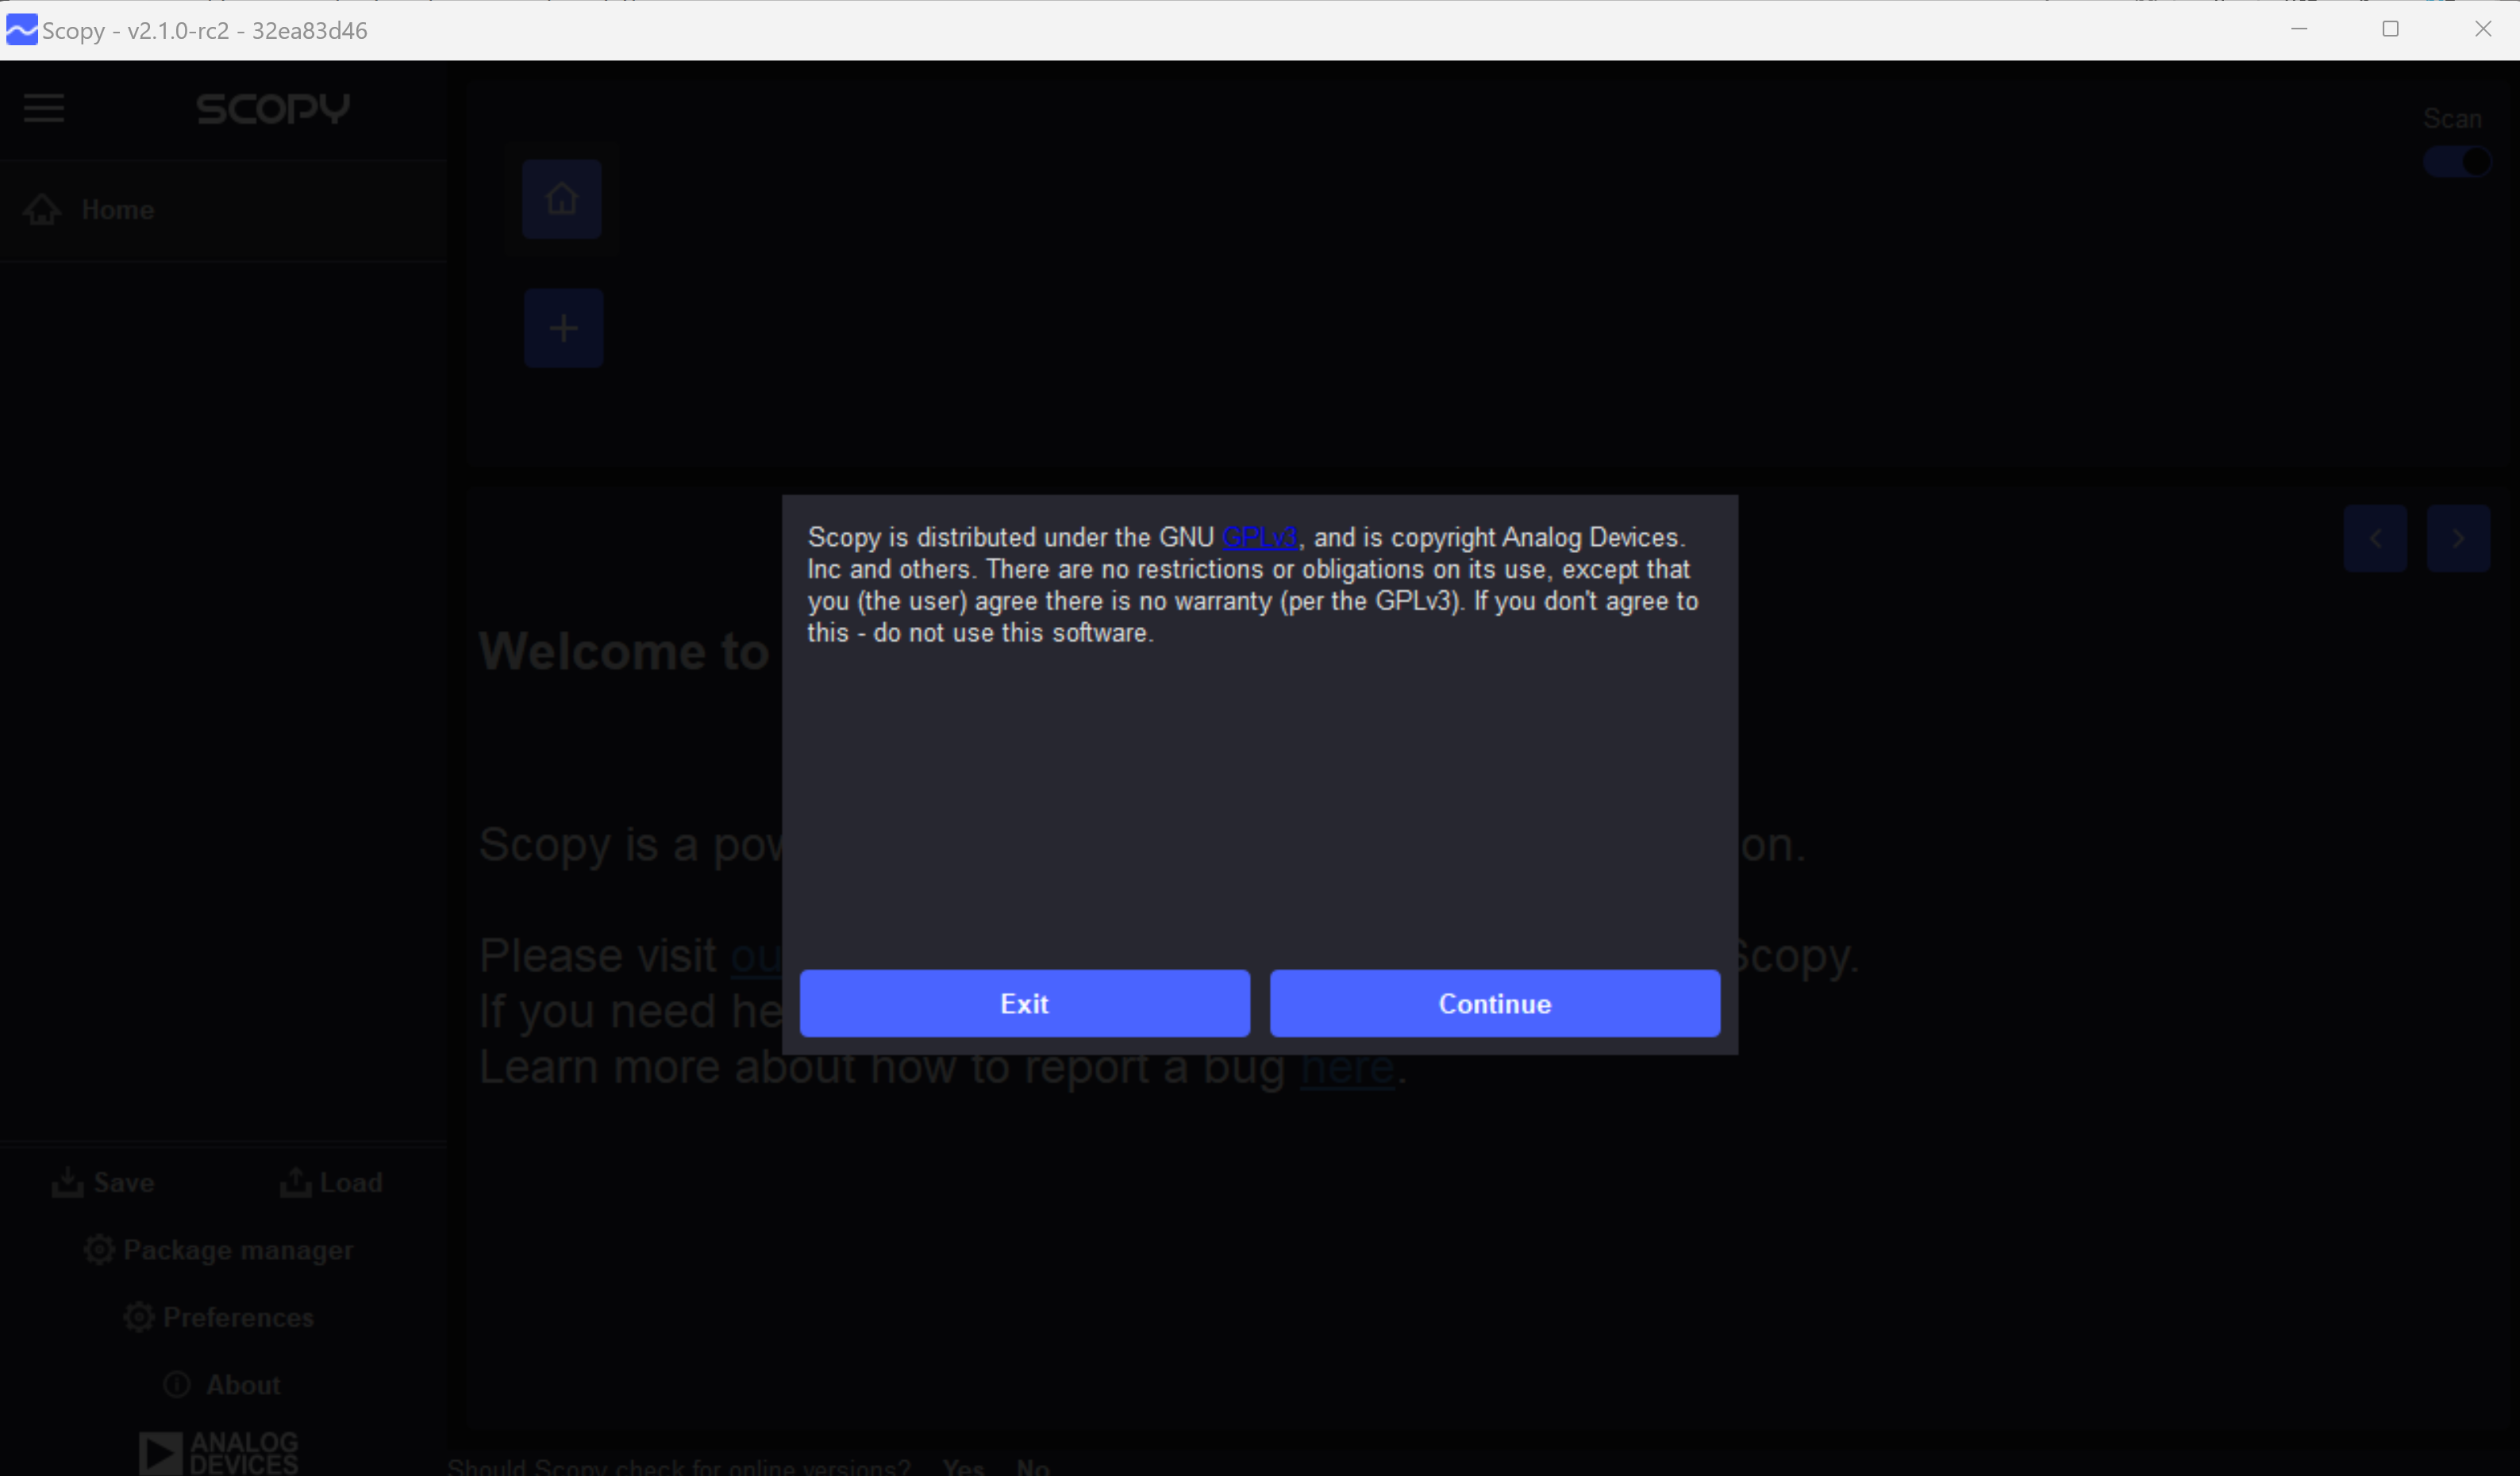
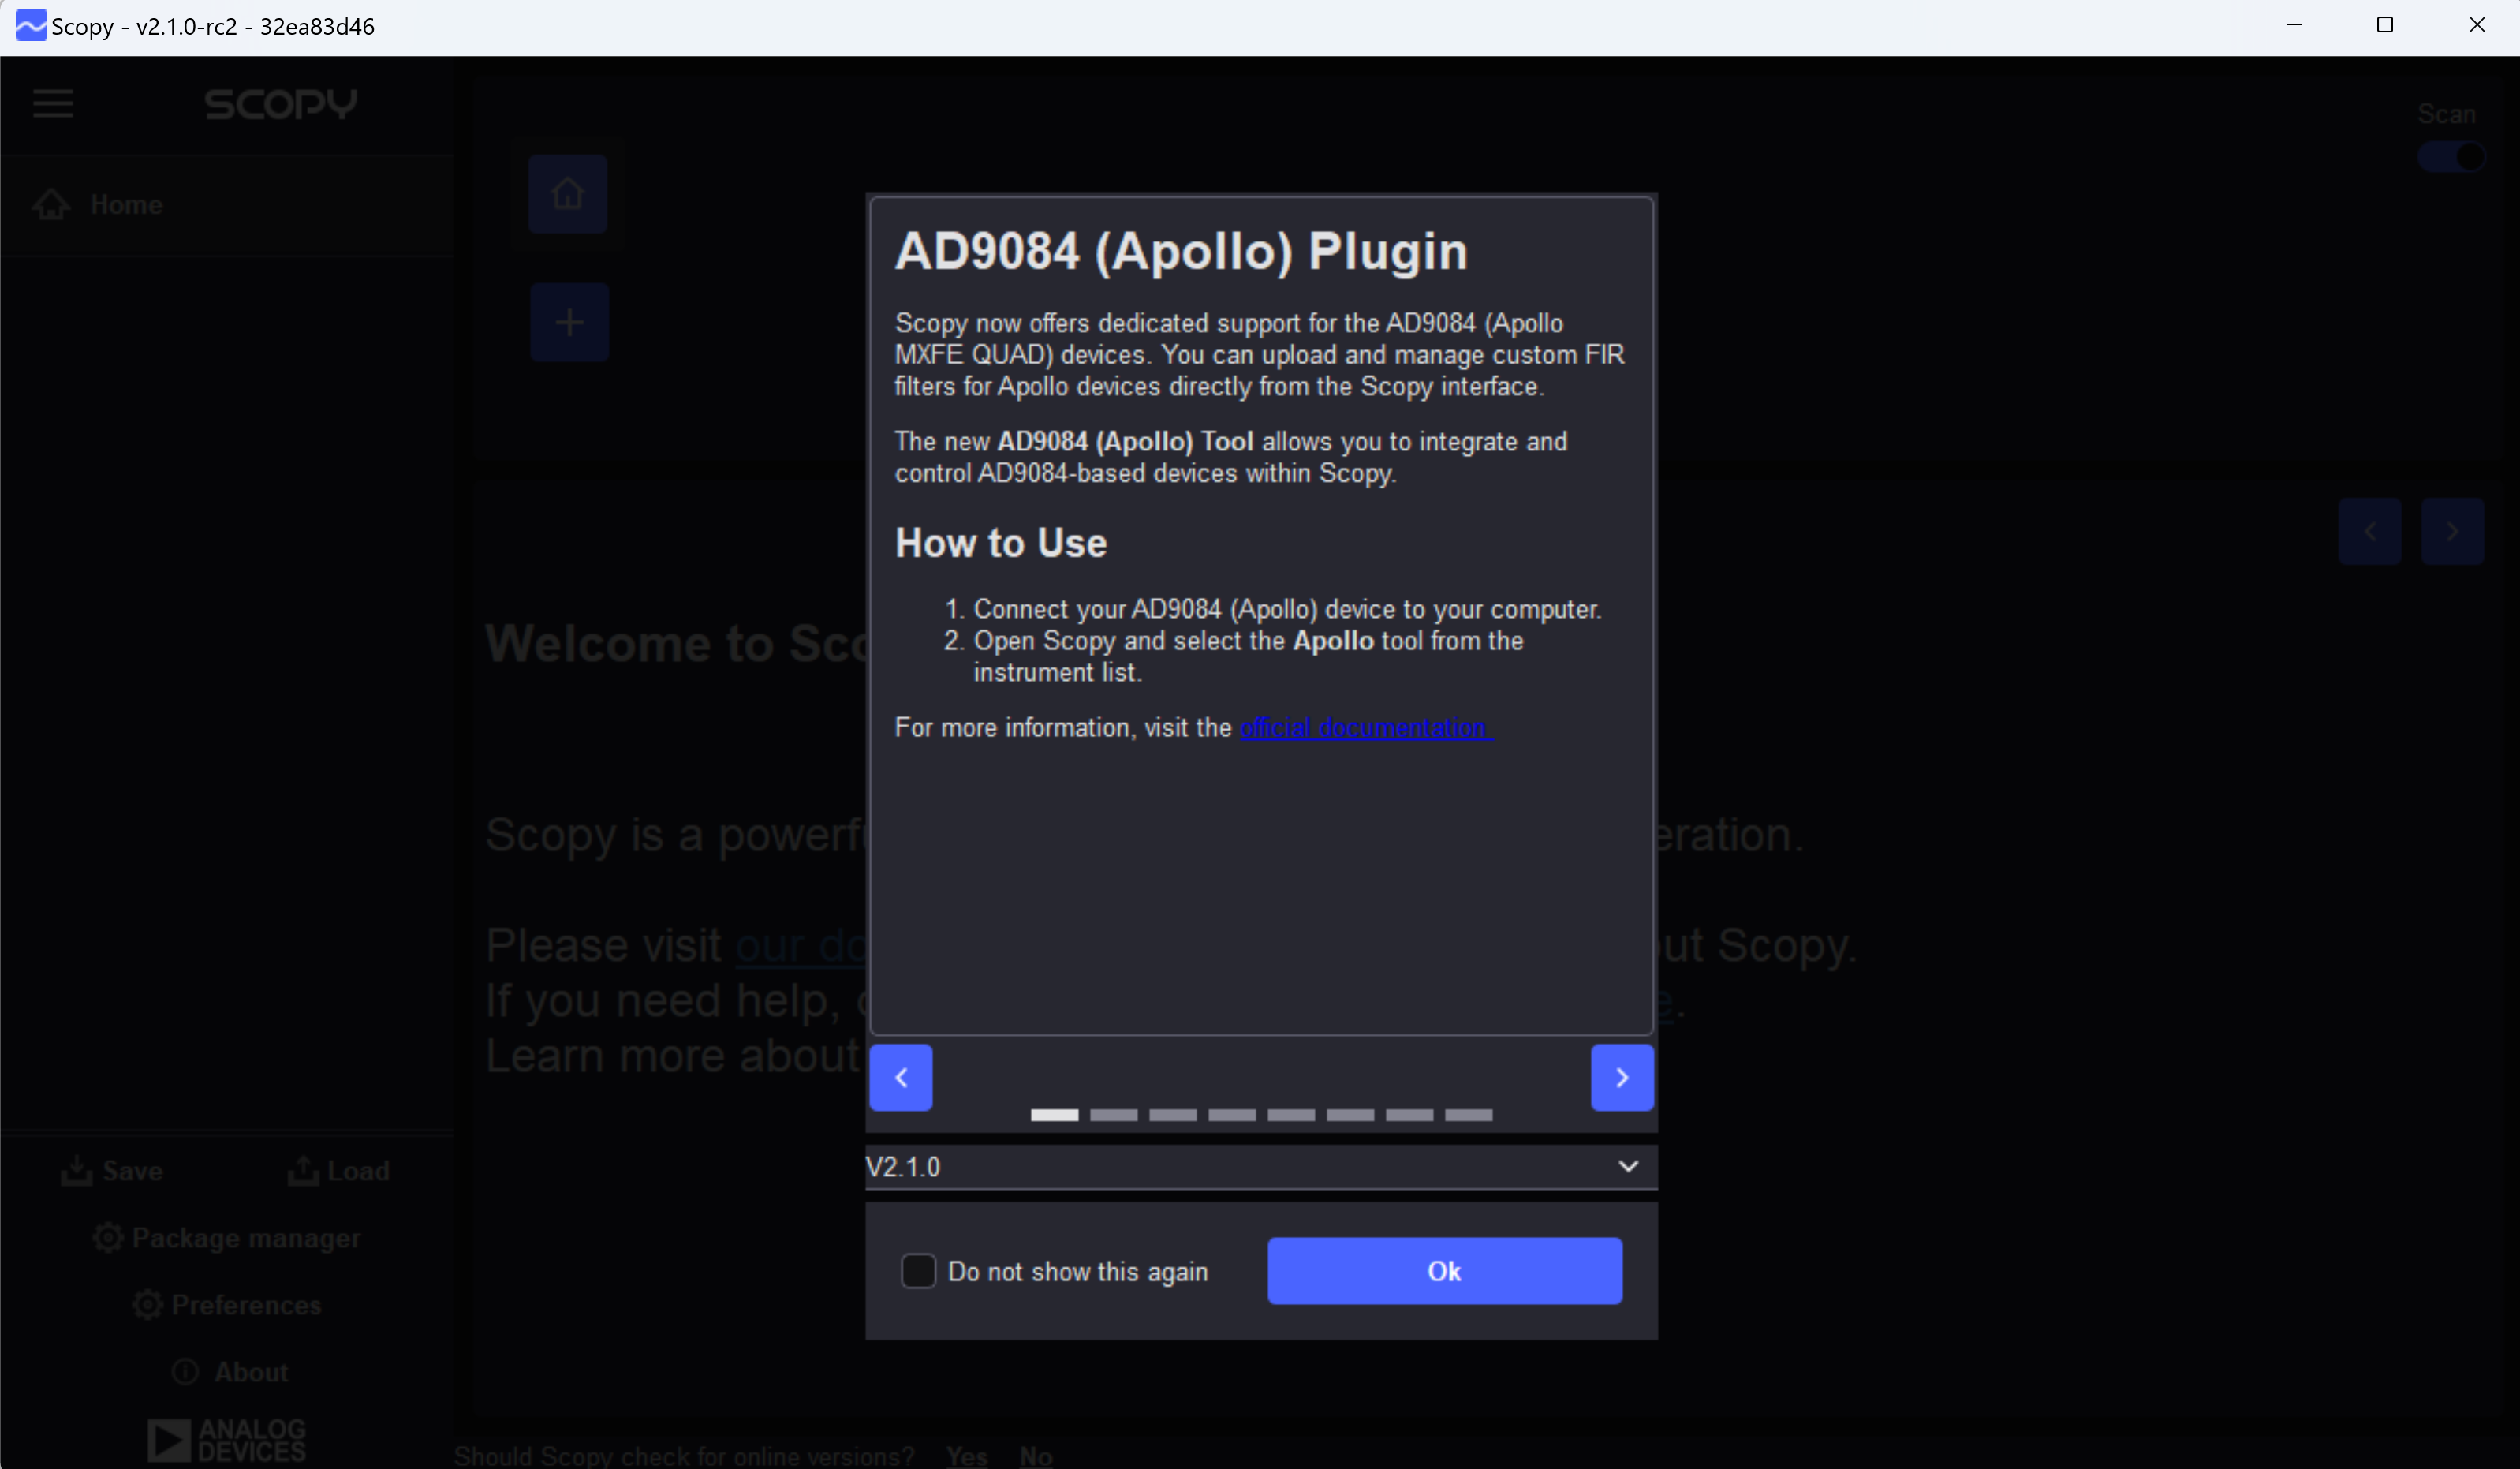
Upon opening Scopy, you will see a pop-up about copyright and about Scopy’s new features. Press continue on both.
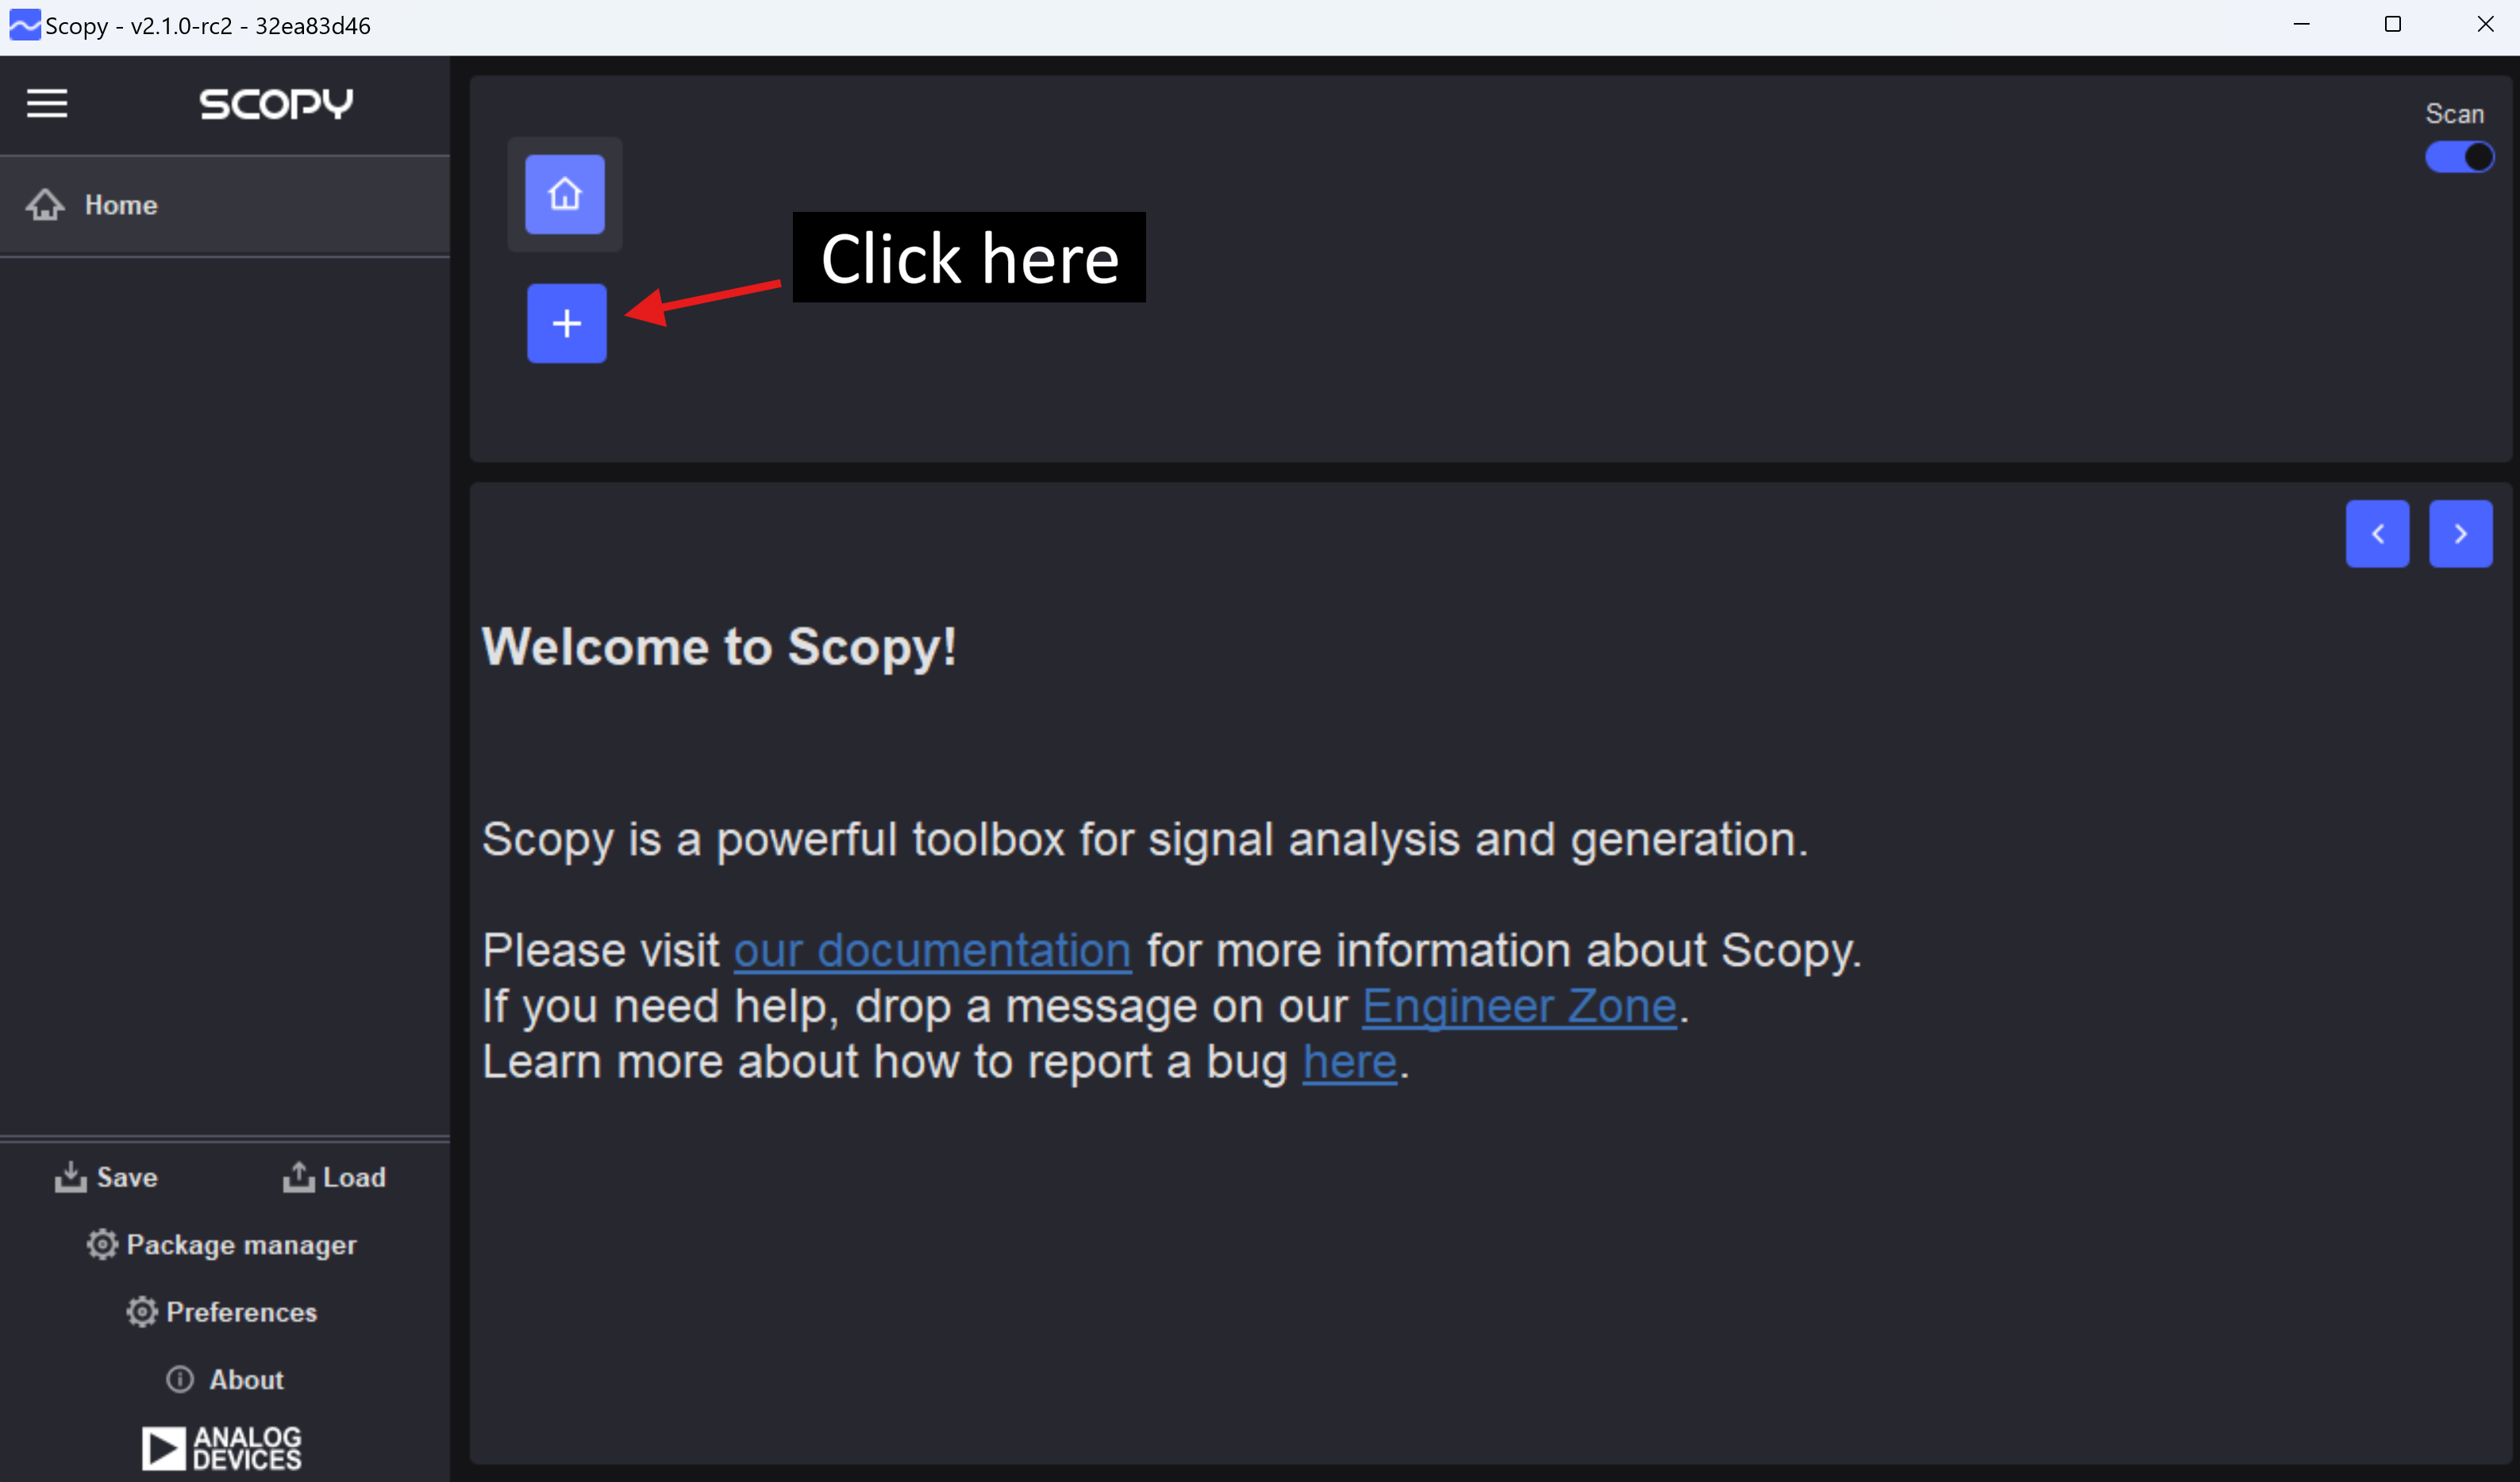
Next, click on the plus icon. It will take you to a page where you will see an option to enter your IP address.
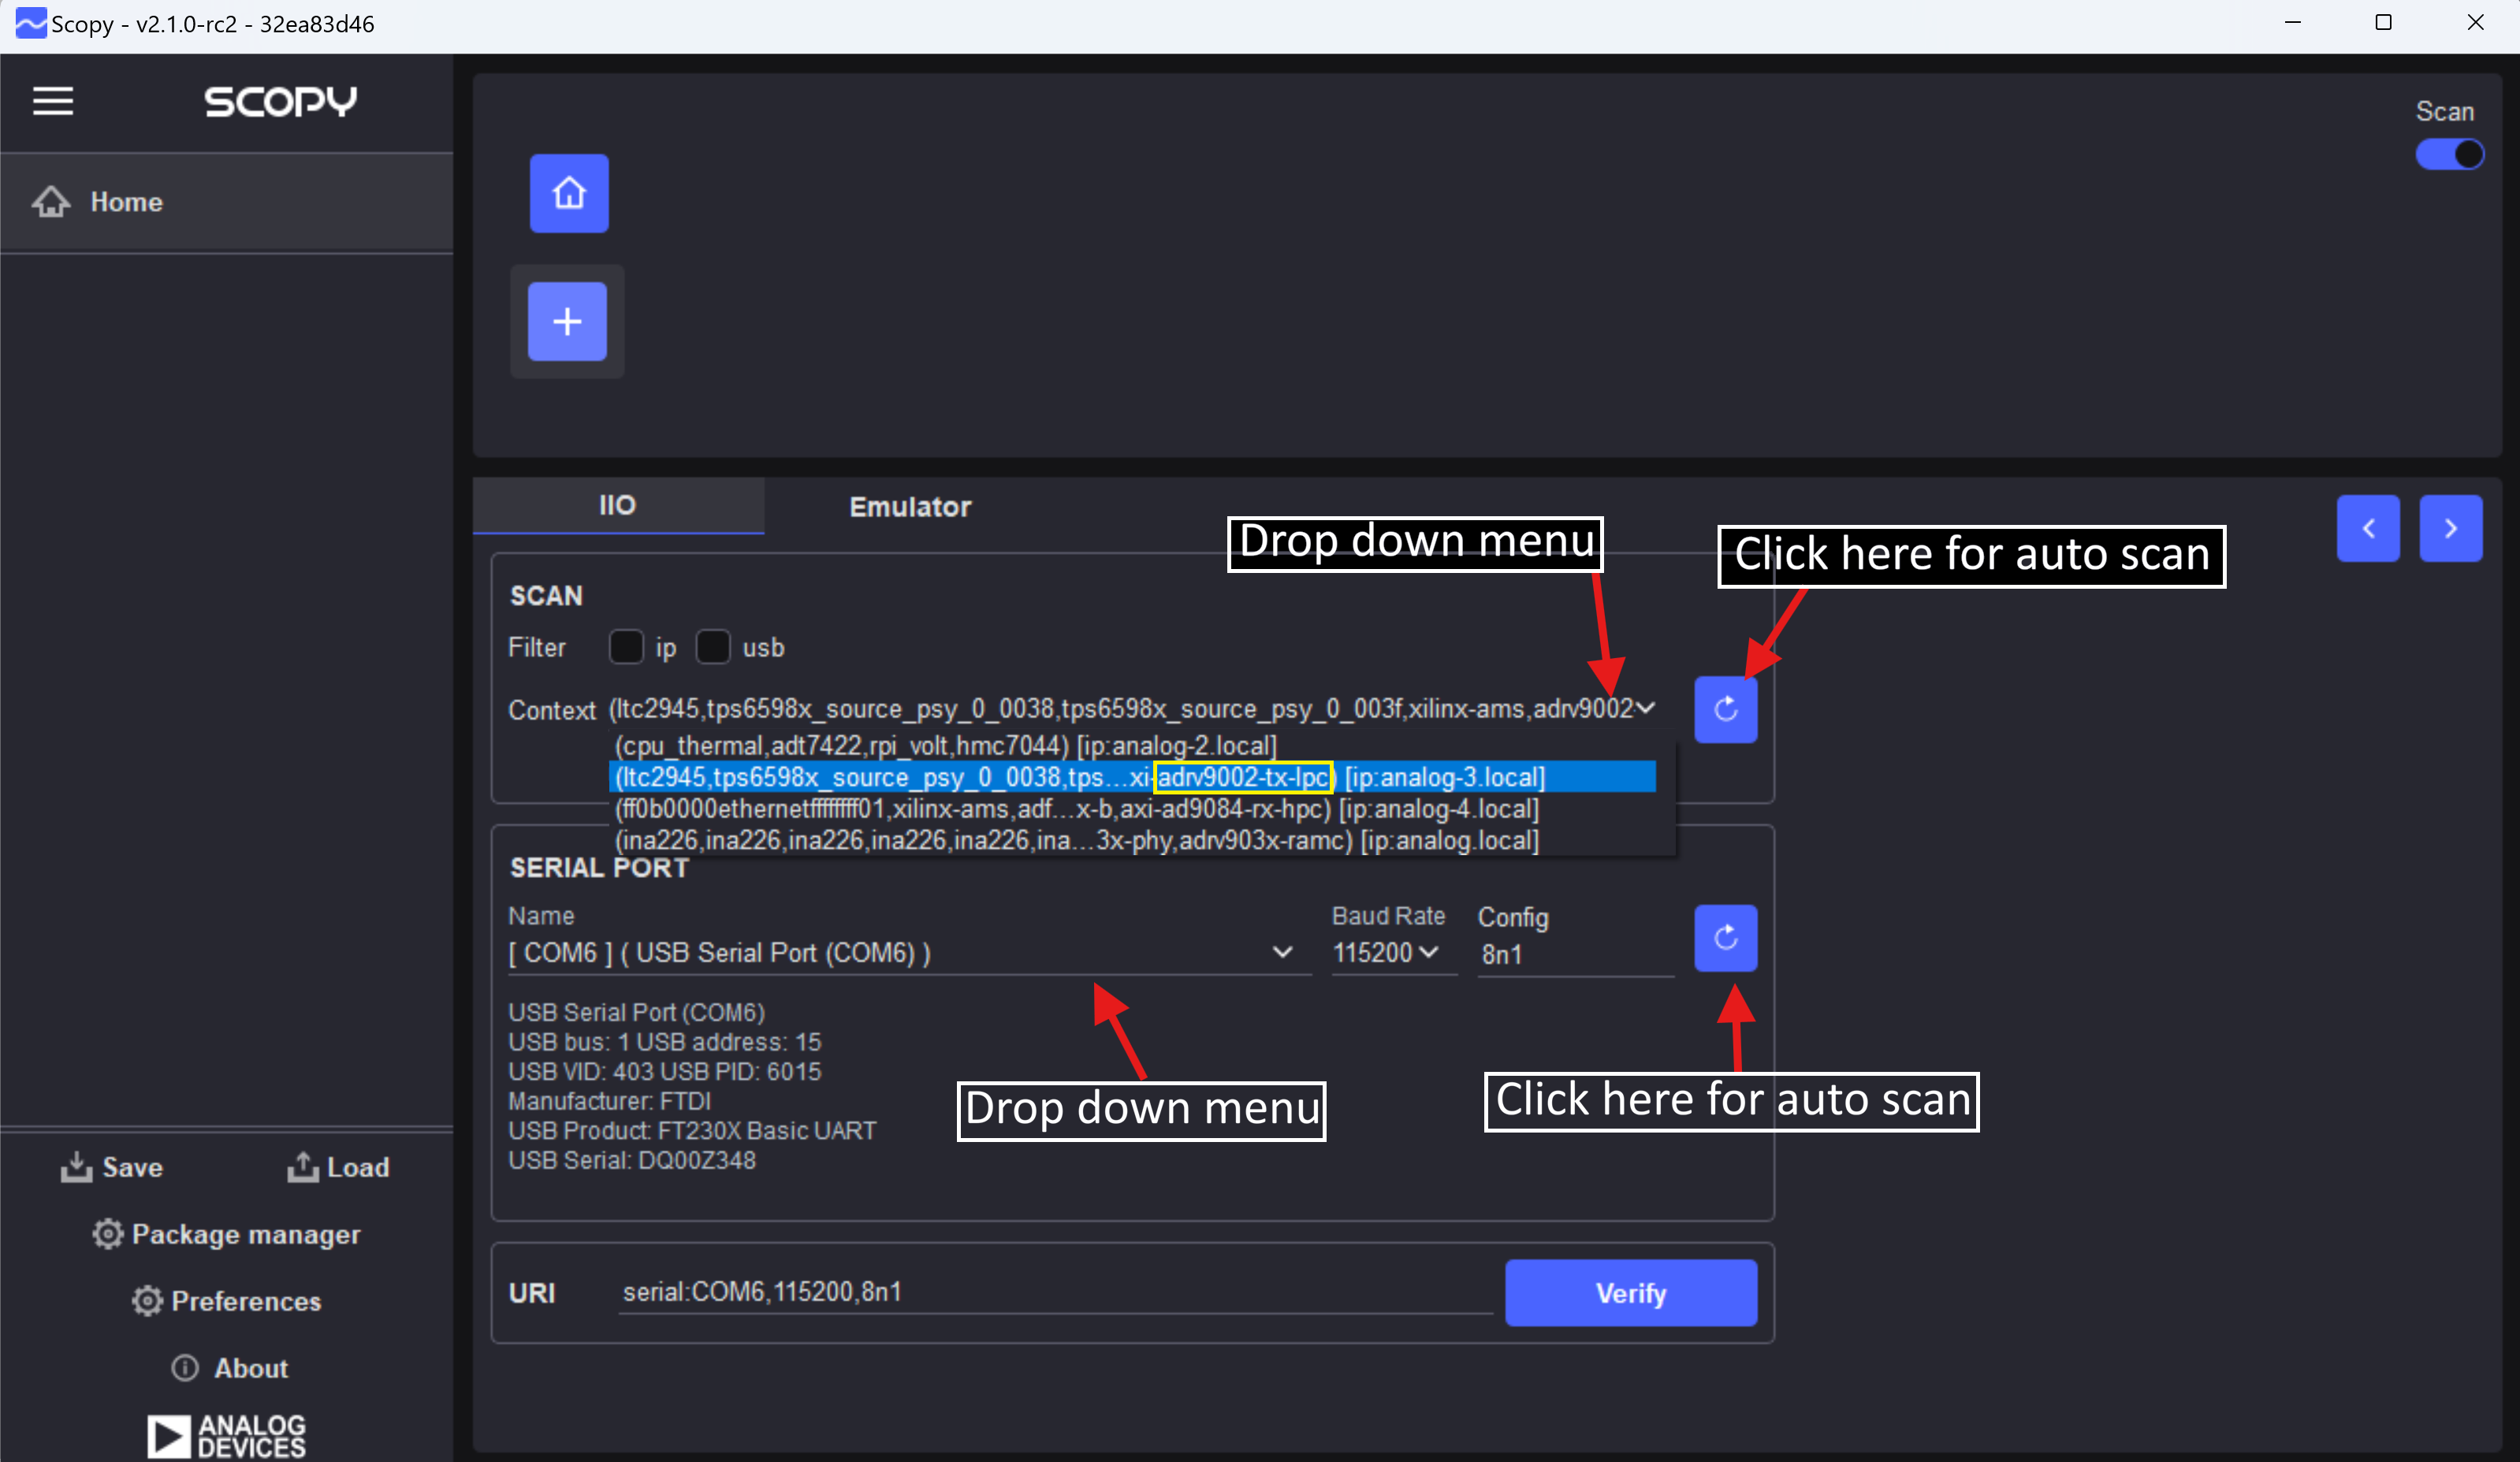
On this page there are three possible ways to connect to the Jupiter:
Scan
In order to use the scan option, click the refresh arrow in the Scan section.
If your desired device is not chosen, select the correct device from the context drop-down menu.
Serial Port
To use the serial port to connect, click the refresh arrow in the Serial Port section.
If this does not update to the desired device, use the drop-down menu to choose the correct COM port.
URI
Using the IP address in the URI section seems to be the easiest method.
To use this, type “ip:(relevant ip address)” be sure to make sure there is not a space between the colon and the IP address.
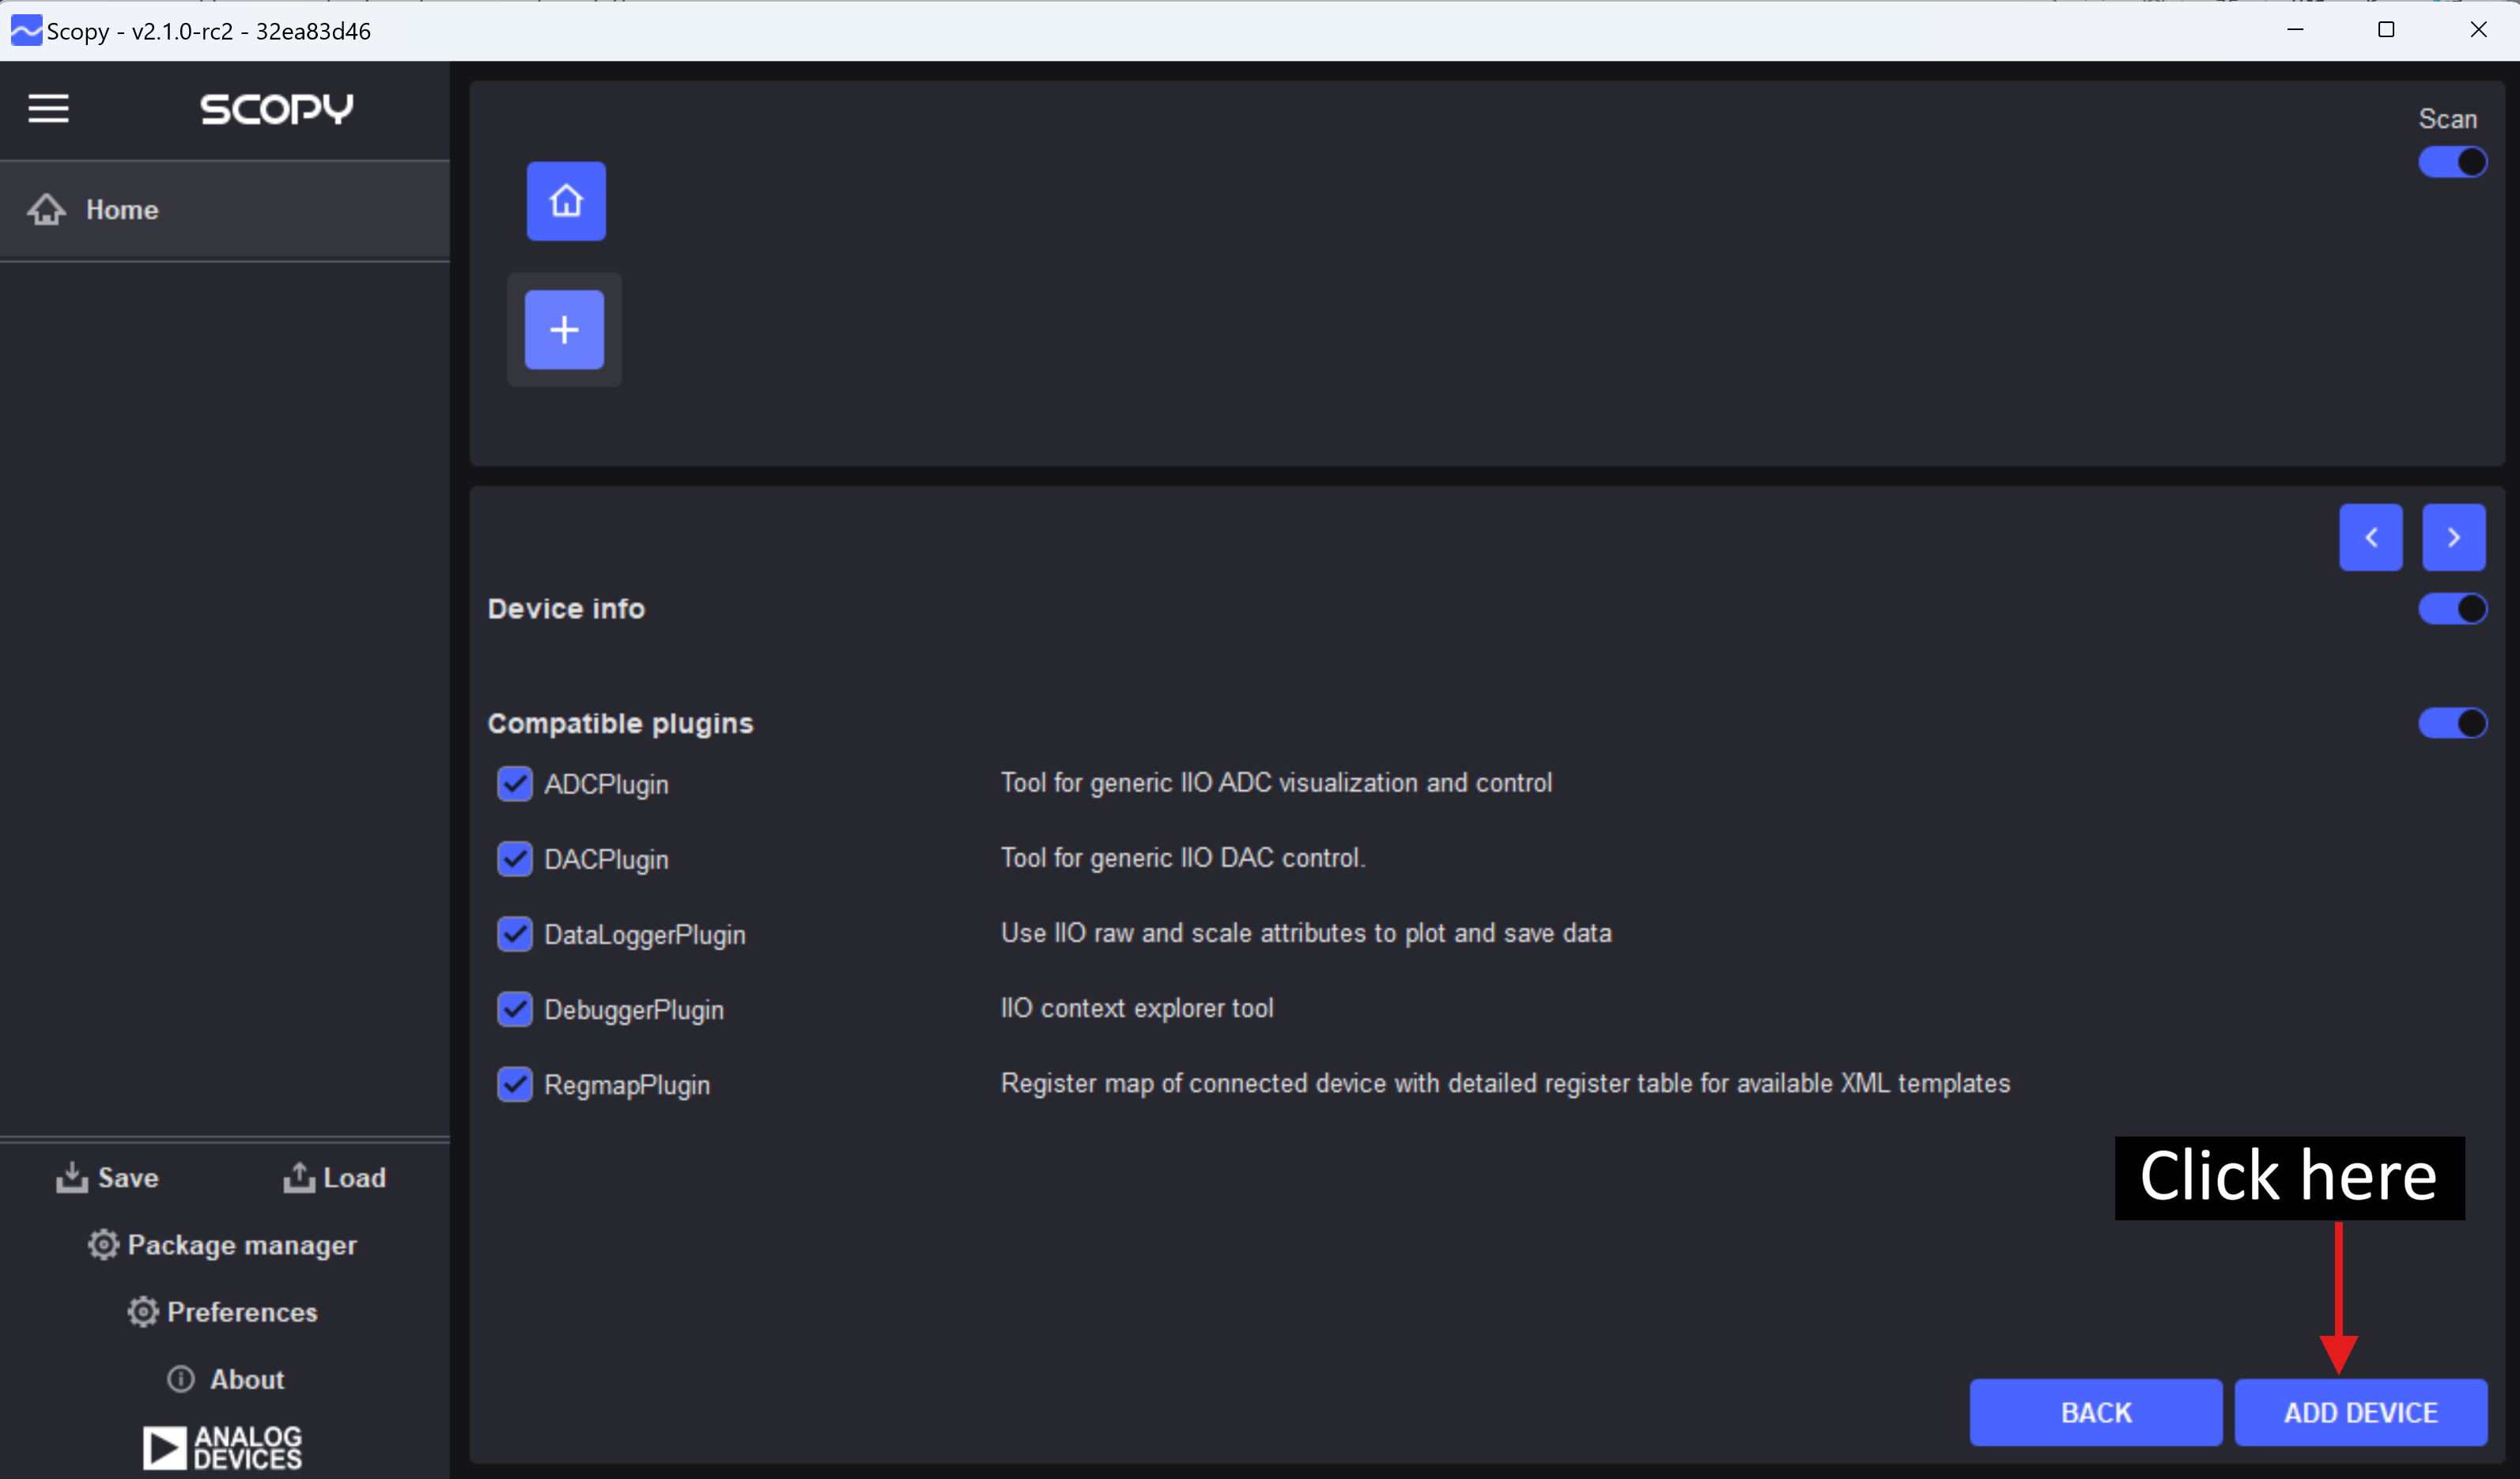
The last step in connecting Jupiter to Scopy is adding the device. In this example all compatible plugins will remain checked, however the user can adjust to their use case.
Example
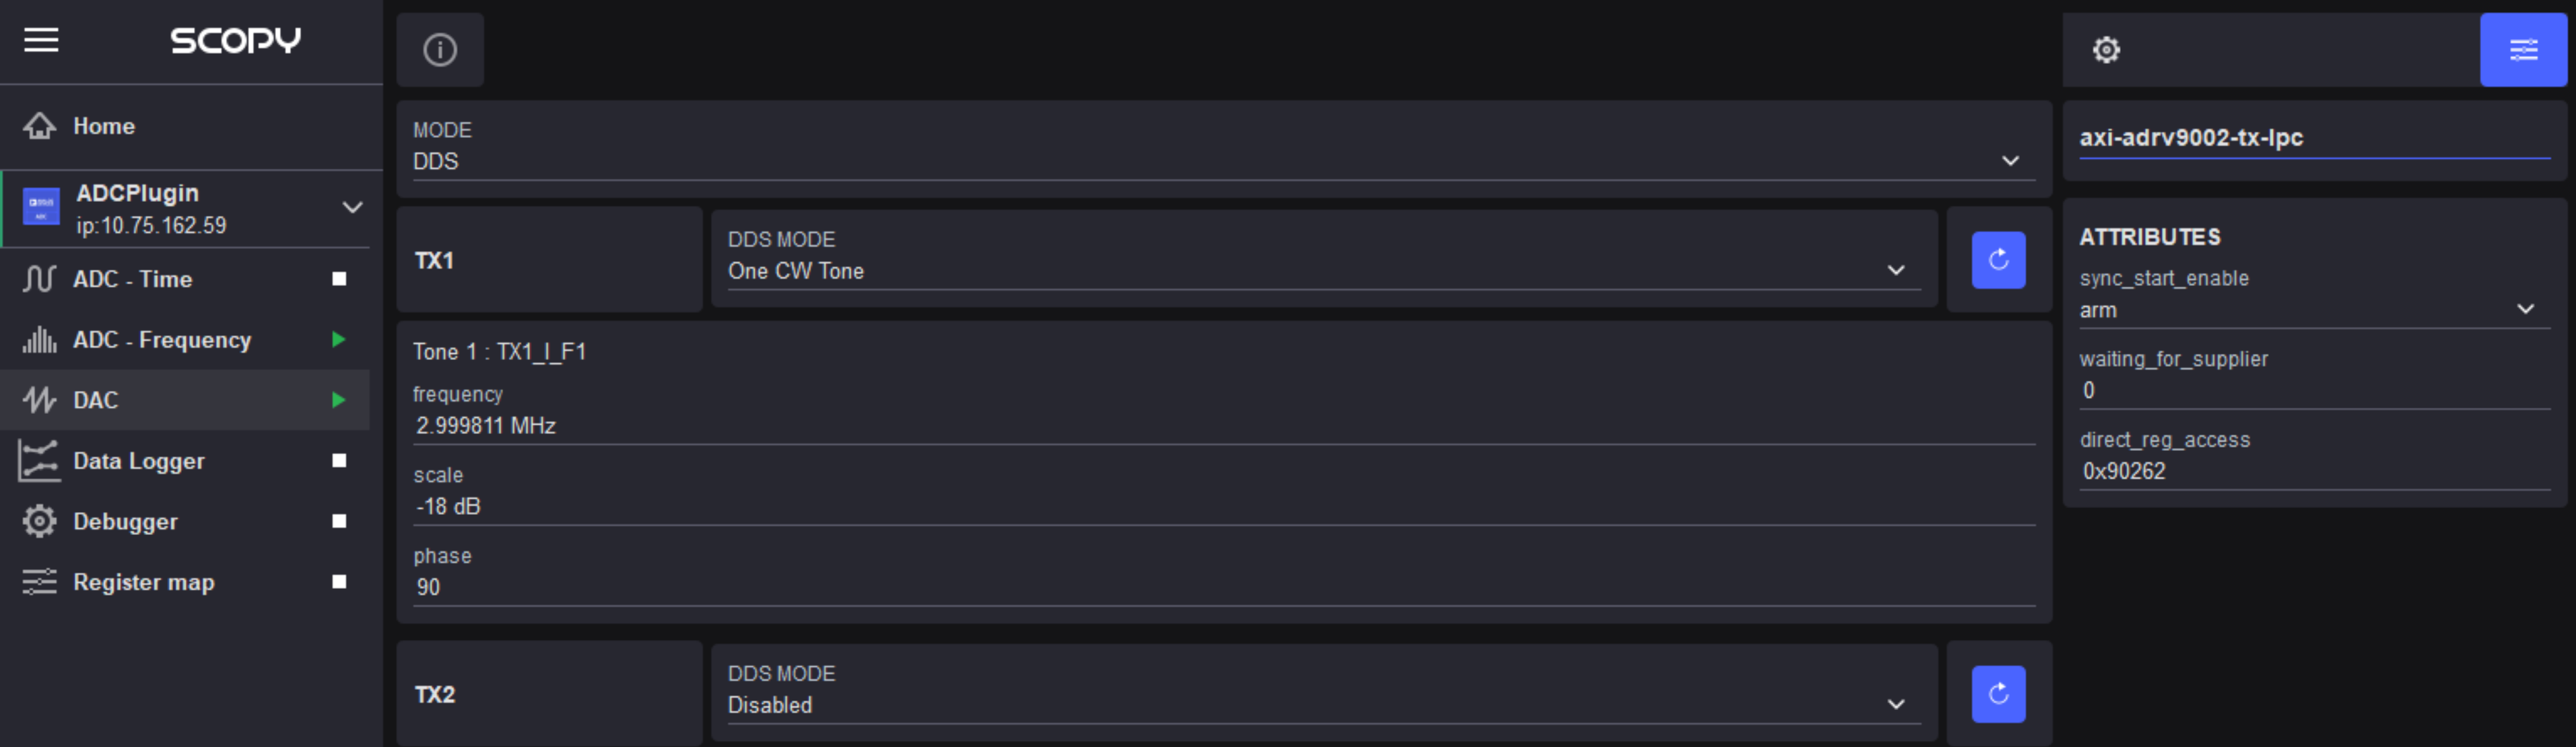
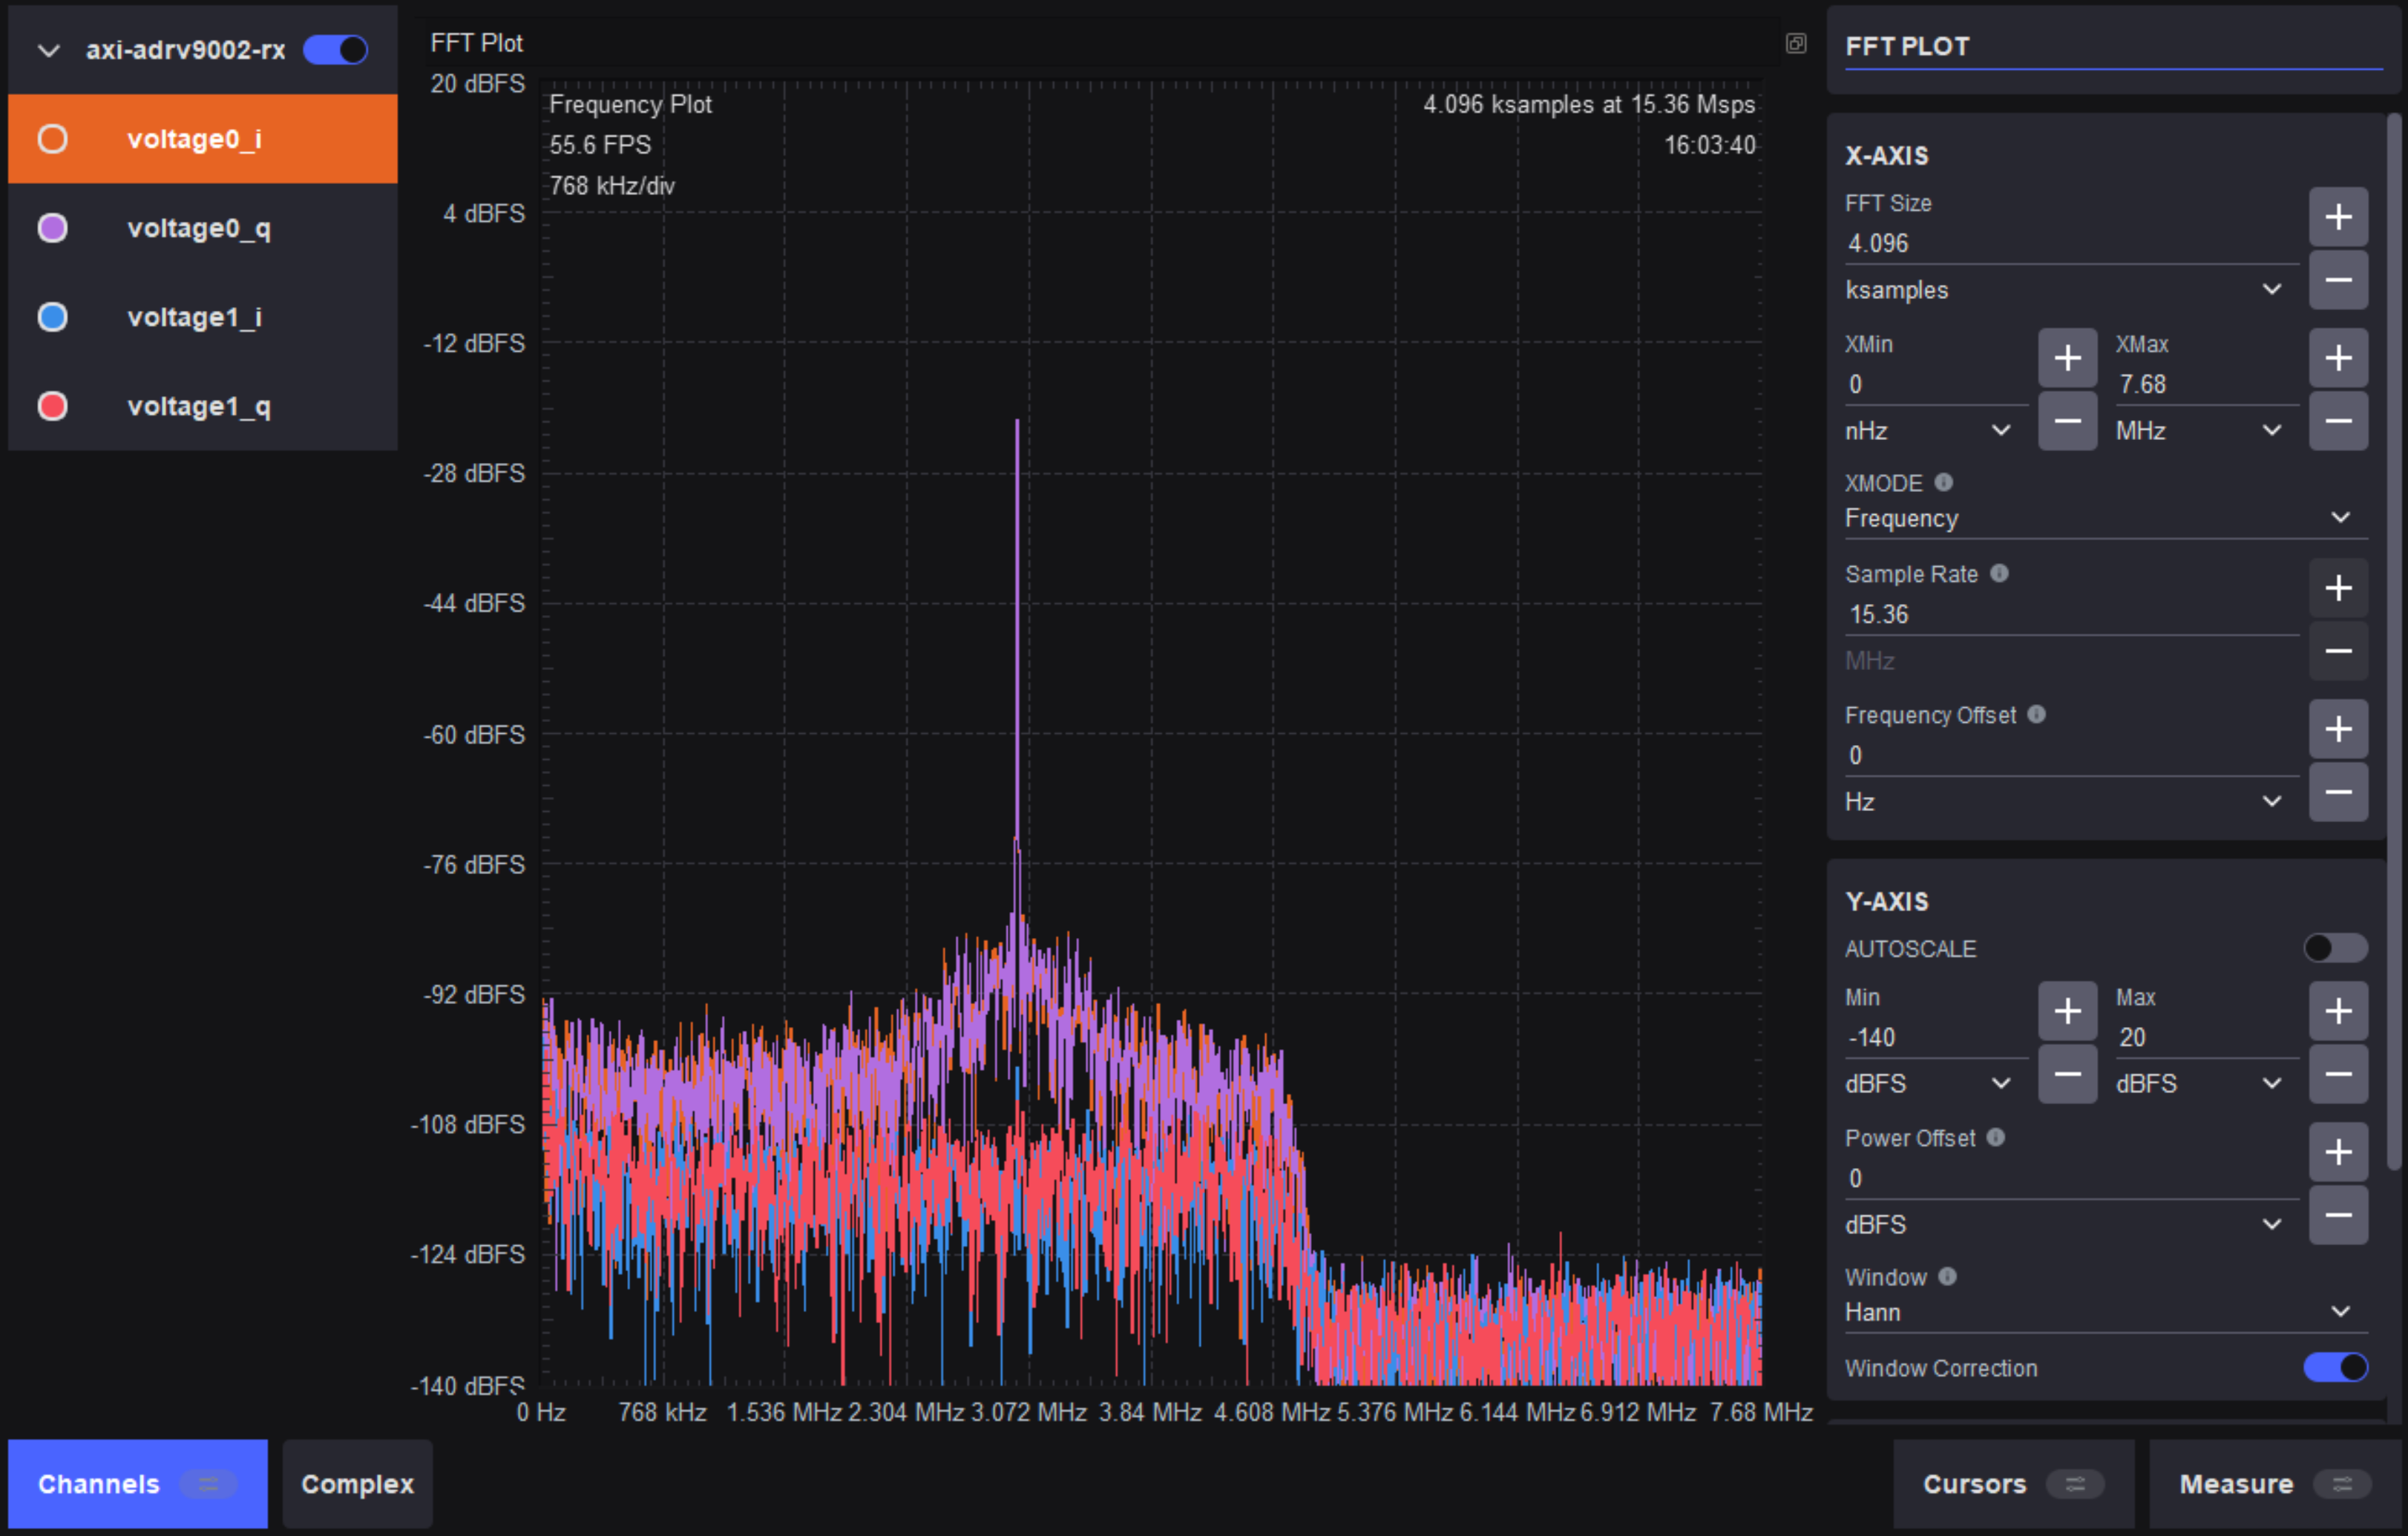
This example uses DDS mode to transmit a 3 MHz continuous wave (CW) tone through the DAC. A simple loopback is used from Tx1A to Rx1A, and the results are observed from the ADC in a spectrogram.
First go to the DAC tab and change the mode to DDS
Click the DDS MODE drop-down menu and select ‘One CW Tone’
Go to the ADC Frequency tab and press the play button
Following these steps will yield the magnitude spectrum shown below.
DAC Settings:
Magnitude Spectrum:
Profile Generation Using Scopy
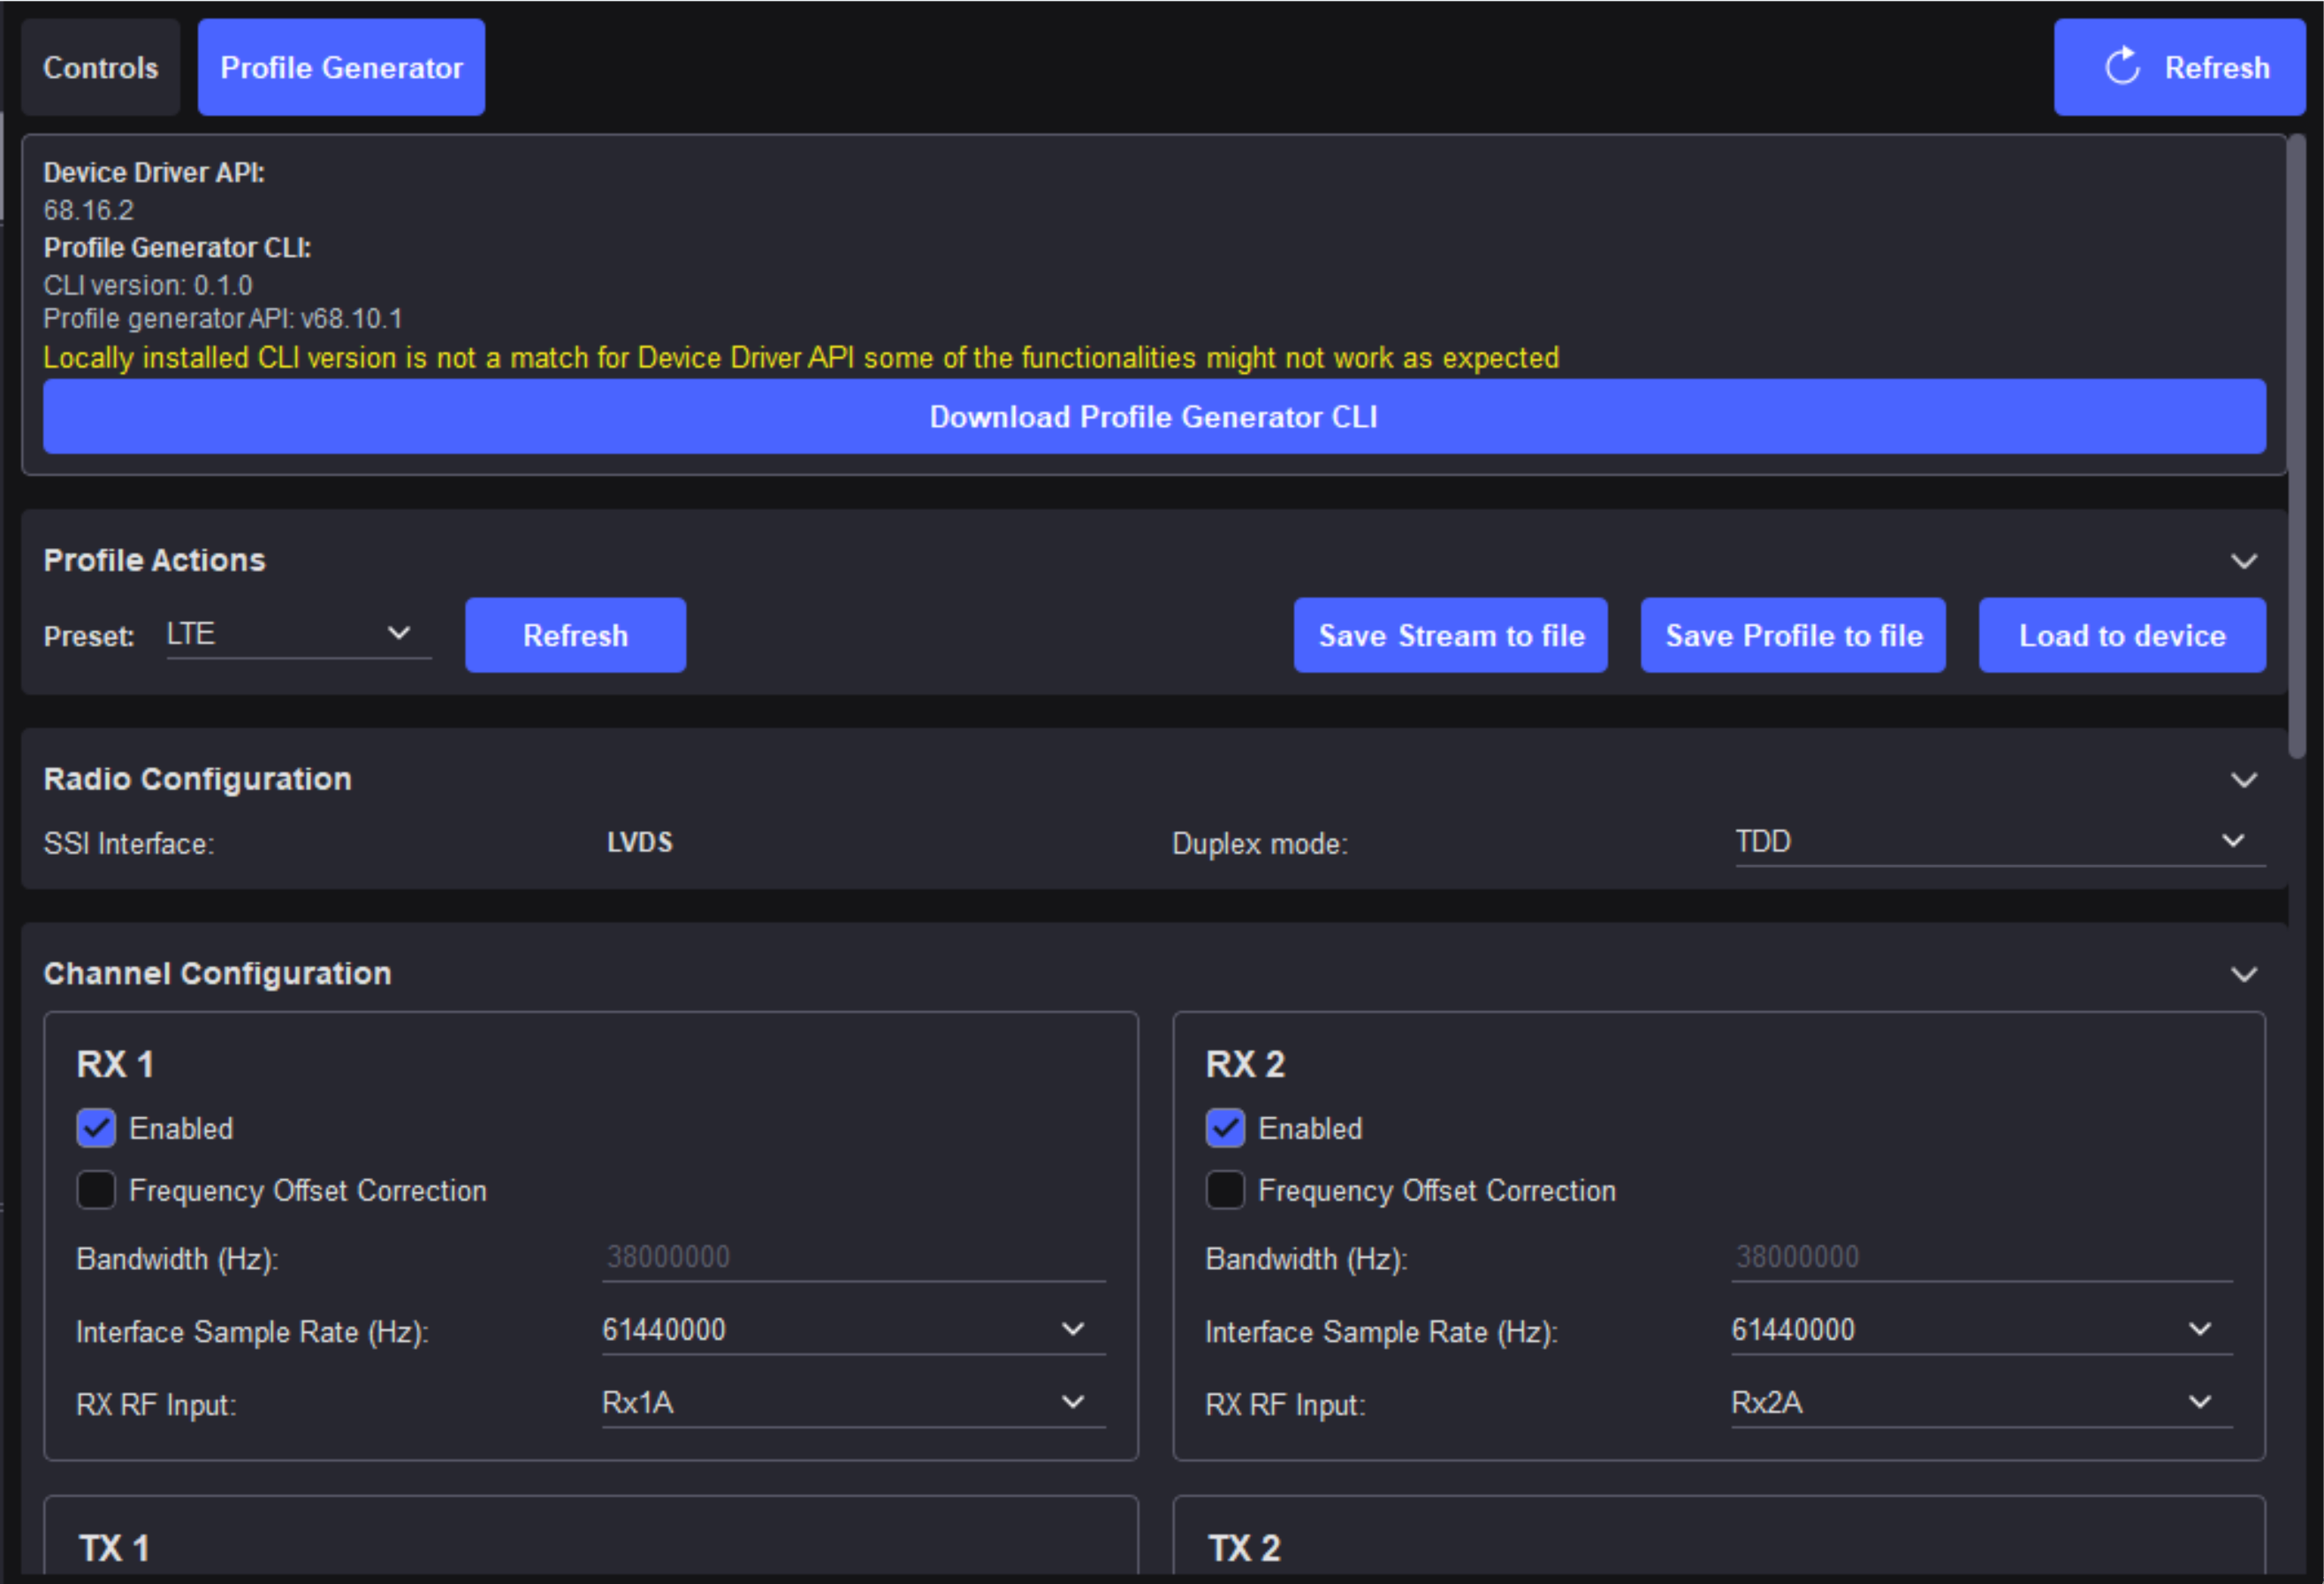
The Profile Generator tab in Scopy allows you to create custom .stream and .json profile files for the ADRV9002. These files configure the radio’s channel settings, sample rates, bandwidths, and duplex mode. Once generated, you can upload them directly to Jupiter from the Controls tab without needing TES or SSH.
Generating Profile Files
Connect to your Jupiter in Scopy and navigate to the Profile Generator tab.
Under Profile Actions, select a preset from the dropdown (e.g., “LTE”) or leave it on the current configuration to customize manually.
Click Refresh to populate the channel configuration fields with the preset values.
Adjust settings as needed under Radio Configuration and Channel Configuration (interface sample rate, bandwidth, duplex mode, RX/TX enable, etc.).
Click Save Stream to file to save the
.streamfile.Click Save Profile to file to save the
.jsonfile.
Uploading Profile Files
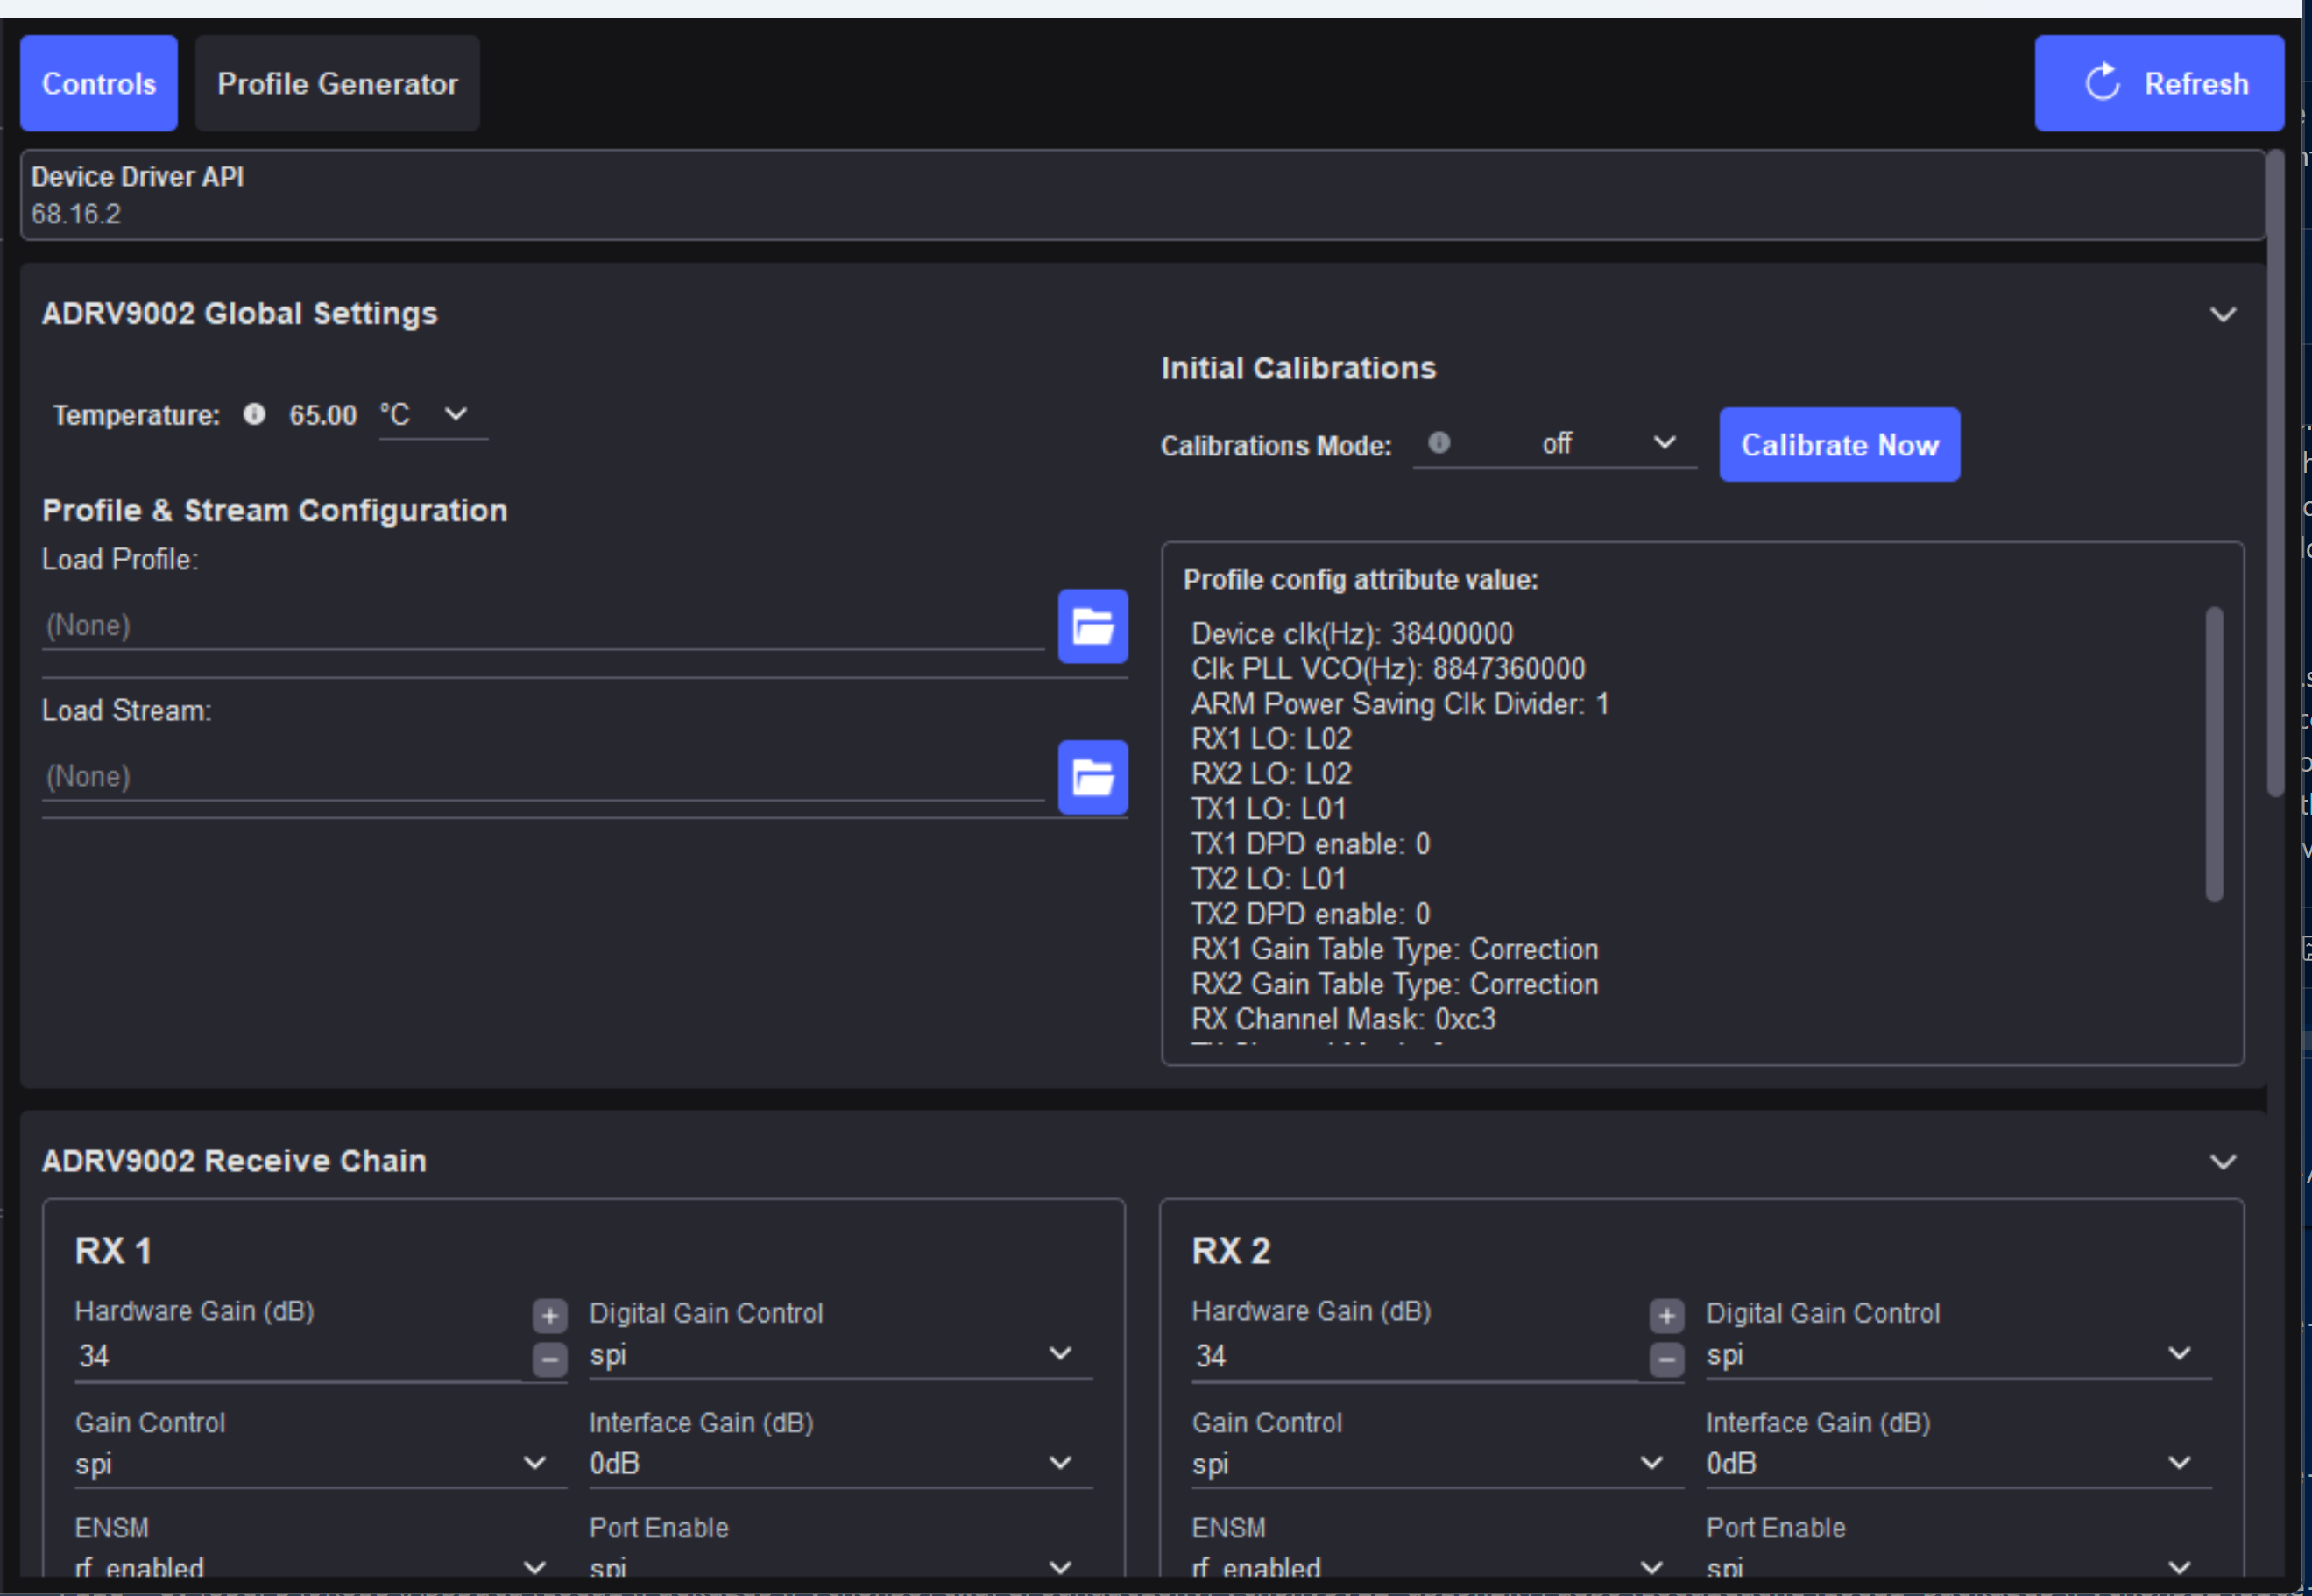
Navigate to the Controls tab.
Under Profile & Stream Configuration, click the folder icon next to “Load Stream” and select the
.streamfile you just saved.Click the folder icon next to “Load Profile” and select the
.jsonfile.The Profile config attribute value panel on the right will update to reflect the new configuration.
Verifying the Profile
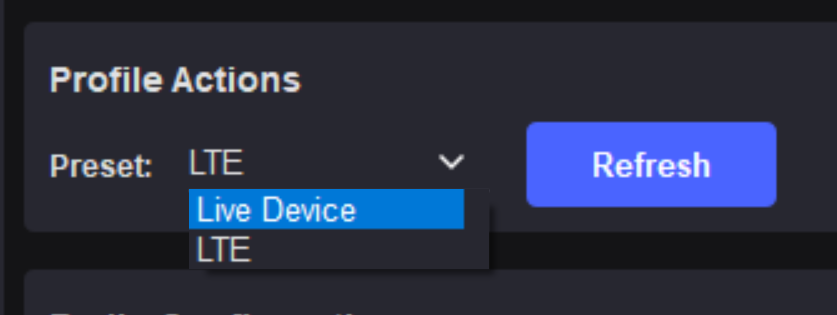
After uploading, you can confirm the new profile took effect:
Disconnect and reconnect to Jupiter in Scopy (or close and reopen Scopy).
Go back to the Profile Generator tab.
Open the Preset dropdown and select Live Device.
The channel configuration displayed should now reflect the settings from your uploaded profile (updated sample rates, bandwidths, etc.).
Notes
You may see a warning that the Profile Generator CLI version (v68.10.1) does not match the Device Driver API (v68.16.2). This can be ignored for basic profile generation. The files will still be created and uploaded successfully.
Profiles uploaded through Scopy’s Controls tab persist across reboots.
The same
.streamand.jsonfiles can also be uploaded via SSH using the commands described in the TES documentation.