SD Card Flashing
The AD-JUPITER-EBZ ships with an SD card, but this SD card MUST be updated with the latest Kuiper image. To do this, follow this procedure:
Download the latest Kuiper Linux Image
Configure the SD card
Install SD Card and Power Up
Download Kuiper Linux
A given use case will dictate which SD card image should be used.
If using a single Jupiter: Kuiper 2.0 build.
On that page, you will see a number of “workflow run results”. Click on the most recent one, at the top of the list, and download its “kuiper_full_64+_image”. It will be a 2 to 3 GB file.
Unzip that file, and locate the image file. This file cannot be directly copied to the SD card, it must be transferred with special image writing software. There are several ways to do this, but the following way is recommended.
If using MCS: MCS documentation.
On this page scroll down until you see “MCS prebuild files”. There will be two .zip files, one for the Jupiter image and the other for Synchrona. Follow the instructions below to flash the SD card, but copy the files from the Jupiter MCS .zip folder instead of the ones in the zynqmp-common and zynqmp-jupiter-sdr folders. The Synchrona .zip contains a device tree overlay (.dtbo) and its source (.dts) for configuring the Synchrona clocks. For Synchrona SD card setup instructions see the MCS setup page.
(Optional) Erase and Format the SD Card using SD Card Formatter
Before the SD Card gets programmed it must be formatted and erased. This can be done with the SD Card Formatter application (https://www.sdcardformatter.com/). This step is recommended if the user is using a new SD card, or there may be something saved on the SD card that could interfere with the image being downloaded.
Insert the SD Card and select it, choose Quick Format option and label the SD Card, e.g. jupiterTest
Press the Format button and wait for the prompt to say it is successful
The SD Formatter software can be closed
SD Card Flash
Several programs can be used to flash the downloaded Kuiper image to the SD Card. Popular options include Win32DiskImager and BalenaEtcher. Both are free, open-source utilities for flashing operating system images (.iso, .img, .zip) onto SD cards and USB drives to create bootable media. In this walkthrough BalenaEtcher will be used.
Ensure you have the image downloaded and unzipped so you have a *.img file to program.
Select the *.img file to program to the SD Card
Select the SD Card to program (double check that this is the correct drive)
Press the Flash button, this may require admin privileges on your laptop. It takes about 10 mins
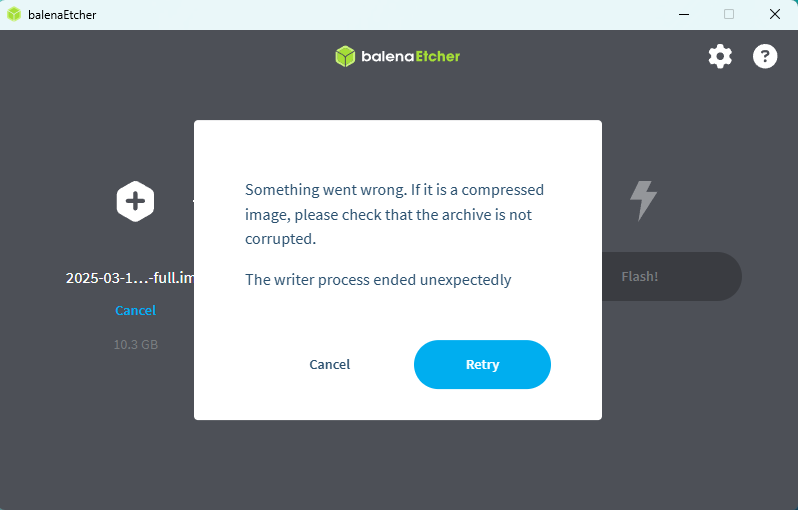
Configure the SD Card
At this point, you now have the Kuiper image installed on your SD card. However, you need to move files to the root directory of the SD Card based on the FPGA platform in your system. For most computers, this is a simple procedure. But if your computer uses a USB encryption, then follow the optional steps at the end of this page.
There are 4 files that need to be copied to the root of the SD Card: Image.img, BOOT.BIN, system.dtb, and boot.scr.
Image.img is found in the “zynqmp-common” folder.
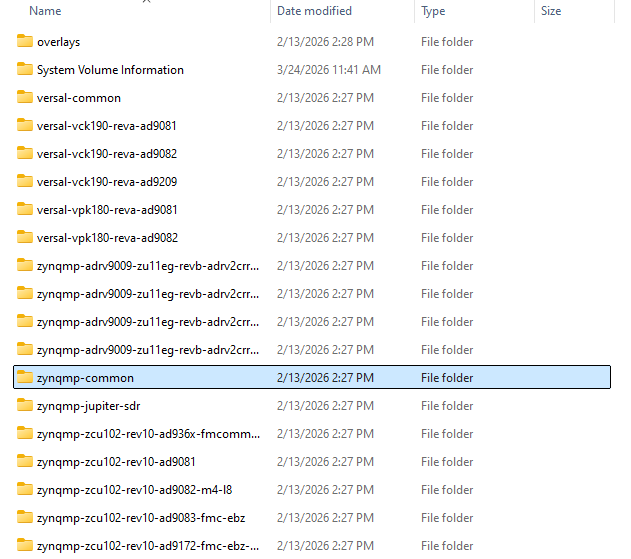
Copy the Image file, go up one level (to the root directory) and paste the file
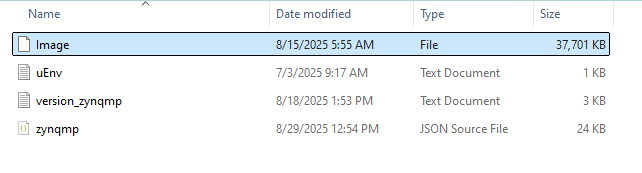
The other 3 files (BOOT.BIN, system.dtb, and boot.scr) are in the zynqmp-jupiter-sdr folder
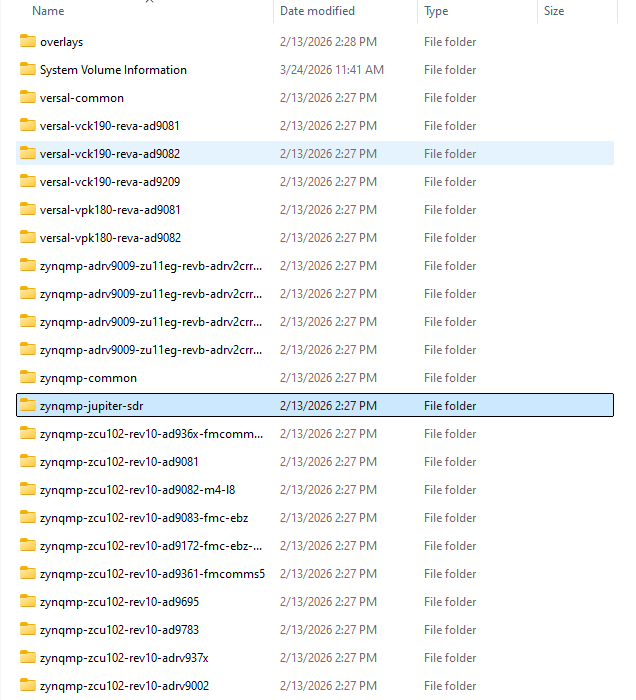
Copy the BOOT.BIN file, boot.scr file, and system.dtb file
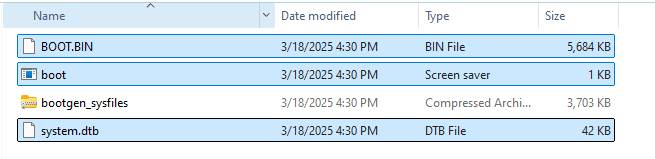
Go up one level (to the root directory) and paste the files
After copying those 4 files to the root directory, close the file explorer and safely eject the SD Card.
(Optional) Dealing with USB Encrypted Computers
Some computers (and all Windows computers within Analog Devices!) encrypt writing to USB devices. But unfortunately, this will make the SD card unreadable to Jupiter. If another, non-encrypted, computer is available, it is best to use that one. But if you must use the encrypted computer, then the following procedure may work:
Following programming, remove the SD Card and re-insert it into the PC/Laptop
Open Windows Explorer, do not select the SD Card Drive, this may encrypt the SD Card prompting a restart
Right click the BOOT drive and select properties and go to the Sharing Tab, copy the network drive
Check if the network path is shared: Right click the BOOT drive and select properties and go to the Sharing Tab
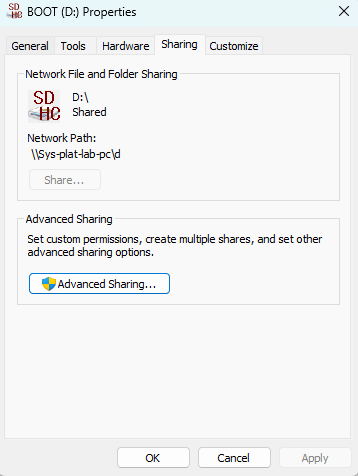
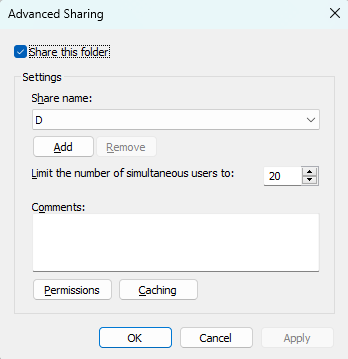
If the network path says not shared, go to Advanced Sharing
Click Share this folder
Next, click permissions and make sure that Full Control is selected under Permissions for Everyone
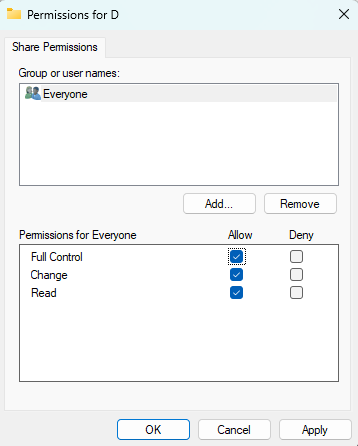
Click apply and ok in the Permissions and Properties tabs, respectively
Create a Map Network Drive to this, right click “This PC” and select Map Network Drive and enter the path copied
A new drive will be created and when you use this drive, there is no encryption
This drive will pop up automatically
Now go to the “Configure SD Card” section and follow the steps