ZedBoard Quick Start Guide
All the products described on this page include ESD (electrostatic discharge) sensitive devices. Electrostatic charges as high as 4000V readily accumulate on the human body or test equipment and can discharge without detection. Although the boards feature ESD protection circuitry, permanent damage may occur on devices subjected to high-energy electrostatic discharges. Therefore, proper ESD precautions are recommended to avoid performance degradation or loss of functionality. This includes removing static charge on external equipment, cables, or antennas before connecting to the device.
This guide provides quick instructions on how to setup the EVAL-AD7616SDZ on:
Using no-OS as software
Necessary files
The following files are needed:
HDL boot file:
system_top.xsano-OS project: projects/ad7616-sdz
Instructions on how to build the HDL boot file from source can be found here:
AD7616-SDZ HDL project build documentation. More HDL build details at Build an HDL project.
Required software
AMD Xilinx Vivado and Vitis (downloading Vitis from here will include Vivado as well)
A UART terminal (Putty/Tera Term/Minicom, etc.) with baud rate 115200 (8N1)
Required hardware
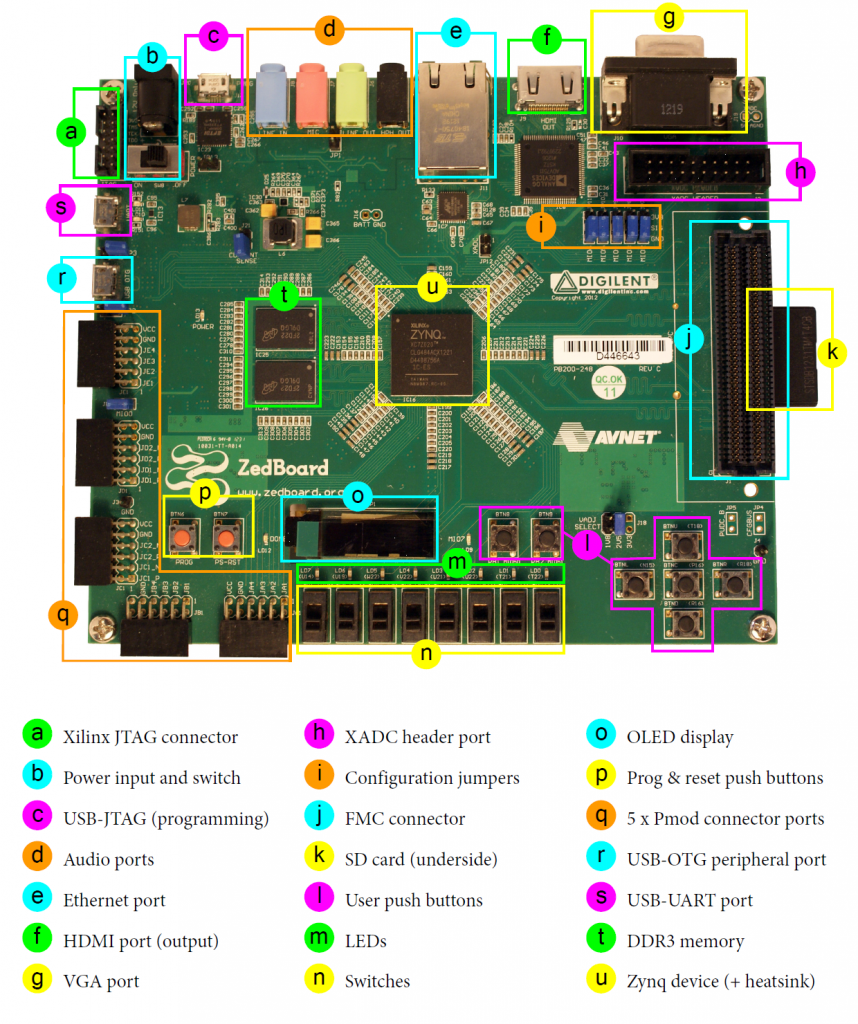
ZedBoard FPGA board and its power supply (12 V DC)
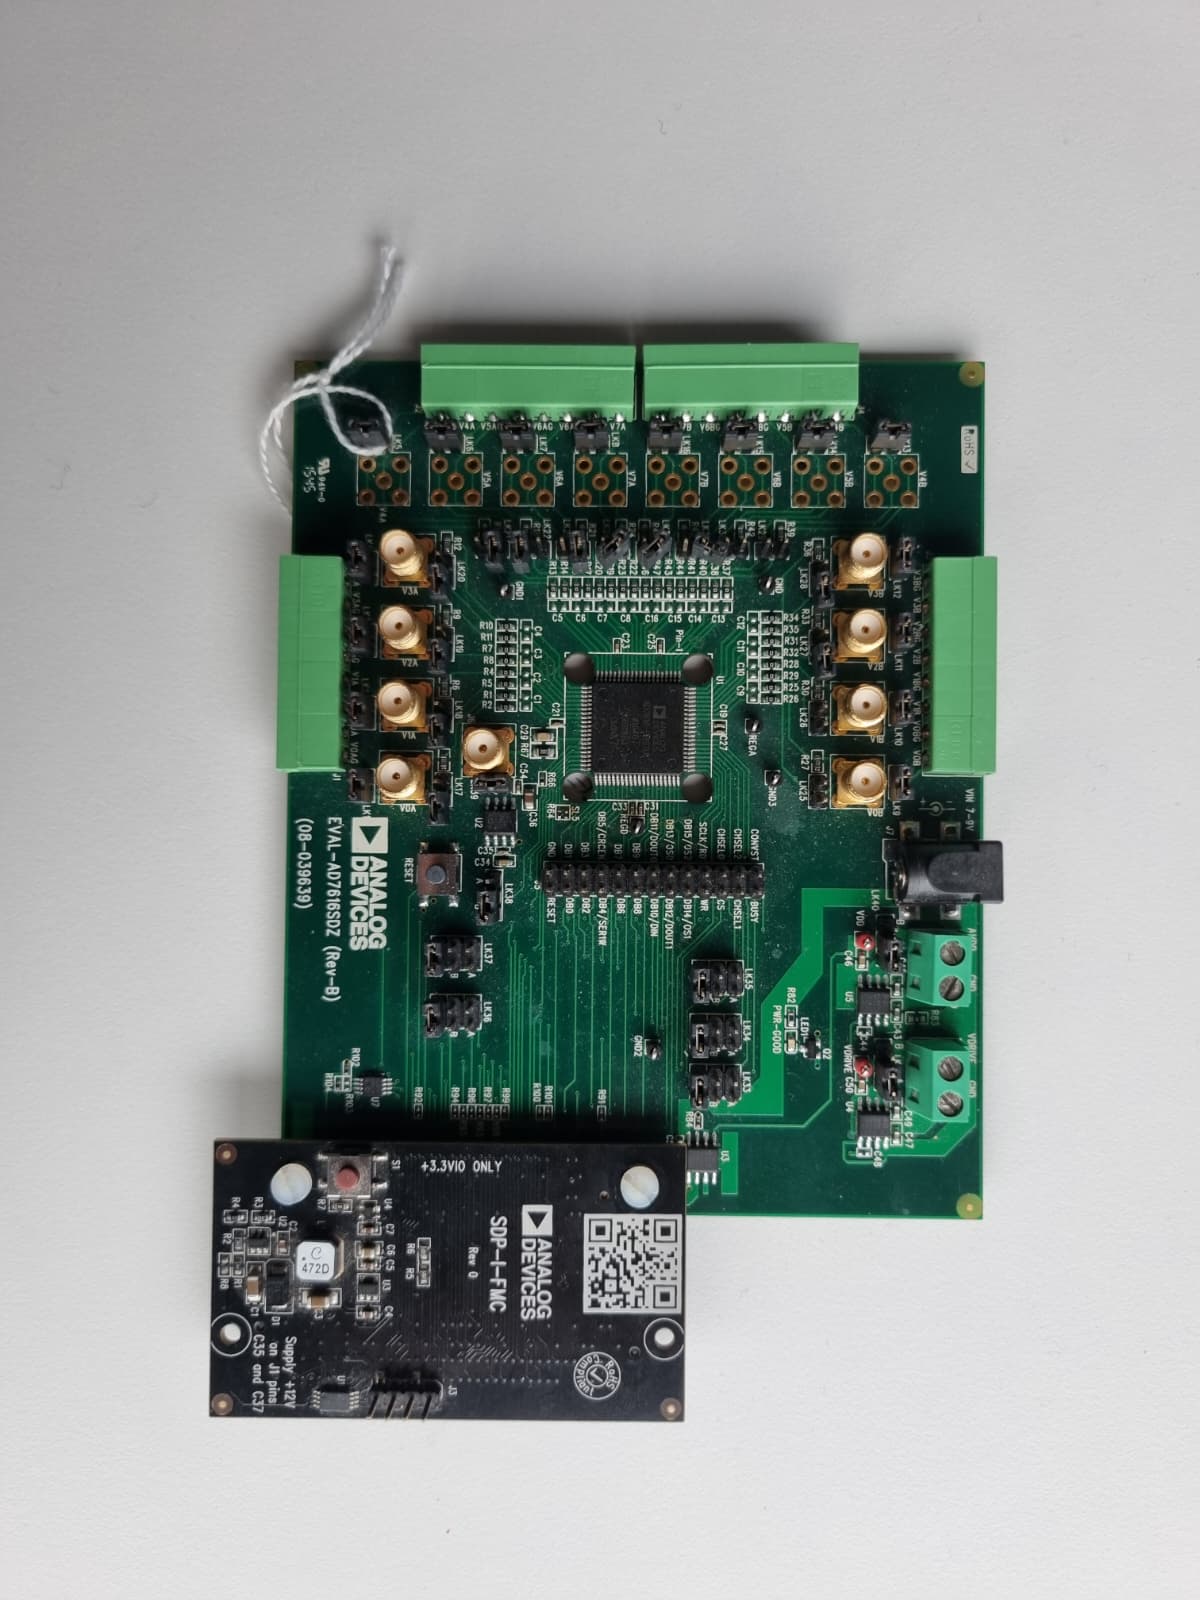
EVAL-AD7616SDZ evaluation board and a 7 V to 9 V DC power supply (J7)
SDP-I-FMC adapter board
2x Micro-USB cables, one for UART (J14) and one for JTAG (J17)
More details as to why you need these, can be found at Prerequisites.
Testing
Creating the setup
Follow the steps in this order, to avoid damaging the components:
Connect the EVAL-AD7616SDZ to the SPD-I-FMC adapter
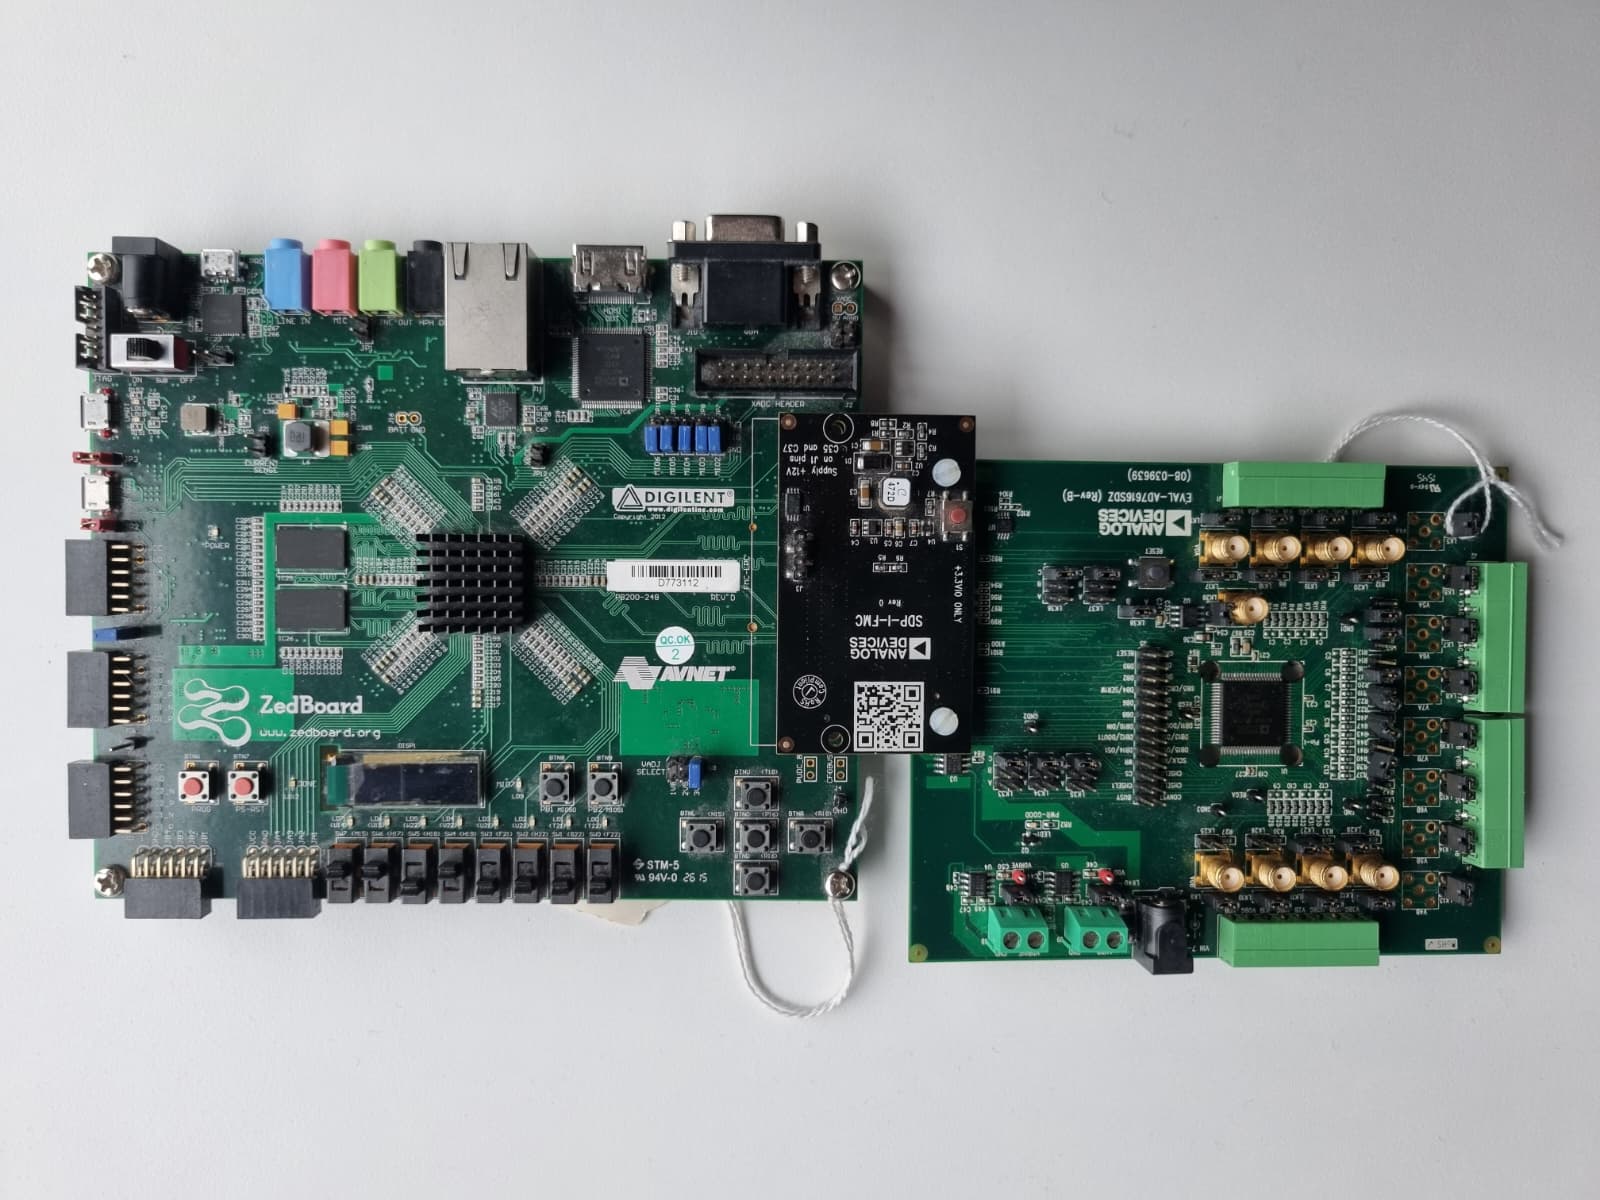
Plug the SPD-I-FMC into the FMC connector of the ZedBoard
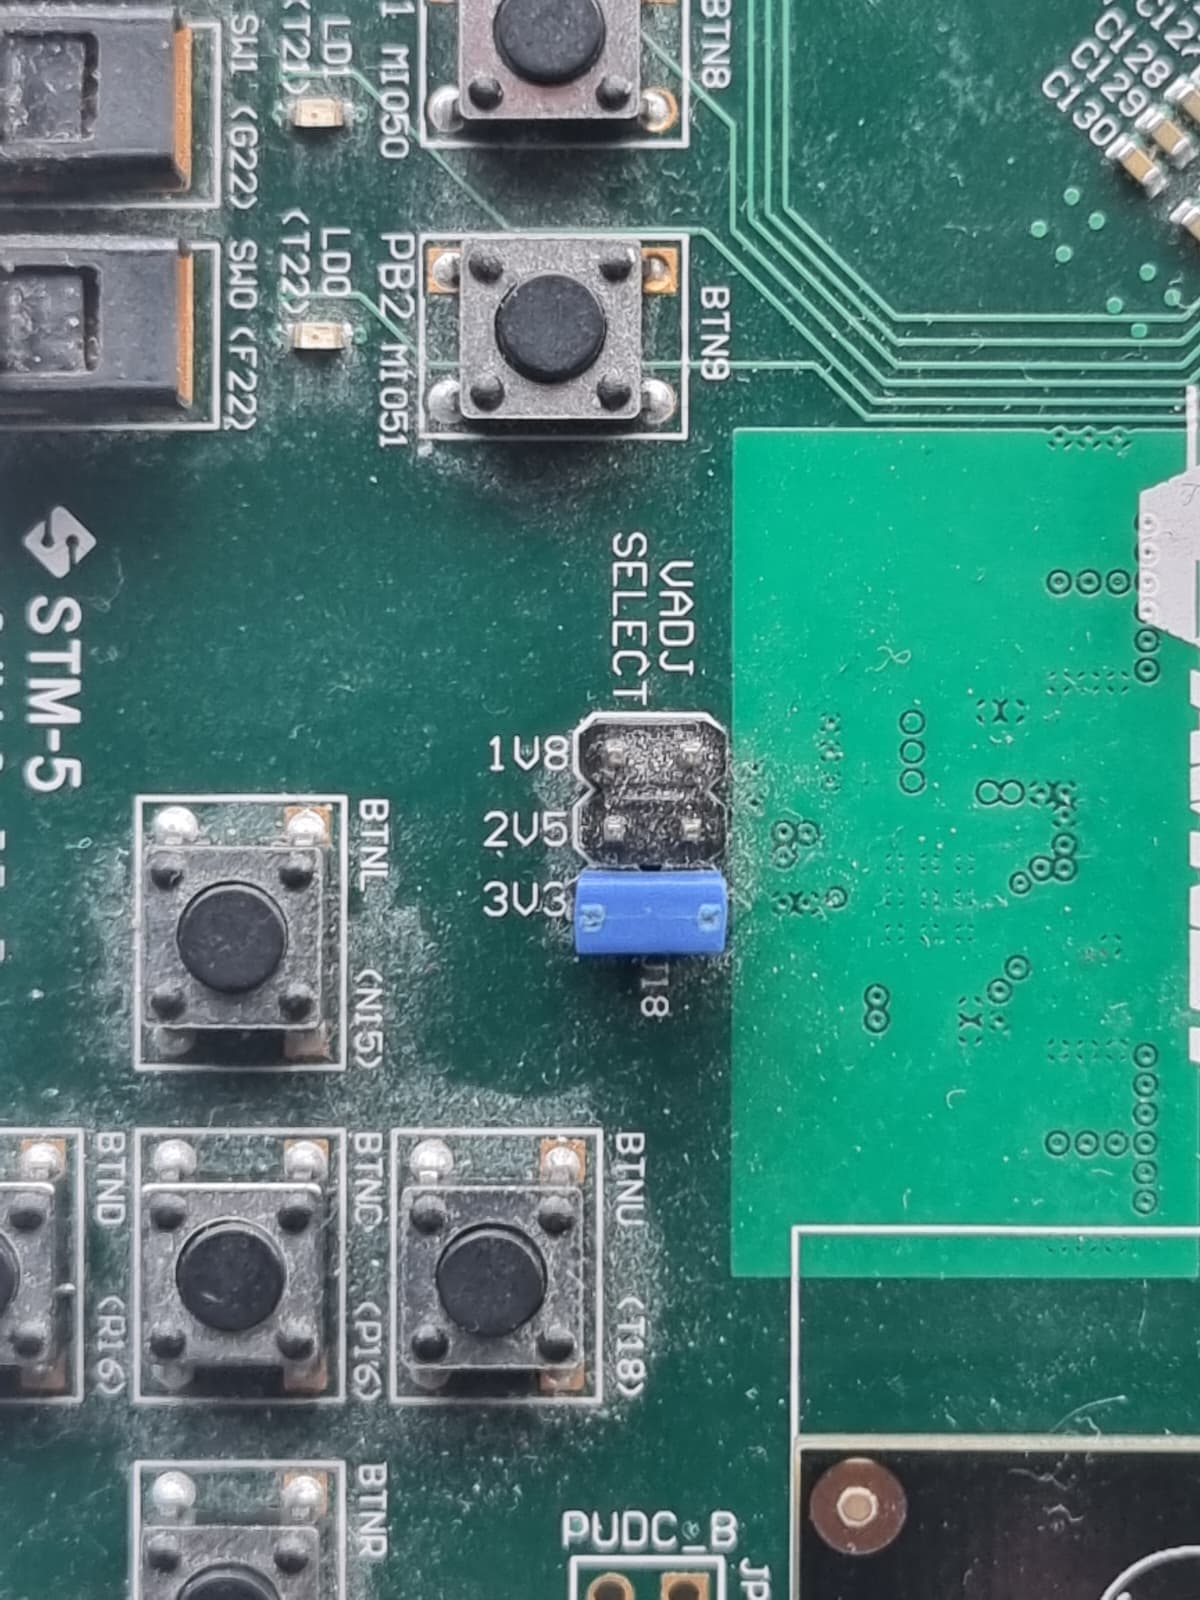
Set the VADJ jumper on the ZedBoard to 3.3 V
Warning
Because of the SPD-I-FMC, the VADJ level on the ZedBoard must be set to 3.3 V.
Configure the EVAL-AD7616-SDZ resistors (on the back) as follows:
Jumper/Solder link
Position
Description
SL1
Unmounted
Channel Sequencer Enable
SL2
Unmounted
RC Enable Input
SL3
Unmounted
Selects 1 MISO mode
SL4
Unmounted
Oversampling Ratio Selection OS2
SL5
Mounted
If mounted, selects serial interface
SL6
Unmounted
Oversampling Ratio Selection OS1
SL7
Unmounted
Oversampling Ratio Selection OS0
LK40
A
Onboard 5V power supply selected
LK41
A
Onboard 3.3V power supply selected
Note
The configuration above selects the serial interface (SL5 mounted). To use the parallel interface instead, unmount SL5.
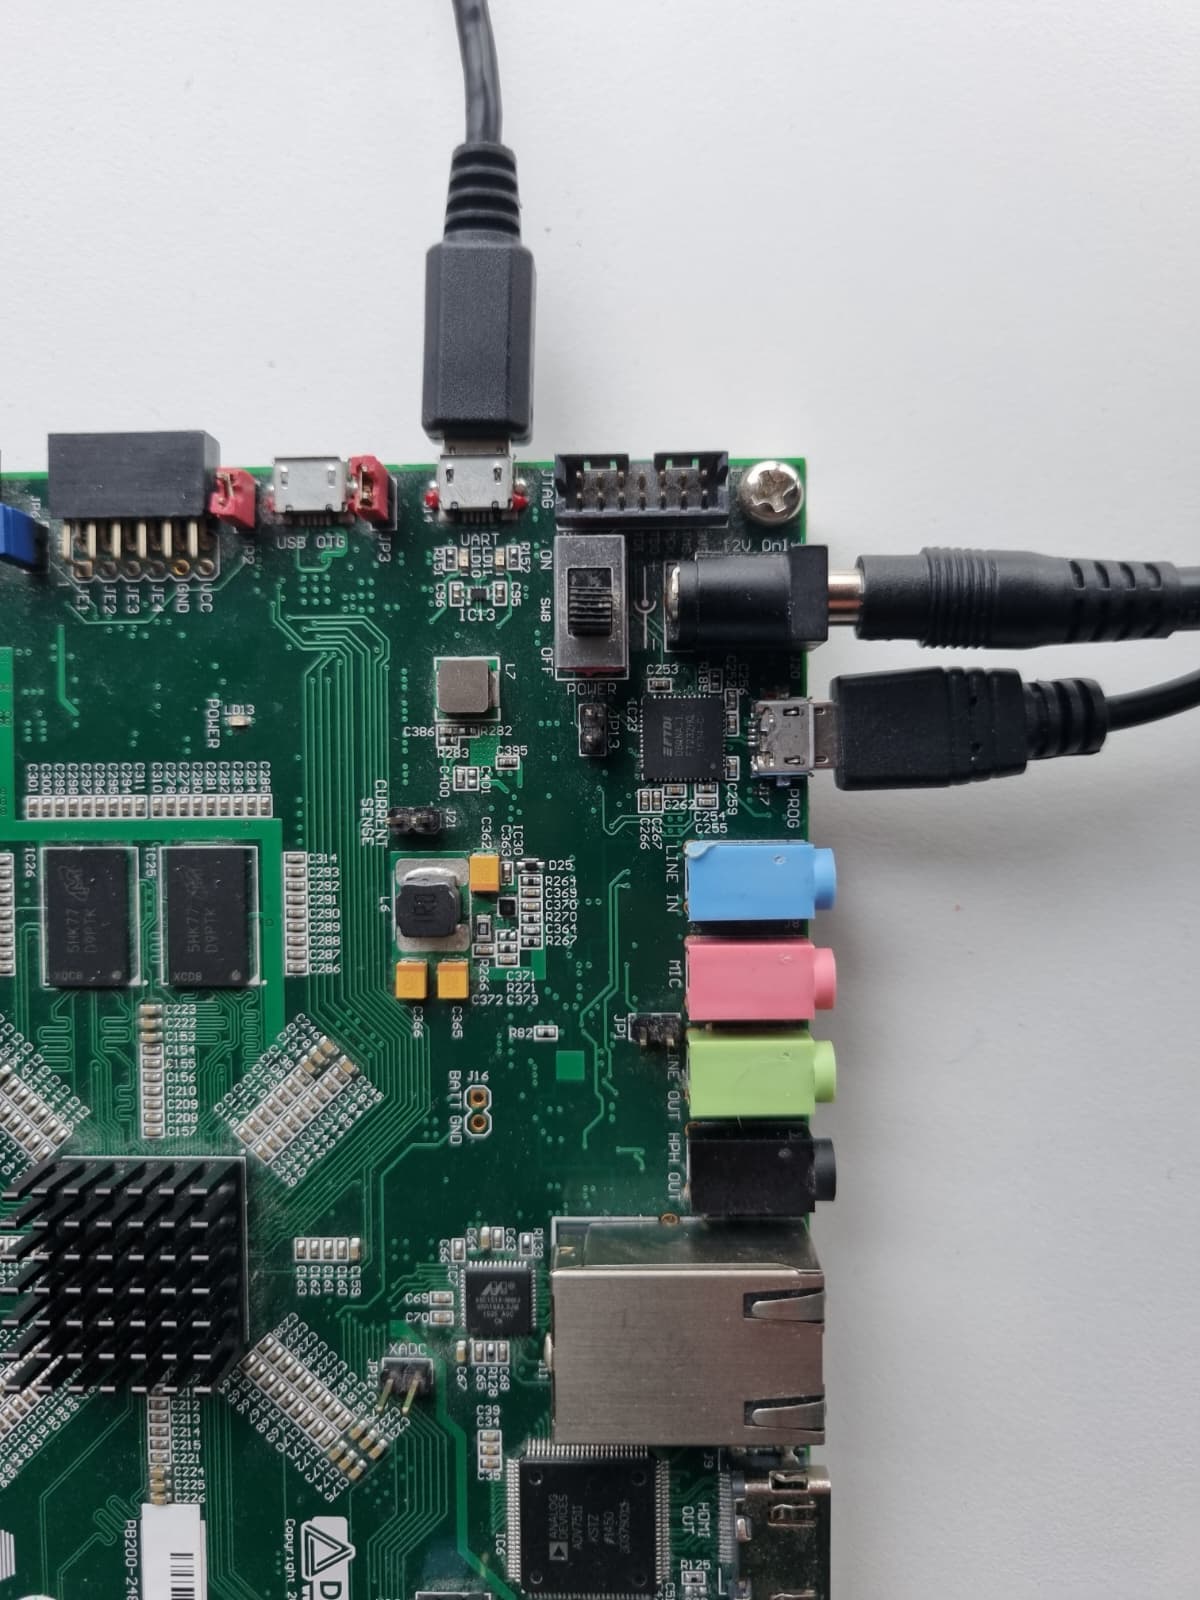
Connect Micro-USB cable to the UART connector (J14) on the ZedBoard and to your host PC
Connect Micro-USB cable to the JTAG connector (J17) on the ZedBoard and to your host PC
Connect the power supply to the ZedBoard
Connect a 7 V to 9 V DC power supply to the EVAL-AD7616SDZ power jack (J7)
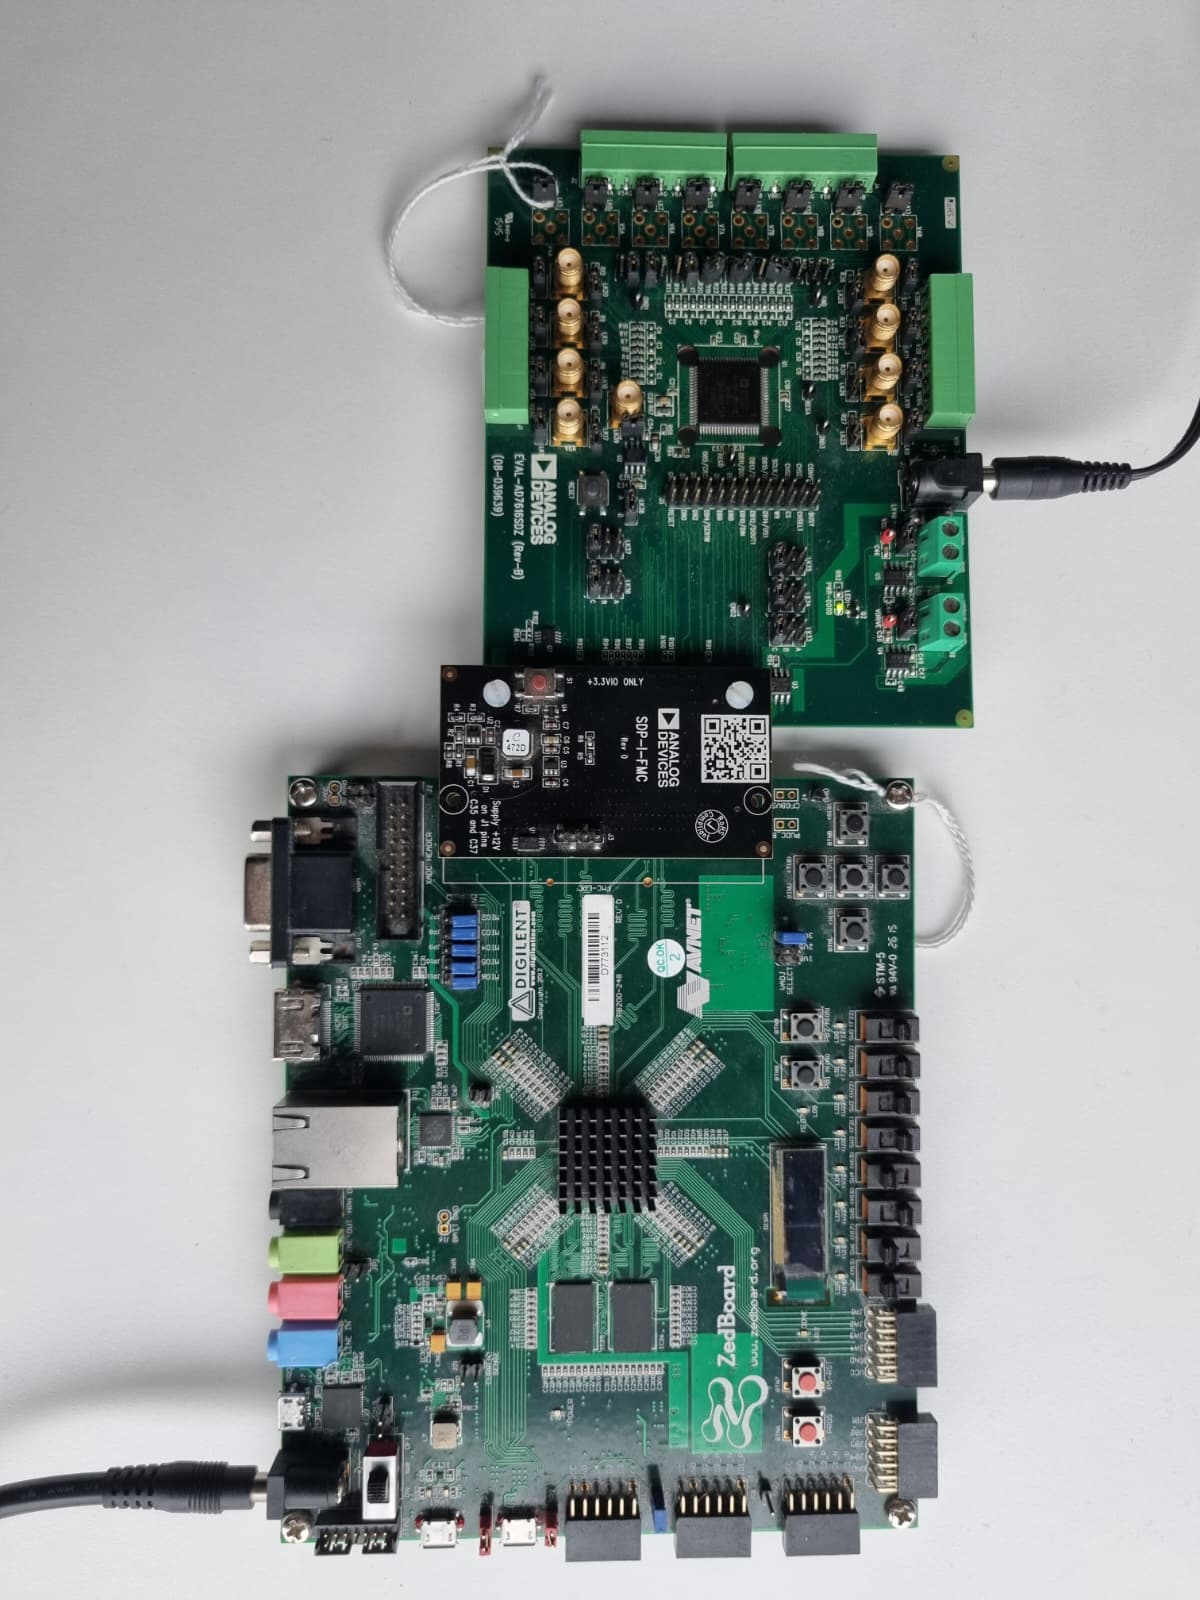
Ensure both boards share a common ground connection
Build the HDL project:
Verify you have the correct version of Vivado installed. The supported version is listed on the HDL releases page.
Build the HDL project to generate the
system_top.xsafile using the Build an HDL project guide.Important
The make command varies based on the interface you want to use:
Serial interface:
$ make SER_PAR_N=1
Parallel interface:
$ make SER_PAR_N=0
Refer to the AD7616 No-Os Example Project for instructions on how to build and run the no-OS project on the ZedBoard.
Turn on the power switch on the ZedBoard
Observe console output messages on your terminal (use the first ttyUSB or COM port registered)