Impact Measurement Demo using the Arduino Uno
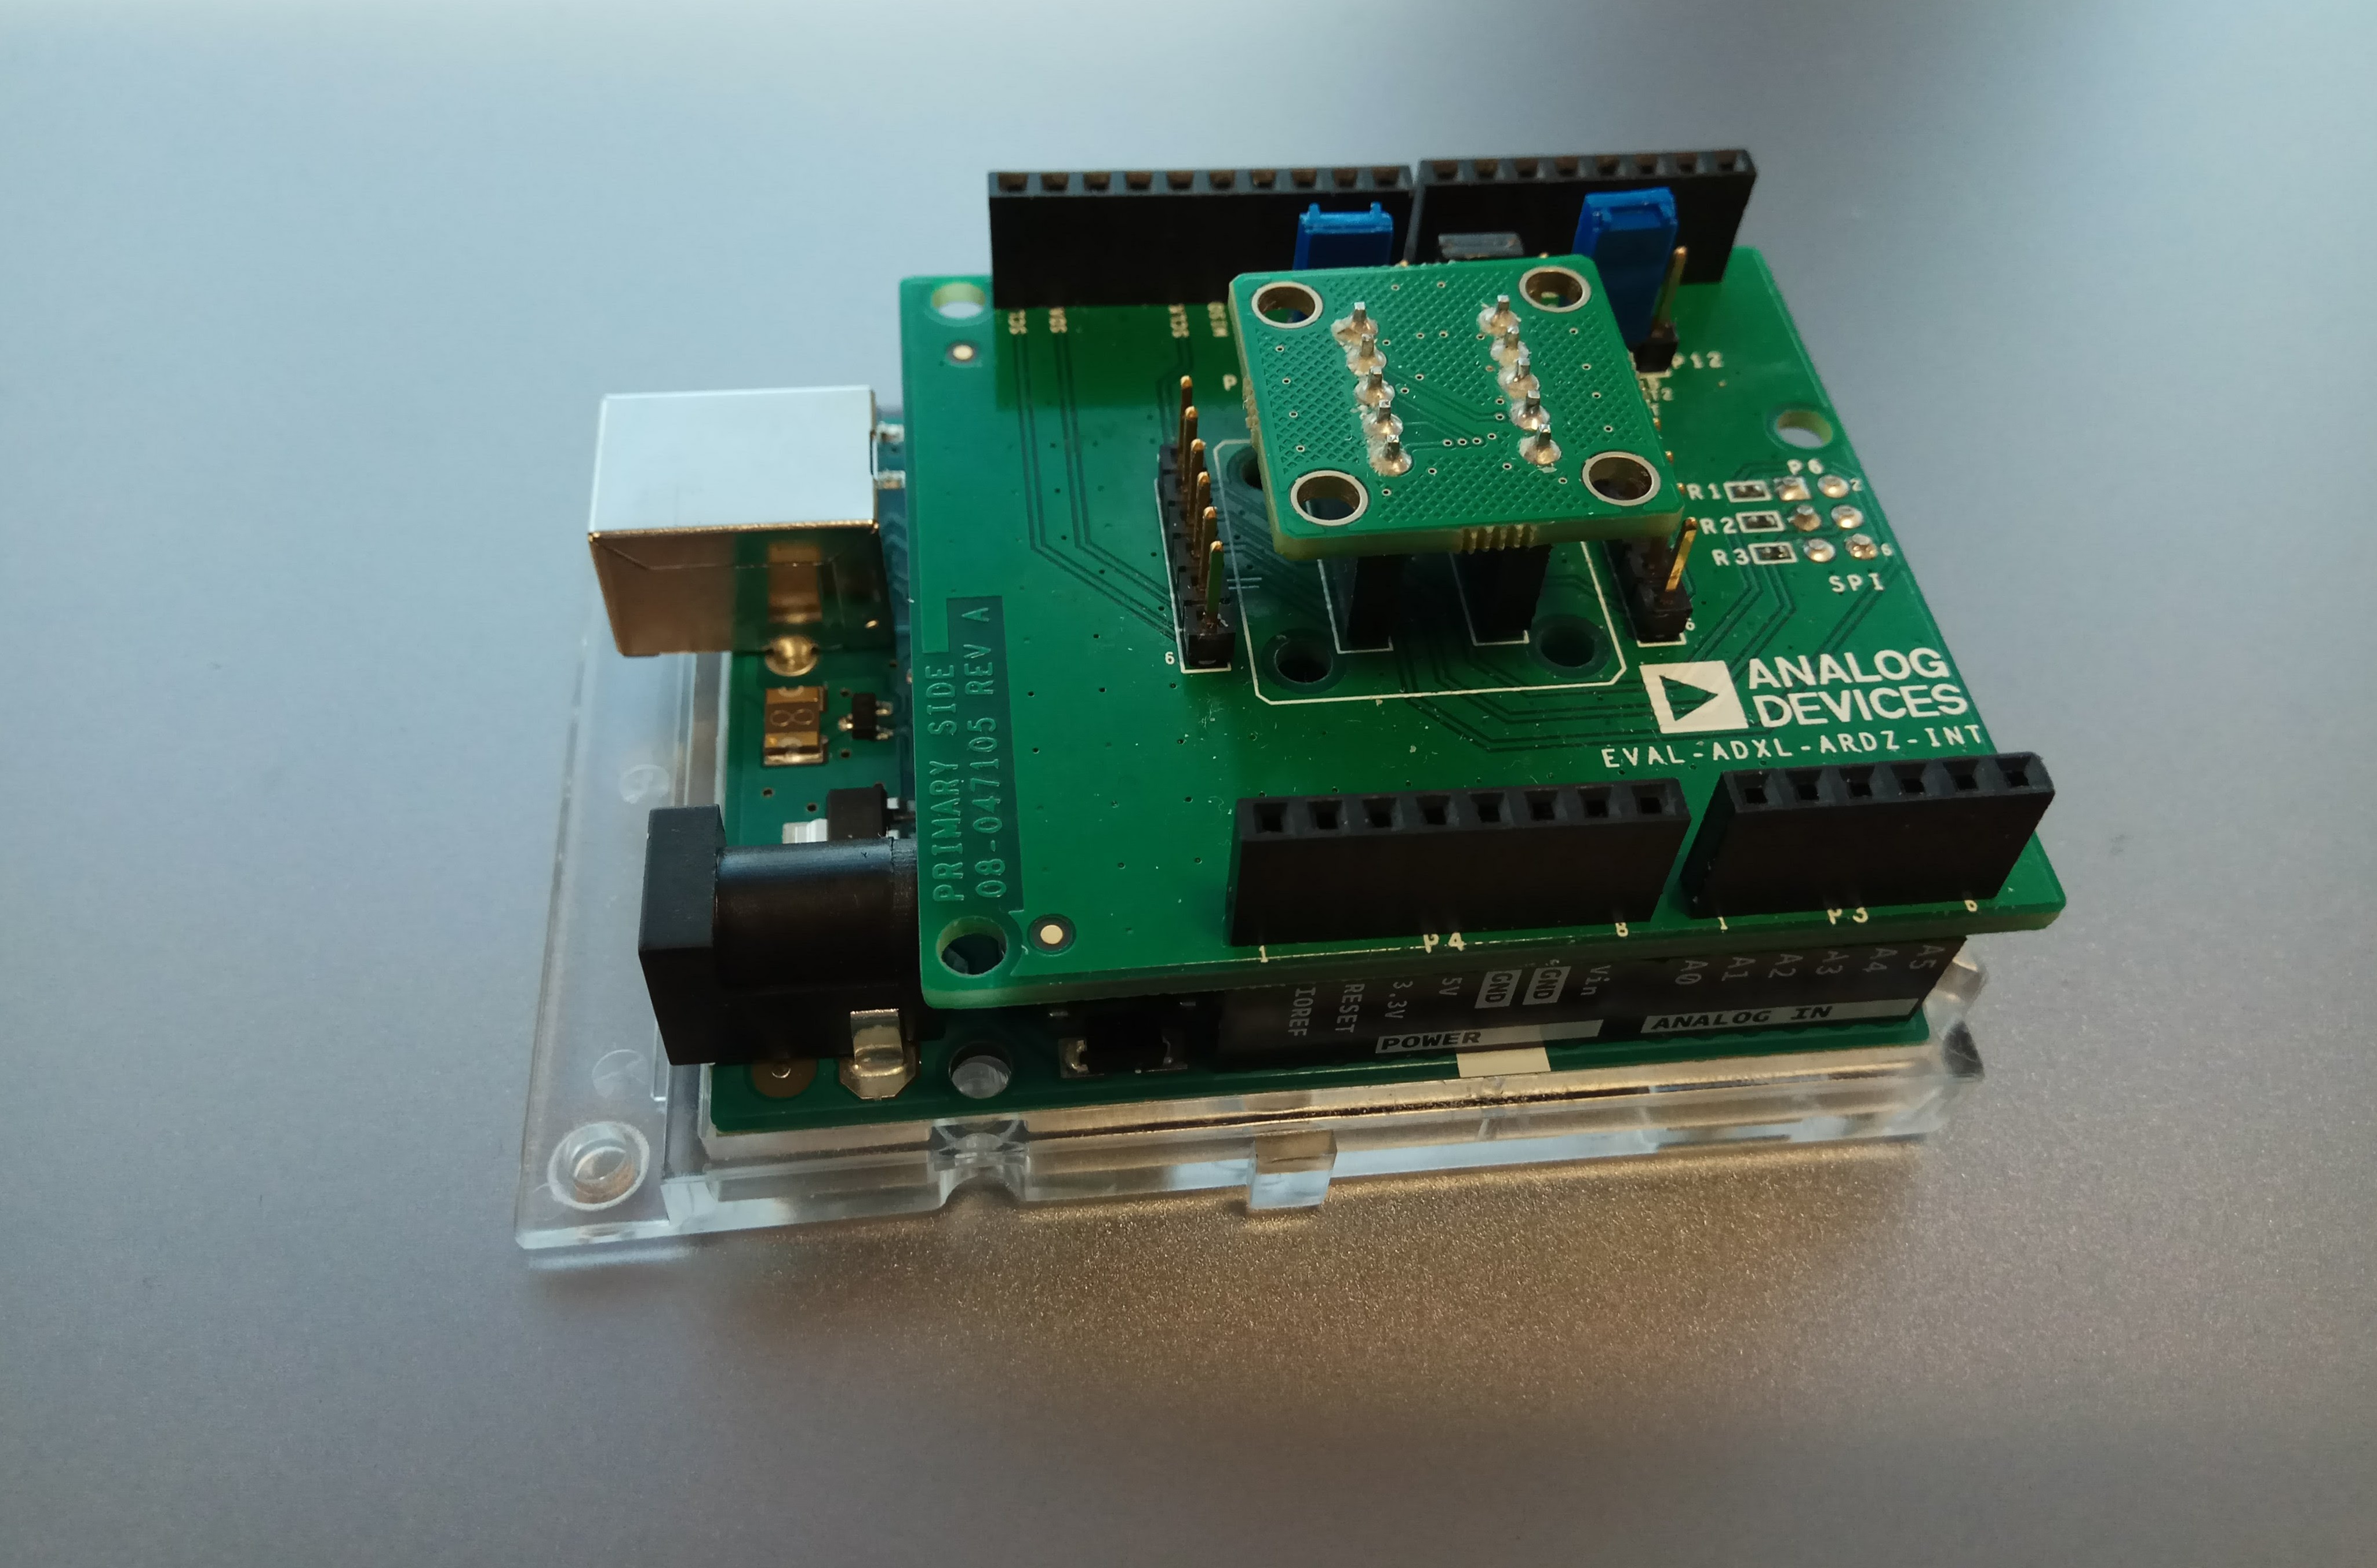
This demo will use EVAL-ADXL372-ARDZ shield along with Arduino Uno base board to create a impact measurement application, using the Arduino IDE.
General Description/Overview
The ADXL372_example project uses the EVAL-ADXL372-ARDZ shield which has an ADXL372 accelerometer. The ADXL372 is configured to operate in “Instant On” mode which means that the device is powered down, until the sensor records an impact event that triggers a threshold. Once that level is surpassed, the ADXL372 automatically goes into measurement mode to capture the rest of the impact event.
The ADXL372 is an ultralow power, 3-axis, ±200 g MEMS accelerometer.
Important
To generate an impact event just hit the device with the palm of your hand.
Demo Requirements
The following is a list of items needed in order to replicate this demo.
Hardware
Arduino Uno Rev 3
EVAL-ADXL372-ARDZ
Type B to Type A USB cable
PC or Laptop with a USB port
Software
ADXL372_example sketch
Arduino Interactive Development Environment(IDE)
Setting up the Hardware
Plug the EVAL-ADXL372-ARDZ shield on top of the Arduino Uno development board by matching up the POWER, ANALOG, DIGI0, DIGI1 connectors.
Note, the boards should only plug together one way, preventing reverse connections.
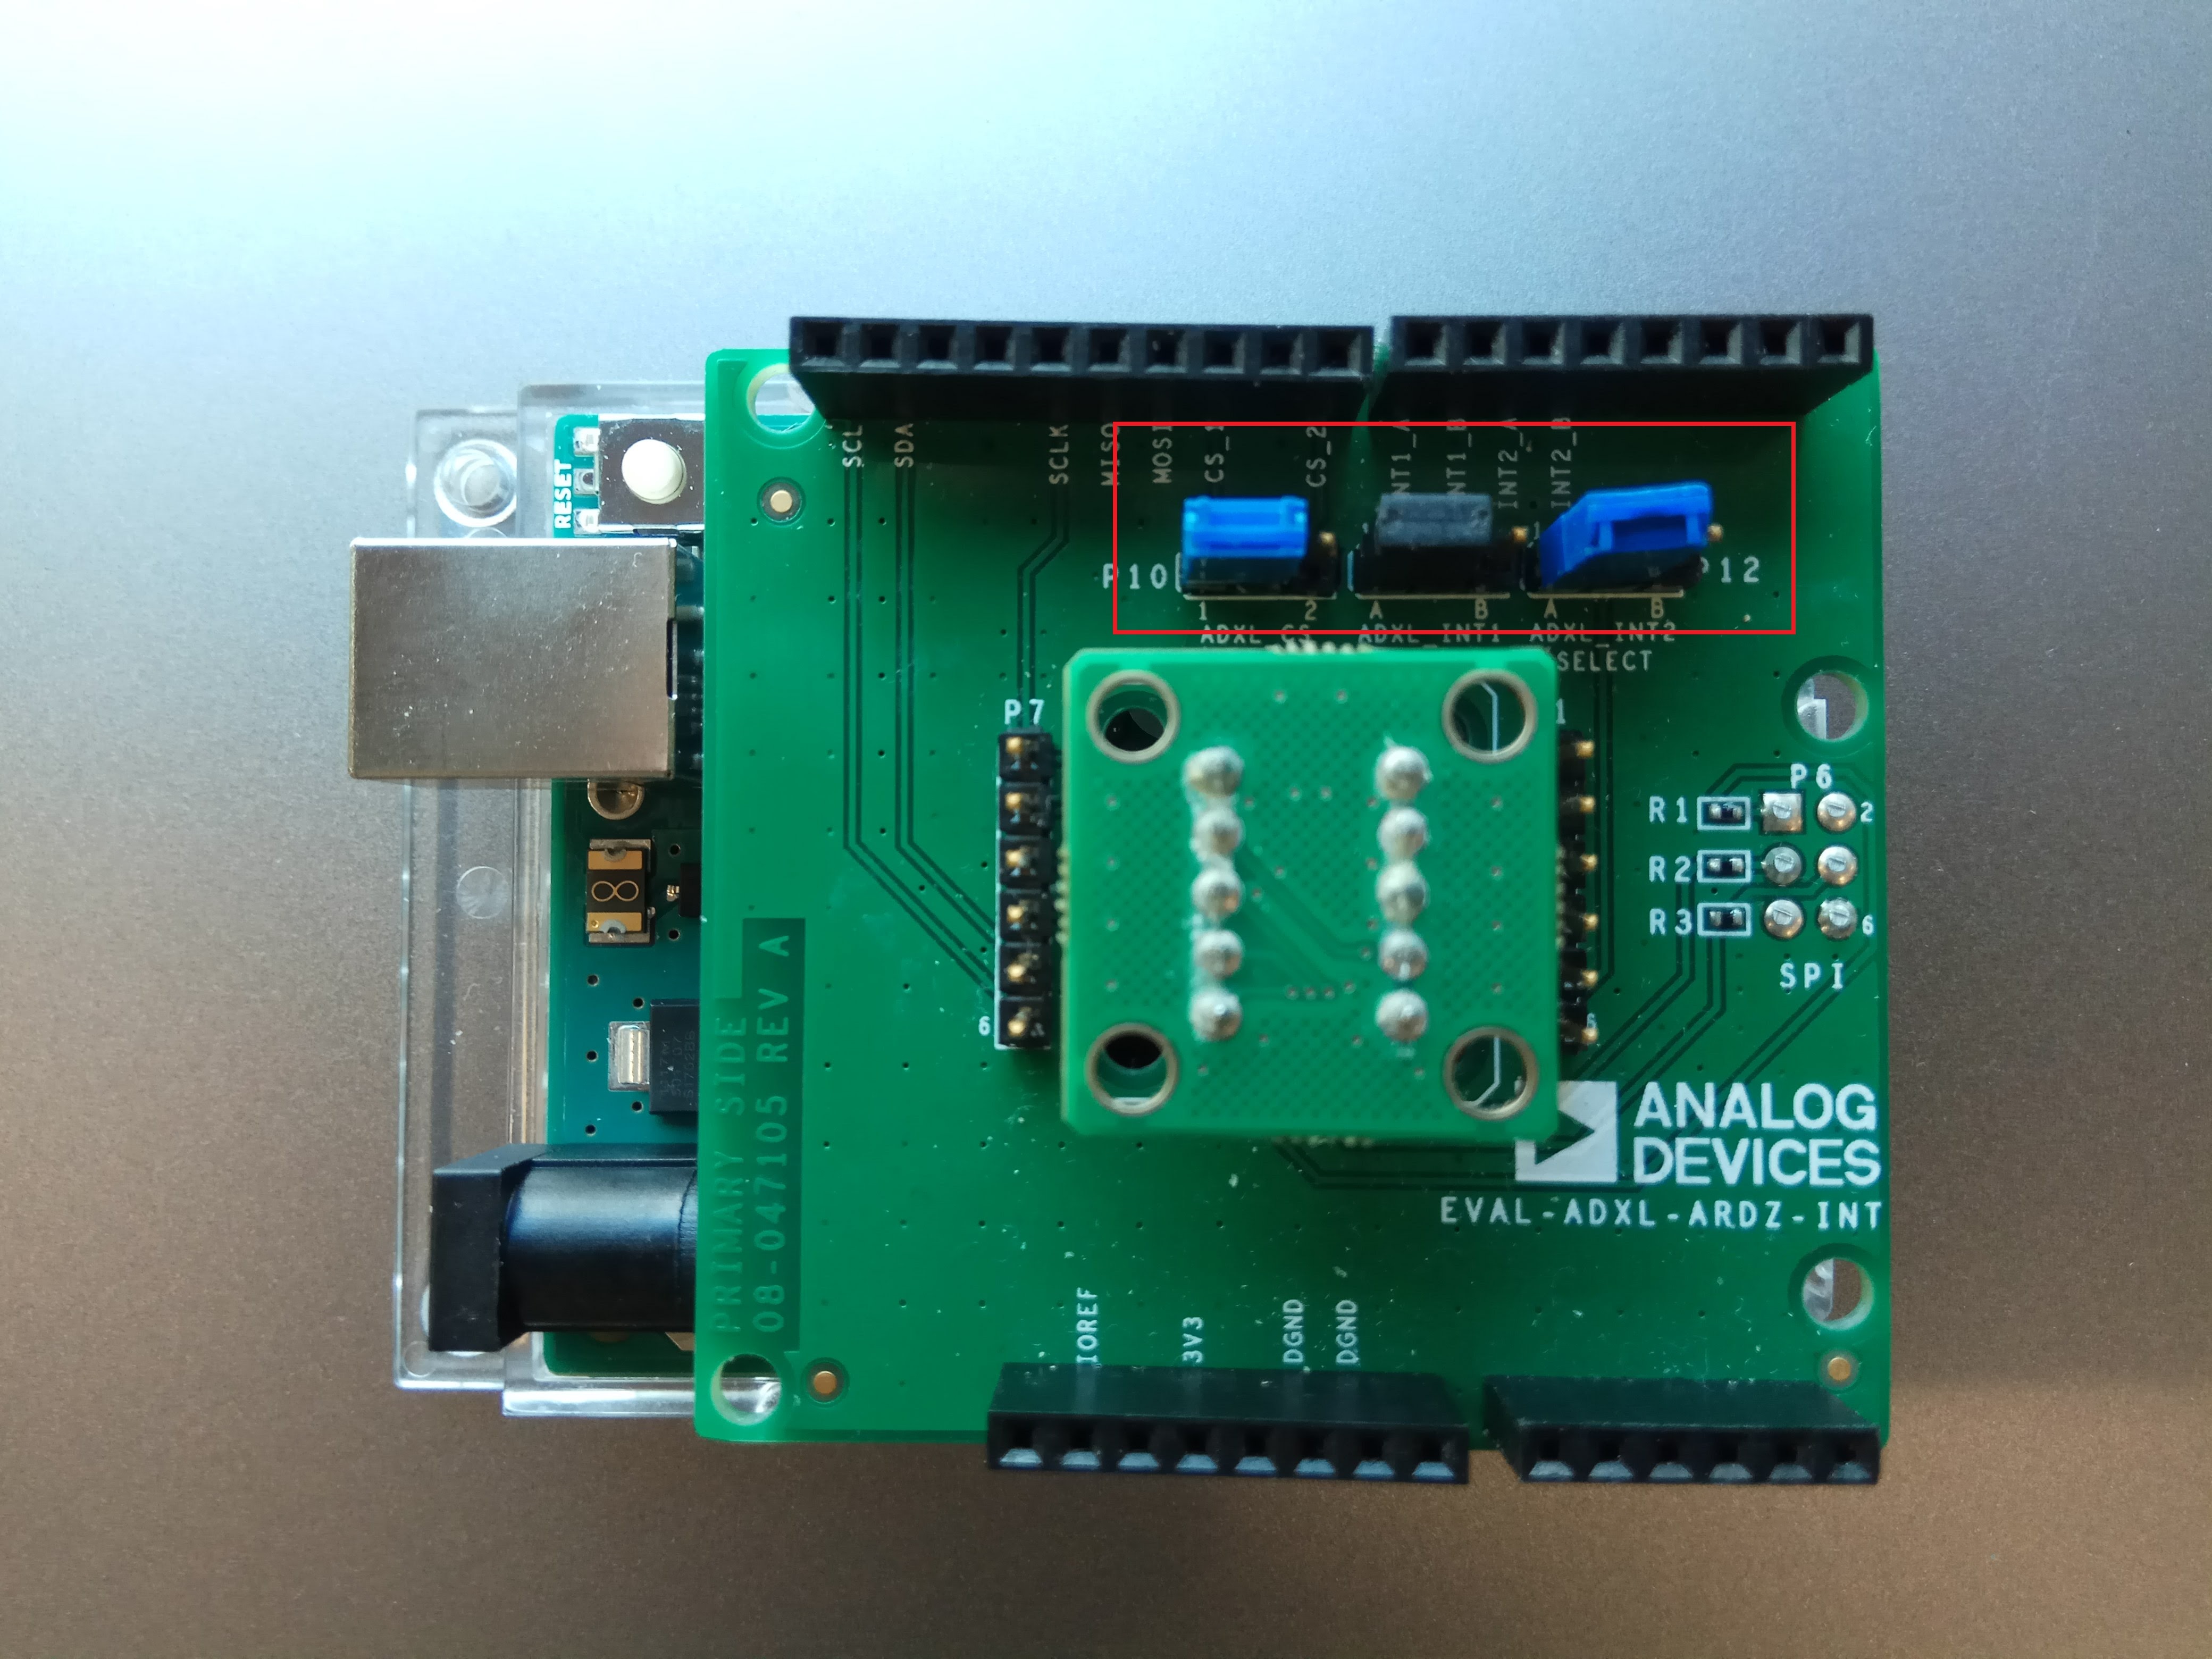
Make sure the jumpers P10, P11, P12 are configured exactly as the picture below.
P10 -> Pin 1-2
P11 -> Pin 1-2
P12 -> Pin 1-2
Plug in the Type B USB cable into the USB port on the Arduino Uno, and the other end into the PC or laptop.
Obtaining the Source Code
The source code and include files of the ADXL372_example can be found here:
Download
Project Structure
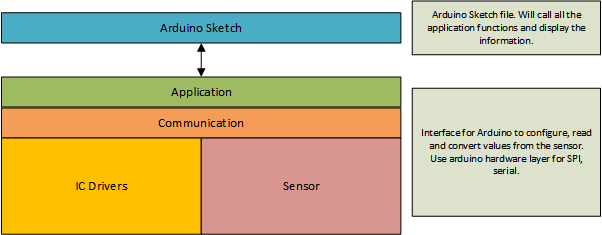
The Arduino Sketch is used to load the example into Arduino IDE. The project is composed of three main parts:
the main program (arduino sketch)
application layer (IC drivers and sensor data)
communication layer
Configuring the Software Parameters
Configure the activity threshold in the ADXL372.h file.
#define ACT_VALUE 30 /* Activity threshold value */
Configure the inactivity value in the ADXL372.h file.
#define ACT_VALUE 30 /* Activity threshold value */
Set the Accelerometer activity Timer in the ADXL372.h file.
#define ACT_TIMER 1 /* Activity timer value in multiples of 3.3ms */
Set the Accelerometer inactivity Timer in the ADXL372.h file.
#define INACT_TIMER 1 /* Inactivity timer value in multiples of 26ms */
Configure the INT1 pin. (Depending on the ADXL_INT1_SELECT jumper the pin can be pin 7 for INT1_A and pin 6 for INT1_B)
#define ADXL_INT1_PIN 7
Configure the INT2 pin. (Depending on the ADXL_INT2_SELECT jumper the pin can be pin 5 for INT2_A and pin 4 for INT2_B)
#define ADXL_INT2_PIN 5
Compiling, Verifying, and Programming
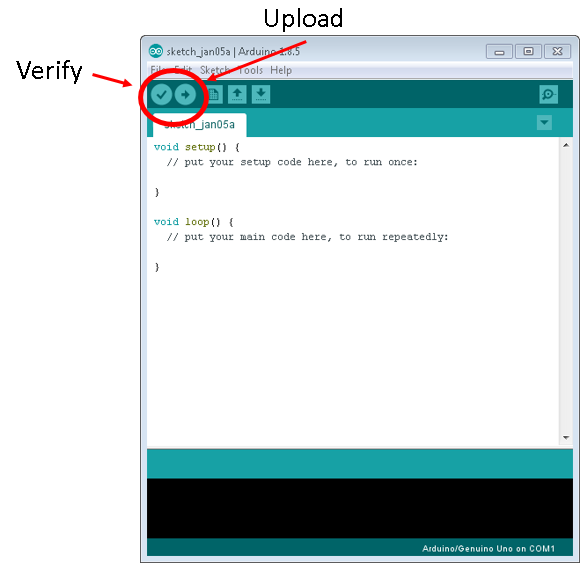
Once the project has been imported and the software parameters have been appropriately configured, you must Compile/Verify the project within the Arduino IDE. You can do this by clicking on the Sketch menu, and then on the Compile/Verify option.
Once the project is compiled and free of errors, you can now upload the project to the Arduino Uno. Click on the Sketch menu item, and then click Upload.
These two steps can also be done using the quick buttons on the Arduino sketch. Check out the image below for locations of the quick buttons.
Outputting Data
Data is output using the USB cable from the Arduino to the PC. The USB port acts as a serial terminal to display the data being transmitted via UART. Opening the serial terminal window from the Arduino IDE is very easy, simply click on the button shown in the picture below.
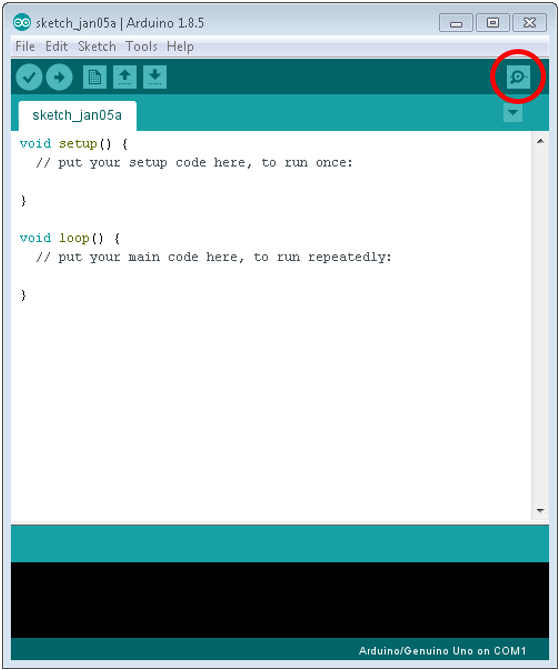
Serial Terminal Output
You may need to configure the serial terminal depending on the current settings of the Arduino IDE. Make sure the settings are as follows:
Select COM Port
Baud rate: 9600
Data: 8 bit
Parity: none
Stop: 1 bit
Flow Control: none
Tools Download and Help
The Arduino tools are easy to use, and there are many tutorials and users guides to help learn how to use the Arduino IDE.
For more information on how to use the tool basics, please check out the Arduino tutorials page.
Download
To download the Arduino tools, check out the Arduino software page.
End of Document