Electrochemical Gas Sensor Demo
General Description/Overview
The CN0429_example is a demo using the EVAL-CN0429-EBZ, the EVAL-M355-ARDZ-INT and the Arduino Uno board as a solution for detecting toxic gases. By utilizing built-in diagnostics features (such as impedance spectroscopy or bias voltage pulsing and ramping) it is possible to inspect sensor health, compensate for accuracy drift due to aging or temperature, and estimate the remaining lifetime of the sensor right at the edge of the sensor network without user intervention. This functionality allows smart, accurate sensor replacement at the individual edge nodes. An integrated, ultra low power microcontroller directly biases the electrochemical gas sensor and runs onboard diagnostic algorithms.
The CN0429 circuit shows how an electrochemical gas sensor is connected to the potentiostat circuit and how it is biased and measured. Common 2-lead, 3-lead, and 4-lead electrochemical gas sensors can be used interchangeably. The integration of this signal chain dramatically reduces cost, size, complexity, and power consumption at the sensor node.
This example uses three types of boards:
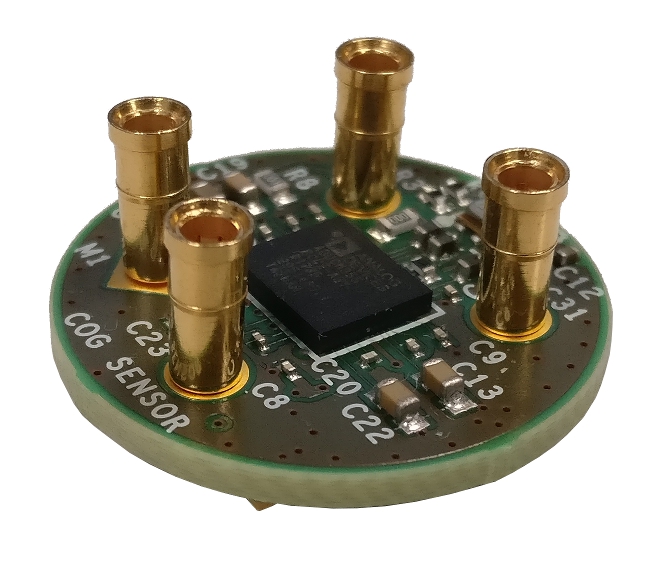
The EVAL-CN0429-EBZ Gas Sensor Board
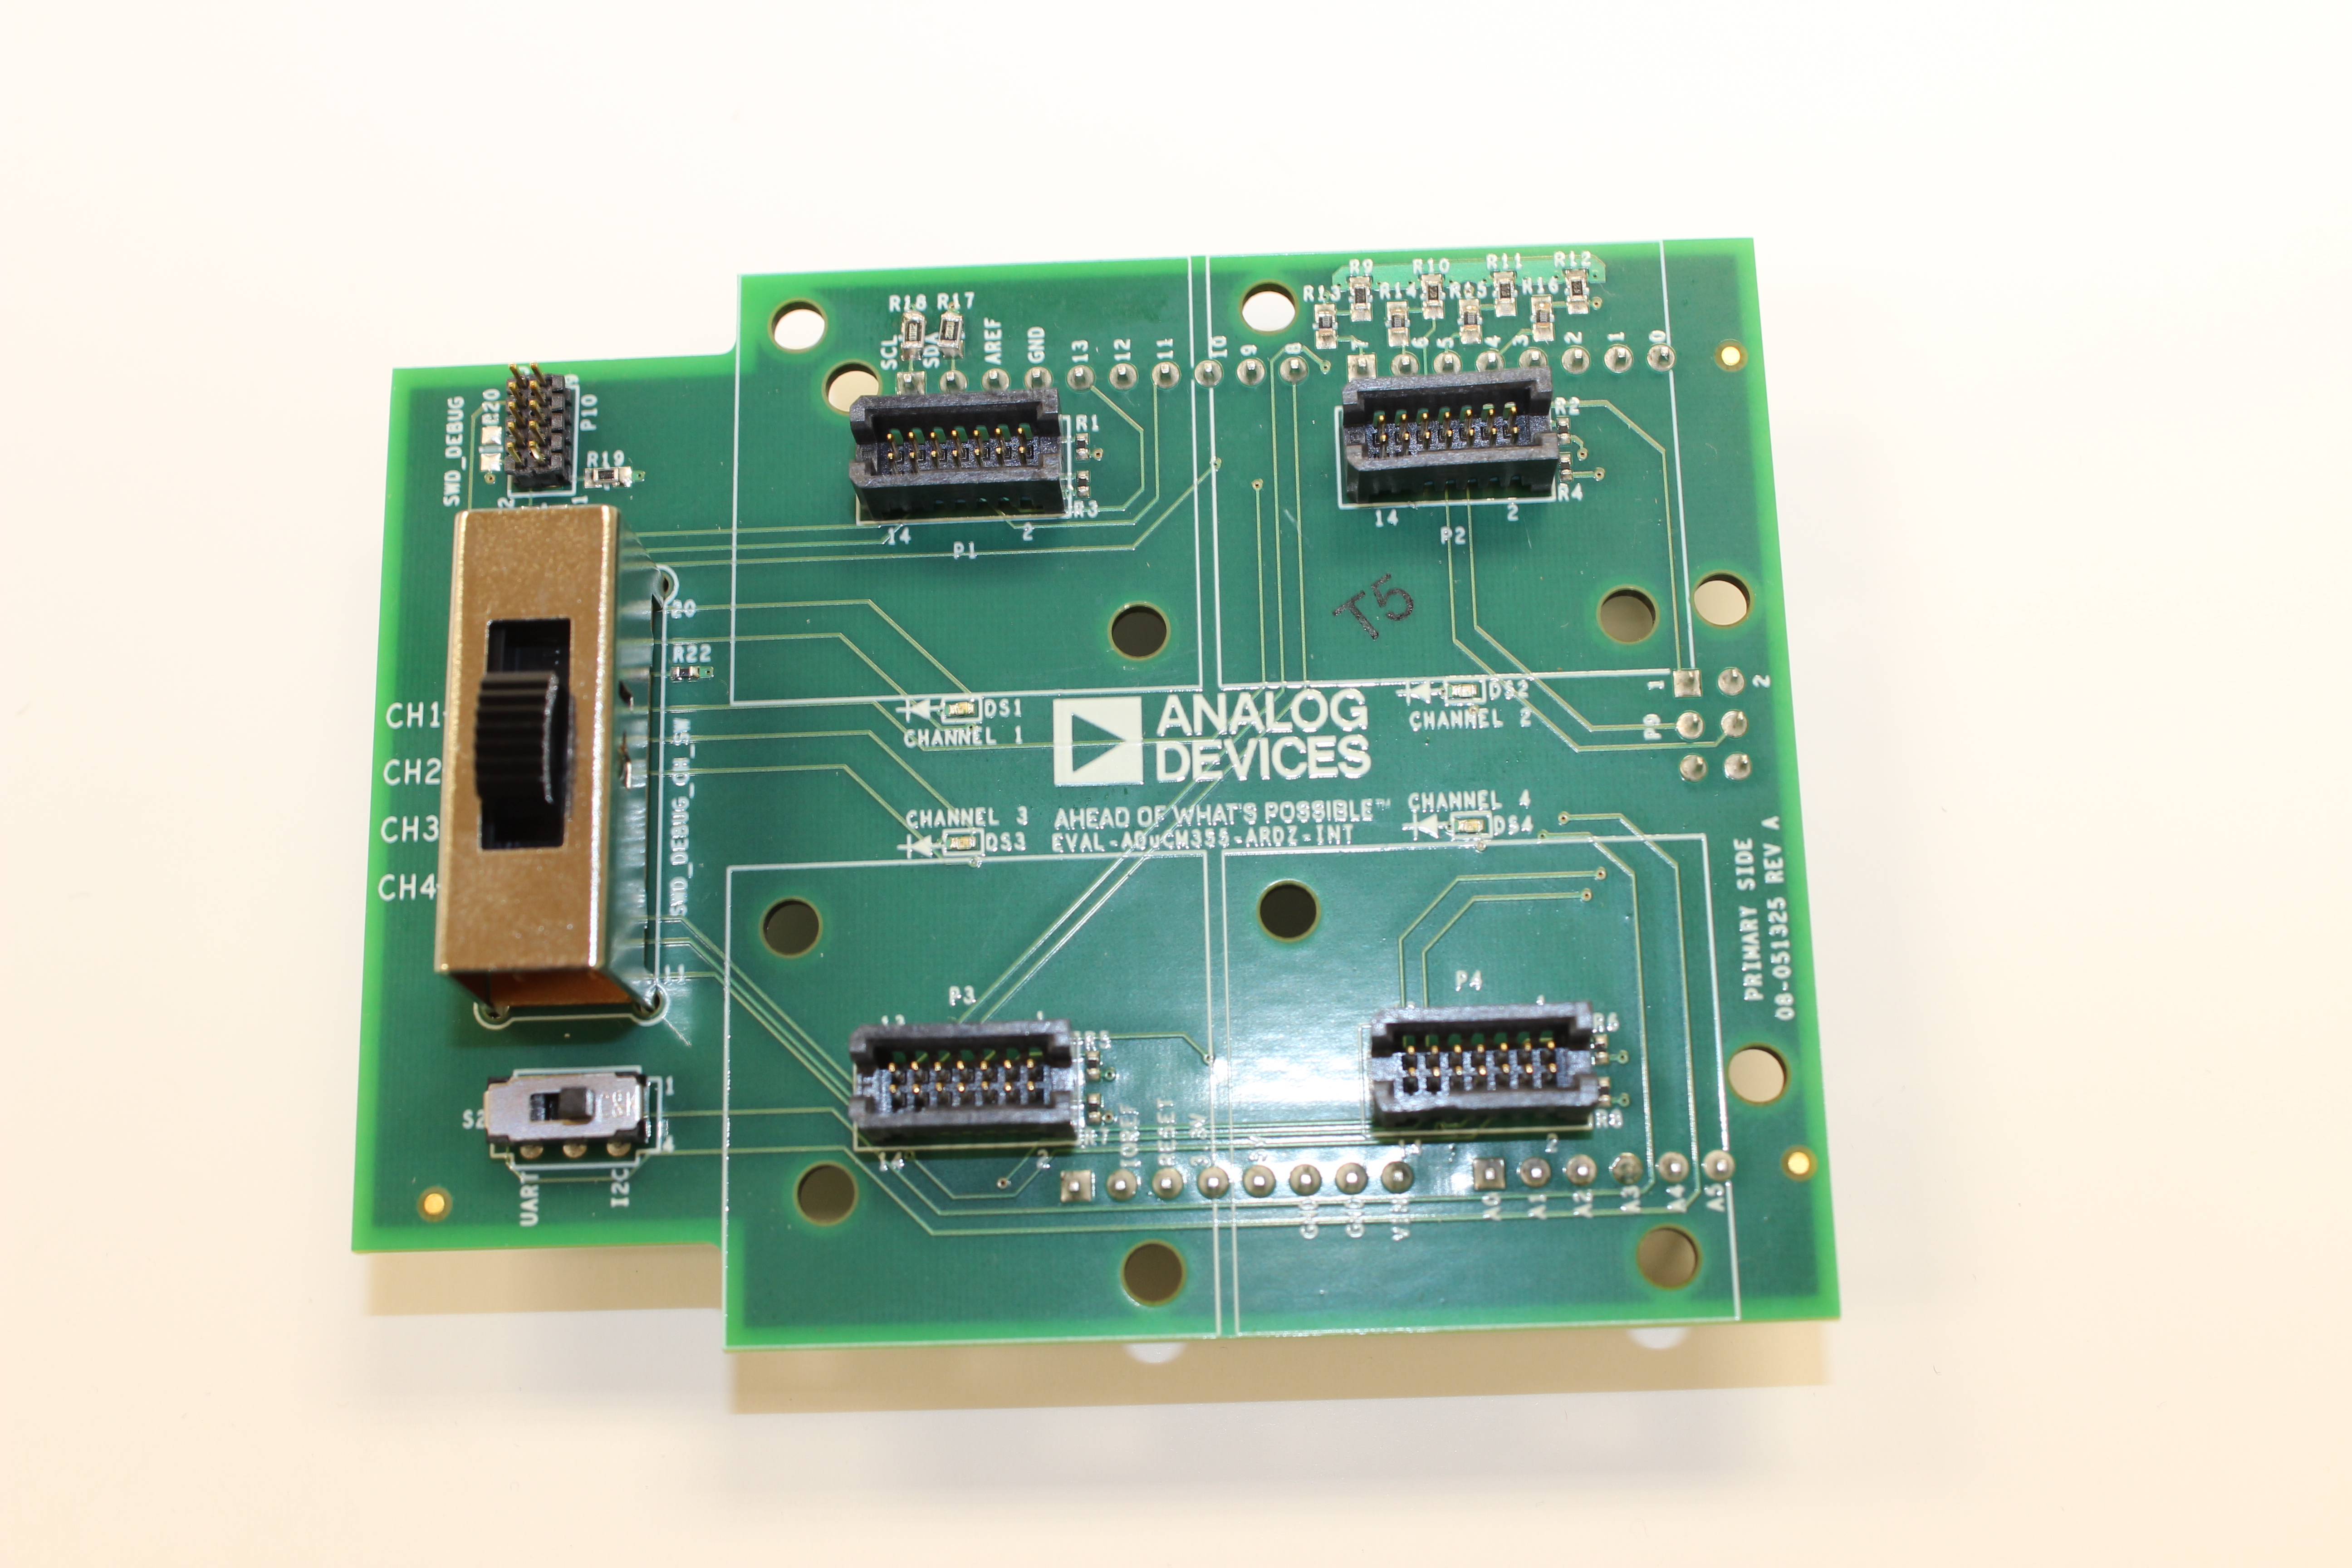
The EVAL-M355-ARDZ-INT Arduino Shield Board
The Arduino Uno Board
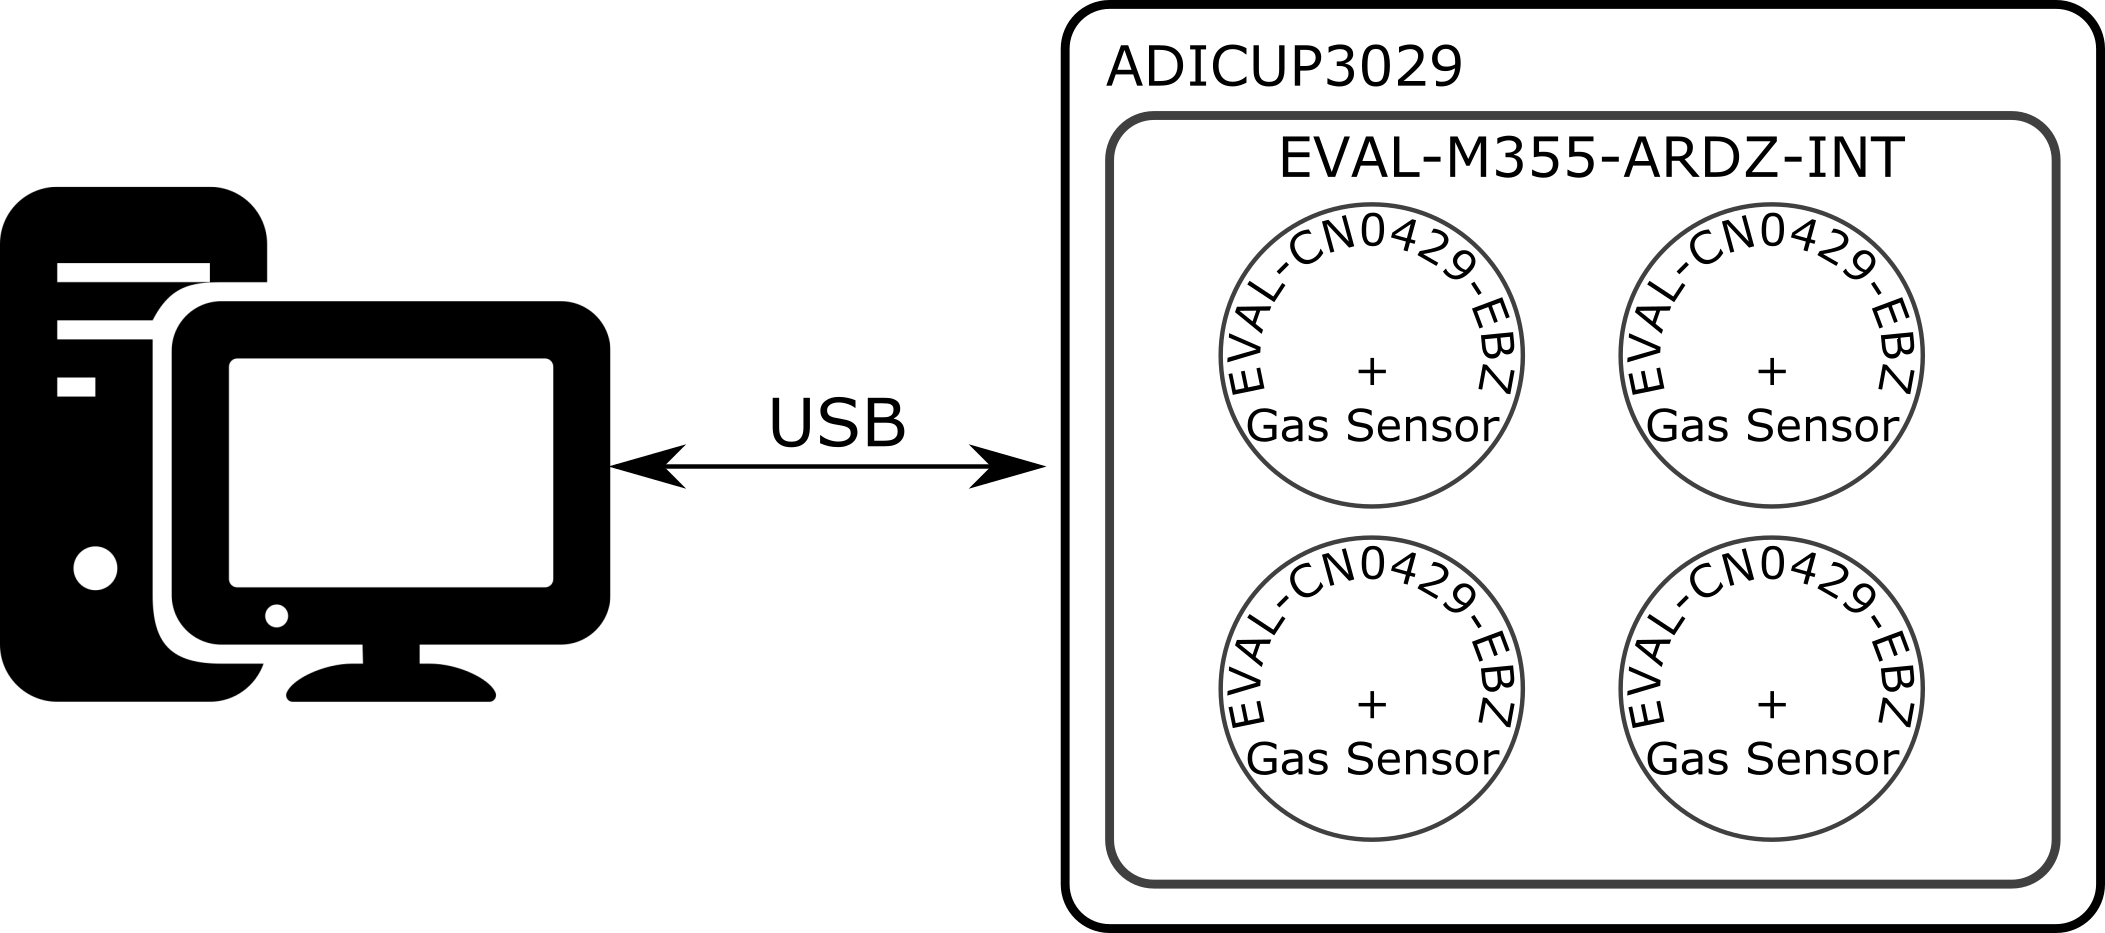
This setup is capable to measure any electrochemical gas sensor in a suitable package and up to 4 sensor boards can be connected and measured simultaneously. The gas sensor daughter boards includes temperature and humidity sensor for calibration and the system includes electrochemical impedance spectroscopy and bias voltage pulse test capabilities.
General Setup
Demo Requirements
The following is a list of items needed in order to replicate this demo.
Hardware
Arduino Uno
EVAL-CN0429-EBZ Gas Sensor Daughter Board loaded with firmware. (up to 4)
Type B to Type A USB cable
PC or Laptop with a USB port
Electrochemical Gas Sensor in a suitable form factor (up to 4)
Software
CN0429_example sketch
Arduino Interactive Development Environment(IDE)
Arduino AVR Boards Built-In by Arduino package (1.6.23 or higher)
Setting up the Hardware
Plug in the EVAL-CN0429-EBZ (CN0429 Shield board) to the EVAL-M355-ARDZ-INT interposer board
Connect the system to the Arduino connectors DIGITAL (PWM~), POWER, ANALOG IN and ICSP of the Arduino Uno board.
Note, the boards should only plug together one way, preventing reverse connections.
Connect the system to the PC using USB cable
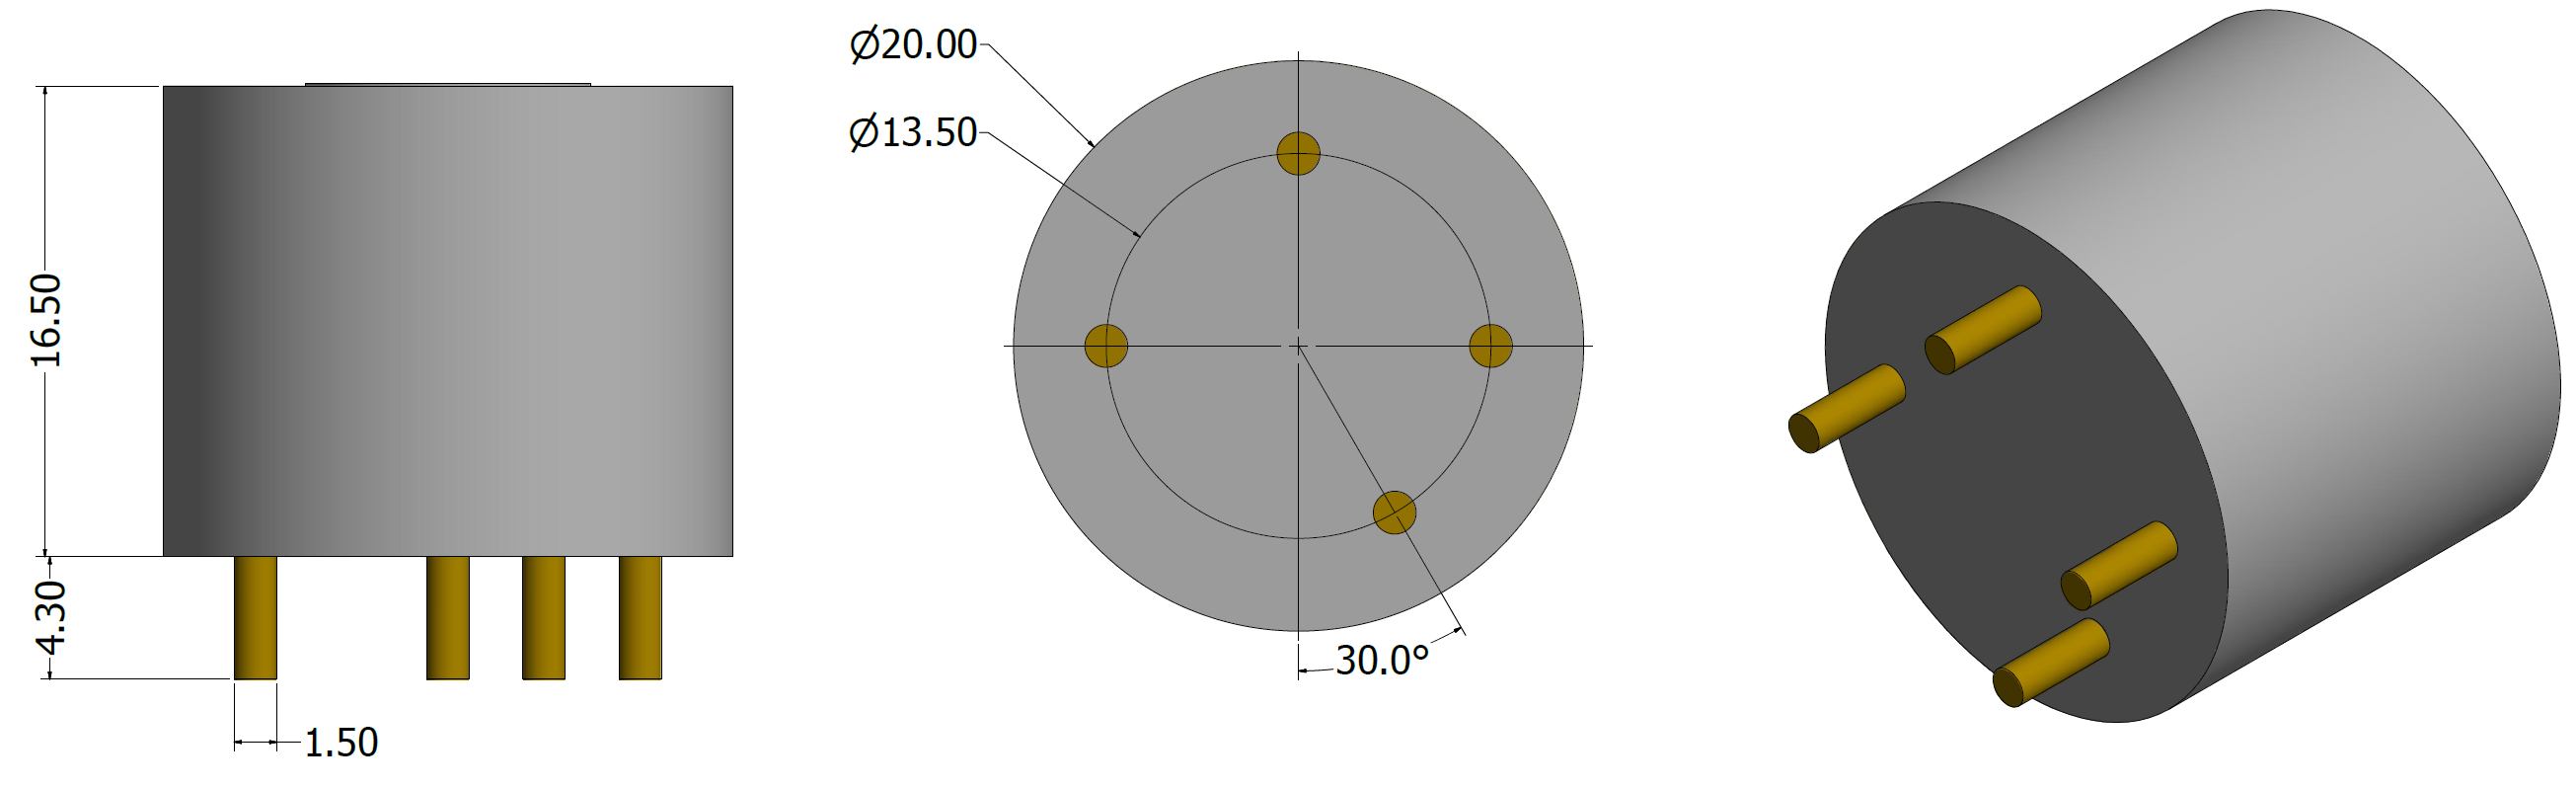
Connect the sensors to the dedicated connectors on the EVAL-CN0429-EBZ. The CN0429 is compatible with electrochemical gas sensors in “4-series” form factor. 2-, 3- and 4-electrode sensors are supported. See the drawing below for form factor dimensions.
Obtaining the Source Code
We recommend not opening the project directly, but rather make a local copy in your workspace and open it using Arduino/Genuino IDE.
The source code and include files of the CN0429_example can be found here:
Download
Project Structure
The CN0411_example is a C Arduino sketch. All files are in the same folder as the .ino file and include the source and header files.
Compiling, Verifying, and Programming
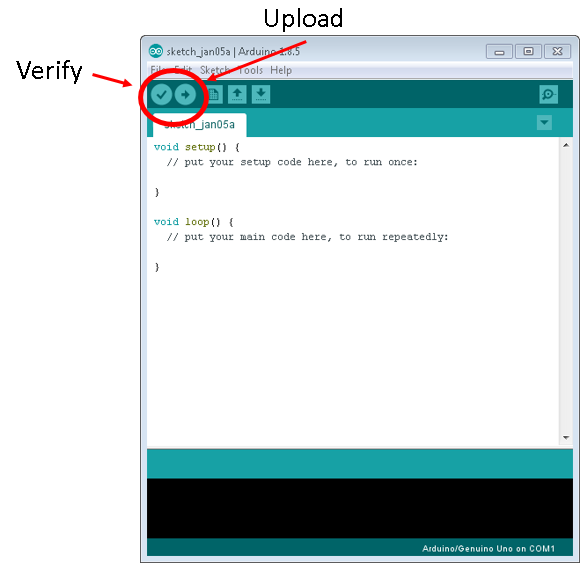
Once the project has been imported and the software parameters have been appropriately configured, you must Compile/Verify the project within the Arduino IDE. You can do this by clicking on the Sketch menu, and then on the Compile/Verify option.
Once the project is compiled and free of errors, you can now upload the project to the Arduino Uno. Click on the Sketch menu item, and then click Upload.
These two steps can also be done using the quick buttons on the Arduino sketch. Check out the image below for locations of the quick buttons.
Outputting Data
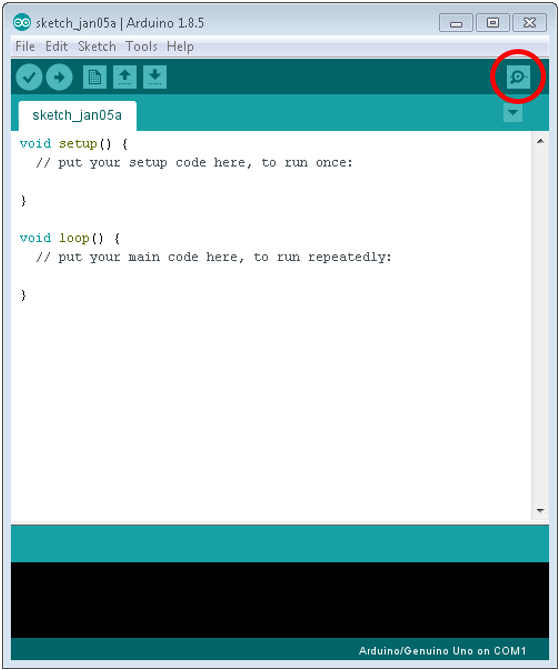
Data is output using the USB cable from the Arduino to the PC. The USB port acts as a serial terminal to display the data being transmitted via UART. Opening the serial terminal window from the Arduino IDE is very easy, simply click on the button shown in the picture below.
Serial Terminal Output
You may need to configure the serial terminal depending on the current settings of the Arduino IDE. Make sure the settings are as follows:
Select COM Port
Baud rate: 115200
Data: 8 bit
Parity: none
Stop: 1 bit
Flow Control: none
Tools Download and Help
The Arduino tools are easy to use, and there are many tutorials and users guides to help learn how to use the Arduino IDE.
For more information on how to use the tool basics, please check out the Arduino tutorials page.
Download
To download the Arduino tools, check out the Arduino software page.
End of Document