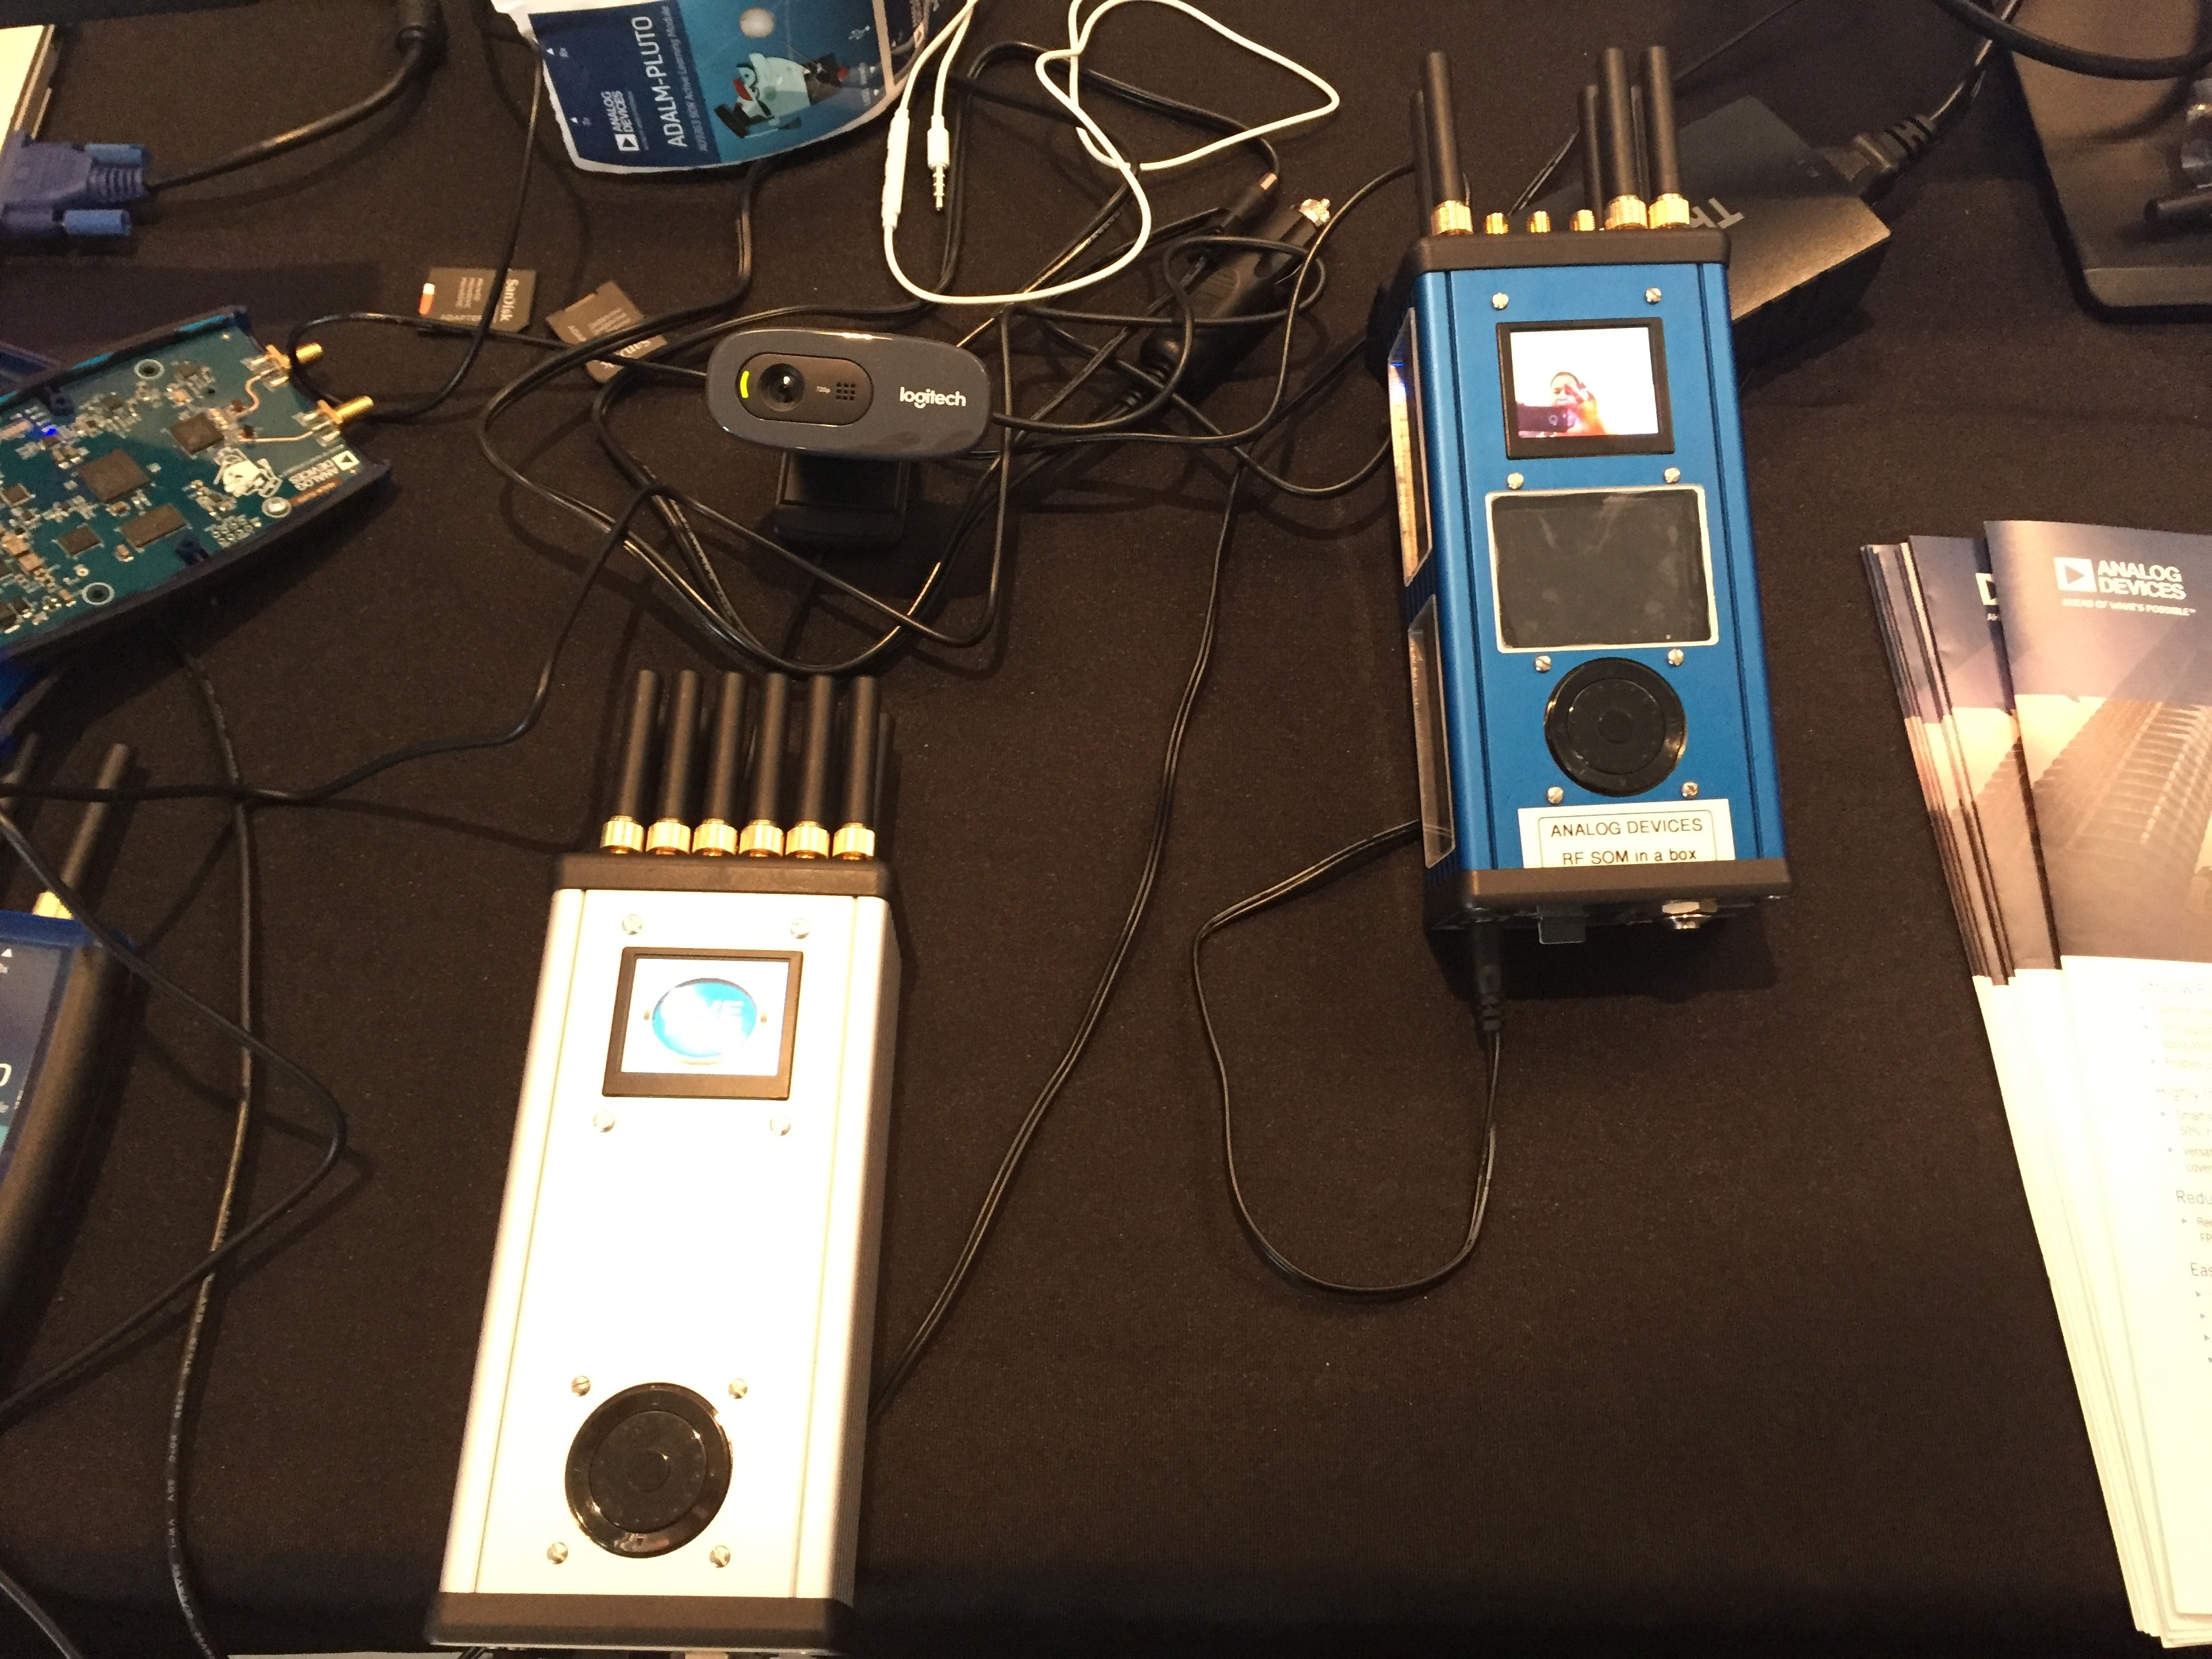
ADRV-PackRF Example Use Case
The setup shown below allows the user to test a simple experiment with the datalink and USB webcams.
Equipment Needed
1 PackRF(includes the following)
2x Portable Reference Radio’s
2x DC wall wart power supplies
1x Micro USB OTG Cable
1x C270 HD USB Webcam
2x Micro SD Card
Setup
The following section will outline how to setup the test and configuration to replicate the demonstration and results we were able to achieve. The image below shows the desired setup. Note: The Ethernet cable is only required for setup and can be removed once the system is operational.
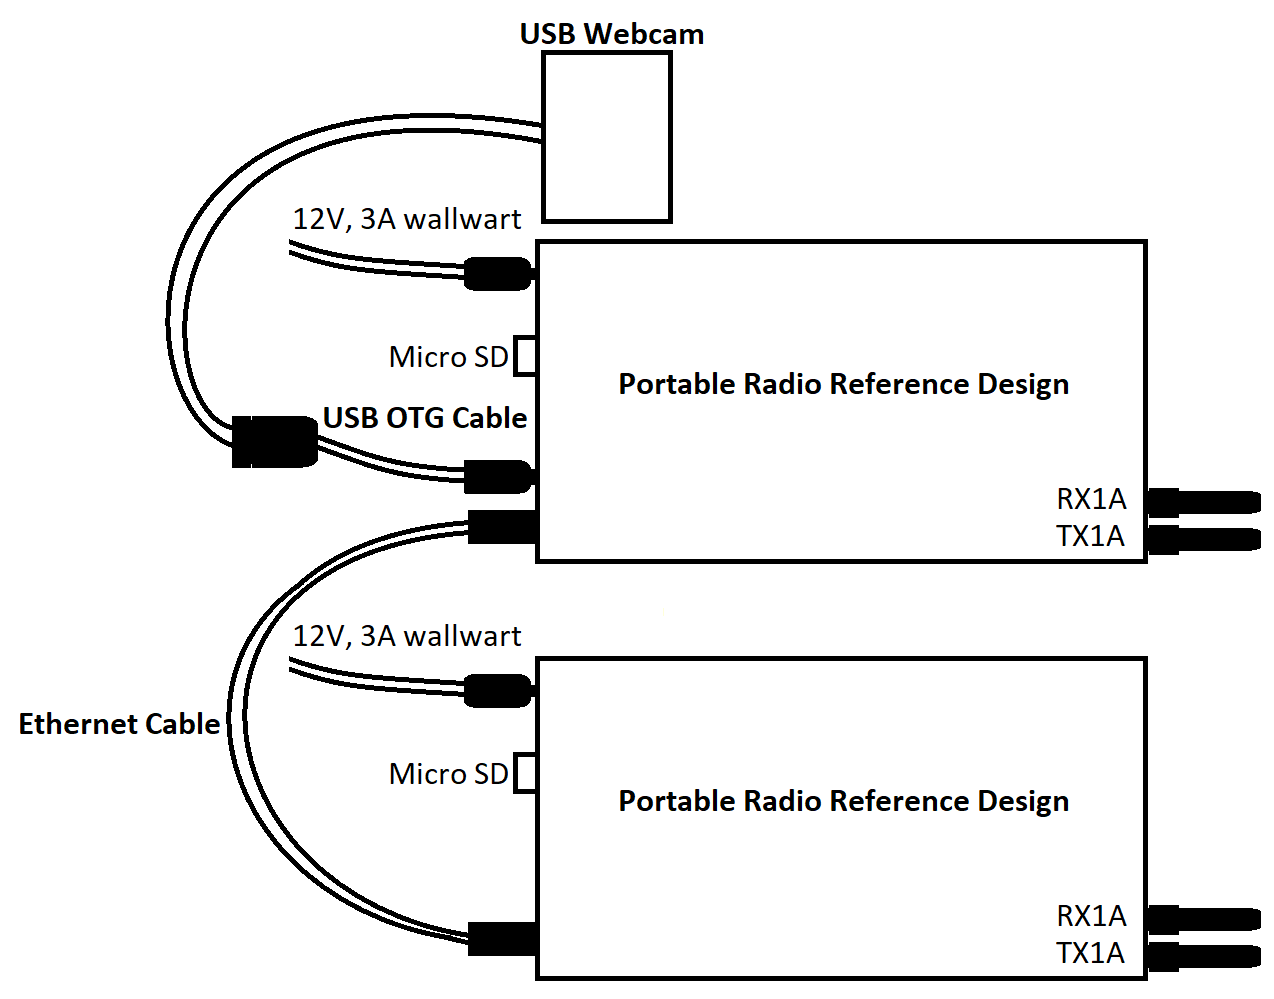
On Radio 1:
Plug the USB webcam into the USB OTG cable.
Plug the USB OTG cable into the micro USB connector on the face plate.
Connect Radio 1 with Radio 2 via the Ethernet port using the Ethernet cable.
On Radio 1 and Radio 2:
Insert the provided micro SD cards into the slot.
Attach the SMA Antenna to TX1A and RX1A.
Plug in the Power Supplies.
Press the Power Button.
Figure 31. ADRV-PACKRF Webcam Testing Diagram On Radio 1: (with webcam attached)
Enter the “Network” menu on the OLED screen
Set the “IP Address” to 192.168.0.101
Set the “Peer IP Address” to 192.168.0.102
Backup to the main menu
Enter the “Modem” menu
Set the “IP Address” to 192.168.23.1
Set the “Peer IP Address” to 192.168.23.2
On Radio 2: (no webcam attached)
Enter the “Network” menu on the OLED screen
Set the “IP Address” to 192.168.0.102
Set the “Peer IP Address” to 192.168.0.101
Backup to the main menu
Enter the “Modem” menu
Set the “IP Address” to 192.168.23.2
Set the “Peer IP Address” to 192.168.23.1
On Radio 1: (with webcam attached)
Run the option “Autoconfig” from the main menu, and let this fully complete
On Radio 2: (no webcam attached)
Go to the OLED screen and on the main menu select “Recv Video”
On Radio 1: (with webcam attached)
Go to the OLED screen and on the main menu select “Send Video”
Once the system is running, the Ethernet cable is no longer required.